
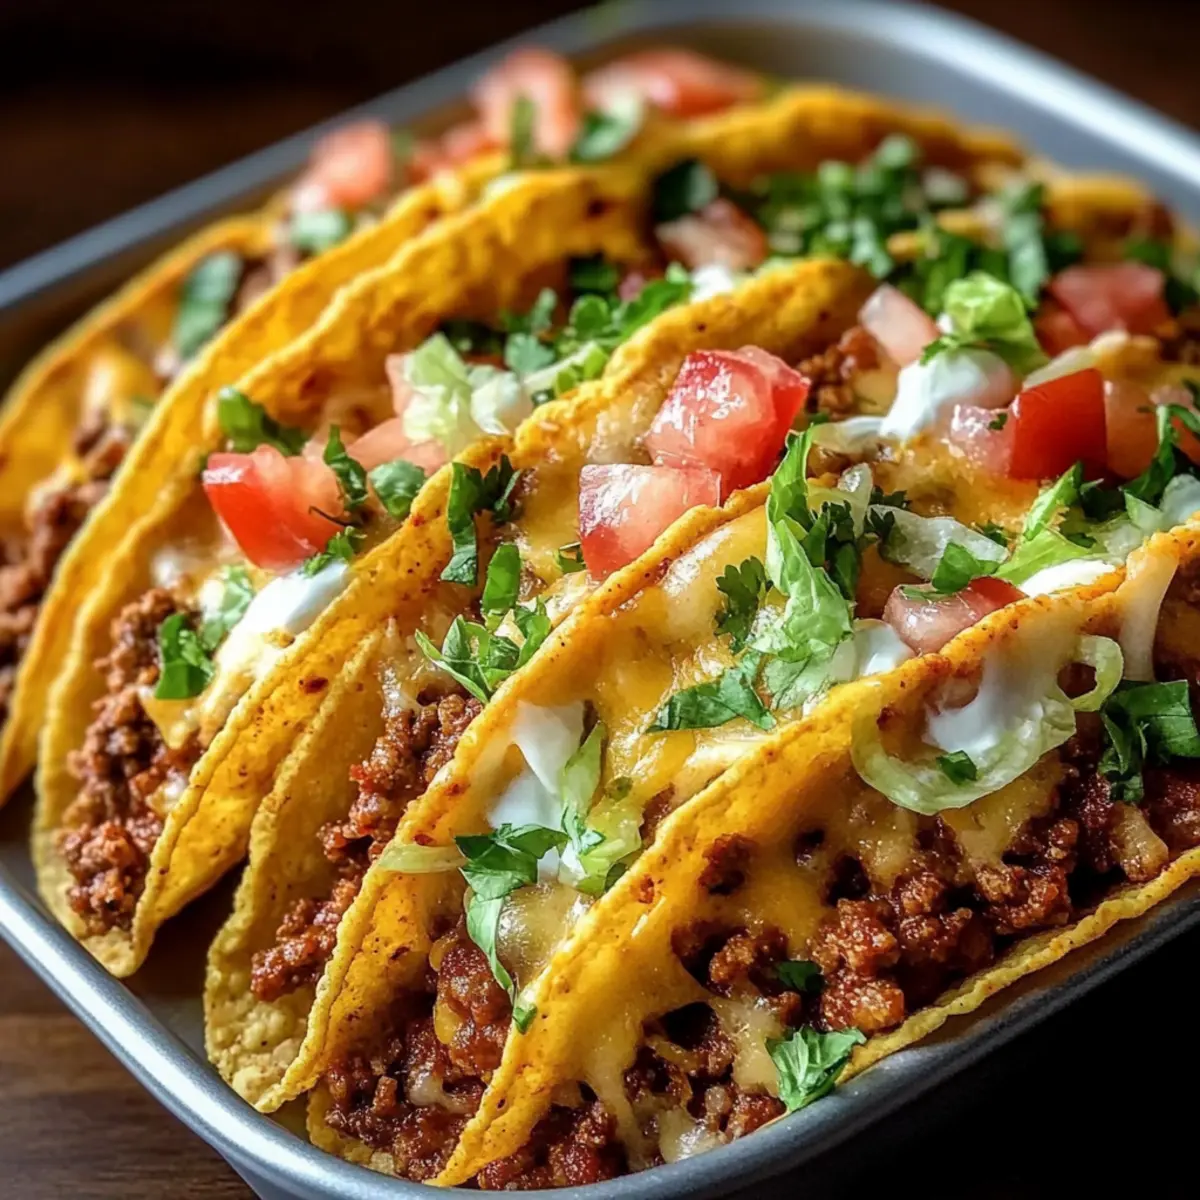
As I threw open the oven door, the aroma of melting cheese and seasoned beef filled my kitchen, instantly transporting me to taco nights at home. These Oven-Baked Cheesy Tacos are a delightful twist on the classic favorite, offering a crispy shell cradling savory goodness that’s ready in just 30 minutes! When life gets hectic, this quick meal saves the day while being completely customizable. Whether you prefer ground turkey, chicken, or even plant-based options, everyone can create their perfect bite. Plus, the dynamic topping choices let you personalize each taco, ensuring every bite is a mini celebration of flavor. Are you ready to create a taco experience that everyone will love? Let’s dive into this simple yet satisfying recipe!
Why Are These Tacos So Irresistible?
Quick Preparation: You can have these delicious tacos ready in just 30 minutes, making them perfect for busy weeknights.
Customizable Goodness: Choose your favorite protein, whether it’s savory ground beef or a lighter ground turkey. There’s even room for vegan options like black beans or lentils!
Mouthwatering Meltdown: Picture the moment when the cheese melts, bubbling over the edges of the crispy taco shells—it’s pure comfort food bliss!
Crowd-Pleaser: These tacos are a surefire hit at any gathering. Pair them with a side of Spicy Southern Cheesy for an unforgettable feast!
Easy Storage: Make-ahead friendly, you can pre-stuff the taco shells and bake them whenever you’re ready for a feast. Tacos for dinner tonight, and even for a quick lunch tomorrow!
Oven-Baked Cheesy Tacos Ingredients
For the Taco Filling
• Hard Taco Shells – Essential for structure and ensuring a sturdy hold on all the delicious fillings.
• Ground Beef – The main protein; feel free to replace it with ground turkey, chicken, or even lentils for a plant-based version.
• Onion (finely diced) – Enhances flavor with sweetness; shallots can be used for a milder touch.
• Garlic (minced) – Adds a robust aroma; fresh garlic is preferred for maximum flavor.
• Taco Seasoning – A blend that controls the spice and flavor; consider homemade seasoning for a personal twist.
• Tomato Sauce or Salsa – Brings moisture and flavor richness; diced tomatoes or roasted red peppers can work as delicious alternatives.
• Shredded Cheese – Adds richness; a Mexican blend is perfect, or try dairy-free cheese for a lactose-free option.
For the Toppings
• Shredded Lettuce – Provides a refreshing crunch.
• Diced Tomatoes – Adds a burst of juiciness and color.
• Red Onion – Offers sharpness; finely diced for better texture.
• Cilantro – Brings a fresh, herbaceous note to each bite.
• Sour Cream – Adds creaminess and tang; use Greek yogurt for a lighter option.
• Guacamole – For creamy texture and rich flavor; don’t forget to add a sprinkle of lime juice to keep it fresh!
• Jalapeños – Optional for those who like a spicy kick!
These Oven-Baked Cheesy Tacos are not just delicious—they are a customizable feast, ensuring everyone at your table gets their preferred flavor with each bite!
Step‑by‑Step Instructions for Oven-Baked Cheesy Tacos
Step 1: Preheat the Oven
Start by preheating your oven to 400°F (200°C). This step is essential for achieving perfectly crispy taco shells. While the oven is heating up, arrange your hard taco shells upright in a baking dish, ensuring they are stable and not overcrowded. This will allow each shell to crisp evenly as they bake.
Step 2: Cook the Ground Beef
In a large skillet, heat over medium flame, add the ground beef along with the finely diced onion. Brown the mixture, stirring occasionally for about 5-7 minutes, until the beef is fully cooked and the onion is translucent. This aromatic base is crucial for your Oven-Baked Cheesy Tacos, so drain any excess fat to keep the filling light and flavorful.
Step 3: Add Flavor
Next, incorporate the minced garlic and taco seasoning into the skillet. Sauté for 1 minute until the garlic is fragrant, stirring constantly to prevent burning. This step infuses your beef mixture with the rich, bold flavors typical of taco night, setting the foundation for your cheesy tacos’ deliciousness.
Step 4: Simmer the Filling
Stir in your choice of tomato sauce or salsa into the beef mixture, mixing well. Let it simmer for approximately 5 minutes, allowing the flavors to meld together. You’ll know it’s ready when the mixture heats through and the sauce becomes slightly thickened, creating a savory filling for your Oven-Baked Cheesy Tacos.
Step 5: Fill the Taco Shells
Carefully fill each taco shell with the savory beef mixture, taking care not to overstuff to prevent bursting during baking. Once filled, generously top each taco with shredded cheese, allowing it to melt beautifully in the oven. This step adds that inviting gooey texture that makes these tacos truly irresistible.
Step 6: Bake to Perfection
Place the filled taco shells in the preheated oven and bake for 10-15 minutes. Keep an eye on them; they are done when the cheese is bubbling and slightly golden, and the taco shells have turned a delightful shade of brown. This is where the magic happens, transforming your Oven-Baked Cheesy Tacos into a crispy, cheesy delight.
Step 7: Add Fresh Toppings
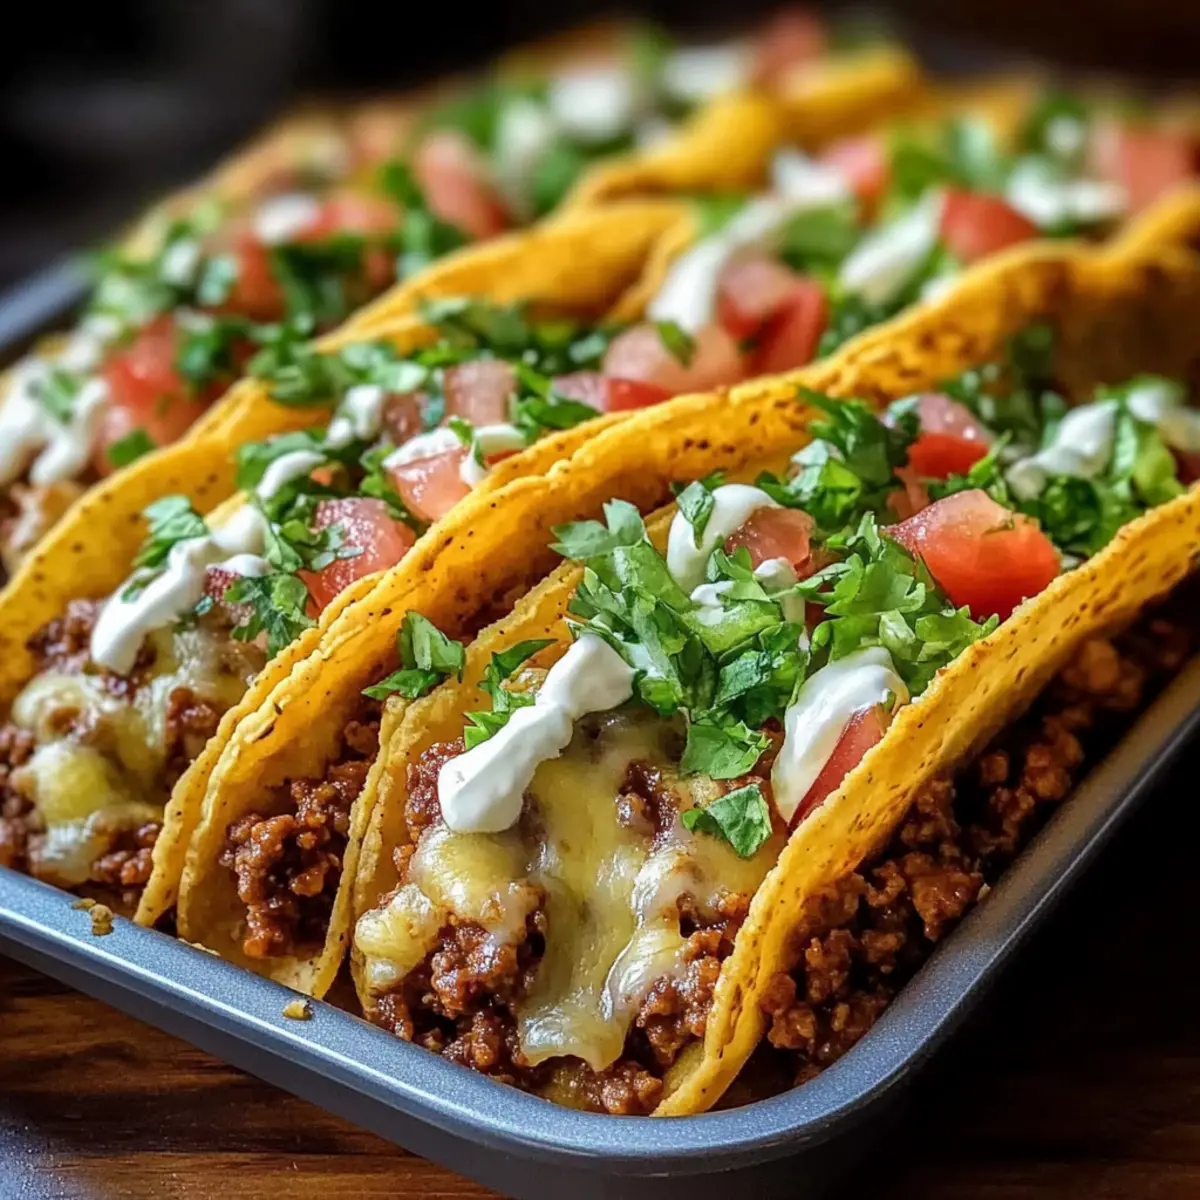
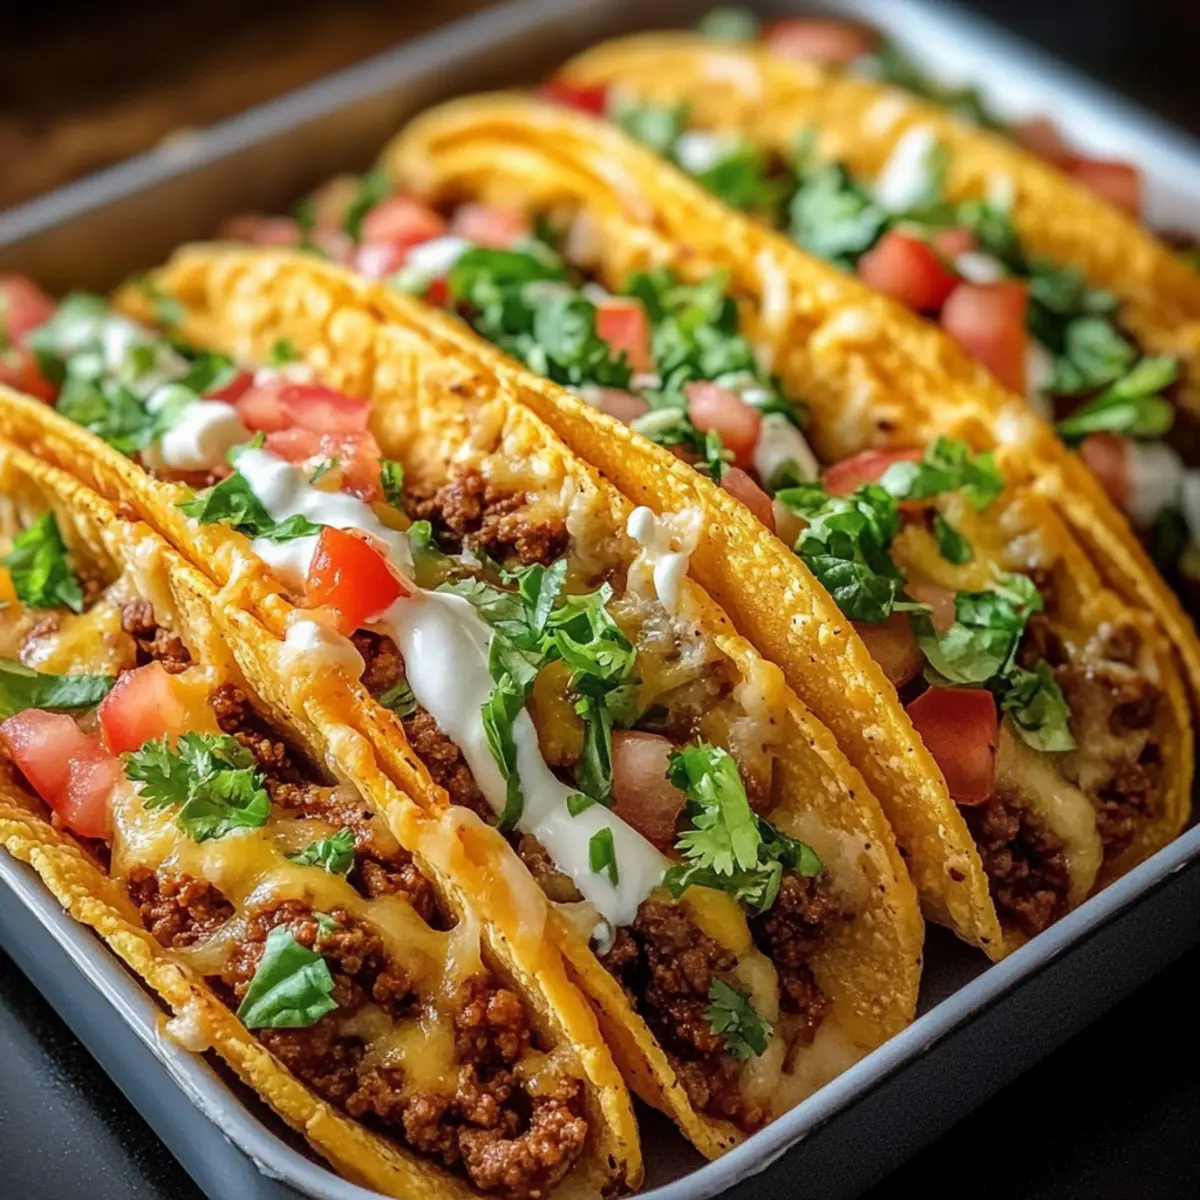
Once out of the oven, feel free to unleash your creativity! Add your favorite fresh toppings such as shredded lettuce, diced tomatoes, red onion, and cilantro. A dollop of sour cream or guacamole on the side elevates each taco, bringing the whole dish together. Serve warm and enjoy the delightful crunch and flavor of your homemade feast!
What to Serve with Oven-Baked Cheesy Tacos?
Pairing your delicious tacos with complementary dishes can elevate your meal to new heights!
- Mexican Street Corn: This creamy, slightly spicy treat adds a touch of sweetness, featuring charred corn, tangy lime, and cilantro.
- Refried Beans: Rich and hearty, they offer a smooth texture that balances the crunch of the tacos; perfect for sopping up every flavorful bite.
- Guacamole: Creamy and zesty, it enhances the freshness of your tacos while adding a delightful touch of richness.
- Cilantro Lime Rice: Light yet flavorful, it can soak up the juices from the tacos, providing a refreshing contrast to the savory filling.
- Fresh Green Salad: A mix of crisp greens, cherry tomatoes, and cucumbers adds a refreshing crunch and balances the hearty nature of the tacos.
- Chips and Salsa: A classic side, the crunch of tortilla chips paired with zesty salsa serves as a perfect appetizer before diving into your tacos.
- Margaritas: These refreshing cocktails provide a sweet, tangy kick that pairs beautifully with the savory and cheesy flavors of the tacos, enhancing your dining experience.
- Churros: For dessert, these warm, crispy treats coated in cinnamon sugar offer a sweet ending to your taco feast, creating a dessert that’s irresistible.
By thoughtfully pairing your Oven-Baked Cheesy Tacos with these delightful sides and drinks, you create a memorable meal that will have everyone asking for seconds!
Oven-Baked Cheesy Tacos Customization
Feel free to get creative with your Oven-Baked Cheesy Tacos, allowing for tweaks that cater to your tastes and dietary needs!
- Gluten-Free: Use corn tortillas instead of hard taco shells for a delicious, gluten-free option. They retain plenty of crunch while satisfying your taco cravings.
- Dairy-Free: Substitute shredded cheese with a plant-based cheese alternative that melts well for a dairy-free experience. Your tacos can still be rich and satisfying!
- Spicy Kick: Add pepper jack cheese or diced jalapeños for an extra layer of heat. Spice lovers will rave about this flavorful twist!
- Vegetarian Friendly: Switch the ground beef for a hearty mix of black beans or lentils. It’s a perfect way to enjoy a nutritious, plant-based taco!
- Flavor Infusion: Experiment with different taco seasonings, perhaps try smoked paprika or a hint of cumin for an aromatic boost. Each bite will be bursting with flavor!
- Topping Variety: Consider unique toppings like pickled onions or sliced avocado. These fresh additions add delightful textures and a splash of brightness.
- Protein Swaps: Really switch things up by using shredded chicken or chorizo. Both meats offer contrasting flavor profiles while keeping their mouthwatering appeal.
- Ultimate Crunch: For a delightful texture contrast, you could add crushed tortilla chips inside the tacos before baking for an extra crunch!
No matter how you decide to customize, your Oven-Baked Cheesy Tacos promise to be a hit worthy of sharing, just like the joy of preparing a warm meal for loved ones. And for those taco nights that need something extra, consider pairing them with a side of Crispy Air Fryer Tacos or Cheesy Corn Fritters!
Make Ahead Options
These Oven-Baked Cheesy Tacos are a fantastic option for meal prep enthusiasts! You can prepare the savory beef mixture up to 3 days in advance; just store it in an airtight container in the refrigerator to maintain its flavor and freshness. Additionally, you can assemble the tacos—fill the hard shells with the beef mixture and top with cheese—up to 24 hours ahead of time. To ensure a delightful crunch, store the assembled but unbaked tacos tightly covered in the refrigerator. When you’re ready to serve, simply preheat the oven and bake for 10-15 minutes until the cheese is melted and the shells are golden brown. This approach saves you precious time on busy weeknights while delivering delicious, homemade comfort food!
Tips for the Best Oven-Baked Cheesy Tacos
Preheat Properly: Ensure your oven is fully preheated to 400°F (200°C) to achieve perfectly crispy taco shells every time.
Avoid Overstuffing: Be mindful not to overfill taco shells; this prevents bursting and ensures even melting of cheese while baking.
Use Sturdy Shells: Opt for high-quality hard taco shells that hold their shape during baking. Cracked or weak shells might break under the filling’s weight.
Experiment with Cheese: Try different cheese blends like pepper jack for added flavor or go dairy-free with plant-based cheese for a unique twist on your Oven-Baked Cheesy Tacos.
Make-Ahead Option: For quick weeknight meals, prepare the filling in advance and store it in the fridge, filling the taco shells just before baking for a speedy dinner.
How to Store and Freeze Oven-Baked Cheesy Tacos
Fridge: Store any leftover baked tacos wrapped in aluminum foil or in an airtight container for up to 3 days to maintain freshness.
Freezer: Assemble unbaked tacos and place them in a freezer-safe container, layered with parchment paper to prevent sticking. They can be frozen for up to 3 months.
Reheating: To reheat baked tacos, place them in a preheated oven at 350°F (175°C) for about 10-15 minutes until hot and the cheese melts. For frozen tacos, bake directly from frozen, adding 5-10 minutes to the cooking time.
Make-Ahead: You can prepare the taco filling in advance and store it in the fridge for up to 24 hours, allowing for quick assembly and baking whenever you’re craving Oven-Baked Cheesy Tacos.

Oven-Baked Cheesy Tacos Recipe FAQs
How do I choose the right hard taco shells?
When selecting hard taco shells, ensure they are sturdy to avoid breaking under the weight of the filling. Look for shells that are free of cracks and have no dark spots, indicating they are fresh. I often choose brands that advertise “extra crunchy” for that perfect bite!
How should I store leftover baked tacos?
Store any leftover baked tacos wrapped in aluminum foil or in an airtight container in the fridge for up to 3 days. This keeps them fresh, but I recommend eating them within the first day or two for optimal flavor and texture.
Can I freeze unbaked cheesy tacos?
Absolutely! Assemble your unbaked cheesy tacos, and place them in a freezer-safe container, separating layers with parchment paper to prevent sticking. They can be frozen for up to 3 months. When you’re ready to bake, simply preheat your oven and cook from frozen, adding about 5-10 minutes to the original cooking time.
What should I do if my taco shells break while filling?
If you find your taco shells breaking as you fill them, it’s important not to overstuff them. Use a lighter hand with the filling and fill the shells slowly. Another tip is to let the shells sit at room temperature for a bit to soften slightly, making them less prone to breaking when filled!
Are there any dietary considerations for my pets?
Yes! Ingredients like garlic and onions, found in this recipe, can be harmful to pets. Always ensure no taco leftovers are accessible to them, as even small amounts can cause health issues. Stick to dog-safe foods when treating your furry friends!
Can I customize the protein in these tacos?
Definitely! You can swap the ground beef with ground turkey, chicken, or plant-based options like lentils or black beans to suit your dietary preferences. Each provides a delightful twist on the standard flavor profiles, ensuring everyone at the table can enjoy their favorite version of these Oven-Baked Cheesy Tacos.
Oven-Baked Cheesy Tacos You’ll Crave Every Weeknight
Ingredients
Equipment
Method
- Preheat your oven to 400°F (200°C). Arrange taco shells in a baking dish.
- In a skillet, heat and brown ground beef with onion for 5-7 minutes.
- Add minced garlic and taco seasoning, sauté for 1 minute.
- Stir in tomato sauce or salsa, simmer for approximately 5 minutes.
- Fill taco shells with beef mixture and top with shredded cheese.
- Bake for 10-15 minutes until cheese is bubbling and golden.
- Add fresh toppings such as lettuce, tomatoes, and cilantro before serving.
Leave a Reply