
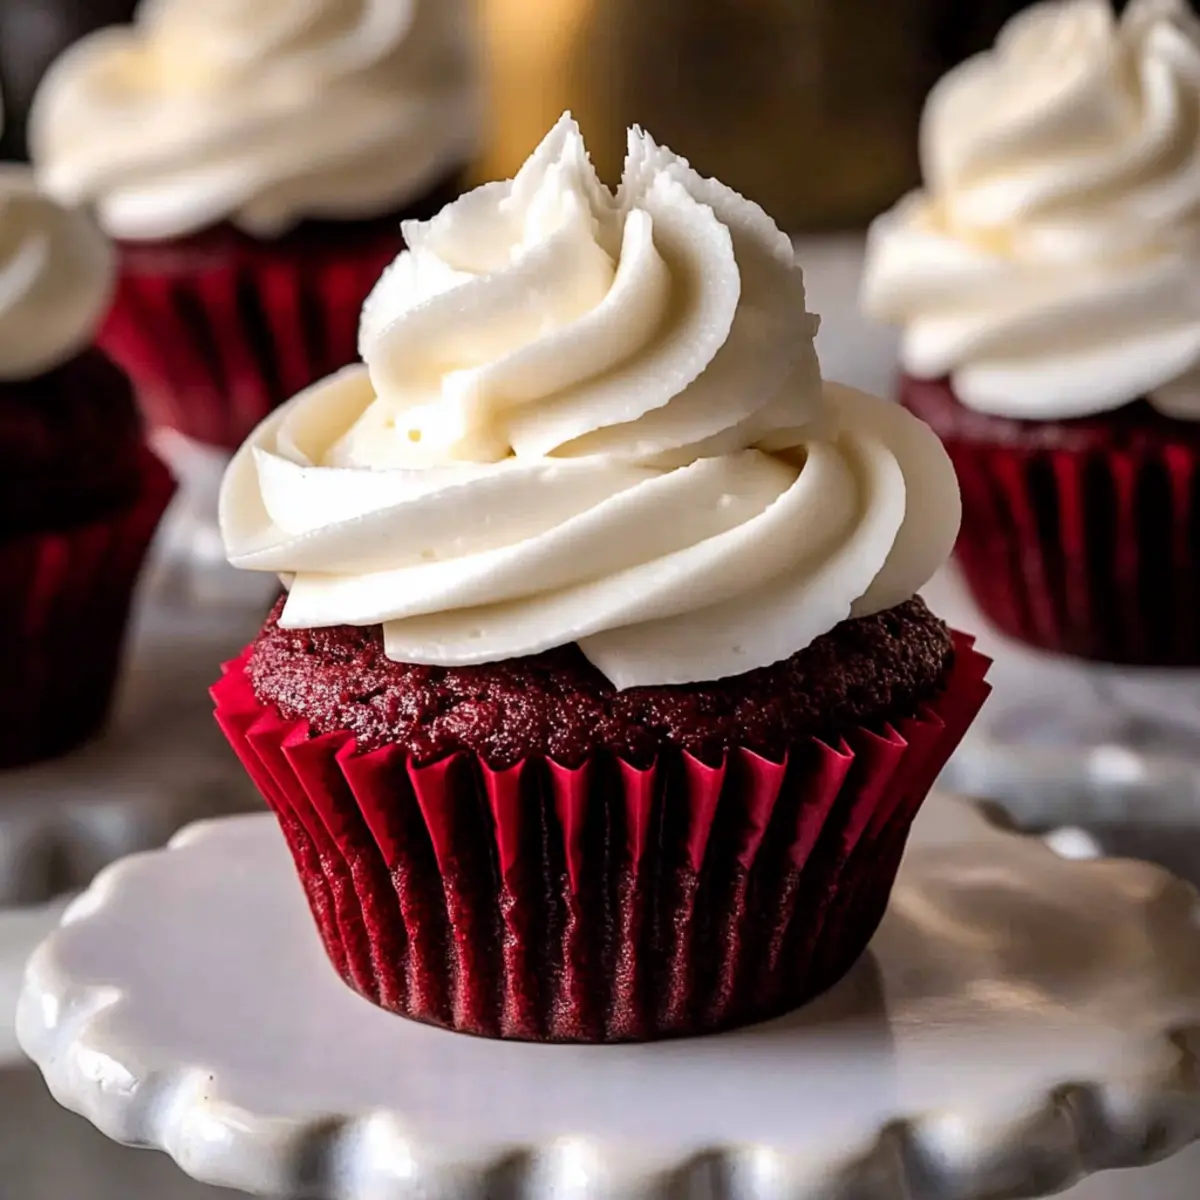
As I rummaged through my pantry looking for something to brighten my day, I stumbled upon the vibrant red gel food coloring tucked away at the back. Suddenly, the world of baking opened up and I felt inspired to whip up a batch of Red Velvet Cupcakes. These delightful treats are a perfect marriage of moist cake and rich cream cheese frosting, making them an irresistible choice for any occasion. Not only are they a visual showstopper, but their quick prep time ensures you won’t be lost in the kitchen for hours. Whether you’re celebrating a birthday, planning a holiday gathering, or just indulging your sweet tooth, these cupcakes are sure to impress. Ready to dive in and create your own little culinary masterpiece? Let’s get started!
Why Are Red Velvet Cupcakes So Popular?
Irresistible Visual Appeal: The stunning deep red color of these cupcakes instantly draws attention, making them a perfect centerpiece for any gathering.
Decadent Flavor: With a hint of cocoa and tangy cream cheese frosting, each bite delivers a rich and satisfying experience that’s hard to resist.
Quick Prep Time: You can whip up these delightful treats in no time, making them ideal for last-minute celebrations or just a sweet craving!
Versatile Options: Add chocolate chips or experiment with different decorations for a personalized touch that suits any occasion. If you like variations, don’t forget to check out my delectable Red Velvet Crinkle recipe!
Crowd-Pleaser: Perfect for parties and gatherings, these cupcakes are sure to impress both friends and family alike, making any moment special.
Authentic Baking Joy: Experience the joy of homemade desserts with these cupcakes that remind us why we love baking in the first place.
Red Velvet Cupcake Ingredients
Here’s everything you need to create these delightful Red Velvet Cupcakes!
For the Cupcake Batter
- All-Purpose Flour – Provides structure and stability; spoon and level for accuracy.
- Cocoa Powder (Dutch Process) – Adds a hint of chocolate flavor and enhances the red color; regular cocoa can work, but Dutch process is richer.
- Baking Powder – This leavening agent helps achieve fluffy cupcakes.
- Baking Soda – Works with acidic ingredients to create the perfect lift.
- Salt – Balances sweetness and enhances the overall flavors.
- Unsalted Butter – Adds richness and moisture; ensure it is softened before using.
- Granulated Sugar – Sweetens while creating a light and fluffy texture.
- Egg and Egg Yolk – Adds moisture and stability; room temperature eggs yield the best results.
- Vanilla Extract – Infuses depth and warmth into the flavor profile.
- Buttermilk – Enhances moisture and ensures a tender crumb; at room temperature for best results, or make DIY with regular milk and vinegar.
- Red Gel Food Coloring – Achieves the iconic deep red color; gel is recommended for vibrancy.
For the Cream Cheese Frosting
- Cream Cheese – Essential for the frosting’s tangy and creamy texture; use cold for easier mixing.
- Powdered Sugar – Sweetens the frosting while contributing to a smooth consistency.
Enjoy whipping up these scrumptious Red Velvet Cupcakes, sure to impress anyone who takes a bite!
Step‑by‑Step Instructions for Best Red Velvet Cupcakes with Cream Cheese Frosting
Step 1: Preheat the Oven
Begin by preheating your oven to 350°F (175°C). While it warms up, line a standard 12-cup cupcake pan with paper liners. This will ensure your red velvet cupcakes bake evenly and are easy to remove once cooked. Set the prepared pan aside as you move on to creating your batter.
Step 2: Mix the Dry Ingredients
In a medium mixing bowl, whisk together the all-purpose flour, Dutch process cocoa powder, baking powder, baking soda, and salt. This dry mixture provides the structure and flavor for your red velvet cupcakes. Once well combined, set the bowl aside to focus on the wet ingredients next, taking care to have everything ready for a smooth process.
Step 3: Cream the Butter and Sugar
In a large mixing bowl, use an electric mixer to cream the softened unsalted butter and granulated sugar together until the mixture is light and fluffy, approximately 1-2 minutes. This step is crucial as it aerates the mixture, contributing to the cupcakes’ delightful texture. Be sure to scrape down the sides of the bowl to incorporate all the ingredients evenly.
Step 4: Add the Eggs and Vanilla
Add in the room temperature egg, egg yolk, and vanilla extract to the creamed mixture. Beat on medium speed until the batter appears pale and smooth, which should take 1-2 minutes. This adds richness and moisture to your red velvet cupcakes, enhancing their flavor and texture.
Step 5: Combine Wet and Dry Mixtures
Gradually add the dry ingredients to the wet mixture while alternating with the buttermilk, mixing on low speed. Begin with the dry ingredients and repeat until everything is just combined; this should take about 1-2 minutes. Take care not to overmix, as it can lead to tough cupcakes.
Step 6: Incorporate the Food Coloring
Fold in the red gel food coloring until the batter is uniformly colored. Aim for a vibrant hue that captures the signature look of red velvet cupcakes. Make sure to mix gently to maintain the airiness of the batter without overworking it, which helps achieve that desirable fluffy texture.
Step 7: Fill the Cupcake Liners
Spoon the batter into the lined cupcake cups, filling each about three-quarters full. This allows room for the cupcakes to rise beautifully while baking. Carefully transfer the filled pan to your preheated oven and bake for 17-20 minutes, or until a toothpick inserted in the center comes out clean.
Step 8: Cool the Cupcakes
Once baked, remove the cupcake pan from the oven and let it cool in the pan for about 10 minutes. This short rest allows them to set, making it easier to transfer them without breaking. Afterward, move the cupcakes to a wire rack to cool completely, which is crucial for perfect frosting application.
Step 9: Prepare the Cream Cheese Frosting
While the cupcakes cool, prepare the frosting by beating the softened butter in a mixing bowl until it becomes pale and fluffy. Then, add the cold cream cheese and beat until just combined. Gradually incorporate the sifted powdered sugar until the frosting is smooth and creamy, which should take about 2-3 minutes of mixing.
Step 10: Frost the Cupcakes
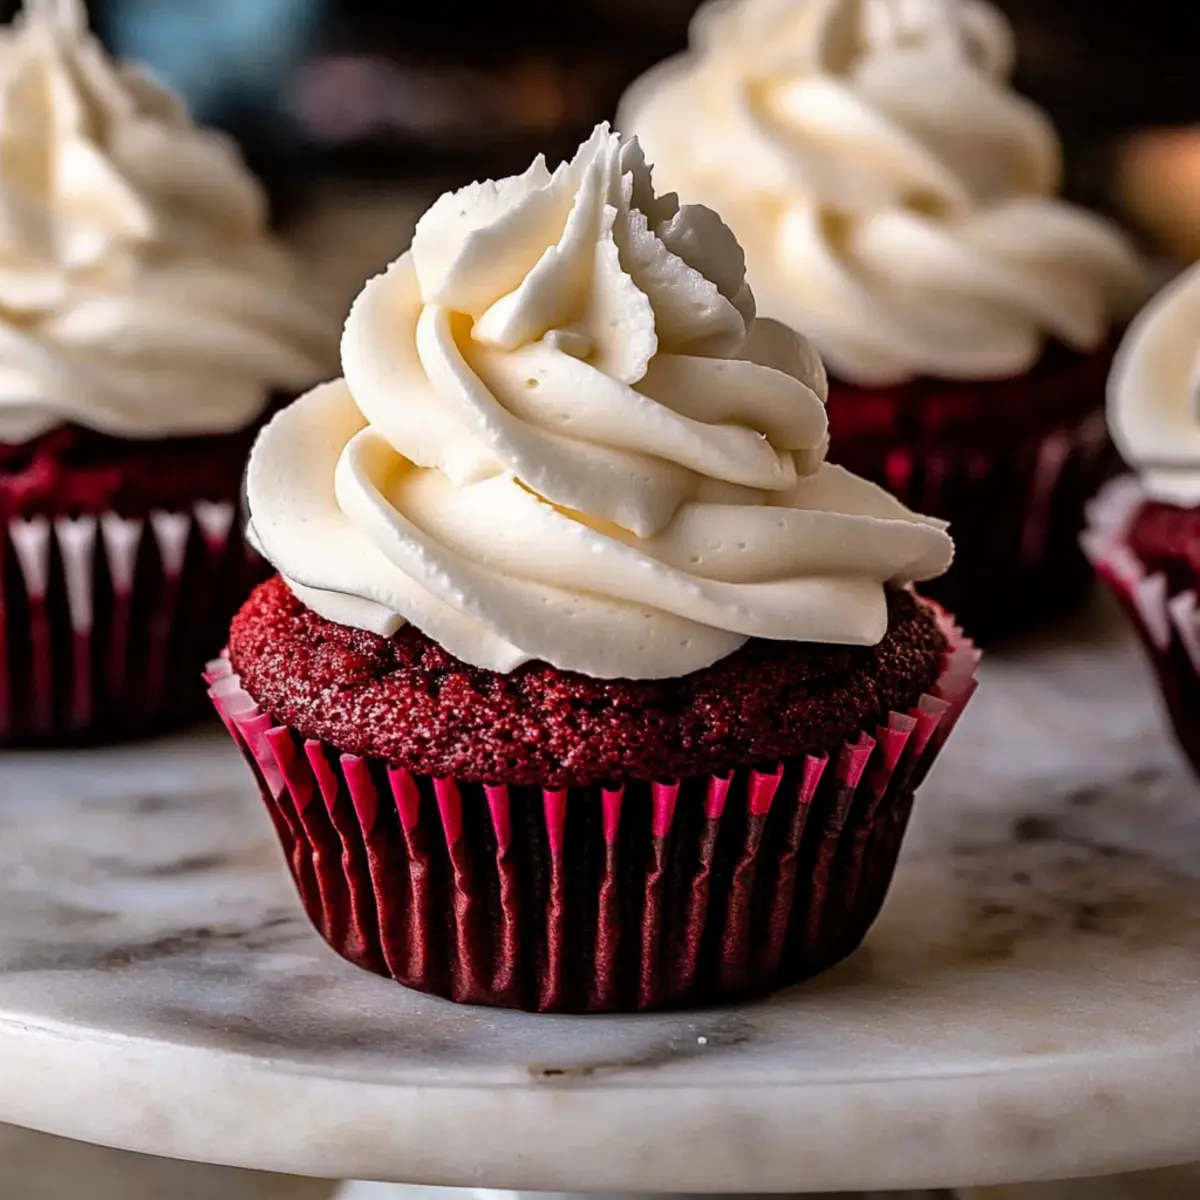
Once the cupcakes are completely cooled, use a piping bag or a spatula to generously frost each cupcake with the cream cheese frosting. Create a beautiful swirl or use any decorative style you prefer. For an added touch, feel free to sprinkle some festive toppings on top, making your best red velvet cupcakes even more irresistible!
Make Ahead Options
These delicious Red Velvet Cupcakes are perfect for busy home cooks looking to save time! You can prepare the cupcake batter up to 24 hours in advance—just mix all the ingredients, cover the bowl tightly, and refrigerate until you’re ready to bake. When you’re ready to serve, simply scoop the chilled batter into lined cupcake cups and bake as directed. The cream cheese frosting can also be made ahead of time and stored in the refrigerator for up to 3 days; just make sure to let it sit at room temperature for 15-20 minutes to soften before frosting your cupcakes. This way, you’ll enjoy the same delightful flavors and textures without the last-minute rush!
What to Serve with Best Red Velvet Cupcakes with Cream Cheese Frosting
Indulging in a delightful treat like these cupcakes opens the door to a world of flavor pairings that will elevate your dessert experience.
- Fresh Berries: The tartness of strawberries or raspberries contrasts beautifully with the rich cupcakes, bringing a refreshing balance.
- Whipped Cream: Light and airy, whipped cream adds a creamy softness that enhances the overall indulgence without overwhelming other flavors.
- Chocolate-Dipped Strawberries: This elegant pairing adds a luxurious touch, pairing the sweet tang of strawberries with the richness of chocolate.
Serve these cupcakes alongside a side of fresh fruit salad; the fruity freshness complements the sweetness. A sprinkling of mint leaves can also add a touch of elegance and balance to the palate.
- Coffee or Espresso: A warm cup of coffee enhances the cocoa flavor, creating a cozy moment that any dessert lover will appreciate.
- Sparkling Rosé: Perfect for celebrations, the bubbly notes in rosy wine provide a lively contrast and complement the cupcakes’ sweetness.
- Mini Cheesecakes: These not only offer another creamy texture but also a different flavor profile, making for an extraordinary dessert spread.
Each of these delightful sides and drinks brings out the best in your red velvet cupcakes, turning any gathering into a loving celebration of flavors!
Expert Tips for Red Velvet Cupcakes
-
Room Temperature Ingredients: Ensure your eggs, butter, and buttermilk are at room temperature, which fosters better emulsification and rise for your red velvet cupcakes.
-
Accurate Flour Measurement: Spoon your flour into the measuring cup and level it off for accuracy, preventing dense cupcakes from excess flour.
-
Never Overmix: Combine the wet and dry ingredients until just blended. Overmixing can lead to tough cupcakes, so keep it gentle!
-
Chill Cream Cheese: For creamy frosting, keep the cream cheese cold while allowing the butter to soften. This prevents the frosting from becoming too runny.
-
Cupcake Storage: Store your red velvet cupcakes in an airtight container for up to 3 days at room temperature. Refrigerate for a longer shelf life and to keep them fresh.
Red Velvet Cupcakes Variations
Feel free to explore these delightful variations that enhance the magic of your red velvet cupcakes!
- Cocoa Swap: Use regular cocoa powder instead of Dutch process for a slightly different flavor and color.
- Add Chocolate Chips: Fold in a handful of chocolate chips for a rich, indulgent twist that elevates the sweetness.
- Nutty Topping: Sprinkle crushed walnuts or pecans on top of the frosting for a delightful crunch and nutty flavor.
- Different Frosting: Swap out cream cheese for a vanilla buttercream or chocolate ganache for a flavored experiment that suits your taste.
- Spicy Kick: Add a pinch of cinnamon or cayenne pepper to the batter for a surprising warmth that enhances the chocolate flavor.
- Fruit Infusion: Incorporate a thin layer of raspberry or strawberry puree under the frosting for a fruity twist that adds exciting tartness.
- Vegan Version: Substitute aquafaba for eggs and use plant-based butter and cream cheese for a vegan-friendly adaptation that doesn’t sacrifice flavor.
- Festive Sprinkles: Top your cupcakes with seasonal sprinkles or colored sanding sugar for an eye-catching finish worthy of any celebration.
For another delicious dessert idea, check out my mouthwatering Beer Battered Halibut for an unexpected sweet-savory pairing! The sky’s the limit when it comes to customizing these beloved treats!
How to Store and Freeze Red Velvet Cupcakes
Room Temperature: Store your red velvet cupcakes in an airtight container at room temperature for up to 3 days. Make sure they are completely cooled before sealing to maintain freshness.
Fridge: For extended shelf life, place the cupcakes in an airtight container in the fridge for up to 1 week. This helps keep the cream cheese frosting firm and delicious.
Freezer: To freeze, wrap cupcakes tightly in plastic wrap or aluminum foil, then place them in a zip-top freezer bag. They can be frozen for up to 3 months.
Reheating: Allow frozen cupcakes to thaw in the fridge overnight before serving. For a quick fix, warm in the microwave for 10-15 seconds if desired.
Red Velvet Cupcakes Recipe FAQs
How do I select the right cocoa powder for my cupcakes?
Absolutely! For the best flavor and color in your red velvet cupcakes, I recommend using Dutch process cocoa powder. It’s darker and richer compared to regular cocoa powder, which enhances both taste and the deep red color. If you only have regular cocoa, it will still work, but the hue may not be as vibrant.
How should I store my red velvet cupcakes?
To keep your cupcakes moist and fresh, store them in an airtight container at room temperature for up to 3 days. If you’ve got leftovers beyond that, feel free to refrigerate them for up to 1 week. Be sure they are completely cooled before sealing them to lock in the freshness!
Can I freeze red velvet cupcakes?
Very! To freeze your cupcakes, wrap each one tightly in plastic wrap or aluminum foil and place them in a zip-top freezer bag. This will help prevent freezer burn. They can be stored frozen for up to 3 months. When you’re ready to enjoy them, simply thaw them in the fridge overnight or pop them in the microwave for a quick reheat (10-15 seconds should do the trick).
What should I do if my cupcakes turn out too dense?
If you find your red velvet cupcakes are too dense, it’s often a sign of overmixing the batter or using too much flour. To prevent this, make sure you spoon your flour into the measuring cup rather than scooping it directly, and when mixing the wet and dry ingredients, combine until just incorporated—no more!
Are these cupcakes safe for people with allergies?
Absolutely! However, keep in mind that this recipe contains common allergens such as gluten (from flour), dairy (from butter and buttermilk), and eggs. If you need to accommodate dietary restrictions, consider substituting with gluten-free flour, dairy alternatives, and egg replacers. Always check labels to cater to specific allergies or intolerances.
How long can I keep the cream cheese frosting?
You can store any leftover cream cheese frosting in an airtight container in the fridge for about 1 week. When ready to use it again, give it a quick stir to return it to its creamy texture. If you’re certain you won’t use it soon, you can also freeze it for about 3 months; just thaw it in the fridge before using!
Delicious Red Velvet Cupcakes with Cream Cheese Frosting
Ingredients
Equipment
Method
- Preheat your oven to 350°F (175°C) and line a 12-cup cupcake pan with paper liners.
- In a medium bowl, whisk together flour, cocoa powder, baking powder, baking soda, and salt.
- In a large bowl, cream together butter and sugar until light and fluffy.
- Add egg, egg yolk, and vanilla to the creamed mixture and beat until smooth.
- Alternately add dry ingredients and buttermilk to the wet mixture, mixing until just combined.
- Fold in the red gel food coloring until well incorporated.
- Spoon batter into cupcake liners, filling each about 3/4 full, and bake for 17-20 minutes.
- Cool the cupcakes in the pan for 10 minutes, then transfer to a wire rack to cool completely.
- For frosting, beat butter until pale, mix in cream cheese until combined, then incorporate powdered sugar.
- Frost cooled cupcakes with cream cheese frosting and decorate as desired.
Leave a Reply