
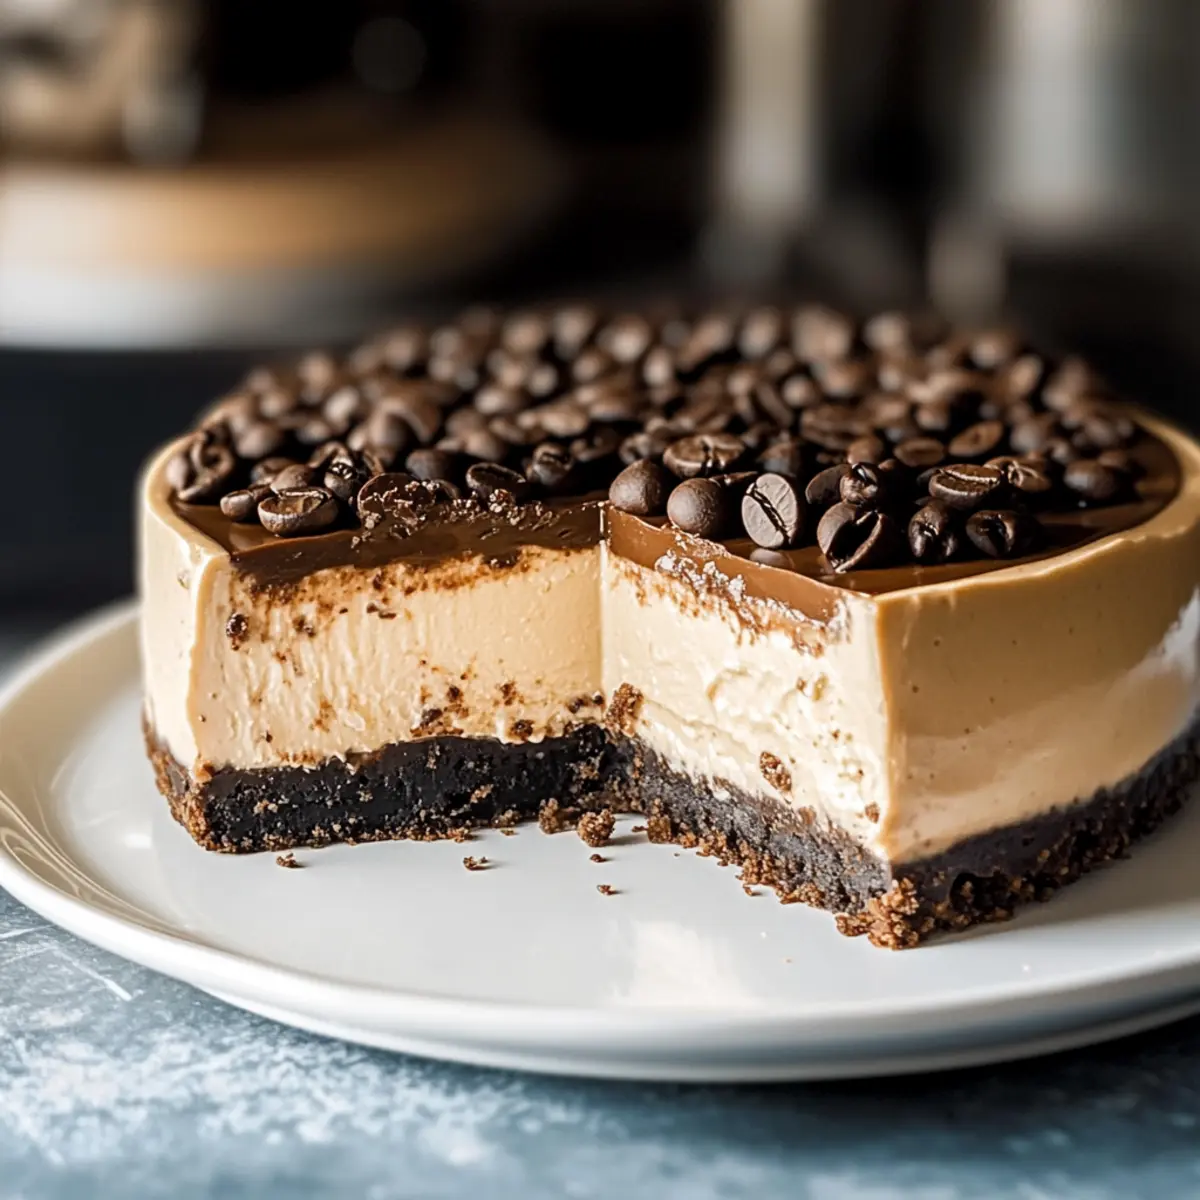
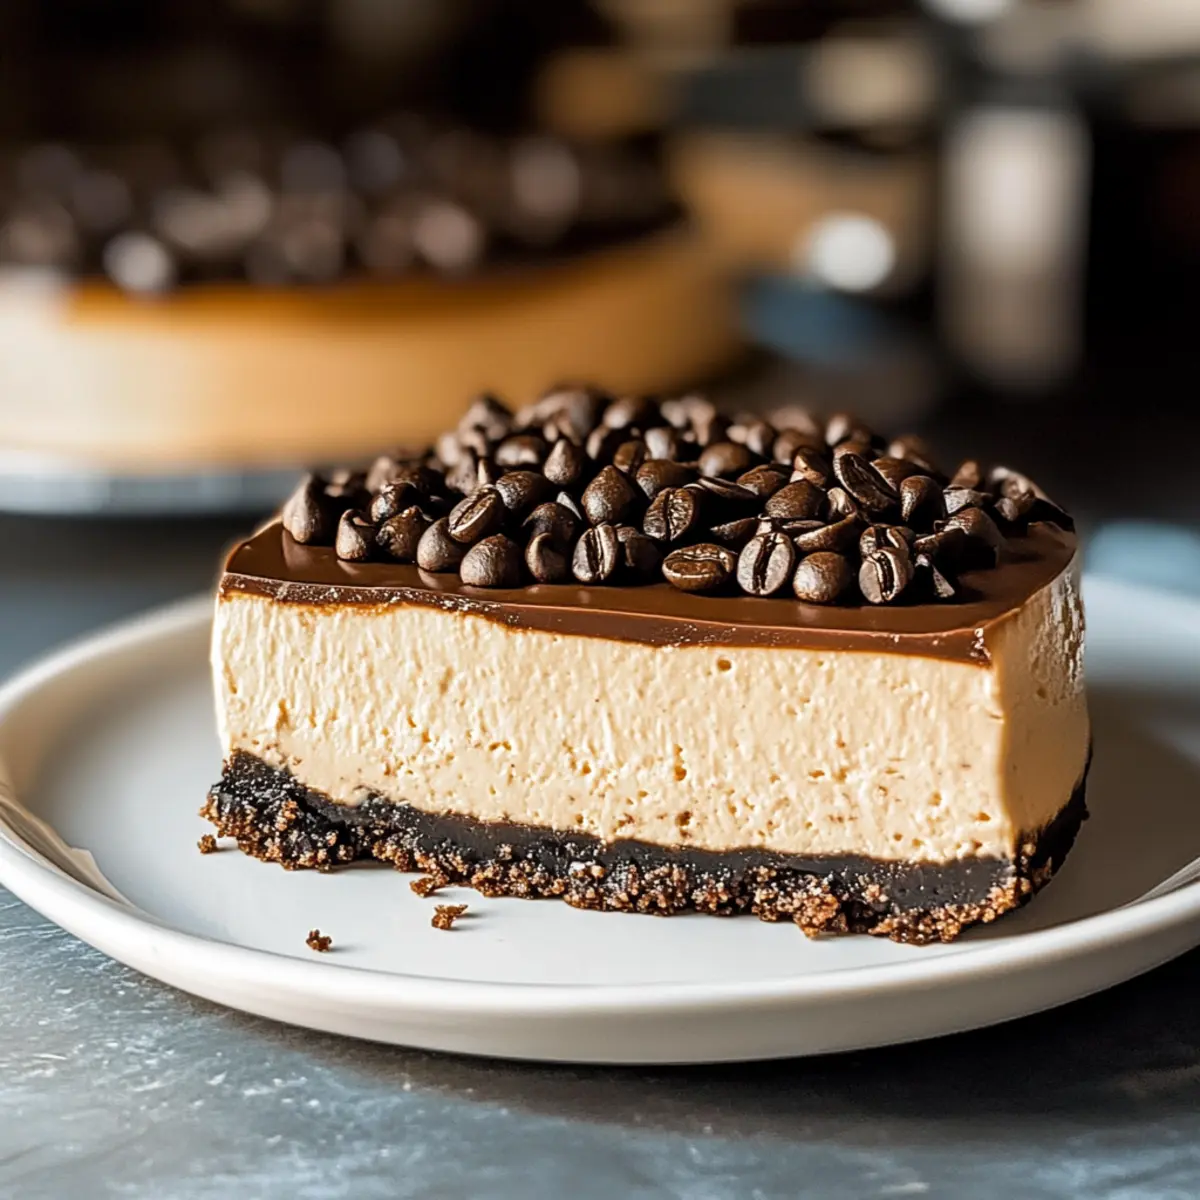
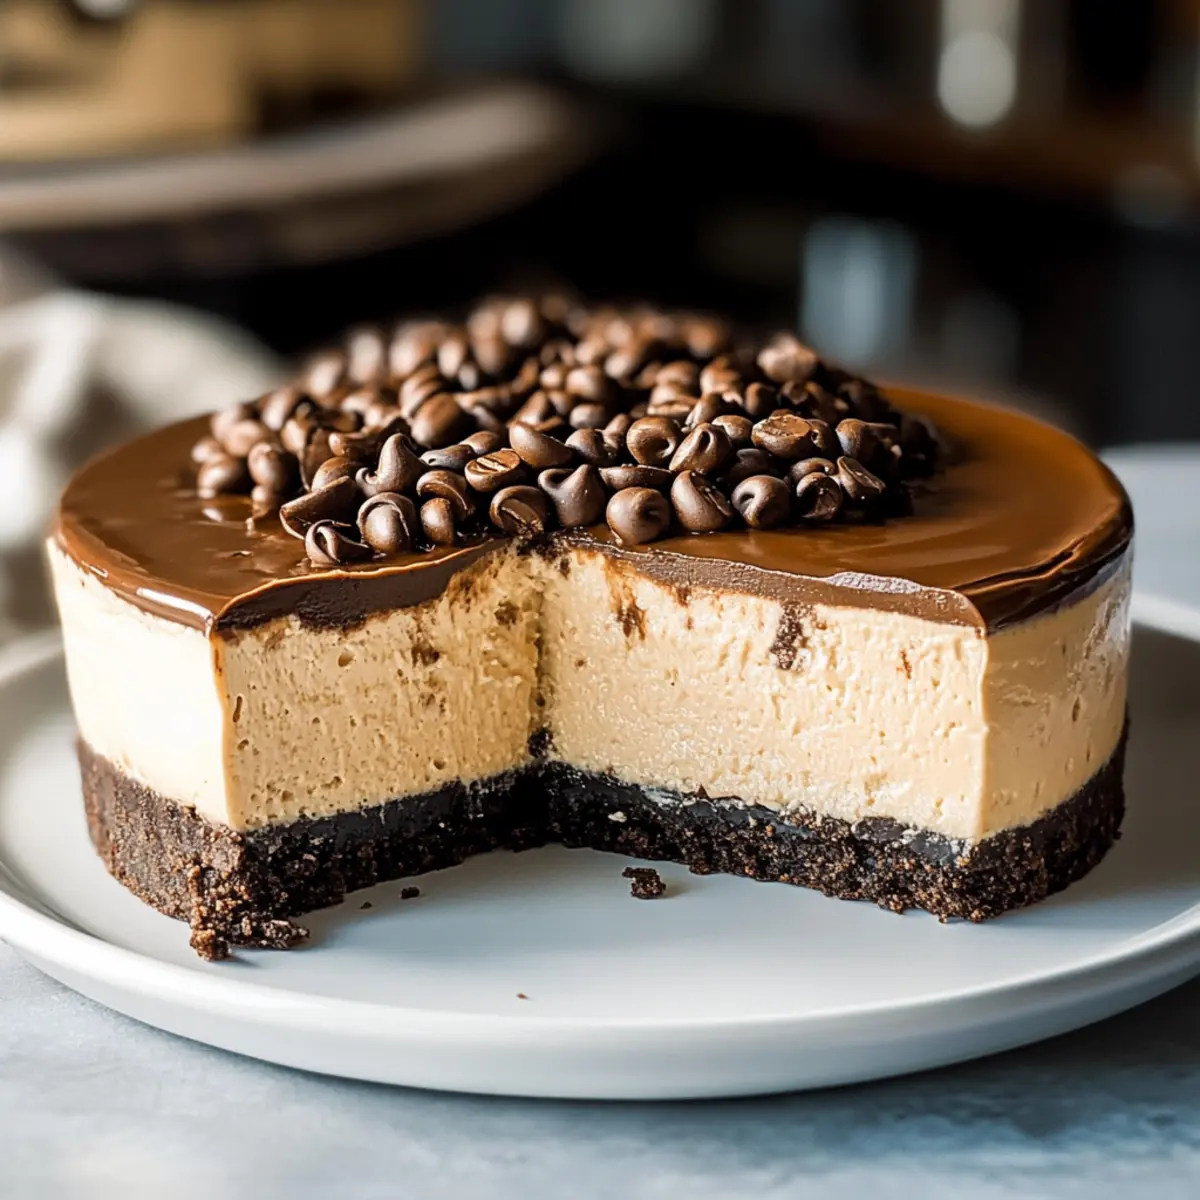
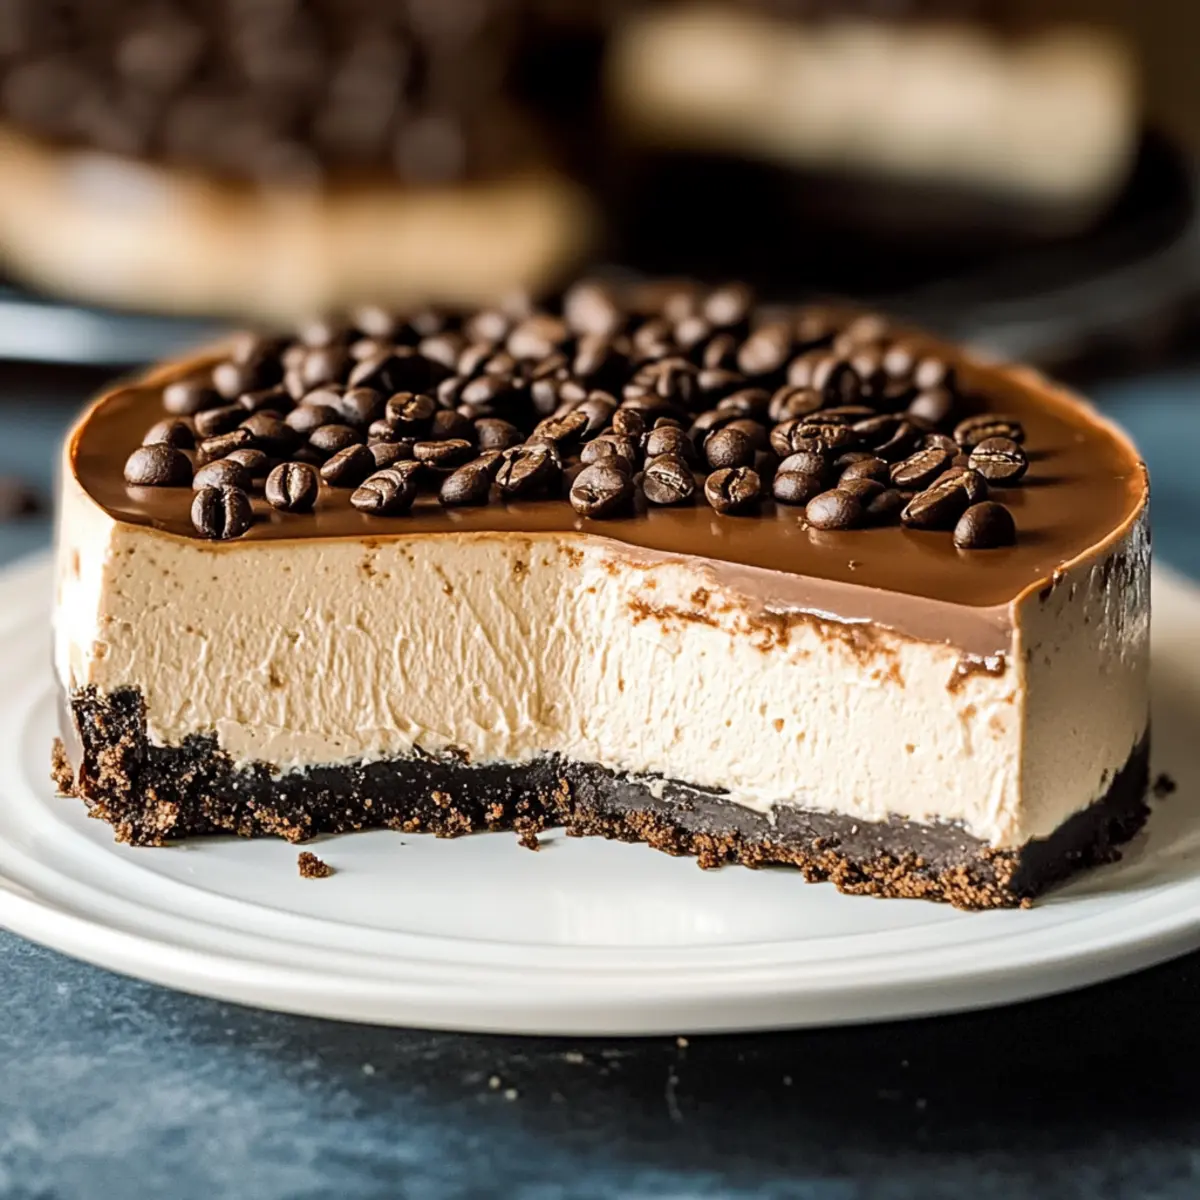
The aroma of freshly brewed espresso still lingered in the air as I whisked together ingredients for my latest obsession: a no-bake Espresso Cheesecake. This creamy delight is not only simple to prepare, but it also captures the heart of coffee lovers with its rich, luxurious flavor. With a crunchy Oreo crust and a glossy chocolate ganache topping, this decadent dessert offers the perfect way to impress family and friends—without turning on the oven. Best of all, it’s the ideal summer treat that’s both elegant and forgiving, allowing you to enjoy delicious results even on the busiest of days. Are you ready to elevate your dessert game with this irresistible espresso cheesecake? Let’s get started!
Why Is This Espresso Cheesecake Unforgettable?
Decadent Flavor: The rich espresso flavor beautifully complements the silky cream cheese, making this cheesecake a delectable choice for coffee lovers.
No-Bake Convenience: Perfect for warm days, this dessert requires no oven, saving you time and keeping your kitchen cool.
Crowd-Pleasing Delight: Whether it’s a family gathering or a special occasion, this cheesecake is sure to impress everyone at the table!
Versatile Variations: You can easily adapt this recipe—swap espresso for instant coffee or add a caramel layer to satisfy different palates.
Elegant Presentation: Topped with luscious chocolate ganache, it looks as stunning as it tastes, making it a showstopper for any event.
Add a delightful touch to your dessert table with this Decadent No-Bake Espresso Cheesecake with Chocolate Ganache that will have everyone asking for seconds!
Espresso Cheesecake Ingredients
• Elevate your dessert with these key flavors!
For the Crust
- Oreo Cookies – Their chocolatey richness forms a perfect, crunchy base; graham crackers can be used for a different twist.
- Butter – This binds the crust and enhances flavor; unsalted is best to control the saltiness.
For the Cheesecake Filling
- Cream Cheese – Adds the creamy texture essential to a cheesecake; ensure it’s soft for easy mixing.
- Espresso Powder – Infuses a robust, coffee flavor; instant espresso powder packs the best punch for this espresso cheesecake.
- Sugar – Balances the bitterness of the espresso; adjust to your sweetness preference.
- Vanilla Extract – Boosts the flavor with its warm notes; opt for pure vanilla for richness.
For the Topping
- Heavy Cream – Essential for a luscious ganache and whipped topping; whip until stiff peaks form for the best texture.
- Chocolate – Use high-quality chocolate for smooth ganache; ensure it’s chopped for easy melting.
With these carefully selected ingredients, you’re on your way to creating a show-stopping Espresso Cheesecake that your guests will love!
Step‑by‑Step Instructions for Espresso Cheesecake
Step 1: Prepare the Crust
Begin by crushing Oreo cookies into fine crumbs using a food processor, or place them in a resealable bag and crush with a rolling pin. Melt unsalted butter in a microwave-safe bowl, then combine with the cookie crumbs until evenly coated. Press this mixture firmly into the bottom of a springform pan to create a solid crust. Chill in the refrigerator for at least 30 minutes until set.
Step 2: Make the Cheesecake Filling
In a large mixing bowl, beat the room-temperature cream cheese with an electric mixer until smooth and creamy. Gradually add in the espresso powder, sugar, and vanilla extract, mixing until fully combined and no lumps remain. The texture should be velvety and light, reflecting the rich flavors of your Espresso Cheesecake.
Step 3: Incorporate Whipped Cream
In a separate bowl, whip the heavy cream until stiff peaks form, which usually takes about 3-4 minutes. Gently fold the whipped cream into the cream cheese mixture using a spatula, being careful not to deflate the cream. This step is essential for achieving the airy consistency that makes your no-bake espresso cheesecake wonderfully light.
Step 4: Assemble the Cheesecake
Carefully pour the cheesecake filling over the chilled crust, using a spatula to smooth the top into an even layer. Cover the springform pan tightly with plastic wrap, then refrigerate the cheesecake for at least 5 hours or, ideally, overnight. This allows the flavors to meld and the cheesecake to set completely.
Step 5: Prepare Chocolate Ganache
To make the ganache, heat the heavy cream in a small pot over low heat until it’s just simmering. Pour it over chopped high-quality chocolate in a heatproof bowl and let it sit for a couple of minutes. Stir gently until the mixture is glossy and smooth. This rich ganache will be the perfect topping for your decadent espresso cheesecake.
Step 6: Finish the Cheesecake
Once the cheesecake has set, carefully remove it from the springform pan. Pour the warm ganache over the top, allowing it to flow seamlessly over the edges for a beautiful finish. Return the cheesecake to the refrigerator for an additional hour to allow the ganache to firm up before serving.
What to Serve with Decadent No-Bake Espresso Cheesecake?
Create a perfect pairing experience with delightful sides and beverages that complement your rich espresso dessert.
- Fresh Berries: The tartness of raspberries or blueberries adds a refreshing contrast, enhancing the dessert’s flavors beautifully.
- Whipped Cream: Light and airy, fresh whipped cream adds a touch of sweetness, perfect for balancing the rich coffee notes of the cheesecake.
- Chocolate-Covered Espresso Beans: For the ultimate coffee lover’s treat, these crunchy bites amplify the espresso experience with each savory crunch.
- Coffee or Espresso: Serve alongside a rich cup of coffee or a shot of espresso to mirror the cheesecake’s flavors for a warming experience.
- Chocolate Mousse: This creamy dessert echoes the lusciousness of the cheesecake while providing an elegant chocolate element alongside the coffee essence.
- Hazelnut Biscotti: For dipping into your espresso or coffee, these crunchy cookies introduce a nutty flavor that beautifully complements the cheesecake’s richness.
With these subtle yet flavorful additions, your Decadent No-Bake Espresso Cheesecake will not just be a dessert but a sensational experience!
How to Store and Freeze Espresso Cheesecake
Refrigerator: Keep your espresso cheesecake covered in an airtight container or wrapped tightly in plastic wrap for up to 2 days. This helps maintain its creamy texture and rich flavor.
Freezer: To freeze, wrap the cheesecake tightly in plastic wrap and then in aluminum foil. It can be frozen for up to 3 months while still retaining its delightful coffee flavor.
Thawing: When ready to enjoy, transfer the cheesecake from the freezer to the fridge and allow it to thaw overnight. This way, it will maintain its soft and luscious texture.
Reheating: There’s no need to reheat this no-bake espresso cheesecake; simply serve chilled and enjoy its decadent, creamy goodness!
Expert Tips for the Best Espresso Cheesecake
-
Room Temperature Cream Cheese: Ensure your cream cheese is at room temperature to avoid lumps and achieve a perfectly smooth filling for your espresso cheesecake.
-
Gentle Whipping: Be cautious not to over-whip the heavy cream; stiff peaks are ideal, but overdoing it can lead to a butter-like texture in your cheesecake.
-
Chill Time Matters: Allow your cheesecake to chill for at least 5 hours, preferably overnight, to ensure it sets properly and flavors meld beautifully.
-
Chocolate Quality: Use high-quality chocolate for the ganache; it significantly affects the final flavor of your espresso cheesecake, ensuring a luxurious finish.
-
Crumb Consistency: When preparing the crust, aim for fine crumbs; they should easily hold together when pressed but not be overly wet, which can cause a soggy base.
Espresso Cheesecake Variations & Substitutions
Feel free to unleash your creativity and customize this delightful cheesecake with these simple twists!
-
Instant Coffee: Swap espresso powder for instant coffee for a milder flavor. It’s an easy alternative that still delivers a enjoyable coffee kick.
-
Caramel Swirl: Add a layer of caramel sauce to the cheesecake filling for extra sweetness. Just drizzle it in before you smooth the top, creating a delightful surprise in every bite.
-
Nutty Flavor: Incorporate chopped hazelnuts or almonds into the crust for a delightful crunch. It adds texture and a subtle nutty note that beautifully complements the coffee.
-
Dairy-Free: Use dairy-free cream cheese and coconut cream instead of heavy cream for a tasty vegan-friendly version. It’s a great way to share your cheesecake with those with dietary restrictions!
-
Flavor Boost: Enhance the flavor by adding a splash of coffee liqueur to the cheesecake filling. This will deepen the coffee essence and make it a fabulous after-dinner treat.
-
Chocolate Variants: Replace the Oreo crust with a chocolate cookie base for an extra chocolaty experience! You can even sprinkle chocolate chips throughout the cheesecake for that indulgent texture.
-
Fruit Toppings: Top your cheesecake with fresh berries like strawberries or raspberries for a pop of color and freshness. The tartness of the fruit adds a lovely balance to the rich cheesecake.
-
Bold Spice: Sprinkle in some cinnamon or nutmeg into the filling for a warm spice note. This can elevate the flavors, making your espresso cheesecake truly unique!
Whether you stick to the classic recipe or opt for one of these variations, don’t forget to check out our Chocolate Cheesecake Decadent or try the Mini Oreo Cheesecakes for even more inspired dessert ideas!
Make Ahead Options
These no-bake Espresso Cheesecake delights are perfect for meal prep, allowing you to enjoy delicious results without last-minute stress! You can prepare the cheesecake filling up to 24 hours in advance and keep it in the refrigerator, ensuring it stays fresh. Additionally, the crust can be made 3 days ahead; just store it wrapped tightly in plastic wrap. To maintain quality, avoid adding the ganache until you’re ready to serve, as it sets beautifully on a freshly chilled cheesecake. When it’s time to impress your guests, simply pour the ganache over the chilled cheesecake, allow it to set briefly, and you’ll be ready to serve this decadent no-bake espresso cheesecake with minimal effort!
Espresso Cheesecake Recipe FAQs
How do I choose the right espresso powder?
To achieve the best flavor in your espresso cheesecake, opt for high-quality instant espresso powder, which provides a rich and bold coffee taste. Look for brands that offer pure espresso without additives. You can also check for coarseness; a finer grind will dissolve better in your cheesecake mixture.
How long does the cheesecake last in the refrigerator?
Your espresso cheesecake can be stored in the refrigerator for up to 2 days. Make sure it is tightly covered with plastic wrap or stored in an airtight container to retain its creamy texture and delicious flavor. Remember that the longer it sits, the better the flavors will meld!
Can I freeze espresso cheesecake?
Absolutely! To freeze your espresso cheesecake, wrap it tightly in plastic wrap and then in aluminum foil. It can last up to 3 months in the freezer. When you’re ready to enjoy it, simply transfer it to the refrigerator the night before serving, allowing it to thaw slowly and maintain that luscious texture.
What should I do if my cheesecake doesn’t set properly?
If your cheesecake hasn’t set after chilling, it might be due to insufficient chilling time or not incorporating enough whipped cream. Make sure to give it at least 5 hours or, ideally, overnight in the refrigerator. If you’d like to help it set, you can try placing it in the freezer for a short time while keeping an eye on it to avoid freezing.
Is there anything I should be aware of regarding allergies with this recipe?
Yes! This espresso cheesecake contains dairy ingredients, so make sure to inform any guests with lactose intolerance or dairy allergies. For a dairy-free version, consider using vegan cream cheese and coconut cream for the filling and ganache. Additionally, check the labels of your other ingredients (like cookies) to confirm they are allergy-friendly.
Can I use flavored extracts instead of vanilla?
Very! If you’re looking to add a twist, consider substituting vanilla extract with flavored extracts like almond or hazelnut. Just be cautious with the quantity; start with half the amount you would use for vanilla and adjust according to your taste preference, as flavored extracts can be stronger.
These FAQs should help you successfully create and enjoy your delightful espresso cheesecake!
Irresistible Espresso Cheesecake That's No-Bake and Dreamy
Ingredients
Equipment
Method
- Begin by crushing Oreo cookies into fine crumbs using a food processor, or place them in a resealable bag and crush with a rolling pin.
- Melt unsalted butter in a microwave-safe bowl, then combine with the cookie crumbs until evenly coated.
- Press this mixture firmly into the bottom of a springform pan to create a solid crust. Chill in the refrigerator for at least 30 minutes until set.
- In a large mixing bowl, beat the room-temperature cream cheese with an electric mixer until smooth and creamy.
- Gradually add in the espresso powder, sugar, and vanilla extract, mixing until fully combined and no lumps remain.
- In a separate bowl, whip the heavy cream until stiff peaks form, then gently fold it into the cream cheese mixture.
- Carefully pour the cheesecake filling over the chilled crust and smooth the top into an even layer.
- Cover the springform pan tightly with plastic wrap and refrigerate for at least 5 hours or overnight.
- To make the ganache, heat the heavy cream in a small pot until simmering. Pour it over the chopped chocolate and let it sit for a couple of minutes.
- Stir gently until the mixture is glossy and smooth, then pour the ganache over the chilled cheesecake and return to the refrigerator for an additional hour.
Leave a Reply