
“Did you try the guava cheesecake?” I overheard my friend asking, her eyes sparkling with delight. That conversation sent me on a mission to create a dessert that would leave everyone at the table asking for seconds. This Creamy Guava Cheesecake is my answer—infusing seasonal fruit into a baked delight that’s bound to turn heads. With its luscious vanilla base and a vibrant homemade guava compote crowning each slice, this cheesecake brings a taste of summer that’s rich yet refreshingly tangy. Not only is it a crowd-pleaser perfect for special occasions, but it’s also surprisingly easy to whip up! Whether you’re celebrating love, friendship, or simply the joy of homemade desserts, this recipe might just become a cherished tradition in your kitchen. Are you ready to elevate your dessert game and impress your loved ones? Let’s make this guava cheesecake together!
Why is this guava cheesecake a must-try?
Deliciously Unique: This Guava Cheesecake stands out with its tropical flair, offering a creamy treat that delights your taste buds with every bite.
Simple Ingredients: Made with accessible staples like cream cheese and guavas, this recipe is perfect for both novice and seasoned bakers.
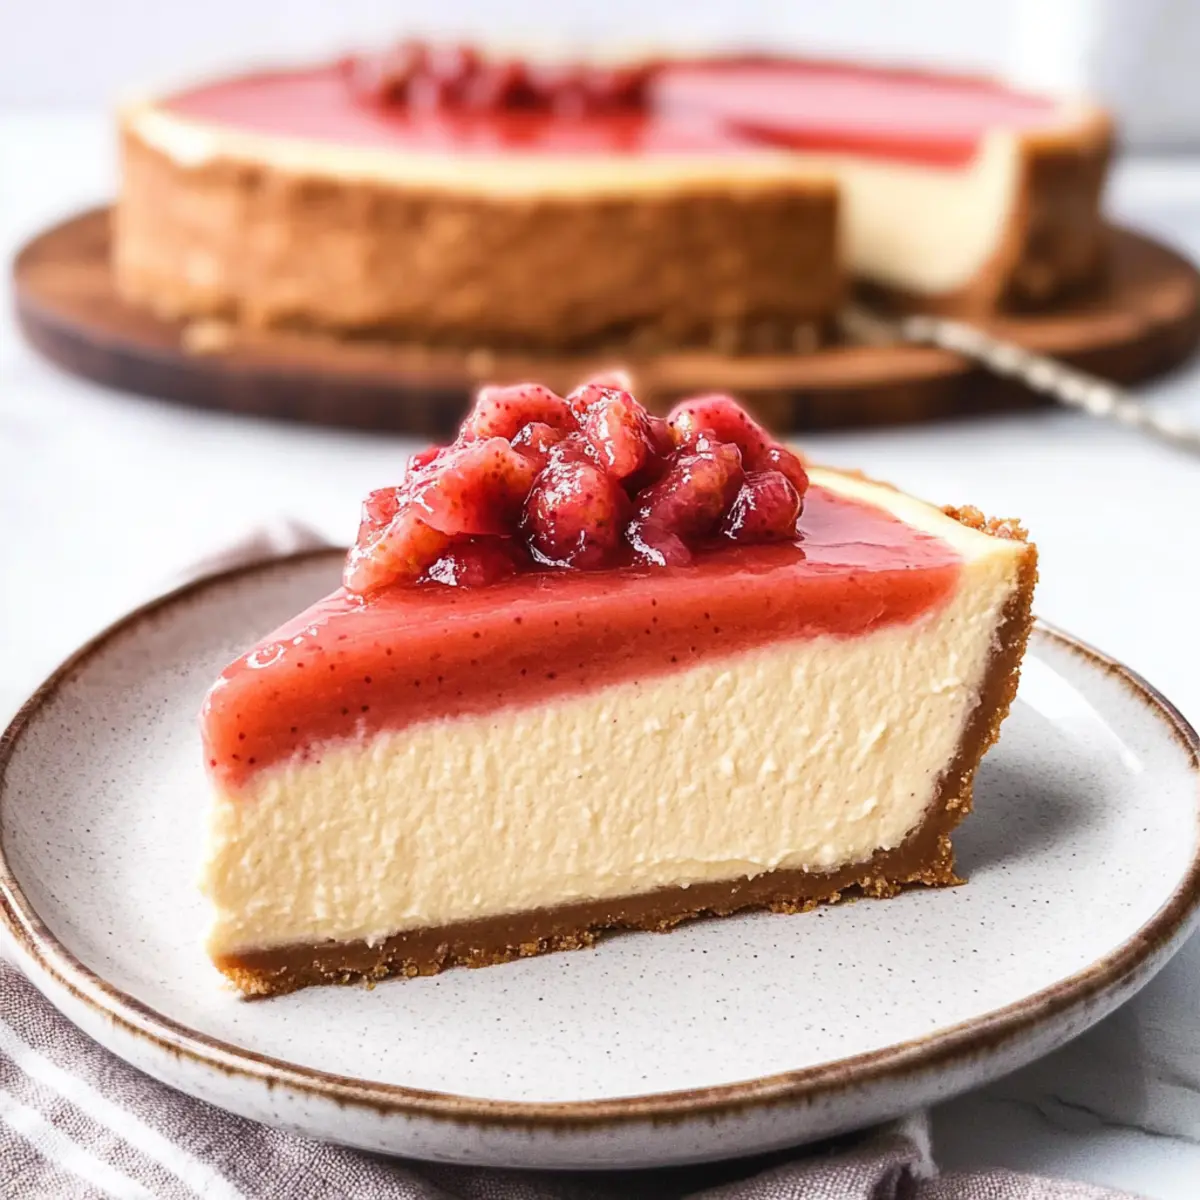
Impressive Presentation: The vibrant guava compote not only adds flavor but also creates a stunning visual appeal that’s sure to impress guests.
Versatile Flavor: While guava shines here, feel free to swap it out for other fruits like strawberries or even passionfruit for a fresh twist.
Make-Ahead Friendly: This cheesecake can be made in advance, making it a stress-free dessert option for any gathering. So, whether you’re hosting a summer barbecue or celebrating a special occasion, this cheesecake is the perfect finisher – similar to the delightful Chocolate Cheesecake Decadent or the refreshing Strawberry Matcha Basque Cheesecake.
Guava Cheesecake Ingredients
For the Crust
• Tennis biscuits – This creates a delightful crust base; graham crackers or digestive biscuits can be used instead.
• Unsalted butter – Binds the crust beautifully; feel free to use salted butter for extra flavor.
For the Cheesecake Filling
• Cream cheese – The star of this Guava Cheesecake; ensure it’s softened for easy blending.
• Castor sugar – Sweetens the cheesecake perfectly; granulated sugar can work as a substitute if needed.
• Eggs (extra large) – Provides structure and richness; flax eggs are an option for a vegan twist.
• Vanilla extract – Enhances flavor dramatically; vanilla bean paste makes a lovely alternative.
• Whipping cream – Adds that creamy texture to the filling; heavy cream or cool whip can be swapped in.
For the Guava Compote
• Fresh guavas – The main ingredient for the compote; substitute with strawberries or raspberries for different flavors.
• Granulated sugar (for compote) – Sweetens the compote; brown sugar brings a deeper flavor profile.
• Lime juice – Brightens the compote significantly; lemon juice can be used if lime is unavailable.
For Garnish
• Guavas (for decoration) – Beautiful fresh fruit topping; seasonal berries can also bring a pop of color if guavas aren’t accessible.
Step‑by‑Step Instructions for Creamy Guava Cheesecake
Step 1: Preheat the Oven
Start by preheating your oven to 170°C (325°F). Meanwhile, prepare a 23cm (9 inches) springform pan by greasing it and lining the bottom with parchment paper. This will ensure your Guava Cheesecake comes out effortlessly after baking, maintaining that beautiful shape and texture.
Step 2: Make the Crust
In a food processor, crush the tennis biscuits into fine crumbs. Melt the unsalted butter and mix it with the crumbs until combined. Press this mixture firmly into the base and slightly up the sides of the prepared pan. Bake the crust for about 10 minutes, until golden and fragrant, then let it cool while you prepare the cheesecake filling.
Step 3: Prepare the Cheesecake Batter
In a large mixing bowl, beat the softened cream cheese and castor sugar together until smooth and creamy, about 3-4 minutes. Add the extra-large eggs one at a time, mixing well after each addition. Incorporate the vanilla extract and whipping cream, combining until the mixture is velvety and well blended. This filling will ensure your Guava Cheesecake is rich and delicious.
Step 4: Assemble the Cake
Pour the creamy cheesecake batter into the cooled crust, smoothing the top with a spatula. Place the springform pan into a larger roasting pan and carefully fill it with hot water halfway up the side of the cake tin. This water bath will help achieve a perfectly baked, silky texture and prevent cracks in your cheesecake.
Step 5: Bake the Cheesecake
Bake the cheesecake in the preheated oven for about 50 minutes. You want the edges to be set while the center remains slightly wobbly; it will continue to firm up as it cools. Once baked, turn off the oven and leave the cheesecake inside for 2 hours, allowing it to cool gradually—this will help prevent cracking.
Step 6: Refrigerate Overnight
After the cheesecake has cooled for two hours, remove it from the oven and the water bath. Cover it with plastic wrap and refrigerate overnight. This chilling period allows the flavors to develop and the texture to become perfectly creamy, ensuring your Guava Cheesecake will be a showstopper.
Step 7: Make the Guava Compote
To prepare the guava compote, place chopped fresh guavas, lime juice, and granulated sugar in a saucepan over medium heat. Simmer for about 10-15 minutes, stirring occasionally, until the mixture thickens. Once done, blend the compote until smooth and strain it to remove any seeds for a silky finish.
Step 8: Final Assembly
Once the cheesecake has chilled completely, remove it from the springform pan and place it on a serving platter. Top the cheesecake generously with the chilled guava compote, allowing it to drizzle down the sides if desired. For a beautiful garnish, arrange fresh guava slices around the top before serving, ensuring your Guava Cheesecake is as stunning as it is delicious.
Expert Tips for Guava Cheesecake
-
Water Bath Essential: Always use a water bath to ensure your guava cheesecake remains creamy and crack-free. The steam helps evenly distribute heat during baking.
-
Gradual Cooling: Allow the cheesecake to cool in the oven with the door slightly ajar for 2 hours. This gradual cooling prevents sudden temperature changes that can cause cracks.
-
Test Guava Ripeness: Before using, taste your guavas. They should be perfectly ripe and sweet for the best flavor in both the cheesecake and the compote.
-
Proper Storage: Keep leftovers in an airtight container in the fridge for up to 4 days. For longer storage, freeze the cheesecake without the compote to maintain its quality.
-
Flavor Variations: Don’t hesitate to experiment! Substitute guavas with other fruits to create different flavor profiles, enhancing your guava cheesecake experience.
How to Store and Freeze Guava Cheesecake
Fridge: Keep leftover guava cheesecake in an airtight container for up to 4 days. This helps maintain its creamy texture and fresh flavor.
Freezer: For longer storage, freeze your guava cheesecake (without the compote) for up to 3 months. Wrap it tightly in plastic wrap and then in aluminum foil to prevent freezer burn.
Thawing: When ready to enjoy, simply thaw the cheesecake in the fridge overnight. This gentle thawing will retain its delightful texture and flavor.
Serving: Before serving, top with fresh guava compote or your choice of fruit to enhance its presentation and taste.
Make Ahead Options
Preparing this Guava Cheesecake ahead of time is a fantastic way to save precious moments on busy days! You can make the cheesecake up to 3 days in advance; just ensure to refrigerate it properly wrapped in plastic wrap to maintain its creamy texture. The guava compote can also be made ahead and stored in the fridge for up to 5 days. When it’s time to serve, just layer the chilled compote over the cheesecake, arranging those beautiful guava slices for garnish to freshen its presentation. By prepping in advance, you’ll have a luscious dessert that’s just as delicious and perfectly ready to impress your guests!
Guava Cheesecake Variations & Substitutions
Feel free to tailor this delightful cheesecake to suit your taste and pantry staples!
- Berry Bliss: Replace guavas with fresh strawberries or a mix of berries for a vibrant twist. The tartness of berries adds a lovely contrast!
- Tropical Passion: Swap guavas for passionfruit puree for a tangy and exotic flavor that will transport you to a beach paradise.
- Nutty Crust: Try using almond or coconut flour in combination with butter for a gluten-free crust option that will add a delicious nutty flavor.
- Sweet Switch: Use brown sugar instead of castor sugar for a deeper, caramel-like sweetness that complements the creaminess beautifully.
- Citrus Zest: Incorporate lemon or orange zest into the cheesecake batter for an extra burst of citrus that pairs wonderfully with the guava!
- Decadent Chocolate: Add a layer of melted dark chocolate to the batter for a rich, cookie-like experience alongside the guava.
- Reduced Sugar: For a lighter option, reduce the sugar by a third, and rely on the natural sweetness of the guava and any toppings you choose.
- Cream Cheese Alternative: For a lighter cheesecake, consider using ricotta cheese blended with a bit of cream cheese for a fluffy texture, as seen in recipes like Mini Oreo Cheesecakes.
What to Serve with Creamy Guava Cheesecake
Looking to create a delightful meal experience that surrounds your slice of creamy decadence with perfect companions?
- Fresh Fruit Salad: A vibrant medley of seasonal fruits adds a refreshing touch and complements the guava’s sweetness.
- Coconut Whipped Cream: This light, airy topping enhances the tropical vibe and pairs exquisitely with the cheesecake’s rich creaminess.
- Espresso or Coffee: A cup of bold espresso or smooth coffee balances the dessert’s sweetness, making for a perfect after-dinner indulgence.
- Vanilla Ice Cream: The creaminess of vanilla ice cream melts beautifully with each slice, providing a delightful contrast in texture and flavor.
- Shortbread Cookies: Crunchy, buttery cookies serve as a lovely textural contrast, perfect for dipping into the guava compote.
- Chocolate Drizzle: A rich chocolate drip adds a decadent element, mingling wonderfully with the guava notes and making a gourmet touch.
- Mint Leaves Garnish: Fresh mint not only adds a pop of color but also a refreshing hint of flavor that elevates each bite.
- Sparkling Water with Lime: A zesty sparkling water helps cleanse the palate, highlighting the vibrant guava flavors in the dessert.
- Cheese Platter: Pairing with mild cheeses can offer a savory counterbalance, making it a chic addition to your dessert spread.
Creamy Guava Cheesecake Recipe FAQs
How do I select ripe guavas for my cheesecake?
Absolutely! When choosing guavas, look for ones that are slightly soft to the touch and fragrant. The skin should be a vibrant color without dark spots or blemishes. A ripe guava will have a sweet aroma and yield gently when pressed.
What is the best way to store leftover guava cheesecake?
Keep your leftover guava cheesecake in an airtight container in the refrigerator for up to 4 days. Make sure it’s well-covered to prevent it from absorbing any strong odors from other foods. This will help maintain its delicious creamy texture and flavor.
Can I freeze guava cheesecake?
Very! You can freeze your guava cheesecake without the guava compote for up to 3 months. Begin by wrapping it tightly in plastic wrap, then place it in a secure airtight container or wrap it in aluminum foil for added protection against freezer burn. When you’re ready to enjoy it, thaw it overnight in the fridge for the best texture.
What if my cheesecake cracks while baking?
If your cheesecake cracks, don’t worry; it happens to the best of us! To prevent this, always use a water bath during baking which helps regulate the temperature. Ensure you allow the cheesecake to cool gradually in the oven with the door slightly ajar. If it does crack, you can simply cover it with compote or fruit slices for a beautiful presentation.
Are there any dietary considerations for this recipe?
This guava cheesecake contains gluten due to the biscuits used in the crust. If you or anyone you’re serving has gluten sensitivities, consider using a gluten-free biscuit alternative. Additionally, for a vegan version, replace the cream cheese with a plant-based alternative and use flax eggs in place of regular eggs.
How can I make this recipe ahead of time?
I often make this creamy guava cheesecake a day before I need it! After baking and cooling, refrigerate it overnight to allow the flavors to meld beautifully. You can also freeze it up to a month in advance; just remember to leave off the compote until serving to keep everything fresh and tasty.
Creamy Guava Cheesecake That Will Brighten Your Day
Ingredients
Equipment
Method
- Preheat your oven to 170°C (325°F). Grease the 23cm (9 inches) springform pan and line the bottom with parchment paper.
- In a food processor, crush the tennis biscuits into fine crumbs. Melt the unsalted butter and mix it with the crumbs until combined. Press the mixture into the base and slightly up the sides of the pan. Bake for about 10 minutes until golden, then let it cool.
- In a mixing bowl, beat the softened cream cheese and castor sugar until smooth and creamy, about 3-4 minutes. Add the eggs one at a time, mixing well after each. Incorporate the vanilla and whipping cream until velvety.
- Pour the creamy mixture into the cooled crust, smoothing the top with a spatula. Place the springform in a larger roasting pan and fill with hot water halfway up the sides.
- Bake in the preheated oven for about 50 minutes until edges are set but the center is slightly wobbly. Turn off the oven and let the cheesecake cool in the oven for 2 hours.
- Remove from the oven and water bath. Cover with plastic wrap and refrigerate overnight.
- For the guava compote, simmer chopped guavas, lime juice, and sugar in a saucepan for 10-15 minutes until thickened. Blend and strain for smoothness.
- After chilling, remove the cheesecake from the pan and place it on a platter. Top generously with guava compote and garnish with fresh guava slices.
Leave a Reply