
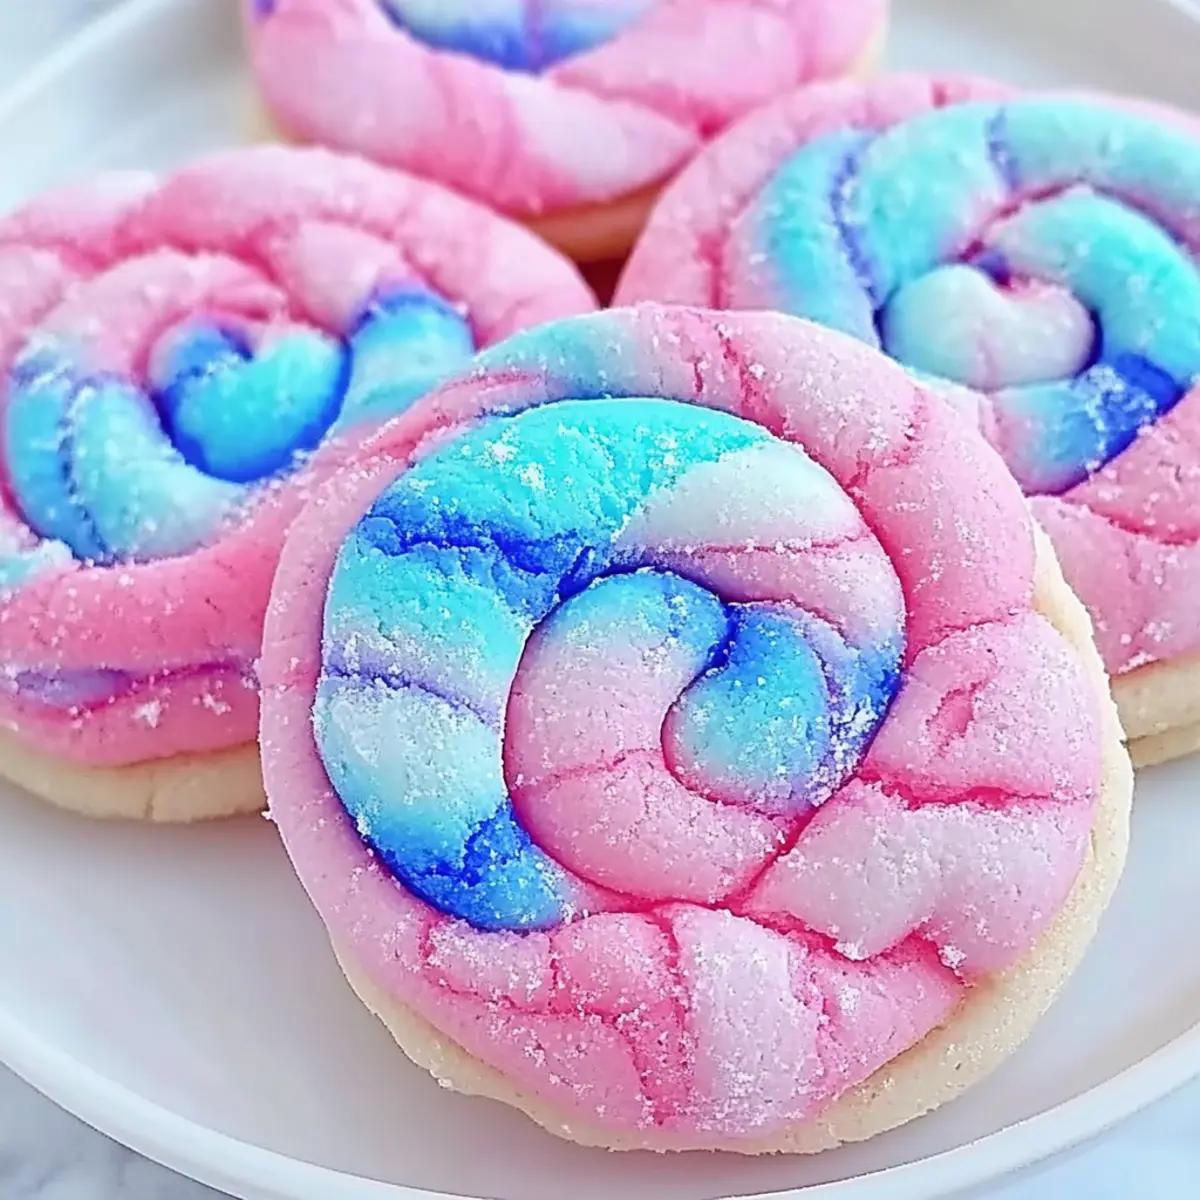
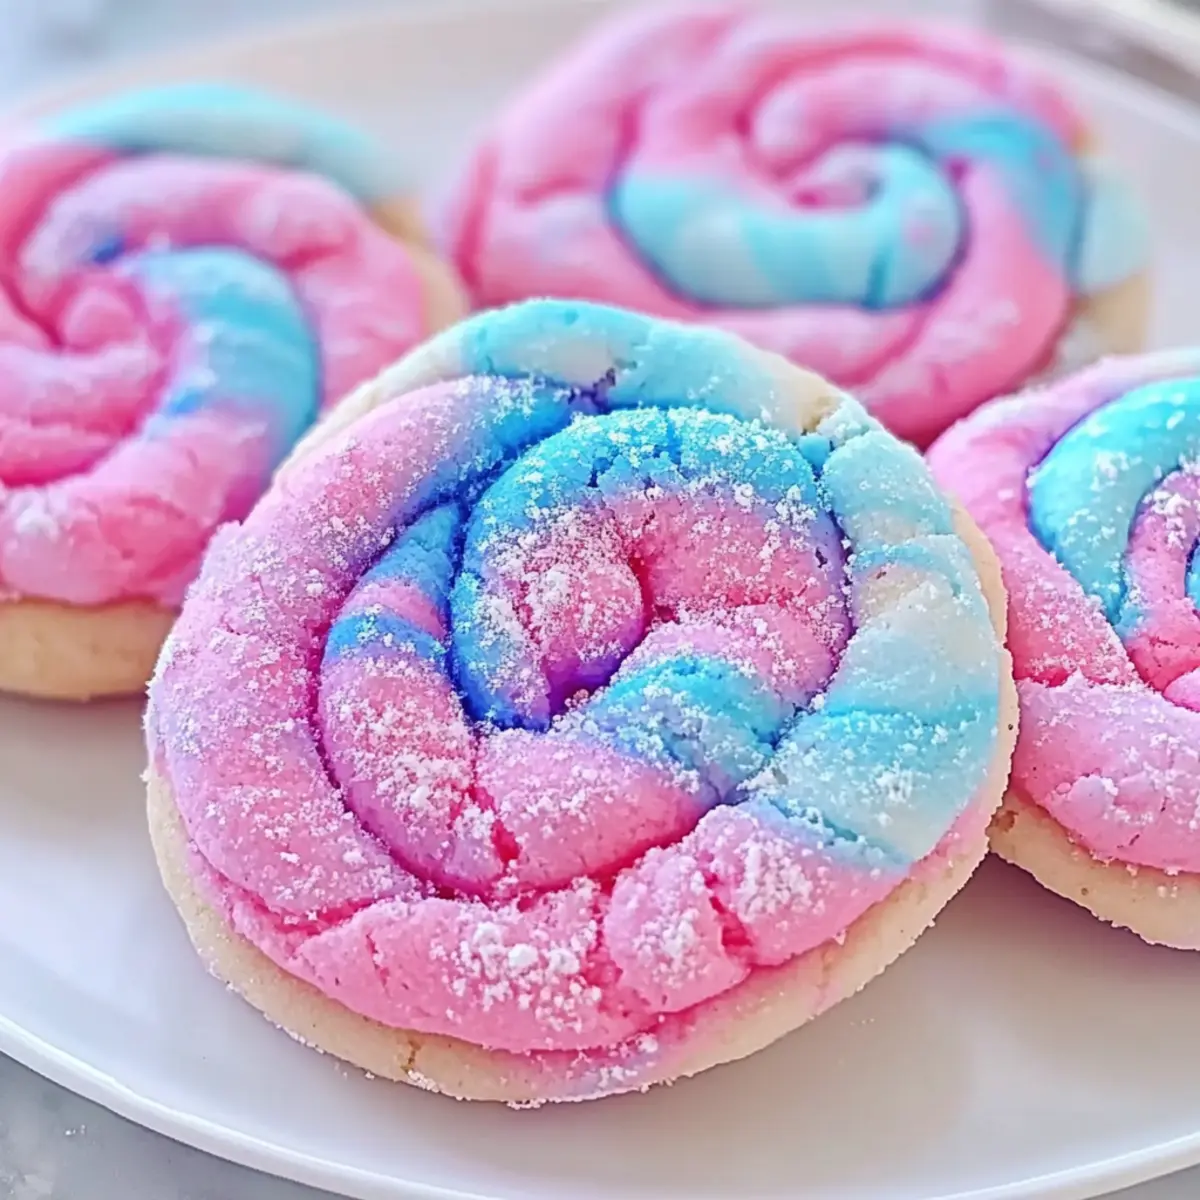
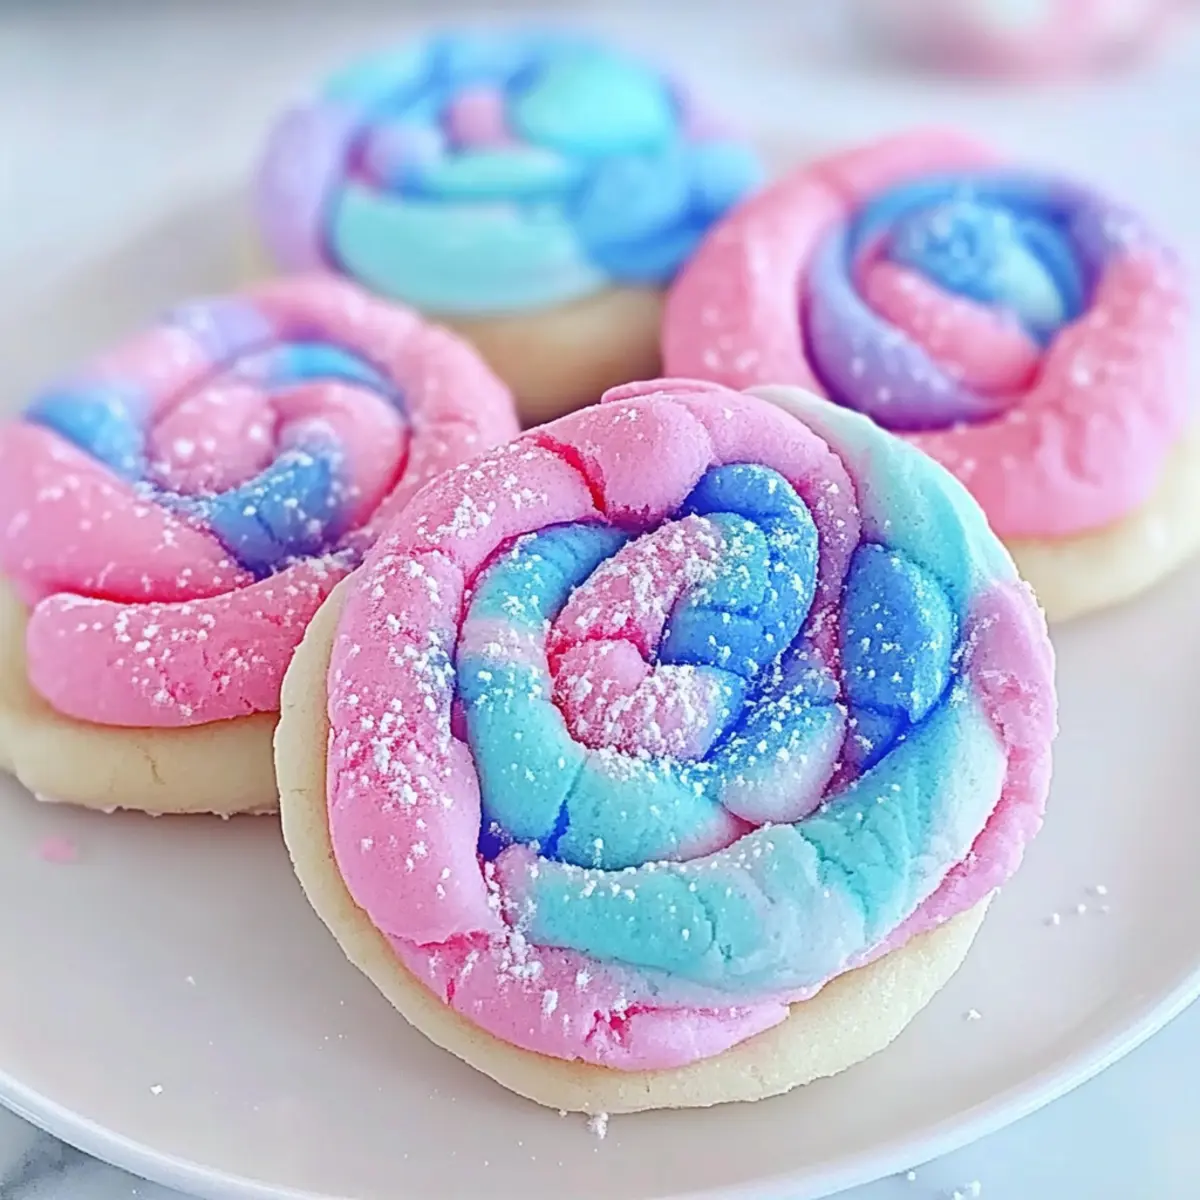
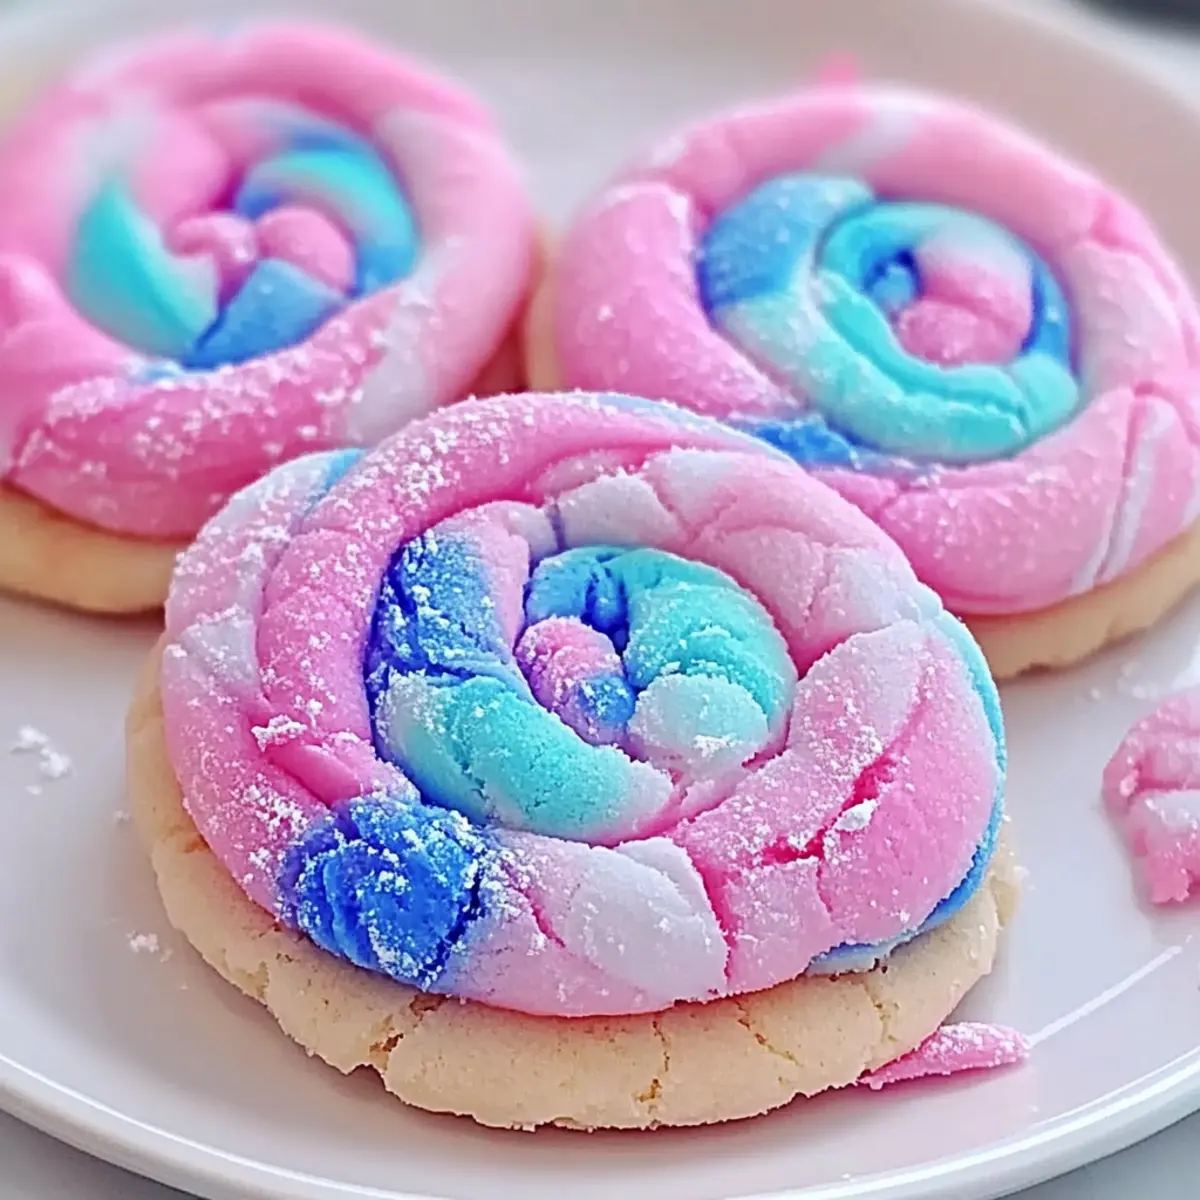
Amid the laughter and colorful lights of a bustling carnival, there’s something enchanting about the aroma of spun sugar in the air. My Cotton Candy Cookies capture that very magic, transforming a nostalgic treat into a delightful dessert that’s perfect for any occasion. With their soft, chewy texture and vibrant swirls of pastel pink and blue, these fun and colorful cookies are not just a treat for the taste buds; they also add an element of whimsy to your baking repertoire. Plus, they’re quick to whip up, making them ideal for a fun afternoon project or a show-stopping addition to your next gathering. Interested in learning how to create these whimsical wonders in your kitchen? Let’s dive into the recipe that will spark joy and leave everyone grinning!
Why Are Cotton Candy Cookies a Must-Try?
Nostalgic Flavors: Relive your childhood memories with these whimsical cookies that capture the essence of carnival cotton candy in every bite.
Vibrant Colors: Delight your guests with the cheerful pink and blue swirls that brighten any dessert table, perfect for celebrations or spontaneous baking sessions.
Easy Steps: Enjoy a straightforward recipe that’s perfect for bakers of all levels, ensuring fun without the fuss.
Dietary Flexibility: Customize your cookies with gluten-free or dairy-free options so everyone can indulge in this dreamy treat.
Great for Sharing: Impress friends and family with a unique dessert that’s sure to spark joy and sweet smiles at every gathering, just like these Velvet Crinkle Cookies you might also enjoy.
Quick Preparation: In less than an hour, you’ll have a batch of soft, chewy cookies ready to share, leaving you ample time to relax or prep for your next adventure!
Cotton Candy Cookies Ingredients
For the Cookies
• All-purpose flour – Provides structure to the cookies; substitute with a gluten-free flour blend for gluten-free options.
• Granulated sugar – Adds sweetness and contributes to chewiness; no direct substitute needed unless reducing sugar.
• Baking powder – A leavening agent that helps the cookies rise; ensure it’s fresh for best results.
• Baking soda – Works with the baking powder to promote leavening.
• Salt – Enhances flavor; essential for balance.
• Unsalted butter (softened) – Adds moisture and richness; for dairy-free, use margarine.
• Buttermilk (or milk with lemon juice/vinegar) – Adds moisture and tang; substitute with plant-based milk for a dairy-free variation.
• Egg – Binds ingredients together and contributes to texture; replace with a flaxseed egg for vegan options.
• Vanilla extract – Enhances flavor; use pure extract for a richer taste.
• Gel food coloring (pink and blue) – Provides vibrant colors; essential for the cookies’ fun appearance.
• Cotton candy flavoring (optional) – Intensifies the cotton candy taste; can be omitted if not available.
Step‑by‑Step Instructions for Cotton Candy Cookies
Step 1: Preheat the Oven
Begin by preheating your oven to 350°F (175°C). While the oven heats up, line a baking sheet with parchment paper, ensuring the surface is ready for the Cotton Candy Cookies to bake evenly and prevent sticking. This step sets the stage for perfectly baked cookies that are soft and chewy.
Step 2: Mix the Dry Ingredients
In a medium bowl, whisk together the all-purpose flour, baking powder, baking soda, and salt until well combined. This dry mixture will add structure to your Cotton Candy Cookies, ensuring a delightful texture. Set the bowl aside as you prepare to cream the butter and sugar next.
Step 3: Cream Butter and Sugar
In a large mixing bowl, beat the softened butter and granulated sugar together using an electric mixer on medium speed for about 2-3 minutes, or until the mixture is light and fluffy. The aeration at this stage adds volume to your cookies, making them soft and chewy. Be sure to scrape down the sides to ensure even mixing.
Step 4: Add Wet Ingredients
Next, carefully mix in the egg, vanilla extract, and buttermilk to the creamed butter and sugar solution. Continue mixing until the mixture becomes creamy and unified, which should take about 1-2 minutes. This combination will infuse moisture and flavor into your Cotton Candy Cookies, setting the foundation for their delightful taste.
Step 5: Combine Ingredients
Gradually add the prepared dry ingredients into the wet mixture, stirring gently until just combined. Avoid overmixing, as this could lead to tougher cookies. The goal here is to create a cohesive dough that will be flavorful and tender, perfect for the whimsical nature of Cotton Candy Cookies.
Step 6: Color the Dough
Divide the combined dough into two equal parts. Using gel food coloring, color one half pink and the other half blue, mixing until each portion is uniformly colored. These vibrant shades will create the delightful appearance of your Cotton Candy Cookies, reflecting the fun carnival vibes they’re inspired by.
Step 7: Form Cookies
Take small amounts of both colored doughs and roll them together into balls, slightly swirling them for a marbled effect. Place these dough balls on the lined baking sheet, ensuring they are spaced about 2 inches apart to allow for spreading during baking. This creative step will make your cookies visually appealing and whimsical.
Step 8: Bake the Cookies
Bake your Cotton Candy Cookies in the preheated oven for 10-12 minutes, or until the edges are lightly golden. Keep a close eye on them, as overbaking can lead to a harder texture. The cookies should look soft in the center but set around the edges, ensuring a delightful chewy bite.
Step 9: Cool the Cookies
Once baked, allow the cookies to cool on the baking sheet for about 5 minutes before transferring them to a wire rack. This cooling period allows them to firm up slightly while maintaining their soft center. Once completely cooled, your Cotton Candy Cookies are ready to be enjoyed or shared with family and friends!
Cotton Candy Cookies Variations & Substitutions
Feel free to unleash your creativity and personalize these delightful treats to make them unique to your taste!
- Gluten-Free: Swap all-purpose flour with a gluten-free flour blend for a deliciously inclusive treat everyone can enjoy.
- Dairy-Free: Use margarine instead of unsalted butter and a plant-based milk in place of buttermilk. This way, everyone can indulge in the fun.
- Vegan Option: Replace the egg with a flaxseed egg (1 tablespoon ground flaxseed mixed with 2.5 tablespoons water) for a delicious vegan twist that still delivers on flavor!
- Flavor Boost: Add a teaspoon of your favorite extract, like almond or coconut, to the wet ingredients for extra depth and character.
- Seasonal Colors: Customize the colors by using gel food coloring that fits various themes—think pastel shades for spring or vibrant oranges and blacks for Halloween.
- Fun Add-ins: Toss in some colorful sprinkles or edible glitter to the dough for a sparkly surprise that’s just as fun to look at as it is to eat.
- Heat Level: For a spicy kick, mix in a pinch of cinnamon or cayenne pepper to the dry ingredients, adding a surprising twist to the sweetness.
- Nutty Surprise: Fold in chopped nuts, like pecans or almonds, to the dough for added crunch and flavor, reminiscent of carnival nut stands! Don’t forget to check out these Kitchen Sink Cookies for more creative inspiration.
Make Ahead Options
These Cotton Candy Cookies are perfect for busy home cooks looking to save time! You can prepare the dough up to 24 hours in advance—simply mix all the ingredients, color the dough, and shape it into balls. Store the uncooked cookie dough balls in an airtight container in the refrigerator to maintain freshness. If you want to prep even further, you can freeze the dough for up to 3 months. When you’re ready to bake, just place the frozen dough balls on a baking sheet (no thawing needed!) and bake at 350°F (175°C) for an additional 1-2 minutes. This way, you’ll enjoy warm, delicious Cotton Candy Cookies with minimal effort on busy weeknights!
Expert Tips for Cotton Candy Cookies
• Avoid Overmixing: Mixing the dough too much can create tougher cookies. Stir until just combined for a light, chewy texture.
• Use Gel Coloring: Opt for gel food coloring instead of liquid for vibrant hues without altering the cookie’s texture.
• Watch the Baking Time: Keep an eye on the cookies as they bake; these delicate treats should have lightly golden edges and a soft center.
• Customize Flavors: Experiment with different flavors such as birthday cake or vanilla for a fun twist on your Cotton Candy Cookies.
• Chill the Dough: If your dough is too sticky, chill it for 30 minutes before rolling into balls for easier handling.
• Store Properly: Keep your cookies in an airtight container to retain their freshness, ensuring they stay soft and delicious for days!
What to Serve with Cotton Candy Cookies
These vibrant treats inspire playful pairings that will make your dessert table sing with joy.
- Milkshake: A creamy vanilla milkshake enhances the sweet flavors and makes for a nostalgic pairing that kids and adults adore.
- Fruit Salad: Fresh fruit adds a refreshing pop of color and natural sweetness, balancing the sugary cookies perfectly.
- Whipped Cream: A dollop of lightly sweetened whipped cream on the side offers a delightful contrast to the chewy cookies.
- Chocolate Dipping Sauce: Drizzling warm chocolate over your Cotton Candy Cookies adds a rich depth that turns each bite into a special occasion.
- Lemonade: The tangy and refreshing nature of lemonade cuts through sweetness, making it an invigorating drink to sip alongside.
- Rainbow Sprinkles: Sprinkling extra colorful toppings over your cookies creates a fun visual treat and adds a delightful crunch with every bite.
- Cotton Candy: For the ultimate carnival experience, serve these cookies with a side of fluffy cotton candy; it’s a nostalgic delight that complements the cookie flavor.
How to Store and Freeze Cotton Candy Cookies
Room Temperature: Store cookies in an airtight container at room temperature for up to 1 week to keep them soft and chewy.
Fridge: For longer freshness, refrigerate the cookies in an airtight container for up to 2 weeks; just allow them to come to room temperature before enjoying.
Freezer: Freeze the cookies individually wrapped in plastic wrap, then store them in a freezer-safe bag for up to 3 months. Thaw in the fridge overnight before serving.
Reheating: If you prefer warm cookies, microwave them for 10-15 seconds; this revives their delightful chewy texture, making the Cotton Candy Cookies feel freshly baked!
Cotton Candy Cookies Recipe FAQs
How do I know if my ingredients are fresh?
Absolutely! For baking, freshness is key. Check your baking powder and baking soda by adding a teaspoon to hot water. If they fizz, they’re active! Flour should be stored in a cool, dry place. If you spot any dark spots or an off smell, it’s time to toss it.
How should I store my Cotton Candy Cookies?
Very! Place your cookies in an airtight container at room temperature for up to 1 week. This keeps them soft and chewy. If you want to keep them longer, you can refrigerate them for up to 2 weeks—just let them return to room temperature before indulging.
Can I freeze Cotton Candy Cookies?
Absolutely! To freeze, wrap each cookie tightly in plastic wrap and store them in a freezer-safe bag. They’ll stay fresh for up to 3 months. When you’re ready to enjoy, thaw in the fridge overnight. If you want a warm treat, microwave them for about 10-15 seconds to restore their delightful chewy texture.
Why are my cookies too tough?
Let’s troubleshoot! If your cookies turn out tough, it’s usually due to overmixing. Mix until just combined! Another tip is to avoid overbaking; once the edges are lightly golden, take them out. Soft centers are crucial for those melt-in-your-mouth cookies!
Can these cookies be made gluten-free or dairy-free?
Absolutely! You can substitute all-purpose flour with a gluten-free blend for a gluten-free version. For dairy-free, swap the butter for margarine and use plant-based milk instead of buttermilk. Your friends with dietary restrictions will love you for accommodating them!
Is there a way to enhance the cotton candy flavor?
Very! If you want to amp up that nostalgic cotton candy taste, consider adding cotton candy flavoring extract. Just a teaspoon will do the trick. If you can’t find it, smaller amounts of vanilla extract can also add a delightful flavor boost!
Cotton Candy Cookies That Bring Back Sweet Memories
Ingredients
Equipment
Method
- Preheat your oven to 350°F (175°C) and line a baking sheet with parchment paper.
- In a medium bowl, whisk together the flour, baking powder, baking soda, and salt until well combined.
- In a large mixing bowl, beat the softened butter and granulated sugar together using an electric mixer on medium speed for about 2-3 minutes until light and fluffy.
- Mix in the egg, vanilla extract, and buttermilk to the creamed mixture until creamy and unified.
- Gradually add the dry ingredients into the wet mixture, stirring gently until just combined.
- Divide the dough into two equal parts and color one half pink and the other half blue using gel food coloring.
- Roll small amounts of both colored doughs together into marbled balls and place them on the prepared baking sheet, spaced 2 inches apart.
- Bake for 10-12 minutes or until edges are lightly golden, keeping a close eye to avoid overbaking.
- Allow the cookies to cool on the baking sheet for about 5 minutes before transferring them to a wire rack.
Leave a Reply