
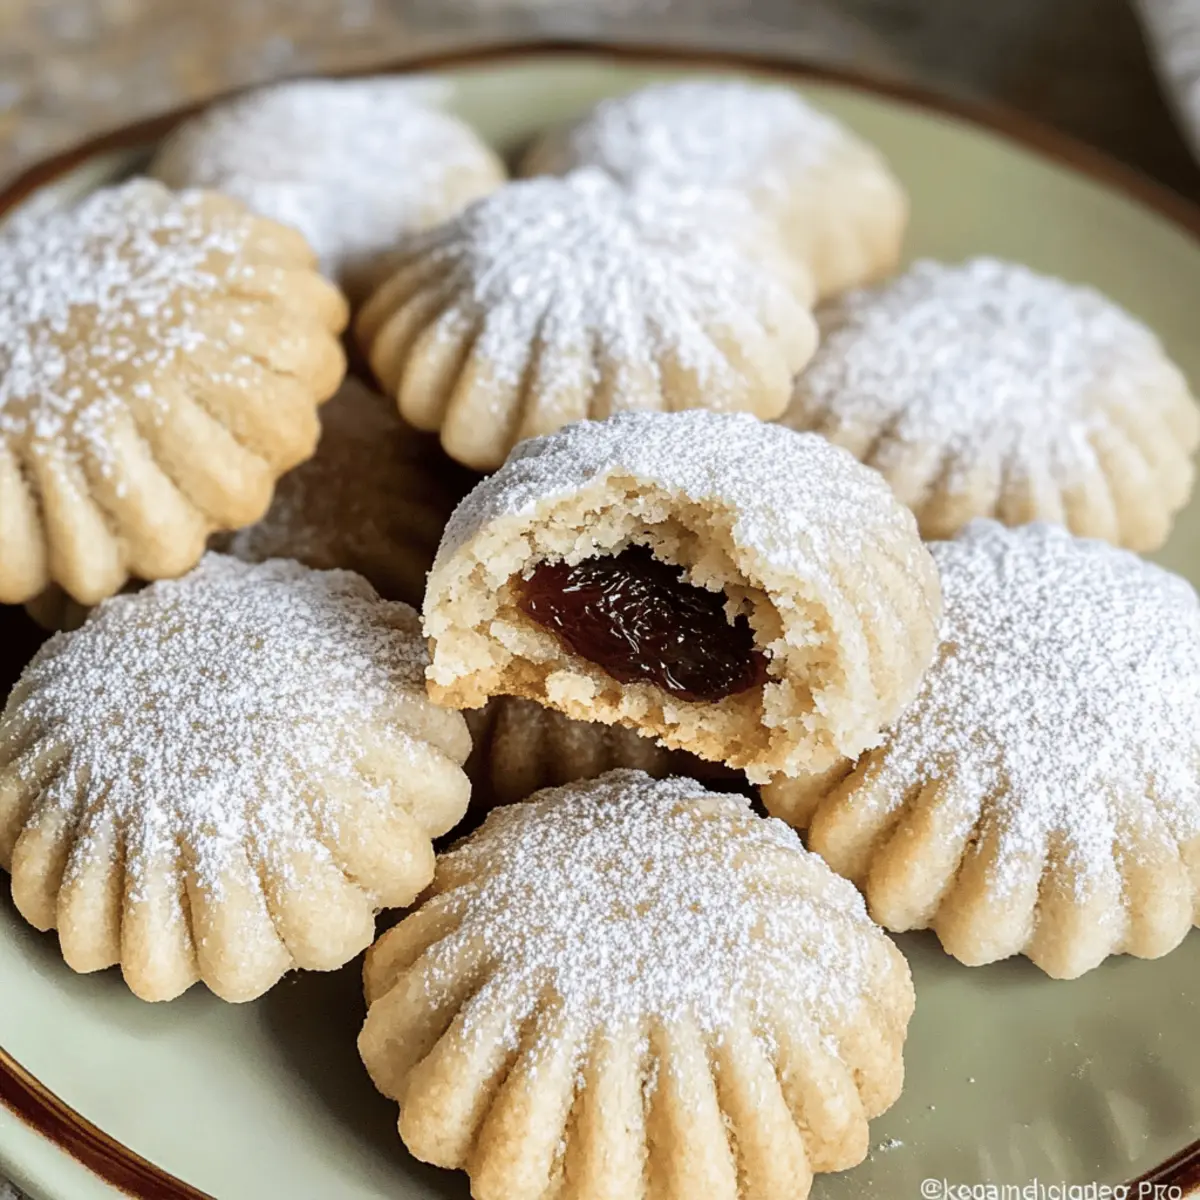
With a blissful aroma wafting through the kitchen, I recently found myself completely enchanted by the art of making Date-Filled Cookies, or Maamoul, as they are lovingly called. These Middle Eastern delights feature a buttery, melt-in-your-mouth texture, enriched by the natural sweetness of dates that make them feel both indulgent and wholesome. The best part? They’re incredibly versatile! You can easily shape them by hand or use molds, offering a fun culinary twist for your baking adventures. Whether you’re marking a special celebration or simply looking to elevate your cookie game, these vegan-friendly, nut-free treats are a delightful addition to any dessert table. As we dive into this recipe, imagine the comfort of sharing these delightful cookies with friends and family— who could resist that? Ready to embark on a delicious journey? Let’s get started!
Why Choose Date-Filled Cookies?
Irresistible Sweetness: These date-filled cookies are naturally sweetened, making them a healthful treat without compromising flavor.
Melt-in-Your-Mouth Texture: Experience the luxurious texture that balances a buttery exterior with a chewy date filling, perfect for indulgent moments.
Versatile Shaping Options: Whether you’re shaping them by hand or using molds, you can customize their look for any occasion!
Plant-Based Delight: With the option to go egg-free and nut-free, these cookies cater to various dietary preferences while still being utterly delicious.
Crowd-Pleasing Treats: Bring them to gatherings, serve alongside Arabic coffee or tea, and watch your friends and family swoon!
If you’re looking for more scrumptious cookie ideas, check out my Kitchen Sink Cookies or try out the delightful Velvet Crinkle Cookie.
Date Filled Cookies Ingredients
For the Dough
- Ghee or Butter – Provides fat for tenderness and flavor; substitute up to ¼ cup with neutral oil for a lighter option.
- All-Purpose Flour – Serves as the main structure of the cookie; remember to sift it to avoid clumps.
- Sugar – Adds sweetness to the dough; go for granulated sugar to keep it classic.
- Rose Water (or Orange Blossom Water) – Imparts a floral aroma that enhances the cookies’ delicacy; this is optional but highly recommended.
- Milk – Adjusts the dough consistency for pliability; use as needed until the dough feels just right.
For the Filling
- Medjool Dates or Date Paste – This sweet filling provides natural sweetness and a chewy texture; finely chopped dates or store-bought paste works well too!
For the Finishing Touch
- Confectioner’s Sugar – An optional dusting for that sweet, elegant finish after baking; sprinkle generously!
These date-filled cookies are not just a recipe; they promise delightful moments with every bite. Enjoy the baking journey!
Step‑by‑Step Instructions for Date Filled Cookies
Step 1: Prepare the Dough
Preheat your oven to 350°F (180°C) for optimal baking. In a medium bowl, melt ghee or butter until liquid. Blend in granulated sugar until smooth. Gradually incorporate sifted all-purpose flour using your fingers until fully absorbed. Add a splash of rose water and enough milk to form a soft, pliable dough. Let this dough rest for 30 minutes, allowing the flavors to meld beautifully.
Step 2: Prepare the Filling
While your dough rests, make the filling by processing Medjool dates in a food processor until smooth and sticky. Once blended, scoop the mixture and divide it into 32 equal portions, rolling each into small balls. This sweet date filling will provide a deliciously chewy center for your date-filled cookies, so set them aside as you proceed.
Step 3: Shape the Cookies by Hand
To shape the cookies by hand, take a portion of the rested dough and flatten it in your palm. Place one date ball in the center, then wrap the dough around it, sealing the edges carefully. Roll the filled dough into a smooth ball and gently flatten it into a disc shape. This method will give your homemade date-filled cookies a lovely handmade touch.
Step 4: Shape the Cookies Using a Mold
For a more polished look, use a cookie mold. Take a small piece of dough and press it firmly into the mold to form the bottom layer. Place a date ball in the center and cover it with additional dough, smoothing it out. Firmly tap the mold to release the cookie in a beautiful shape. Repeat until all dough and filling are used.
Step 5: Bake the Cookies
Arrange your shaped date-filled cookies on a lined baking sheet, leaving space between each one for spreading. Bake in the preheated oven for 15-20 minutes, or until the edges appear lightly golden and firm to the touch. The heavenly aroma of your buttery maamoul will fill your kitchen, signaling that they are nearly ready.
Step 6: Cool and Dust
Once baked, remove the cookies from the oven and transfer them to a wire rack to cool completely. This step ensures they set properly and don’t become soggy. After cooling, dust the top of each cookie generously with confectioner’s sugar, adding a beautiful finishing touch to your delightful date-filled cookies.
Expert Tips for Date-Filled Cookies
Dough Consistency: Ensure your dough is soft but not sticky. Add milk gradually to achieve the right texture for your date-filled cookies.
Avoid Overfilling: Use just enough filling to prevent cracking. A small ball of date filling is perfect for a beautiful cookie.
Using Molds: Lightly dust molds with flour or use plastic wrap to make cookie release effortless. This keeps your shapes pristine.
High-Quality Dates: Choose fresh, plump Medjool dates for the best flavor and texture in your cookies. Dried dates may come out too dry.
Cooling Time: Allow cookies to cool on a wire rack for even texture. Skipping this step can lead to soggy bottoms.
What to Serve with Buttery Maamoul?
These delightful treats are perfect for creating a warm and inviting atmosphere at your next gathering or festive occasion.
- Arabic Coffee: A fragrant cup of Arabic coffee pairs beautifully with the sweet richness of maamoul, enhancing its flavors.
- Mint Tea: The refreshing notes of mint tea provide a vibrant contrast, balancing the buttery cookie with its crisp, herbal essence.
- Fruit Platter: Seasonal fruits like pomegranate or sliced oranges add freshness and a burst of color, complementing the sweetness of the cookies.
- Tahini Dip: A creamy tahini blend drizzled on the side adds a nutty richness, enhancing the overall experience in a unique way.
- Creamy Yogurt Dessert: Serve with gentle-spiced, sweetened yogurt for a smooth, cooling contrast to the cookie’s warmth.
- Chocolate Truffles: Indulge in rich chocolate truffles for those with a sweet tooth; the chocolate is a delightful juxtaposition to the date filling.
- Baklava: Continue the Middle Eastern theme with layers of flaky pastry and honey-infused nuts that echo the maamoul’s warmth.
Make Ahead Options
These date-filled cookies are perfect for busy cooks looking to save time without compromising on flavor! You can prepare the dough and the date filling up to 24 hours in advance. Simply follow the first two steps in the recipe, then wrap the dough tightly in plastic wrap and refrigerate, while storing the date filling in an airtight container. To maintain the cookies’ quality, ensure the dough is well-sealed to prevent drying out. When you’re ready to bake, let the dough rest at room temperature for about 15 minutes before shaping the cookies and proceeding with the baking steps. This way, you’ll enjoy deliciously fresh date-filled cookies with minimal effort!
Date Filled Cookies: Fun Variations
Feel free to explore these delightful twists, and let your creativity soar while you bake your perfect batch of cookies!
- Dairy-Free: Substitute ghee with any plant-based butter alternative for a vegan-friendly treat that’s just as delicious.
- Nutty Surprise: Add chopped nuts, like pistachios or walnuts, into the date filling for a delightful crunch in every bite.
- Citrus Zest: Infuse the dough with lemon or orange zest for a refreshing citrus twist that brightens the overall flavor profile.
- Cocoa Delight: Mix in a couple of tablespoons of cocoa powder to the flour for a rich, chocolaty version that pairs wonderfully with dates.
- Spiced Up: Add a pinch of ground cinnamon or cardamom to the dough to warm the cookies with a little spice, perfect for cozy gatherings.
- Flavored Filling: Use flavored date paste, such as vanilla or almond, to enhance the sweetness and bring a unique experience to your cookies.
- Mini Maamoul: Form smaller, bite-sized cookies for a delightful treat that’s perfect for sharing at parties or as after-school snacks.
And if you’re craving something else sweet, don’t forget to check out my scrumptious Kitchen Sink Cookies or indulge in the delightful Velvet Crinkle Cookie.
Storage Tips for Date Filled Cookies
Room Temperature: Store your date filled cookies in an airtight container at room temperature for up to 1 week to maintain their delightful texture.
Fridge: If you prefer them chilled, you can refrigerate the cookies in an airtight container for up to 2 weeks; just let them warm to room temperature before serving.
Freezer: For longer storage, freeze the cookies in an airtight container or freezer bag for up to 3 months. Thaw them in the fridge or at room temperature before enjoying.
Reheating: To revive the flavor, reheat frozen cookies in a 350°F (180°C) oven for about 5-7 minutes before serving, allowing them to regain their lovely warmth.
Date Filled Cookies Recipe FAQs
What type of dates should I use for the filling?
Absolutely! Fresh, plump Medjool dates are the best choice for your date-filled cookies. They are naturally sweet, soft, and easy to process into a smooth filling. Avoid dried dates, as they can be too tough and may not provide that delightful chewiness that makes your cookies irresistible.
How should I store leftover date-filled cookies?
For optimal freshness, store your date-filled cookies in an airtight container at room temperature for up to one week. If you prefer a chilled treat, they can be refrigerated for up to two weeks. Just remember to let them warm up a bit before serving to enjoy their delightful texture!
Can I freeze date-filled cookies, and if so, how?
Yes, you can definitely freeze these cookies! To freeze, place your date-filled cookies in an airtight freezer container or freezer bag, and they can be stored for up to three months. When you’re ready to enjoy them, simply thaw in the fridge or leave them at room temperature until soft. For an extra treat, you can reheat them in a 350°F (180°C) oven for about 5-7 minutes before serving!
What should I do if my dough is too sticky?
If your dough ends up too sticky, no worries! Just sprinkle a little more sifted all-purpose flour into the mixture and knead it gently until the dough achieves a soft yet workable consistency. It should feel pliable but not stick to your hands. Remember, patience is key!
Can I make these cookies vegan?
Very much so! You can easily substitute ghee or butter with vegan butter or a neutral oil to keep the recipe completely plant-based. Additionally, the recipe is already egg-free, making it a fantastic vegan-friendly treat without compromising on flavor and texture!
How can I tell when my date-filled cookies are properly baked?
Look for a beautiful golden edge and a firm texture when gently pressed. They should not feel doughy in the center. As they bake, your kitchen will be filled with a heavenly aroma that signals they are close to ready. Happy baking!
Delightful Date Filled Cookies: A Sweet Homemade Treat
Ingredients
Equipment
Method
- Preheat your oven to 350°F (180°C). Melt ghee or butter in a medium bowl. Blend in granulated sugar until smooth. Gradually incorporate sifted all-purpose flour until fully absorbed. Add rose water and enough milk to form a soft, pliable dough. Let rest for 30 minutes.
- While the dough rests, process Medjool dates in a food processor until smooth and sticky. Divide the mixture into 32 equal portions, rolling each into small balls.
- To shape the cookies by hand, flatten a portion of dough in your palm, place a date ball in the center, wrap the dough around it, sealing the edges carefully, and flatten into a disc shape.
- For a polished look, use a cookie mold. Press a small piece of dough into the mold, place a date ball in the center, cover with more dough, smooth it out, and tap the mold to release.
- Arrange cookies on a lined baking sheet, bake for 15-20 minutes, until edges are lightly golden. The aroma will indicate they are nearly ready.
- After baking, transfer cookies to a wire rack to cool completely. Dust each cookie with confectioner's sugar once cooled.
Leave a Reply