
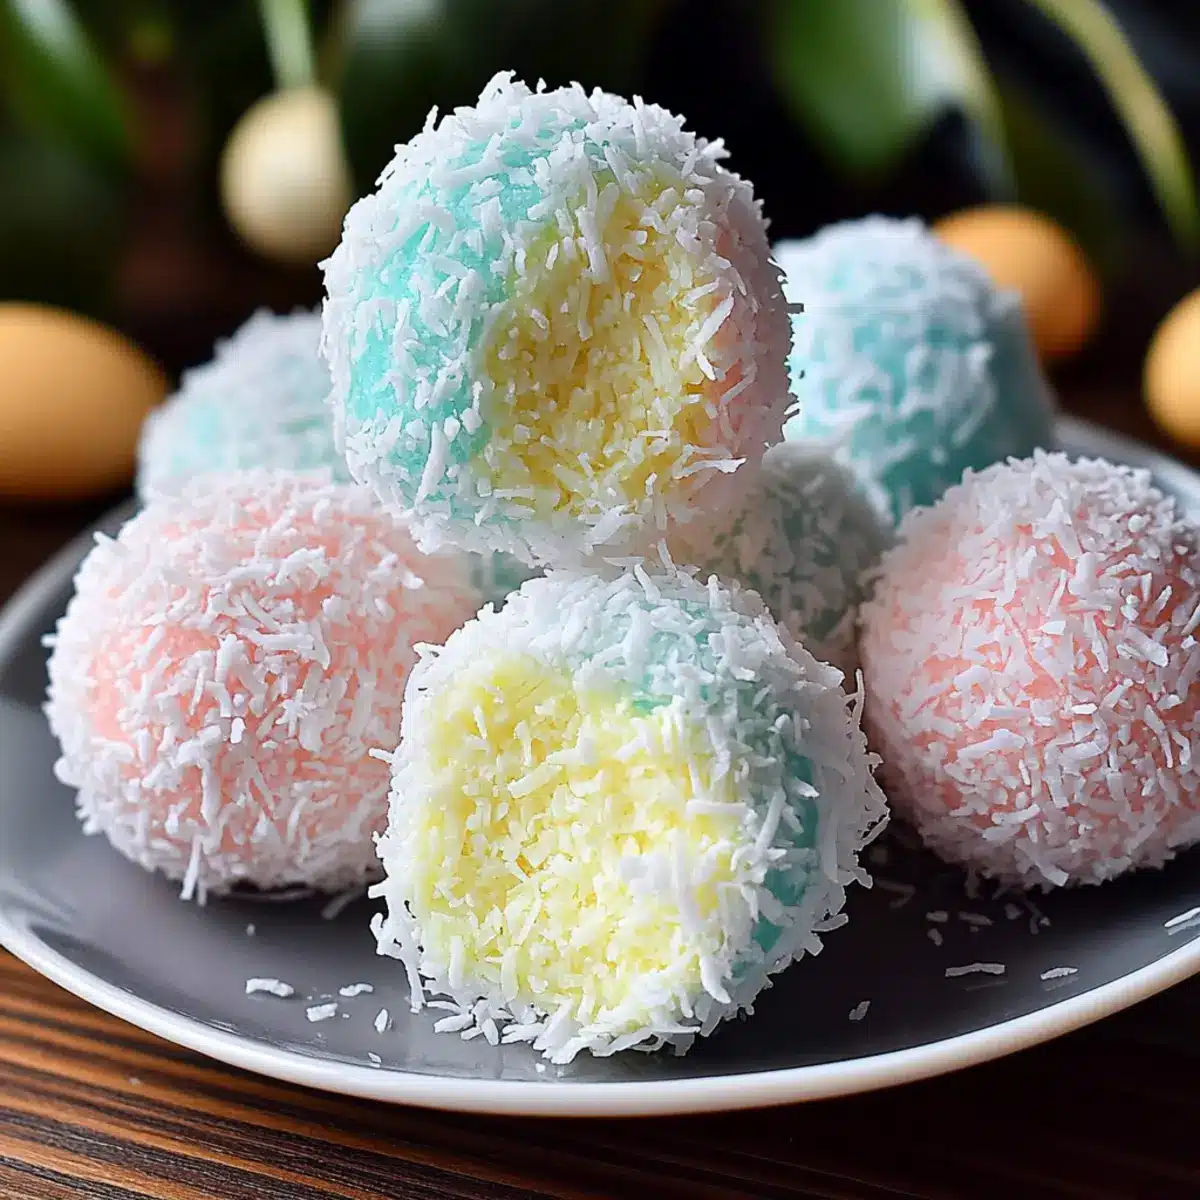
As I stood in my kitchen, unpacking bags of colorful coconut flakes for the first time this season, it hit me: Easter doesn’t just call for chocolate bunnies, but a playful twist in the form of Easter Bunny Coconut Tails! These no-bake treats are a delightful marriage of chewy coconut goodness and vibrant pastel coatings that beckon to be shared. They’re not only easy to whip up but also the perfect project for little hands eager to join in on the fun. I adore how customizable they are—whether you prefer a sweeter coconut base or require a vegan option, this recipe has you covered. With these Easter Bunny Coconut Tails, you’ll create joy, laughter, and a festive spirit in your home this holiday season. Ready to hop into this delicious adventure? Let’s create some magic together!
Why Make Easter Bunny Coconut Tails?
Kid-Friendly Fun: These treats are simple enough for little hands to help, making them a delightful family activity. Vibrant Colors: Coating the coconut tails in pastel shades brings whimsy to your Easter celebrations. Customizable Base: Whether you want a rich, sweet coconut or a vegan alternative, this recipe adapts to your preferences. No-Bake Ease: Whip these up without turning on the oven, saving time and hassle. Festive Appeal: Perfect for parties and gifting, they’ll brighten any gathering alongside other sweet treats like Coconut Crusted Fish or Crockpot Thai Coconut.
Easter Bunny Coconut Tails Ingredients
For the Coconut Mixture
• Unsweetened medium shredded coconut – Provides a chewy texture and base; feel free to use sweetened for a richer treat.
• Sweetened condensed milk – Acts as the binding agent for these Easter Bunny Coconut Tails; substitute with dairy-free condensed milk for a vegan version.
• Butter (melted) – Adds richness and helps bind the mixture together; you can use plant-based butter for a vegan option.
• Vanilla extract – Enhances the overall flavor; opt for pure vanilla for best results.
• Confectioner’s sugar – Sweetens and helps in binding the coconut mixture; adjust the amount based on your desired sweetness.
For the Coating
• Unsweetened fine shredded coconut – Used for coating, creating a charming visual appeal; consider dying it with food coloring for a fun twist.
• Liquid food coloring – Ideal for coloring fine shredded coconut; use gel coloring if you want to create vibrant hues.
Enjoy whipping up these delightful Easter Bunny Coconut Tails that can transform your holiday celebrations!
Step‑by‑Step Instructions for Easter Bunny Coconut Tails
Step 1: Mix the Wet Ingredients
In a large mixing bowl, whisk together 1 cup of sweetened condensed milk, ¼ cup of melted butter, and 1 teaspoon of vanilla extract until the mixture is smooth and well combined. This creates a luscious base for your Easter Bunny Coconut Tails. Ensure there are no lumps, as this blend will bind all the ingredients beautifully.
Step 2: Incorporate the Coconut and Sugar
Add 2 cups of medium shredded coconut and a generous 1 cup of confectioner’s sugar into the wet mixture. Stir with a spatula until the coconut is thick and slightly sticky, forming a cohesive mixture. The textures should come together after about 2-3 minutes of mixing, ensuring that every bit of coconut is coated and ready for chilling.
Step 3: Chill the Mixture
Cover the bowl with plastic wrap and place it in the refrigerator for about 15 minutes. This chilling step is crucial to firm up the coconut mixture, making it easier to shape into balls later. You’ll know it’s ready when it feels slightly firm to the touch, allowing for smooth rolling.
Step 4: Color the Fine Shredded Coconut
While the mixture chills, divide 1 cup of fine shredded coconut into small bowls, adding 3–4 drops of liquid food coloring to each. Mix well until the coconut is evenly colored, creating pastel shades that will coat the Easter Bunny Coconut Tails. This step allows you to get creative with colors for a festive appearance!
Step 5: Shape the Coconut Balls
Remove the mixture from the refrigerator and use a tablespoon or cookie scoop to scoop about 1½ teaspoons of the coconut mixture. Roll each scoop into smooth balls using your hands, ensuring they are uniformly sized for presentation. The mixture should hold together well. Place the shaped balls on a parchment-lined baking sheet as you work.
Step 6: Coat the Balls in Coconut
Once all the balls are formed, take each ball and roll it gently in the colored fine shredded coconut, ensuring it is fully coated. This adds vibrant color and creates a delightful visual effect on your Easter Bunny Coconut Tails. Place the coated balls back on the parchment-lined baking sheet, continuing until all are complete.
Step 7: Chill to Set
After coating, put the baking sheet in the refrigerator for at least one hour. This final chilling time allows the coconut balls to firm up further, enhancing their texture. You’ll know they’re ready when they feel solid to the touch and are perfect for serving chilled, adding to the delightful treat experience.
What to Serve with Easter Bunny Coconut Tails?
These delightful no-bake treats not only brighten your Easter table but also inspire a fun, festive meal with the family.
- Fresh Fruit Salad: A mix of berries and citrus brings a refreshing contrast to the sweet coconut tails. Serve bright colors in a large bowl for added festivity.
- Mini Carrot Cakes: Soft, spiced carrot cakes offer a delightful pairing. Their moist texture complements the chewy coconut tails, creating a well-rounded dessert experience.
- Creamy Vanilla Ice Cream: A scoop of ice cream provides a rich and smooth contrast to the chewy texture of the coconut tails. Drizzle with chocolate sauce for a decadent touch!
- Lemonade: This zesty, refreshing drink balances the sweetness of the coconut tails beautifully. Serve it chilled with fresh mint leaves for an inviting look.
- Chocolate Dipped Strawberries: These sweet treats add a touch of elegance and a burst of flavor. The chocolate contrasts wonderfully with the playful coconut tails.
- Easter-Themed Cupcakes: Bright, colorful cupcakes can elevate your dessert table and keep the festive spirit high. Topped with fruity or floral flavors, they harmonize nicely with coconut.
- Tea or Coffee: A hot cup of tea or coffee rounds off your dessert experience. These beverages offer warmth and deepen the enjoyment of every bite.
- Coconut Macaroons: For coconut lovers, these chewy, sweet delights amplify the coconut experience while providing a delightful textural contrast.
- Fruit-Infused Water: Create a refreshing drink with sliced cucumbers, berries, or citrus in water. It cleanses the palate between sweet treats and keeps everyone hydrated.
Easter Bunny Coconut Tails Variations
Feel free to explore these delightful variations to make your Easter Bunny Coconut Tails even more fun and personalized!
-
Sweeter Coconut: Use sweetened coconut instead of unsweetened for a richer treat. Adjust the confectioner’s sugar down for balance.
-
Vegan Version: Swap in dairy-free sweetened condensed milk and plant-based butter. Enjoy a delicious treat without compromising your dietary preferences!
-
Colorful Coating: Mix and match colors in the fine shredded coconut for a swirled effect. Layering colors can add festive flair!
-
Sprinkle Magic: Top the coated balls with festive sprinkles or edible glitter for a delightful touch. They become even more eye-catching at your Easter gatherings.
-
Textured Fun: Mix in chopped nuts or seeds for an unexpected crunch. This adds texture and gives an exciting twist to your classic coconut tails.
-
Fruit Infusion: Fold in bits of dried fruit like cranberries or apricots in the coconut mixture. This brings a different flavor dimension that perfectly complements the coconut.
-
Extra Creamy: Consider adding a tablespoon of nut butter to the base mixture. This adds creaminess and a nuttier flavor profile that both kids and adults will love.
With these variations, you’ll have plenty of options to indulge in, and don’t forget to serve them alongside other delicious treats like Salmon Coconut Curry for a delightful Easter feast!
Make Ahead Options
These Easter Bunny Coconut Tails are perfect for busy home cooks looking to save time during the holiday season! You can prepare the coconut mixture up to 24 hours in advance, just mix it as instructed and keep it tightly covered in the refrigerator. Additionally, you can also color and prepare the fine shredded coconut for coating up to 3 days ahead, storing it in airtight containers to maintain freshness. When you’re ready to serve, simply scoop and roll the mixture into balls, coat them in the colored coconut, and chill for about an hour. This advance prep ensures that your festive treats stay just as delicious while freeing up your time on Easter day!
How to Store and Freeze Easter Bunny Coconut Tails
Fridge: Keep your Easter Bunny Coconut Tails in an airtight container in the refrigerator for up to 1 week. This helps maintain their delightful texture and flavor.
Freezer: For longer storage, freeze the coconut tails in a single layer on a baking sheet until firm, then transfer them to a freezer-safe container. They can be frozen for up to 3 months.
Thawing: When you’re ready to enjoy them, simply move the treats to the fridge to thaw overnight. Serve chilled for the best experience!
Layering: If stacking the coconut tails, use parchment paper between layers to prevent sticking and keep them looking beautiful.
Expert Tips for Easter Bunny Coconut Tails
-
Chill for Ease: Ensure the coconut mixture is chilled before rolling to make shaping easier. This prevents sticking and helps maintain form.
-
Customize Sweetness: If you prefer a sweeter treat, use sweetened coconut and adjust the confectioner’s sugar accordingly for your ideal balance.
-
Use Quality Ingredients: Opt for pure vanilla extract and the best-quality condensed milk for richer flavor. It elevates the essence of your Easter Bunny Coconut Tails.
-
Coloring Tips: Liquid food coloring provides a more vibrant color distribution than gel. Mix thoroughly for even coloring on your fine shredded coconut.
-
Storage Essentials: Keep the treats in an airtight container in the refrigerator. This will preserve their freshness and ensure they’re enjoyed at their best texture.
Easter Bunny Coconut Tails Recipe FAQs
How do I choose the right coconut for this recipe?
Absolutely! For a chewy texture, I suggest using unsweetened medium shredded coconut for the base. If you prefer a sweeter taste, opt for sweetened coconut. For the coating, use unsweetened fine shredded coconut—it’s perfect for achieving that delightful pastel look and texture!
How should I store my Easter Bunny Coconut Tails?
You can store your Easter Bunny Coconut Tails in an airtight container in the refrigerator for up to 1 week. This will help keep them fresh and maintain their delightful texture until you’re ready to indulge in these treats!
Can I freeze Easter Bunny Coconut Tails?
Yes! To freeze, first arrange the coconut tails in a single layer on a baking sheet and place them in the freezer until they’re firm (about 2 hours). Then, transfer them to a freezer-safe container, layering them with parchment paper between each layer to prevent sticking. They can be frozen for up to 3 months. When you’re ready to enjoy them, simply transfer to the fridge to thaw overnight.
What if my coconut mixture is too sticky to roll?
The key here is patience! If the coconut mixture feels too sticky, make sure it’s thoroughly chilled. If you still encounter stickiness, you can lightly grease your hands with butter or coconut oil before rolling them into balls. This will help the mixture roll smoothly!
Are there any allergy concerns I should be aware of?
Definitely! Be cautious if anyone has an allergy to coconut or dairy. To make these treats vegan and dairy-free, you can substitute the sweetened condensed milk with dairy-free sweetened condensed milk and use plant-based butter. Always double-check ingredient labels to ensure they’re safe for your dietary needs.
Can I customize the colors for the coating?
Very much so! You can mix and match various food coloring shades to create vibrant pastels or even swirls. If you want to experiment, try layering different colors or adding sprinkles for extra flair. After all, the more colorful, the better for Easter festivities!
Easter Bunny Coconut Tails: No-Bake Fun for Everyone
Ingredients
Equipment
Method
- Mix the Wet Ingredients: In a large mixing bowl, whisk together sweetened condensed milk, melted butter, and vanilla extract until smooth.
- Incorporate the Coconut and Sugar: Add medium shredded coconut and confectioner's sugar, stirring until thick and sticky.
- Chill the Mixture: Cover with plastic wrap and refrigerate for about 15 minutes to firm up.
- Color the Fine Shredded Coconut: Divide fine shredded coconut into bowls, adding liquid food coloring to each and mix well.
- Shape the Coconut Balls: Scoop about 1½ teaspoons of the coconut mixture and roll into balls.
- Coat the Balls in Coconut: Roll each ball in the colored fine shredded coconut until fully coated.
- Chill to Set: Refrigerate the coated balls for at least one hour to firm up.
Leave a Reply