
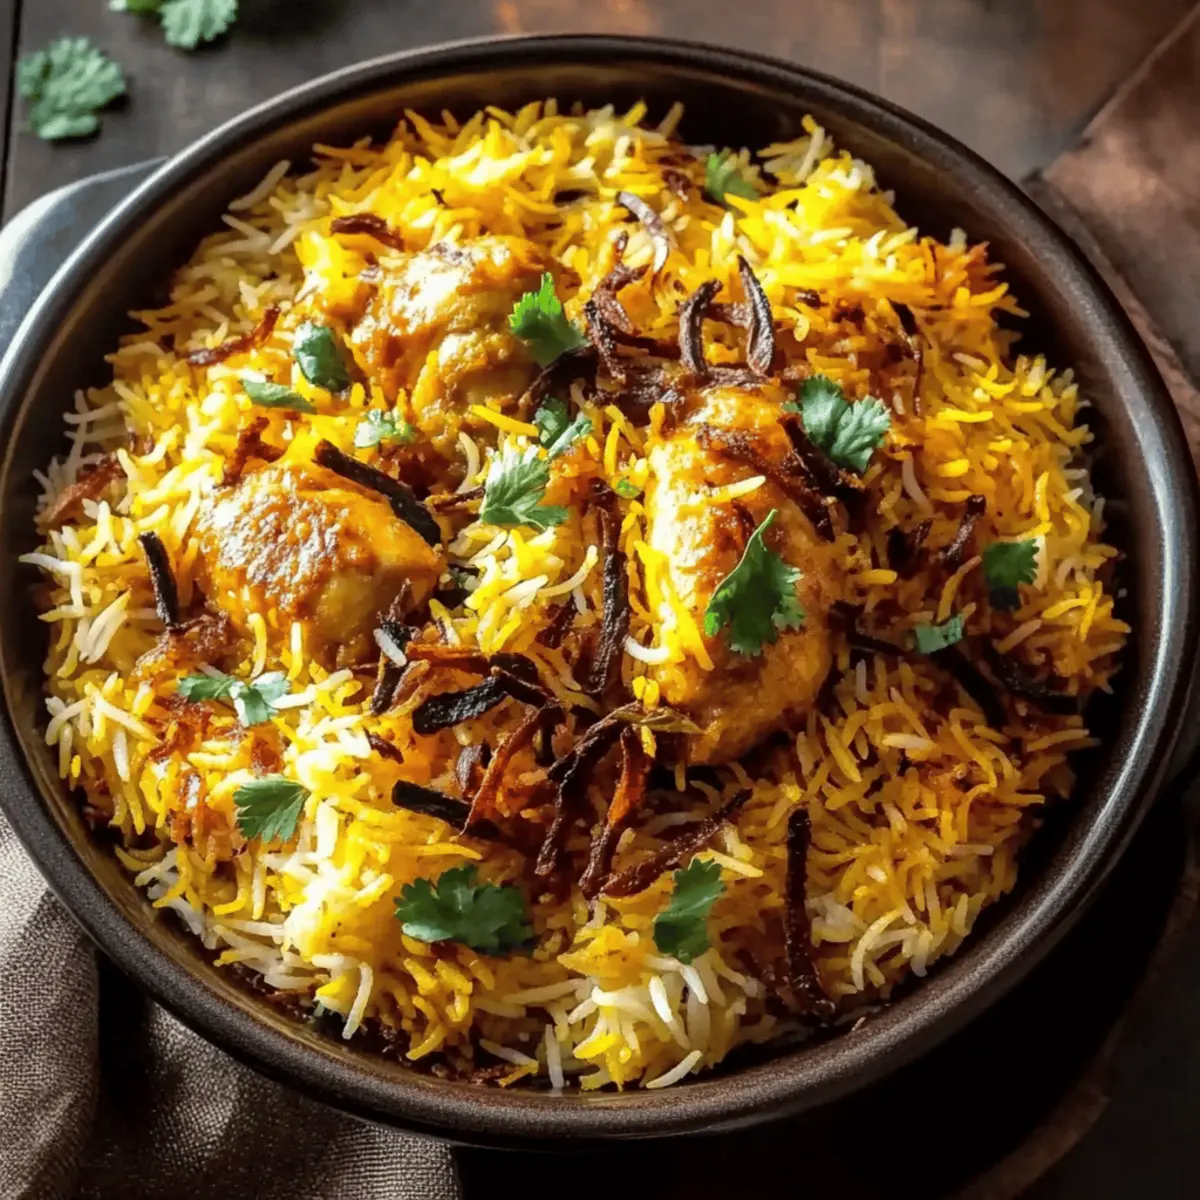
The aroma of spices wafting through the kitchen instantly transports me to the vibrant street markets of South Asia. Today, I’m eager to share my take on Instant Pot Biryani Chicken, a one-pot wonder that captures the essence of comfort food, all while keeping things hassle-free. With just a handful of ingredients and under 30 minutes of cook time, this gluten-free dish is ideal for busy weeknights, bringing a delightful meal to the family table without lengthy prep. The combination of juicy marinated chicken and fluffy basmati rice, infused with rich spices, creates a flavor explosion that even the pickiest eaters can’t resist. Ready to dive into a culinary adventure that’s quicker and just as satisfying as traditional biryani? Let’s get cooking!

Why is Biryani Chicken a Family Favorite?
Ease of Preparation: Making biryani from scratch can be daunting, but this recipe simplifies the process, allowing you to enjoy scrumptious flavors without the fuss.
Flavor Explosion: The blend of warm spices and marinated chicken will awaken your taste buds, creating a dish that packs a punch while being entirely gluten-free!
One-Pot Convenience: Not only will you save time, but you’ll also cut down on cleanup. This biryani chicken dish comes together beautifully in your Instant Pot, making it perfect for any busy weeknight.
Versatile Options: Customize your biryani by switching up the meat or adding vegetables like peas for an extra nutrition kick.
Family Demand: Kids and adults alike will be raving about this dish, making it a go-to meal that pleases even the pickiest of eaters! Check out how this pairs perfectly with Garlic Parmesan Chicken Meatloaf for an awesome family feast!
Biryani Chicken Ingredients
For the Chicken Marinade
• Chicken (bone-in or boneless) – Use bone-in for richer flavor or boneless for quicker cooking; both result in a fantastic Biryani Chicken!
• Yogurt – Helps tenderize the chicken and adds creaminess; buttermilk works as a great substitute if needed.
• Ginger – Fresh is best for that aromatic kick; powdered ginger can be used in a pinch.
• Garlic – Fresh cloves enhance flavor significantly; you can switch to garlic powder for ease.
• Spices
- Garam Masala – Essential for the authentic biryani flavor profile.
- Cumin – Adds earthiness to the marinade.
- Turmeric – Imparts a warm color and slight flavor.
- Kashmiri Chili Powder – Introduces a mild heat for a vibrant appearance.
- Cardamom & Cinnamon – Elevate the dish with aromatic sweetness.
For the Rice Layer
• Basmati Rice – Soak before cooking for fluffy, non-sticky grains; rinsing helps remove excess starch.
• Onions – Sauté until caramelized for a delectable base; using ghee adds extra richness.
• Saffron (optional) – A little goes a long way in flavor and color; can substitute with turmeric in warm milk if unavailable.
• Mint & Cilantro – Fresh herbs bring brightness and flavor; you may use parsley if mint is out of reach.
For Cooking
• Water – The key to perfectly cooked basmati; maintain a 1:1 ratio for soaked rice or adjust if using bone-in chicken.
Embrace the warmth of this one-pot Biryani Chicken recipe, and watch as it transforms your family dinners into something special!
Step‑by‑Step Instructions for Biryani Chicken
Step 1: Sauté Onions
Heat your Instant Pot on the sauté setting, adding a tablespoon of ghee. Once melted, toss in thinly sliced onions and cook for about 10 minutes, stirring occasionally until they turn golden brown. Remove half for garnish, setting aside, while ensuring the remaining onions stay in the pot to build flavor.
Step 2: Prepare Marinade
In a mixing bowl, combine your choice of chicken with yogurt, freshly minced ginger, garlic, and the aromatic spices. Ensure each piece is well-coated with the marinade, and let it rest for at least 30 minutes to intensify the flavors. This step is crucial for achieving the succulent Biryani Chicken.
Step 3: Deglaze Pot
Add the marinated chicken to the Instant Pot over the sautéed onions while scraping any browned bits from the bottom using a wooden spoon. This process, which takes about 2-3 minutes, builds depth in flavor and prevents the “burn” warning during pressure cooking.
Step 4: Layer Ingredients
Next, gently layer the soaked basmati rice over the chicken without stirring. Pour in an equal amount of water, using the 1:1 ratio for soaked rice. Ensure the rice is slight pressed down for even cooking, maintaining the layers that are essential for a perfect biryani vibe.
Step 5: Pressure Cook
Secure the Instant Pot lid, turning the steam release valve to sealed. Set the pressure cooker to high pressure and cook for 6 minutes. If using bone-in chicken, pressure cook for 4 minutes first, then add rice and water before cooking. Quick release the pressure when done.
Step 6: Fluff and Serve
Once the pressure is released, open the lid carefully. If the top layer appears a tad undercooked, gently fluff the rice with a fork, allowing the residual steam to finish cooking it. Garnish with reserved caramelized onions, saffron milk if using, and a sprinkle of fresh mint and cilantro for that final touch of flavor and color.
Storage Tips for Biryani Chicken
Fridge: Keep leftovers in an airtight container for up to 3 days. As the flavors meld, you’ll discover that Biryani Chicken tastes even better the next day!
Freezer: Portion the Biryani Chicken into freezer-safe containers. It can be frozen for up to 3 months, making weeknight meals a breeze!
Reheating: When ready to enjoy, thaw in the fridge overnight, then reheat in the microwave or on the stovetop until steaming hot, ensuring the chicken remains moist.
Airtight Wrapping: Always ensure your containers are well-sealed to avoid freezer burn and to preserve the delightful flavors of your savory Biryani Chicken.
Make Ahead Options
Instant Pot Biryani Chicken is perfect for meal prep enthusiasts looking to save time during busy weeknights! You can marinate the chicken up to 24 hours in advance; simply combine it with yogurt, ginger, garlic, and spices, then store it in the refrigerator for maximum flavor. Additionally, you can chop and sauté the onions ahead of time, keeping them in an airtight container for up to 3 days. When you’re ready to enjoy this delectable dish, just deglaze the pot with the pre-marinated chicken, layer in the soaked rice, pour in your water, and pressure cook as instructed. With these make-ahead tips, you’ll have a hassle-free, impressive meal ready in no time!
Biryani Chicken Variations to Try
Feel free to explore these delightful twists and swaps that can elevate your Biryani Chicken experience, making it even more satisfying!
-
Vegetable Boost: Add peas, carrots, or bell peppers to the pot for a nutritious burst of color and flavor. Not only do they enhance the dish visually, but they also provide added vitamins that everyone will appreciate.
-
Spicy Kick: For those who love a bit of heat, toss in extra Kashmiri chili powder or sliced jalapeños with the marinade. Adjust to your preferred spice level for a tantalizing kick that ignites the palate.
-
Different Protein: Swap out chicken for lamb, beef, or even tofu for a hearty alternative. Each protein brings its own richness, creating a unique version of the classic biryani that caters to different cravings.
-
Herb Infusion: Incorporate fragrant herbs like pandan leaves or curry leaves with the cook. This subtle addition will bring an aromatic flair that sparks joy and makes your kitchen smell heavenly.
-
Coconut Cream: For a luxurious touch, stir in a splash of coconut cream after cooking. This not only adds creaminess but also introduces a lovely tropical note that complements the spices wonderfully.
-
Nutty Texture: Sprinkle in some toasted almonds or cashews before serving to add a satisfying crunch. Their nutty taste enhances the entire dish, offering a delightful contrast to the tender chicken and fluffy rice.
-
Citrus Zing: A squeeze of fresh lemon juice just before serving brightens up the flavors nicely. This simple addition lifts the dish, balancing the spices with a refreshing tang.
-
Serving Suggestions: Pair your Biryani Chicken with a tangy raita, zesty lemon wedges, or a crisp salad for a complete meal experience. Be sure to check out how it complements the rich flavors of Honey Garlic Chicken for a delightful dinner spread!
Embrace these variations and make this Biryani Chicken your own; it’s all about finding that perfect flavor profile that your family will love!
Expert Tips for Biryani Chicken
-
Marinating Time: Allow the chicken to marinate for at least 30 minutes for deeper flavor absorption; longer is better if time permits.
-
Avoiding Sogginess: If using bone-in chicken, layer the rice carefully to prevent overcooking. A 1:1 water-to-rice ratio is essential for fluffy, non-sticky basmati rice.
-
Ghee Versus Oil: Using ghee instead of oil for sautéing onions adds a rich, authentic flavor to your biryani chicken; don’t skip this step!
-
Deglazing Importance: Scrape the bottom of the pot well when deglazing; this prevents burning and enhances the dish’s flavors.
-
Sensational Garnish: Don’t overlook the garnishes! Fresh mint and cilantro not only add color but elevate the dish’s taste and aroma beautifully.
What to Serve with Instant Pot Biryani Chicken
When it comes to creating a complete meal, the right side dishes can elevate your Instant Pot Biryani Chicken experience to new heights.
-
Cooling Raita: A tangy yogurt sauce loaded with finely chopped cucumber and spices, raita balances the warm spices in the biryani, providing a cooling effect.
-
Lemon Wedges: A simple squeeze of fresh lemon juice over your dish adds brightness, enhancing the rich flavors of the biryani with a zesty kick.
-
Garlic Naan: Soft, pillowy garlic naan is perfect for scooping up the biryani, creating a delightful combination of textures and flavors that your family will love.
-
Cucumber Salad: Refreshing and crunchy, a salad made with diced cucumbers, tomatoes, and a light vinaigrette brings brightness and freshness to each bite, complementing the spices beautifully.
-
Mango Chutney: The sweet and tangy notes of mango chutney provide a delightful contrast to the savory biryani chicken, adding just the right touch of sweetness to the meal.
-
Masala Chai: End your meal on a warm note with a comforting cup of masala chai, enhancing the overall experience with its aromatic spices that tie back to the biryani flavors.
-
Fresh Mint and Cilantro: Scatter freshly chopped mint and cilantro over your biryani for added aroma and a pop of color, taking your dish from delicious to stunning.
-
Spiced Roasted Vegetables: Serve a side of roasted vegetables seasoned with cumin and coriander; they provide an earthy flavor that beautifully rounds out the meal.
-
Fruit Salad: A light dessert with a mix of seasonal fruits adds a refreshing finish, cleansing the palate after the bold flavors of biryani chicken.

Biryani Chicken Recipe FAQs
What type of chicken is best for Biryani Chicken?
Absolutely! Both bone-in and boneless chicken work wonderfully for this dish. Bone-in chicken offers a richer flavor as it cooks, while boneless chicken allows for quicker cooking. I often recommend using bone-in chicken for a more authentic taste, but if you’re short on time, boneless is a fantastic option too!
How should I store leftovers?
To keep your Biryani Chicken fresh, store any leftovers in an airtight container in the fridge for up to 3 days. The flavors actually deepen and improve upon reheating! If you find you’re not able to finish it within that timeframe, consider transferring it to the freezer.
Can I freeze Biryani Chicken?
Yes, you can! Divide your Biryani Chicken into portions and place them in freezer-safe containers. It’ll last for up to 3 months in the freezer. When you’re ready to enjoy it again, just thaw it in the refrigerator overnight and reheat until steaming hot on the stove or microwave.
What can I do if my rice is undercooked?
If your rice appears a bit undercooked after releasing the pressure, no need to worry! Simply fluff the rice gently with a fork, then allow it to sit covered for an additional 5 to 10 minutes. The residual steam will further cook the rice and help achieve the perfect fluffiness.
Is this recipe gluten-free?
Very! This Biryani Chicken is a delightful gluten-free dish as it uses basmati rice and provides a hearty, flavor-packed meal suitable for anyone avoiding gluten. If you have any dietary restrictions concerning spices, be sure to check the labels to ensure they fit your needs.
Can I add vegetables to Biryani Chicken?
The more the merrier! Feel free to get creative by adding vegetables like peas, carrots, or bell peppers during the layering stage. They not only add nutritional value but also enhance the dish’s flavor and color, making it a complete meal that pleases everyone at the table.
Biryani Chicken Bliss: Your Quick, Flavor-Packed Family Meal
Ingredients
Equipment
Method
- Heat your Instant Pot on the sauté setting, adding ghee. Cook onions until golden brown, remove half for garnish.
- In a bowl, combine chicken with yogurt, ginger, garlic and spices. Let it marinate for at least 30 minutes.
- Add the marinated chicken to the pot, deglazing it with a wooden spoon.
- Layer the soaked rice over the chicken, pour in water and ensure even cooking.
- Seal the pot, set to high pressure, and cook for 6 minutes (4 minutes if bone-in chicken).
- Release pressure and fluff rice with a fork. Garnish with onions, saffron milk, and herbs.
Leave a Reply