
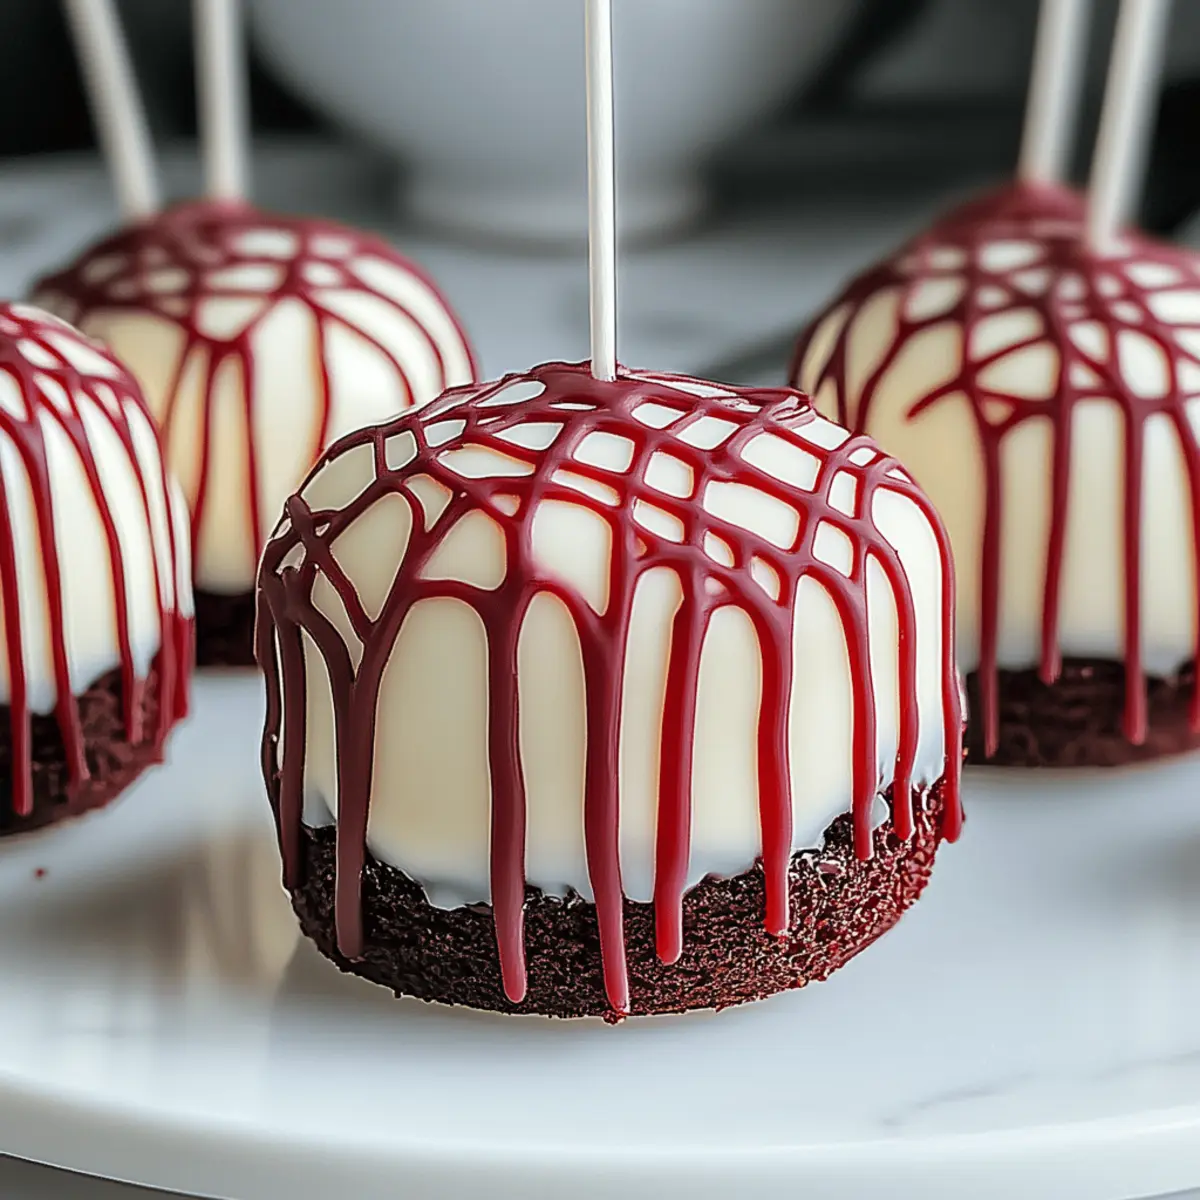
As I dipped a cake pop into a swirl of melted white chocolate, the vibrant red hue of my Bloody Red Velvet Cake Pops transformed into a chilling Halloween delight. This spooky dessert isn’t just about eye-catching aesthetics—it’s deliciously fun to make! Perfect for festive gatherings or a cozy night in, these delightful cake pops are both easy to prepare and kid-friendly, ensuring everyone can partake in the Halloween spirit. With each bite, you’ll discover the moistness of red velvet paired with the sweet creaminess of chocolate, creating a treat that captivates both young and old. Are you ready to bring a little magic to your Halloween celebrations?
Why Are These Cake Pops a Must-Try?
Visually Stunning: The cheerful red color and dripping white chocolate make these cake pops the ultimate Halloween treat that will impress guests.
Fun to Make: Easy for kids to help with, from shaping to dipping, these cake pops turn baking into an exciting Halloween project.
Irresistibly Delicious: Combining the rich flavor of red velvet with creamy chocolate, every bite is a moist, sweet delight.
Versatile Treat: Perfect for parties, classroom treats, or as a cozy holiday snack while watching a spooky movie. Don’t forget to check out our Vampire Donuts for more festive ideas!
Time-Saving: With simple ingredients and quick methods, you can whip these up in no time, letting you enjoy more of the fun this Halloween.
Bloody Red Velvet Cake Pops Ingredients
For the Cake Pops
• Red velvet cake – Provides moisture and flavor; substitutes with chocolate cake can give a deeper taste.
• Cream cheese frosting – Binds the cake together; use store-bought for convenience or make your own for freshness.
For the Coating
• White chocolate – Creates a deliciously sweet shell; can be replaced with milk chocolate for a different flavor profile.
• Candy eyes – Adds a spooky touch; swap for chocolate chips if you prefer a simpler look.
This enticing recipe for Bloody Red Velvet Cake Pops will surely make your Halloween celebrations memorable!
Step‑by‑Step Instructions for Bloody Red Velvet Cake Pops
Step 1: Bake the Red Velvet Cake
Preheat your oven to 350°F (175°C) and grease a cake pan. Prepare the red velvet cake batter according to your favorite recipe or box mix, ensuring all ingredients are well combined. Pour the batter into the prepared pan and bake for 25-30 minutes, until a toothpick inserted in the center comes out clean. Let the cake cool completely before crumbling.
Step 2: Make the Cake Pop Mixture
Once your red velvet cake has cooled, crumble it into a large mixing bowl. Add cream cheese frosting gradually, mixing with your hands until it holds together but isn’t overly sticky. You want a rich, moist texture that can be easily shaped into balls. Roll the mixture into 1-inch balls and place them on a baking sheet lined with parchment paper. Refrigerate for at least 30 minutes to firm up.
Step 3: Prepare for Coating
While your cake pop balls are chilling, melt white chocolate in a microwave-safe bowl. Heat in short bursts of 15-20 seconds, stirring in between until completely smooth. This step is crucial for achieving the perfect coating on your Bloody Red Velvet Cake Pops. Set up a workstation with the melted chocolate, cake pop sticks, and sprinkles or candy eyes for decoration.
Step 4: Dip and Decorate the Cake Pops
Remove the chilled cake pop balls from the refrigerator. Dip the end of each stick into the melted white chocolate and then insert it halfway into a cake pop. This helps keep the stick secure. Once assembled, dip each cake pop into the melted chocolate, allowing excess to drip off. Before the coating sets, add candy eyes or sprinkle toppings to create that spooky, Halloween touch.
Step 5: Allow to Set
Carefully place the dipped cake pops upright in a Styrofoam block or a cake pop stand to allow the coating to harden completely. This should take about 20-30 minutes at room temperature. Ensure they are fully set before serving to maintain their shape and decoration. If needed, refrigerate them for a firmer finish.
Step 6: Present Your Halloween Treats
Once your Bloody Red Velvet Cake Pops are set and beautifully decorated, arrange them on a festive platter or in treat bags for party favors. These delightful pops are not only visually stunning but also a delicious treat that’s perfect for your Halloween celebrations. Serve them at your next gathering and watch everyone delight in their spooky charm!
Make Ahead Options
These Bloody Red Velvet Cake Pops are perfect for meal prep enthusiasts! You can bake the red velvet cake up to 3 days in advance; simply allow it to cool completely before wrapping it tightly in plastic wrap and refrigerating. Additionally, once you’ve shaped the cake balls, they can be refrigerated for up to 24 hours prior to dipping. This allows for a quick assembly session when it’s time to serve. To maintain their quality, ensure the dipped pops are stored upright until the coating has completely set (about 20-30 minutes at room temperature). When ready to enjoy your festive treats, just arrange the pops on a platter, and you’ll have a delightful treat that’s as enchanting as it is easy!
Storage Tips for Bloody Red Velvet Cake Pops
-
Room Temperature: Store your cake pops in an airtight container for up to 3 days to maintain their delightful freshness and prevent drying out.
-
Fridge: If you want to keep them longer, place the container in the fridge where they can last up to a week. Just remember to bring them back to room temperature before serving for the best taste.
-
Freezer: For even longer storage, freeze your cake pops in a single layer on a baking sheet, then transfer to a freezer-safe bag once solid. They can last up to 3 months!
-
Reheating: There’s no need to reheat cake pops; instead, simply take them out of the fridge or freezer and let them thaw naturally at room temperature before enjoying your Bloody Red Velvet Cake Pops!
What to Serve with Bloody Red Velvet Cake Pops?
Indulge in a whimsical spread that enhances your Halloween festivities and delights every sweet tooth in the room.
-
Witch Hat Cupcakes: These cute cupcakes topped with sugar cones add a playful touch. Their rich chocolate flavor pairs perfectly with the sweetness of your cake pops.
-
Pumpkin Spice Cookies: Soft and spiced, these cookies offer a delightful contrast to the creamy red velvet. The warm flavors of pumpkin spice celebrate the season beautifully.
-
Ghost Meringues: Light, airy, and simply delightful, these will keep things fun! Their subtle sweetness creates a lovely balance alongside the richer cake pops.
-
Frankenstein Rice Krispie Bars: Gooey and colorful, these bars bring a fun texture that’s chewy and crispy. They make for a light counterpoint to the moist cake pops.
-
Candy Corn Cheesecake Bars: Rich yet refreshing, the sweet and tangy profile of these bars complements the chocolate coating and enhances the Halloween atmosphere.
-
Vampire Donuts: Offering a cake-like texture and sweet icing, these donuts add a whimsical spin. Enjoy them alongside the cake pops for a truly festive feast!
-
Hot Apple Cider: For a warm drink that brings the flavors of fall, serving spiced apple cider is an excellent way to wash down the sweetness and keep guests cozy.
-
Chocolate Milk: This classic drink brings nostalgia and sweetness, pairing well with the rich velvet cake flavors and making it a kid-friendly option at your gathering.
Variations & Substitutions for Bloody Red Velvet Cake Pops
Indulge your creativity with these delightful twists on the classic Bloody Red Velvet Cake Pops that will tantalize taste buds and please the eye!
-
Gluten-Free: Substitute regular flour with a gluten-free blend to make these cake pops friendly for those with dietary restrictions. Enjoy the same moist, rich flavor without a hitch!
-
Dairy-Free Delight: Use non-dairy cream cheese and dark chocolate to create a vegan version that will still thrill your palate. These treats can cater to a wider audience while keeping it deliciously spooky.
-
Spice It Up: Incorporate a dash of cinnamon or nutmeg into the cake mixture for a warm autumn spice experience. The subtle hints of spice will elevate your cake pops to the next level of cozy goodness.
-
Texture Twist: For an added crunch, mix in finely crushed nuts or cookie crumbs into the cake pop mixture. It brings an unexpected texture that pops with flavor—a delightful surprise with every bite!
-
Fun Colors: Instead of the classic red, replace with vibrant shades using food coloring to customize your cake pops for various occasions. Green for your Halloween celebrations or pink for a festive Valentine’s twist!
-
Creative Coatings: While white chocolate is standard, try using candy melts in various colors for a more vibrant presentation. Experiment with an array of colors and flavors to make your treats even more visually stunning!
-
Mini Cake Bites: For an adorable twist, roll smaller cake balls for bite-sized mini cake pops that are perfect for little hands. Serve these at parties for a fun and easy-to-eat dessert!
-
Theme Tie-ins: Decorate these cake pops as cute Halloween characters, like mummies, ghosts, or pumpkins, to enhance the festive spirit. Utilizing various decorations can turn your treat into a visual feast that’s sure to impress!
As you dive into these variations, remember that the fun lies in the creativity! If you’re looking for more festive recipes, don’t miss our Vampire Donuts or explore the delightful charm of our Candy Corn Cheesecake Bars.
Expert Tips for Bloody Red Velvet Cake Pops
-
Quality Ingredients: Choose high-quality red velvet cake mix or recipe for the best flavor. Using fresh cream cheese frosting enhances the moistness of the cake pops.
-
Chill Effectively: Ensure your cake pop mixture is well chilled before dipping. It helps maintain the shape and ensures a clean coat of chocolate without melting.
-
Coating Technique: Dip quickly but smoothly to prevent the chocolate from clumping. Gently tap the stick on the bowl’s edge to remove excess coating, which could cause a puddle.
-
Decoration Details: Use gel food coloring to paint edible decorations or add layers of frosting to make your cake pops visually striking. The right garnish can elevate the Halloween theme!
-
Storage Tips: Keep your finished Bloody Red Velvet Cake Pops in an airtight container at room temperature for up to three days or refrigerate for longer freshness.
Bloody Red Velvet Cake Pops Recipe FAQs
How do I know if my red velvet cake is the right consistency?
Absolutely! When preparing your red velvet cake, it should be moist but not overly sticky. A simple test is to insert a toothpick into the center; if it comes out clean after baking, you’re good to go! If the cake is too dense, you may want to check the ratios of wet to dry ingredients and ensure the baking powder is fresh.
How should I store the finished Bloody Red Velvet Cake Pops?
You can store your cake pops at room temperature in an airtight container for up to 3 days. If you want them to last longer, refrigerate them, where they can stay fresh for up to a week. Just make sure to let them come back to room temperature before enjoying for the best taste!
Can I freeze the Bloody Red Velvet Cake Pops?
Absolutely! To freeze your cake pops, place them in a single layer on a baking sheet until solid. Then transfer them to a freezer-safe bag. They can be stored in the freezer for up to 3 months. When you’re ready to enjoy them, simply take them out and let them thaw at room temperature.
What should I do if my coating is clumping?
No worries! If you find that your melted white chocolate is clumping, it might be too hot or not fully melted. Try reheating in short bursts of 15-20 seconds, stirring in between, until it’s completely smooth. Additionally, adding a teaspoon of vegetable oil can help achieve a smoother consistency for easier dipping.
Are there any dietary considerations for the Bloody Red Velvet Cake Pops?
Very! If you’re making these cake pops for someone with dietary restrictions, you can easily adapt the recipe. For a gluten-free option, use a gluten-free red velvet cake mix. You can also swap out the cream cheese frosting for a dairy-free version to accommodate those with dairy allergies. Always ensure that your chocolate is also allergy-friendly if necessary!
Can I use different coatings instead of white chocolate?
The more the merrier! You can definitely experiment with different coatings. Milk chocolate is a delicious alternative, or for a fun twist, try colorful candy melts for a festive look. Just remember that the flavor profile will change slightly, but it can add a fantastic personal touch to your treats!
Bloody Red Velvet Cake Pops That Bring Halloween Thrills
Ingredients
Equipment
Method
- Preheat your oven to 350°F (175°C) and grease a cake pan. Prepare the red velvet cake batter according to your favorite recipe or box mix, ensuring all ingredients are well combined. Pour the batter into the prepared pan and bake for 25-30 minutes, until a toothpick inserted in the center comes out clean. Let the cake cool completely before crumbling.
- Once your red velvet cake has cooled, crumble it into a large mixing bowl. Add cream cheese frosting gradually, mixing with your hands until it holds together but isn't overly sticky. Roll the mixture into 1-inch balls and place them on a baking sheet lined with parchment paper. Refrigerate for at least 30 minutes to firm up.
- While your cake pop balls are chilling, melt white chocolate in a microwave-safe bowl. Heat in short bursts of 15-20 seconds, stirring in between until completely smooth.
- Remove the chilled cake pop balls from the refrigerator. Dip the end of each stick into the melted white chocolate and then insert it halfway into a cake pop. Dip each cake pop into the melted chocolate, allowing excess to drip off. Before the coating sets, add candy eyes or sprinkle toppings.
- Carefully place the dipped cake pops upright in a Styrofoam block or a cake pop stand to allow the coating to harden completely. This should take about 20-30 minutes at room temperature.
- Once your Bloody Red Velvet Cake Pops are set and beautifully decorated, arrange them on a festive platter or in treat bags for party favors. Serve them at your next gathering.
Leave a Reply