
The moment you step into the kitchen, the delightful aroma of baked goods fills the air, instantly transporting you to a world of nostalgia and creativity. As Halloween approaches, there’s no better way to embrace the spirit of the season than with these enchanting Witch Hat Cupcakes. This recipe not only sparks joy with its playful presentation, but it also offers an easy and fun way to get the kids involved in holiday baking. With just a few simple ingredients, you can create these festive treats that are sure to be the highlight of your Halloween celebrations. From the rich chocolate base to the whimsical sugar cone hats, these cupcakes are a perfect balance of spooky and delicious—ideal for home-chefs of all skill levels. Ready to conjure up some magic in your kitchen? Let’s dive into the crafting of these playful desserts that will leave everyone craving more!
Why Are Witch Hat Cupcakes a Must-Make?
Delightful presentations are a sure way to impress your guests! These Witch Hat Cupcakes combine a rich chocolate base topped with whimsical sugar cone hats for a festive twist on classic treats. Kid-friendly and simple, this recipe invites little hands into the kitchen for some fun family bonding. Unique and spooky-literal interpretations of the holiday make them perfect for any Halloween gathering. Easy preparation means you can whip these up quickly, leaving you ample time for other fall festivities. And crowd-pleasing, they’re irresistible to kids and adults alike—so be sure to make extras or pair them with our delicious Caramel Brownie Cheesecake for even more sweet options!
Witch Hat Cupcake Ingredients
• Get ready to bake some spooky delights!
For the Cupcakes
- All-Purpose Flour – Essential for structure; consider gluten-free flour for a gluten-free version.
- Granulated Sugar – Sweetens your cupcakes perfectly; can substitute with coconut sugar for a healthier option.
- Unsweetened Cocoa Powder – Adds rich chocolate flavor; use Dutch-processed for a deeper taste.
- Baking Powder – Helps the cupcakes rise; check for freshness to ensure they’re effective.
- Salt – Enhances flavors; don’t skip it, even in sweet recipes!
- Eggs – Bind ingredients together; use flax eggs for a vegan alternative.
- Milk – Keeps cupcakes moist; swap with almond milk for a dairy-free option.
- Vegetable Oil – Creates a tender crumb; melted coconut oil works well here too.
- Vanilla Extract – Adds depth to flavors; opt for pure extract for a more pronounced taste.
For the Frosting
- Butter – Gives the frosting a creamy base; use dairy-free butter for a vegan choice.
- Powdered Sugar – Sweetens and thickens; sift to avoid lumps for a smooth texture.
- Milk or Cream – Adjusts consistency; try using a non-dairy milk to keep it vegan-friendly.
- Green Food Coloring – Makes frosting festive; substitute with natural dyes like spinach powder if desired.
For the Witch Hats
- Sugar Cones – Forms the witch hat; easy to find in stores or make your own with rolled sugar cookie dough.
- Chocolate Melts – Used to attach candy eyes to hats; any melting chocolate will do.
- Candy Eyes – Adds a spooky touch; feel free to use any edible decorations for variety.
These Witch Hat Cupcake ingredients come together to create an enchanting treat that embodies the spirit of Halloween. Get your ingredients ready and prepare for a delightful baking adventure!
Step‑by‑Step Instructions for Witch Hat Cupcakes
Step 1: Prepare the Cupcake Batter
In a large mixing bowl, combine 1 ½ cups of all-purpose flour, 1 cup of granulated sugar, ½ cup of unsweetened cocoa powder, 1 ½ teaspoons of baking powder, and a pinch of salt. In a separate bowl, whisk together 2 large eggs, 1 cup of milk, ½ cup of vegetable oil, and 2 teaspoons of vanilla extract. Gradually mix the wet ingredients into the dry ingredients until fully incorporated. Preheat your oven to 350°F (175°C) and line a cupcake tin with paper liners.
Step 2: Bake the Cupcakes
Spoon the prepared batter evenly into the cupcake liners, filling each about two-thirds full. Bake in the preheated oven for 18-20 minutes, or until a toothpick inserted into the center comes out clean. Once baked, remove the cupcakes from the oven and let them cool in the tin for 5 minutes before transferring them to a wire rack to cool completely.
Step 3: Make the Frosting
While the cupcakes cool, prepare the frosting by creaming together ½ cup of softened butter and 2 cups of powdered sugar in a mixing bowl. Gradually add 2-3 tablespoons of milk to achieve a smooth consistency, then mix in a few drops of green food coloring to give it a vibrant, spooky hue. Beat until fluffy and set aside until the cupcakes are completely cool.
Step 4: Assemble the Witch Hats
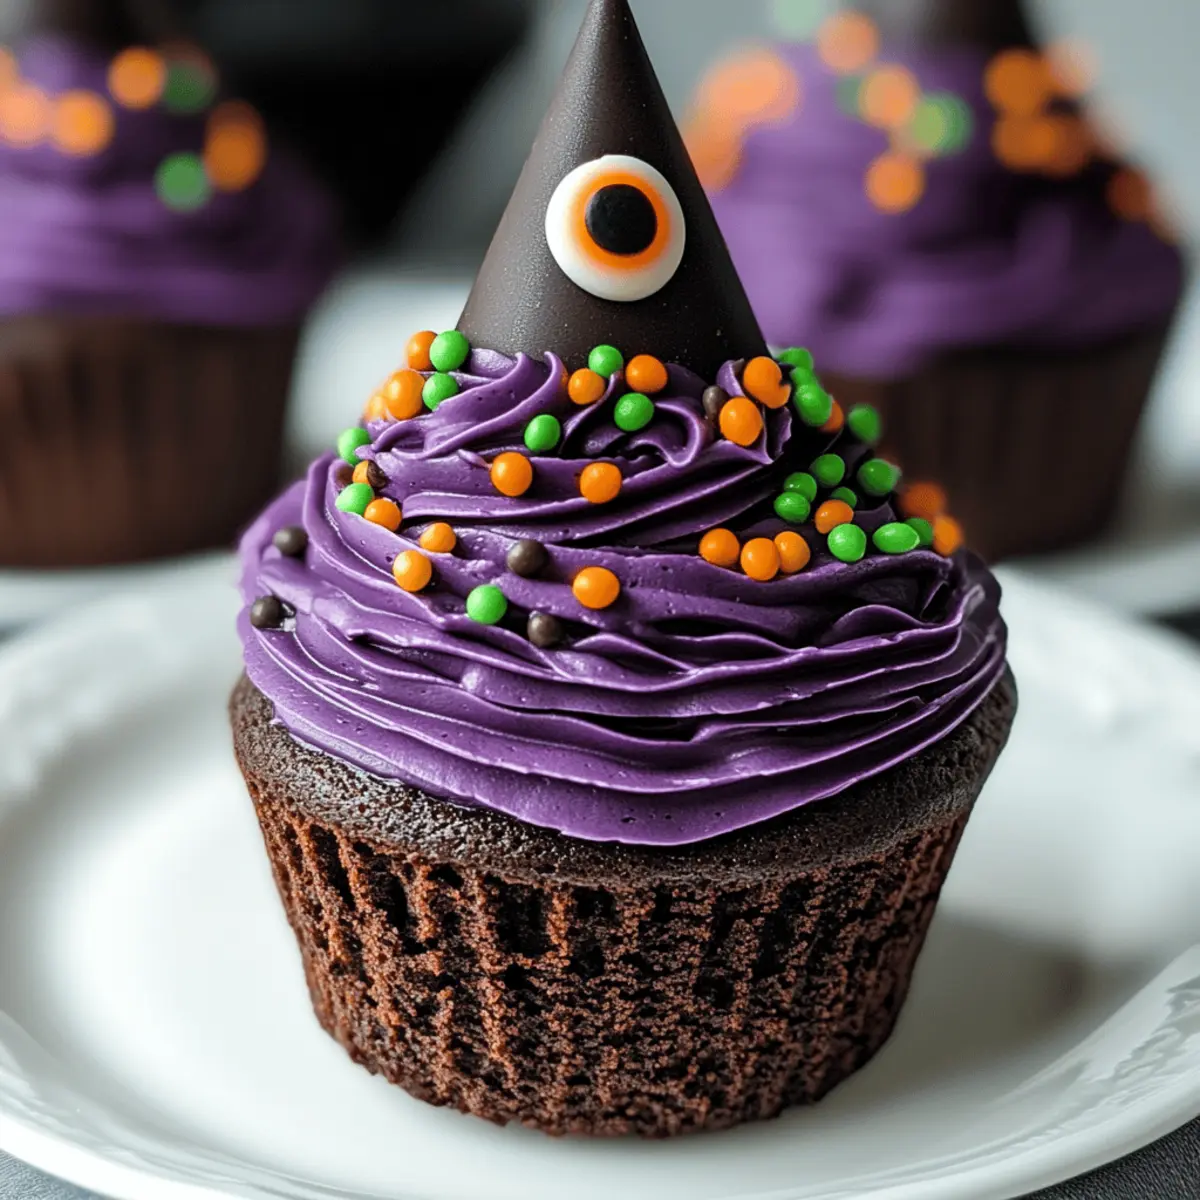
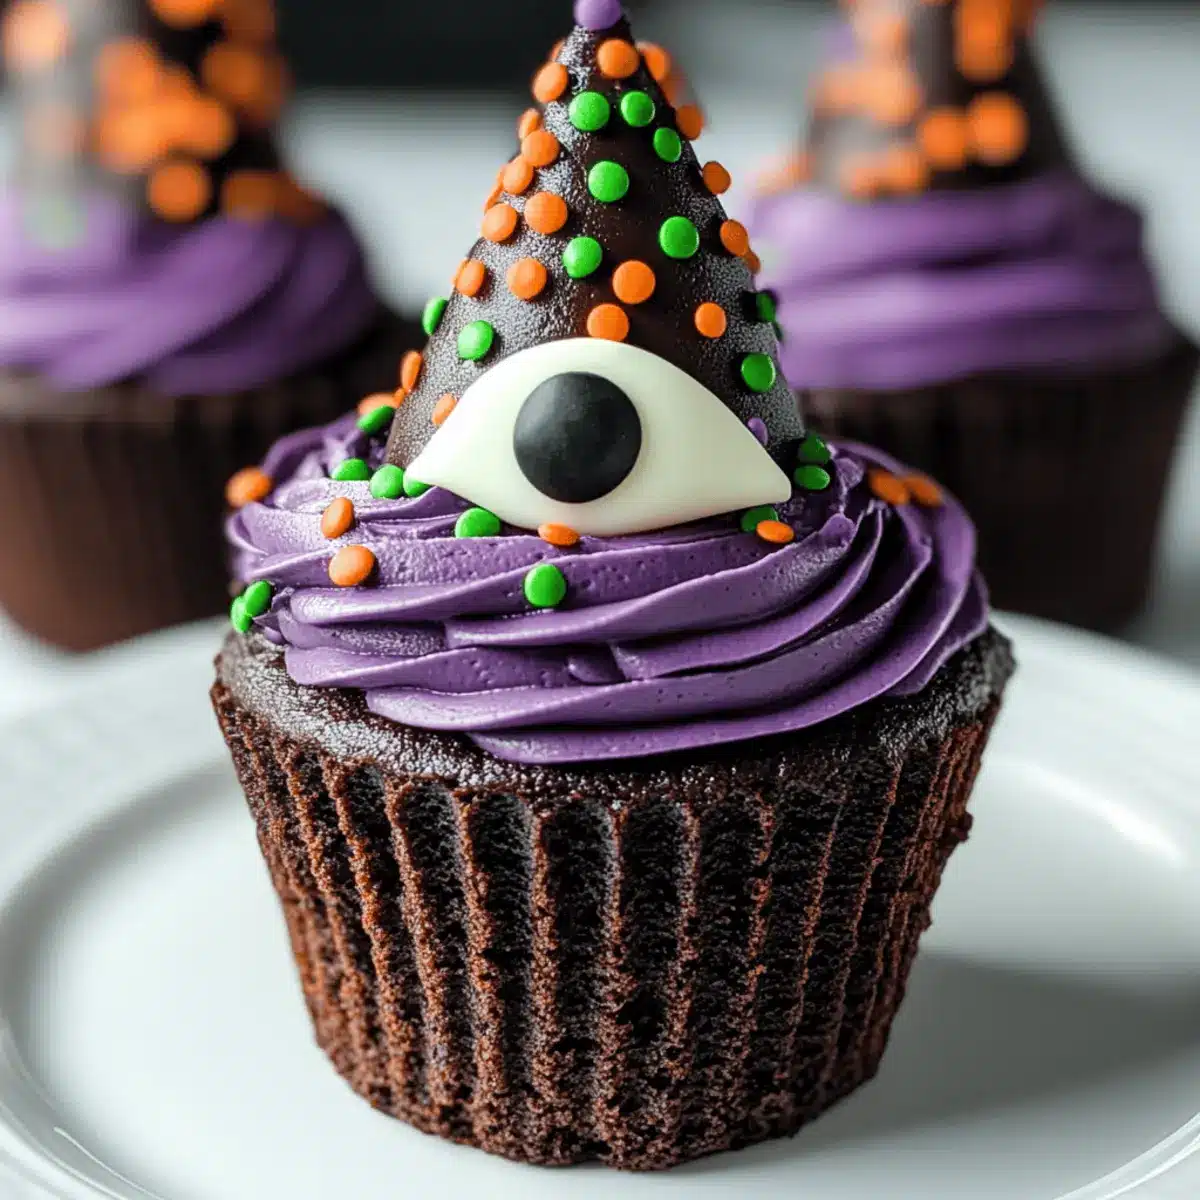
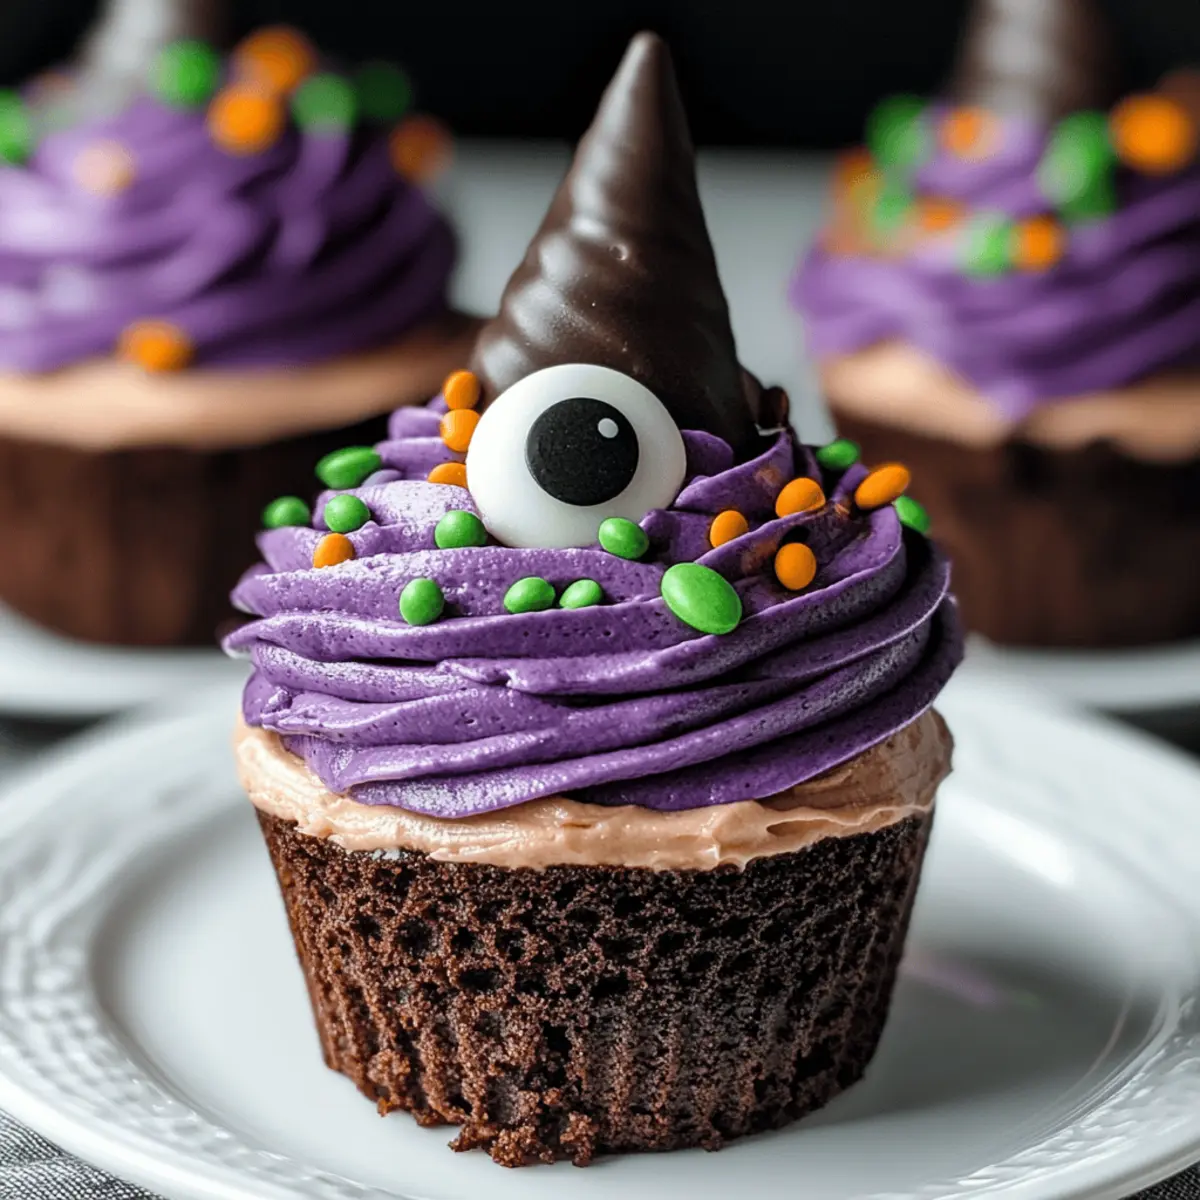
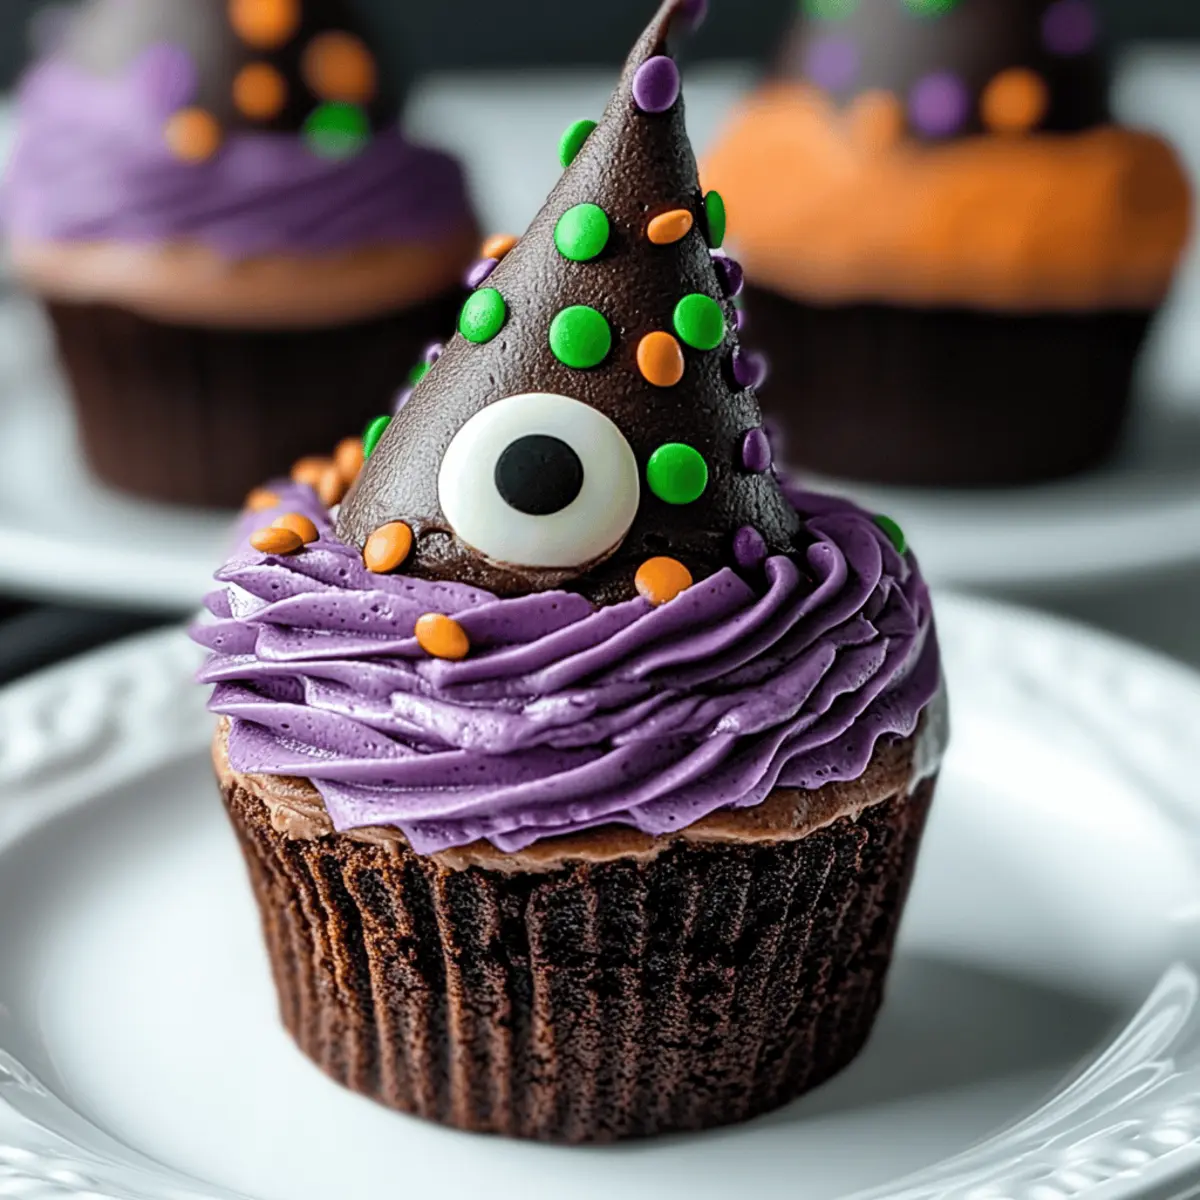
Once the cupcakes have completely cooled, use a piping bag fitted with a star tip to generously frost the tops with the green frosting. For the witch hats, take sugar cones and melt a small amount of chocolate melts in a microwave or double boiler. Dip the pointed ends of the cones into the chocolate, then press on candy eyes or additional decorations to personalize your witch hats.
Step 5: Decorate the Cupcakes
Carefully place the chocolate-dipped sugar cones onto the frosted cupcakes, pressing gently to secure them in place. To enhance the festive look, you can add additional frosting around the base of the cones and sprinkle colorful Halloween-themed sprinkles on top.
Step 6: Cool & Display
Allow the decorated Witch Hat Cupcakes to set for about 10 minutes so that the chocolate hardens slightly. Once set, you can arrange them on a themed Halloween platter for a delightful presentation that will enchant your guests. Enjoy the sweetness of these festive treats at your Halloween festivities!
Tips for the Best Witch Hat Cupcakes
-
Mise en Place: Gather all ingredients before you start cooking to prevent any last-minute searches when crafting your Witch Hat Cupcakes. This makes the baking process smooth and enjoyable.
-
Avoid Overmixing: When combining wet and dry ingredients, mix just until incorporated. Overmixing can lead to tough cupcakes—your goal is light and fluffy!
-
Proper Cool Down: Ensure cupcakes are completely cooled before frosting. If warm, the frosting will melt and slide off, ruining your playful witch hat design.
-
Chocolate Melting: Use a microwave or double boiler for melting chocolate melts. Stir frequently to avoid burning and ensure a smooth coating for your sugar cones.
-
Creative Decor: Feel free to customize your cupcake decorations. Use different candy toppings or colored sprinkles to make your Witch Hat Cupcakes unique and eye-catching!
-
Storage Solutions: To keep your cupcakes fresh, store them in an airtight container at room temperature. Enjoy them within 2-3 days for the best flavor and texture!
Variations & Substitutions for Witch Hat Cupcakes
Embrace your inner chef and let your creativity shine while customizing these delightful cupcakes!
-
Gluten-Free: Substitute all-purpose flour with a gluten-free blend for everyone to enjoy.
-
Dairy-Free: Use almond milk in place of regular milk and dairy-free butter for the frosting; watch those smiles grow!
-
Chocolate-Free: Switch cocoa powder with a vanilla cake mix for a lighter, equally whimsical version.
-
Healthy Sweeteners: Replace granulated sugar with honey or maple syrup for a natural sweetness that packs a punch.
-
Spiced Variation: Add a pinch of cinnamon to the cupcake batter for an aromatic twist that speaks to the fall season.
-
Decadent Ganache: Drizzle chocolate ganache over the cupcakes for an extra layer of rich flavor; it’s a chocolate lover’s dream!
-
Seasonal Colors: Swap green food coloring for orange to create lively pumpkin-themed hats—perfect for a spooky vibe!
-
Mini Versions: Bake mini cupcakes for small bites, perfect for little ones or for serving at larger gatherings—everyone loves a bite-sized treat!
These variations not only keep things exciting but also ensure everyone at your Halloween party gets to indulge! Enjoy experimenting with these options while making your spooky goodies, and consider pairing them with some delicious Sponge Cake Heart or our festive Chocolate Chip Zucchini for a complete dessert table!
Make Ahead Options
These Witch Hat Cupcakes are perfect for busy home cooks looking to save time during the Halloween rush! You can prepare the cupcake batter up to 24 hours in advance; simply mix and refrigerate it until you’re ready to bake. Cupcakes can also be baked and stored in an airtight container for up to 3 days to maintain their moisture. For the frosting, make it ahead and refrigerate; just give it a good stir before using. Assemble your witch hats and decorate immediately before serving to ensure they look fresh and festive. With these make-ahead tips, you’ll enjoy hassle-free baking while keeping everything just as delicious!
What to Serve with Witch Hat Cupcakes?
Indulging in these whimsical treats sets the stage for a delightful Halloween celebration full of fun and flavor.
- Spooky Fruit Platter: A colorful array of seasonal fruits adds a fresh contrast to the rich chocolate cupcakes, offering a lighter option for guests.
- Ghostly Marshmallow Pops: These white chocolate-dipped marshmallows, decorated as ghosts, are a fun and chewy treat that complements the cupcakes perfectly.
- Pumpkin Spice Hot Chocolate: This festive drink warms up the party, enhancing the autumnal feeling while balancing the sweetness of the cupcakes.
- Candy Corn Trail Mix: A mix of nuts, chocolates, and candy corn provides a crunchy and sweet snack that keeps the Halloween spirit alive.
- Creepy Cheese Board: Dig into a selection of cheeses, cured meats, and crackers, which offer savory notes to contrast with the sweet cupcakes.
- Mummy Dogs: These easy-to-make puff pastry-wrapped hot dogs add a fun, savory twist to your dessert lineup, delighting kids and adults alike.
- Boozy Pumpkin Pie Milkshake: For the adults, this dessert-inspired drink adds a festive touch with flavors that perfectly echo the season.
- Halloween-themed Cookies: Bake or buy spooky-shaped cookies for an additional sweet treat, balancing out the rich chocolatey flavors of the cupcakes.
- Witch’s Brew Punch: Serve a refreshing punch—perhaps with apple cider and ginger ale—that echoes the Halloween theme, making it a hit with guests.
- Gingerbread Haunted House: Invite your guests to assemble a gingerbread house for an interactive dessert experience that pairs wonderfully with the cupcakes.
Storage Tips for Witch Hat Cupcakes
Room Temperature: Keep your Witch Hat Cupcakes in an airtight container at room temperature for up to 2-3 days to maintain their freshness and flavor.
Fridge: If you prefer, you can refrigerate the cupcakes for up to a week, but be aware that the frosting may lose some of its fluffy texture. Use an airtight container to prevent drying out.
Freezer: For longer storage, freeze the cupcakes without frosting for up to 2 months. Wrap them tightly in plastic wrap, then store in a freezer-safe bag to prevent freezer burn.
Reheating: When ready to enjoy, thaw the cupcakes in the refrigerator overnight, then bring to room temperature before adding frosting or serving.
Witch Hat Cupcakes Recipe FAQs
How do I choose the right chocolate for the cupcakes?
Absolutely! When it comes to chocolate, using high-quality unsweetened cocoa powder helps achieve the rich flavor you desire. For a deeper taste, you can opt for Dutch-processed cocoa powder. If you’re looking for a dairy-free option, consider using dairy-free chocolate melts for decorating.
How should I store the Witch Hat Cupcakes?
Store your Witch Hat Cupcakes in an airtight container at room temperature for up to 2-3 days. If you decide to refrigerate them, they can last up to a week, but be aware that the fluffy texture of the frosting may diminish slightly. For longer storage, freeze the cupcakes without frosting by wrapping them tightly in plastic wrap and placing them in a freezer-safe bag for up to 2 months.
Can I make these cupcakes ahead of time?
Certainly! You can bake the cupcakes a day or two in advance. Just cool them completely before storing them in an airtight container. You can frost them on the day of your event for the best presentation and freshness.
Are there any common troubleshooting tips for the cupcakes?
Very! If your cupcakes don’t rise as expected, check your baking powder for freshness since expired leavening agents can affect the outcome. Also, avoid overmixing the batter; mix just until combined for light and fluffy cupcakes. And if the frosting is too runny, add powdered sugar gradually until you reach the desired thickness.
Can I customize the ingredients for dietary restrictions?
Absolutely! For a gluten-free option, substitute the all-purpose flour with a gluten-free flour blend. To make this recipe vegan, you can replace the eggs with flax eggs (1 tablespoon of flaxseed meal mixed with 2.5 tablespoons of water equals one egg) and use non-dairy milk and butter substitutes.
What’s the best way to decorate the cupcakes?
I’m glad you asked! After piping on the frosting, securely place the chocolate-dipped sugar cones as witch hats. Add candy eyes for a spooky finishing touch, and sprinkle some colorful Halloween-themed sprinkles around the base for that extra festive flair.
Witch Hat Cupcakes That Are a Spooky Sweet Treat for All
Ingredients
Equipment
Method
- In a large mixing bowl, combine 1 ½ cups of all-purpose flour, 1 cup of granulated sugar, ½ cup of unsweetened cocoa powder, 1 ½ teaspoons of baking powder, and a pinch of salt. In a separate bowl, whisk together 2 large eggs, 1 cup of milk, ½ cup of vegetable oil, and 2 teaspoons of vanilla extract. Gradually mix the wet ingredients into the dry ingredients until fully incorporated. Preheat your oven to 350°F (175°C) and line a cupcake tin with paper liners.
- Spoon the prepared batter evenly into the cupcake liners, filling each about two-thirds full. Bake in the preheated oven for 18-20 minutes, or until a toothpick inserted into the center comes out clean, then let them cool.
- While the cupcakes cool, prepare the frosting by creaming together ½ cup of softened butter and 2 cups of powdered sugar in a mixing bowl. Gradually add 2-3 tablespoons of milk until you have a smooth consistency, then mix in a few drops of green food coloring.
- Once the cupcakes have completely cooled, use a piping bag fitted with a star tip to frost the tops with the green frosting. For the witch hats, melt chocolate melts and dip the pointed ends of sugar cones into the chocolate, attaching candy eyes or decorations.
- Carefully place the chocolate-dipped sugar cones onto the frosted cupcakes, adding additional frosting around the base and colorful Halloween-themed sprinkles if desired.
- Allow the decorated cupcakes to set for about 10 minutes, then arrange them on a themed Halloween platter for presentation.
Leave a Reply