
As the sun sets and Halloween night creeps in, the air fills with a delightful chill, urging gatherings that mix spooky and scrumptious. Join me in crafting Creative & Spooky Halloween Party Snacks that not only thrill the taste buds but also ignite the imagination with their playful twists. With these easy-to-make treats, you’ll find that entertaining becomes a breeze, allowing you to savor every spooky moment with family and friends. Imagine dashing around with your favorite mini pizzas and inviting spider cookies while keeping the kitchen chaos to a minimum! These festive delights are customizable to suit any taste, making them perfect crowd-pleasers for all ages. Ready to charm your guests with some delightful Halloween fun? Let’s get cooking!
Why Are These Spooky Treats a Hit?
Festive and Fun: Each snack embodies the spirit of Halloween, perfect for spreading joy and laughter.
Easy to Create: With minimal effort, you can whip up an impressive spread that will leave guests amazed.
Customizable: Tailor the flavors and designs to match your party theme or personal preferences; mix in some Spooky Spiderweb Brownies for extra flair!
Family-Friendly: These treats delight both kids and adults, making them a hit across the board.
Visual Appeal: The clever presentation and fun decorations ensure your spread looks as fabulous as it tastes, sparking excitement among guests.
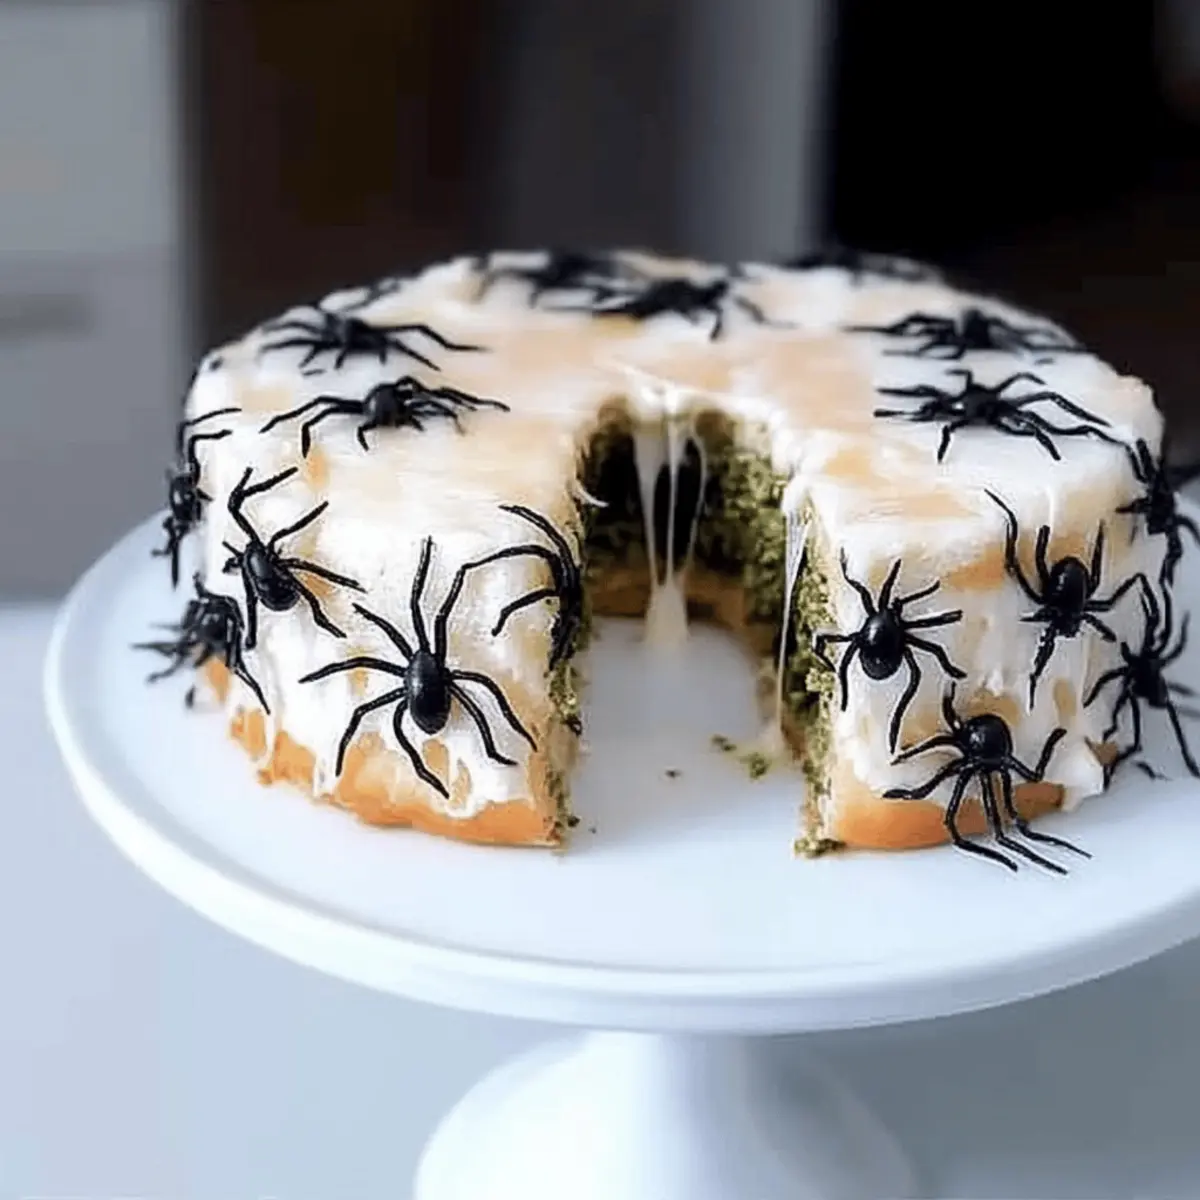
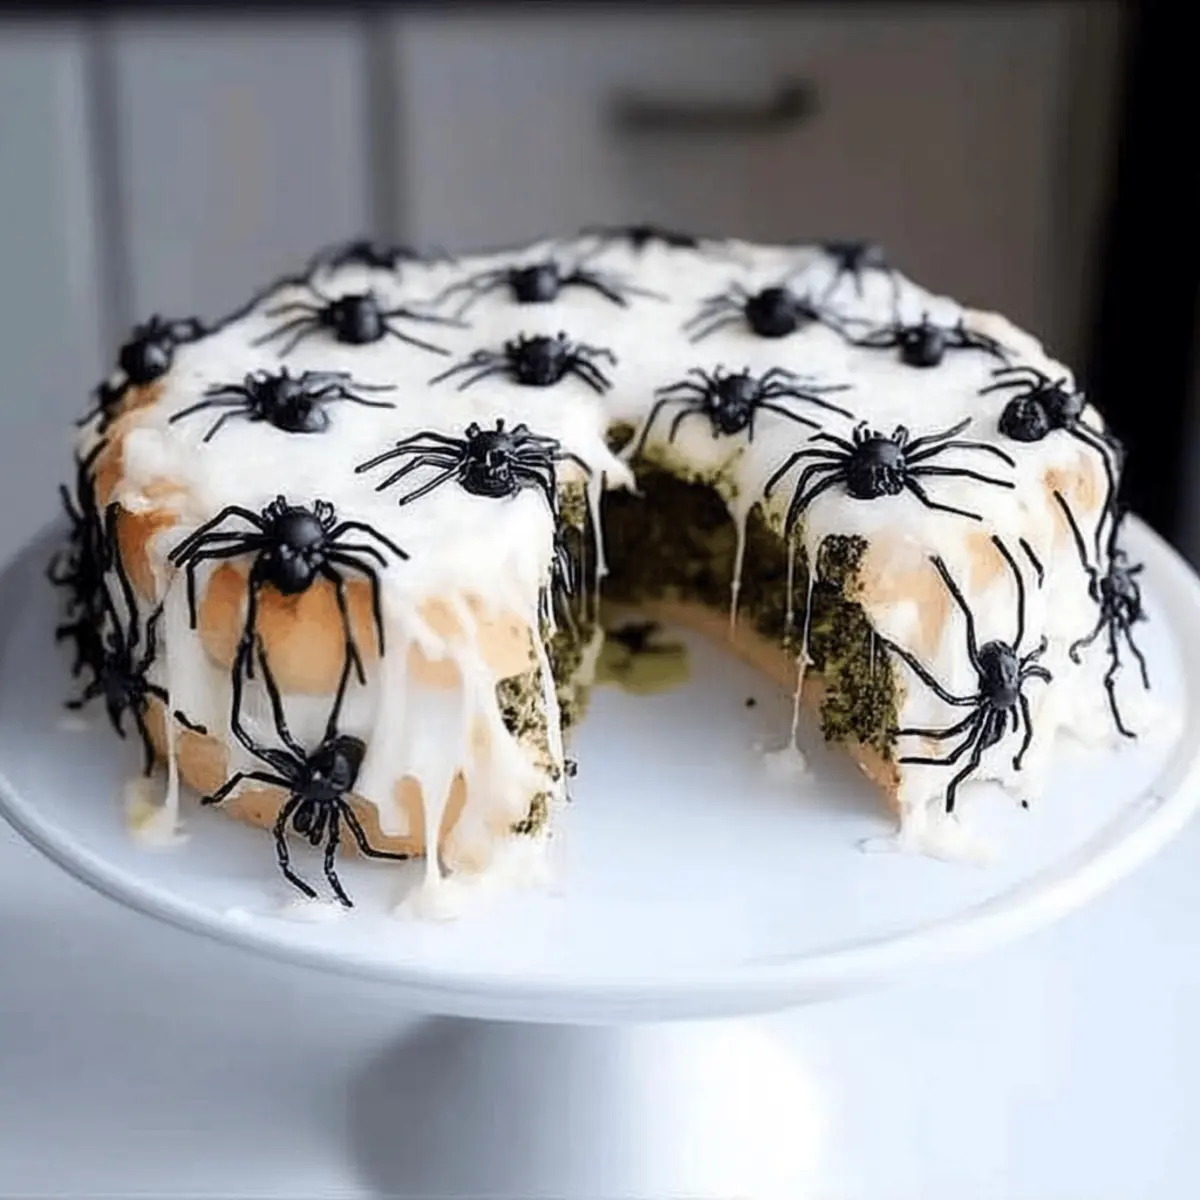
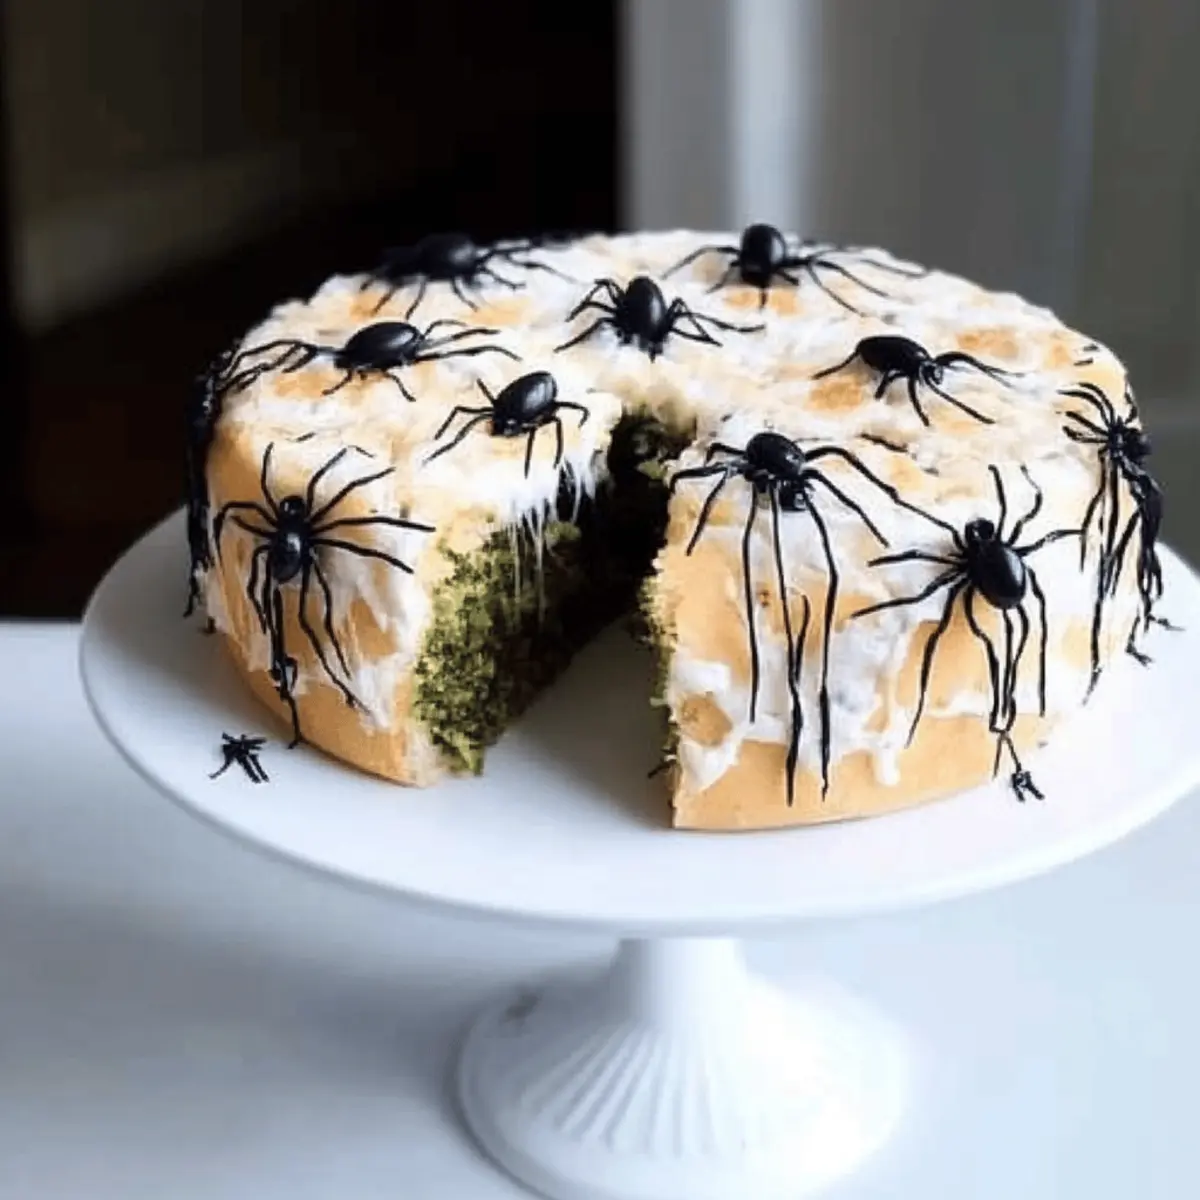
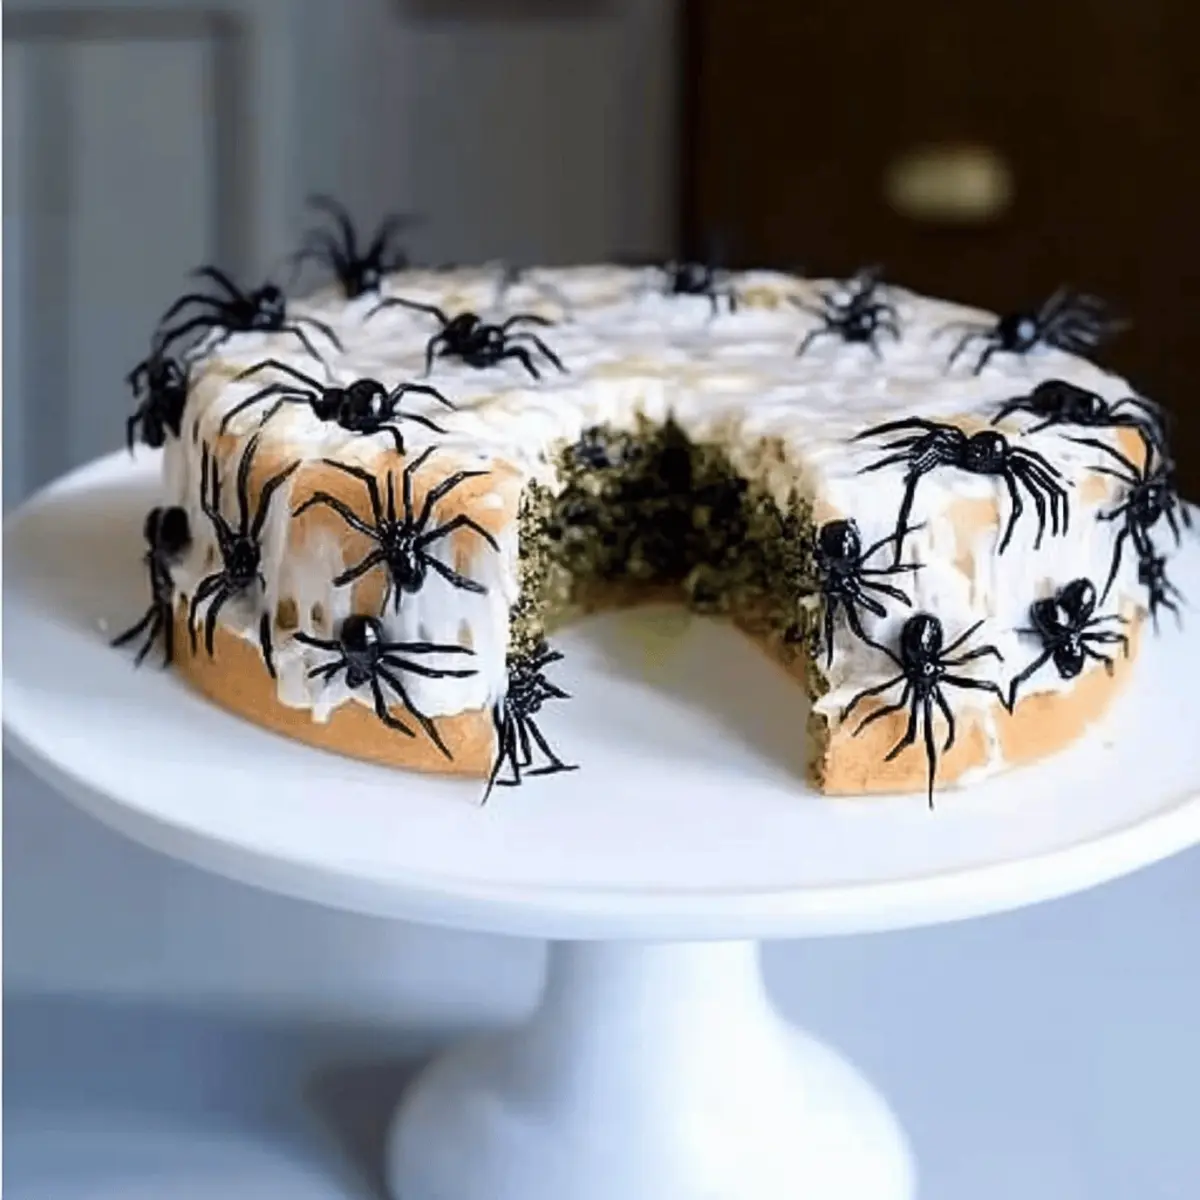
Spooky Spiders Ingredients
For the Spider Cookies
- Peanut Butter – Provides a rich, nutty flavor, perfect for cookies.
- Granulated Sugar – Adds sweetness and helps achieve that lovely chewy texture.
- Brown Sugar – Keeps the cookies soft and adds a caramel flavor.
- Eggs – Binds the ingredients together for a proper texture.
- Vanilla Extract – Enhances the overall flavor and aroma.
- All-Purpose Flour – The base for your cookies; make sure it’s measured correctly.
- Baking Soda – Helps the cookies rise, providing a fluffy texture.
- Chocolate Chips – Use semi-sweet for a delightful finishing touch.
- Candy Eyes – Perfect for adding that spooky touch to your cookies. You could even use chocolate chips as a sweet alternative.
For the Decorations
- Dark Chocolate – Melted for spider legs, adds an irresistible richness.
- Chocolate Sprinkles – For a fun, festive finish on your cookies.
- Licorice Strings – Cut to shape, they make fantastic spider legs!
Each ingredient serves a purpose in crafting these Spooky Spiders, ensuring not just flavor but also visual delight as they creep their way into your Halloween festivities!
Step‑by‑Step Instructions for SPOOKY SPIDERS
Step 1: Prepare the Cookie Dough
In a mixing bowl, combine 1 cup of peanut butter, 1 cup of granulated sugar, and 1/2 cup of brown sugar until smooth. Beat in 1 large egg and 1 teaspoon of vanilla extract for flavor. Gradually mix in 1 cup of all-purpose flour and 1 teaspoon of baking soda until fully incorporated. Refrigerate the dough for about 30 minutes to firm up, making it easier to shape spooky spiders.
Step 2: Shape the Cookies
Preheat your oven to 350°F (175°C) and line two baking sheets with parchment paper. Scoop tablespoon-sized portions of the chilled dough and roll them into balls, placing them 2 inches apart on the sheets. Use a fork to make a crisscross pattern on each ball, giving the cookies a textured look reminiscent of spider bodies. Bake for 10-12 minutes until golden around the edges but still soft in the center.
Step 3: Melt the Chocolate
While the cookies cool, melt about 4 ounces of dark chocolate in a microwave-safe bowl in 30-second intervals, stirring in between until smooth. This melted chocolate will serve as the spider legs, so make sure it’s fully melted for easy drizzling. Set aside and allow it to cool slightly before use, so it’s not too runny when decorating.
Step 4: Decorate with Spider Legs
Using a piping bag or a fork, carefully drizzle the melted chocolate over each cookie to create spider legs. Aim for eight legs per cookie, making sure to have them extending from the sides for a spooky effect. While the chocolate is still gooey, add chocolate sprinkles along the legs for an additional texture that mimics the creepy crawly look of spiders.
Step 5: Add Candy Eyes
Before the chocolate sets completely, gently press two candy eyes into the top center of each cookie. This finishing touch brings your SPOOKY SPIDERS to life, ensuring they look adorably eerie. Allow the cookies to sit for at least 30 minutes to ensure the chocolate hardens and the eyes are secure.
Step 6: Serve or Store
Once the cookies have cooled and the chocolate has set, transfer your SPOOKY SPIDERS to a festive platter for serving. Alternatively, if you’re preparing in advance, store them in an airtight container to keep them fresh. These treats are best enjoyed within a few days, allowing you to wow your guests during the Halloween festivities!
Expert Tips for Spooky Spiders
-
Chill the Dough: Refrigerating the cookie dough for 30 minutes makes it easier to handle, leading to perfectly shaped spooky spiders without spreading too much.
-
Quality Chocolate: Use high-quality dark chocolate for melting to ensure a smooth, delicious drizzle for the spider legs that adds an irresistible richness.
-
Spacing is Key: When placing the cookie dough balls on the baking sheet, keep enough space between them. This prevents merging during baking and allows for better texture and shape.
-
Decorate Warm Cookies: To get the best results, decorate your cookies with chocolate and candy eyes while they are still warm. This helps the eyes stick better for that fun spooky effect!
-
Mix Up the Eyes: Experiment with different candies for the eyes! Instead of candy eyes, try using mini chocolate chips for a different look while keeping the spooky theme alive. Enjoy your SPOOKY SPIDERS!
What to Serve with Creative & Spooky Halloween Party Snacks
Elevate your Halloween gathering with delightful pairings that enhance the festive atmosphere and tantalize your guests’ taste buds.
- Spooky Punch: A vibrant, fruity drink with floating gummy worms adds a fun, thematic touch to your spread.
- Ghostly Guacamole: Serve this alongside crispy tortilla chips for a fresh, zesty contrast to the sweet treats.
- Mini Pumpkin Pies: These adorable desserts bring a touch of fall flavors, completing your spooky snack lineup.
- Chilling Cider: Warm or chilled, apple cider aligns perfectly with Halloween vibes, providing a cozy drink option.
- Cheesy Eyeball Meatballs: Mini meatballs with mozzarella eyes create an eerie centerpiece that matches the spooky theme.
- Witch’s Brew Soup: A creamy tomato-based soup served in eerie cauldrons mixes comfort with creativity.
- Festive Fruit Platter: Bright, seasonal fruits add refreshing lightness and color to balance the richness of your snacks.
- Creepy Cocktails: Fun cocktails with Halloween-themed garnishes can add excitement for the adult guests.
These pairings ensure a well-rounded experience, keeping everyone engaged in both the flavors and the fun of Halloween!
Spooky Spiders Variations & Substitutions
Feel free to get creative with these spooky delights and make them uniquely yours!
-
Pumpkin Spice: Swap peanut butter for pumpkin puree and add a pinch of pumpkin spice for a seasonal flavor twist.
Dive into the fall spirit with a hint of cinnamon and nutmeg—perfect for cozy autumn gatherings. -
Chocolate Chip Cookies: Use a classic chocolate chip cookie base instead of peanut butter for a friendly variation.
This offers a familiar taste that everyone loves and serves as a blank canvas for spooky decor! -
Nut-Free: Replace peanut butter with sunbutter for a safe, nut-free alternative that maintains flavor and texture.
Your guests with nut allergies will appreciate this thoughtful twist! -
Gluten-Free: Use a gluten-free flour blend instead of all-purpose flour to keep these treats accessible for all.
Gluten-free baking can be just as delicious and satisfying with the right swaps! -
White Chocolate Drizzle: Choose white chocolate for the legs instead of dark chocolate for a sweet, contrasting look.
Its creamy sweetness adds an extra layer of fun and elegance to your spooky cookies. -
Coconut Spider Legs: Use melted coconut oil combined with cocoa powder for spider legs, offering a vibrant touch of tropical flavor.
This variation not only looks appealing but also adds a hint of coconut goodness. -
Miniature Versions: Create bite-sized spider cookies using mini cookie dough balls for easy snacking at your gathering.
Everyone loves a delightful, petite treat that leaves room for trying more!
And while you’re at it, how about making some Spooky Spiderweb Brownies for a hauntingly delicious dessert pairing? With these versatile variations, you’ll have a killer lineup of spooky snacks ready for your Halloween festivities!
Storage Tips for Spooky Spiders
Airtight Container: Store your Spooky Spiders in an airtight container at room temperature for up to 5 days to maintain their freshness and chewy texture.
Refrigeration: If you live in a particularly warm climate, consider refrigerating the cookies to help them stay firm; they can last up to 7 days this way.
Freezing: For longer storage, freeze the baked cookies in a single layer on a baking sheet before transferring them to a freezer-safe bag. They can last up to 2 months.
Thawing: To enjoy them later, simply let the cookies thaw at room temperature for about 30 minutes before serving. Enjoy the fun!
Make Ahead Options
These SPOOKY SPIDERS are perfect for meal prep, saving you time on that busy Halloween night! You can prepare the cookie dough up to 24 hours in advance by mixing it and refrigerating it until you’re ready to bake. Just scoop and roll into balls, then bake as directed for fresh, warm cookies. Additionally, you can melt the dark chocolate ahead of time and store it in an airtight container for up to 3 days—just rewarm it slightly before decorating. When ready to serve, simply drizzle the melted chocolate for the spider legs and add the candy eyes just before they hit the table to maintain the best presentation and freshness. Enjoy your hassle-free spooky fun!
Spooky Spiders Recipe FAQs
How do I choose ripe ingredients for my Spooky Spiders?
Absolutely! When selecting your peanut butter, opt for a high-quality natural option without added sugars or oils. Ensure that your granulated and brown sugars are fresh and free from clumps for optimal mixing. Using chocolate chips that are at room temperature helps them melt perfectly into your cookies!
What’s the best way to store Spooky Spiders?
For optimal freshness, keep your Spooky Spiders in an airtight container at room temperature for up to 5 days. If you live in a warmer climate, refrigerating them will extend their shelf life to about 7 days while keeping the cookies nice and chewy. Be sure to allow them to reach room temperature before serving for the best texture.
Can I freeze my Spooky Spiders for later?
Yes, you can absolutely freeze your Spooky Spiders! After baking and cooling, place the cookies in a single layer on a baking sheet and freeze for about 1 hour until solid. Then transfer them to a freezer-safe bag or container, ensuring all air is removed. They will keep well for up to 2 months. To enjoy, just thaw them at room temperature for about 30 minutes before serving.
What should I do if my cookies spread too much while baking?
Very! If your cookies spread too much, it could be due to soft dough, so chilling the dough for at least 30 minutes beforehand can help prevent this. Alternatively, check that your oven is correctly calibrated; a temperature too low can cause them to spread even more. If it happens again, try adding a bit more flour to the dough before baking.
Are there any allergen considerations for Spooky Spiders?
Yes, it’s wise to be careful! For nut allergies, you can substitute peanut butter with sunflower seed butter. Always check the labels on your chocolate chips and any additional decorations to ensure they’re nut-free. For vegan options, consider using a flax egg (1 tbsp ground flaxseed mixed with 2.5 tbsp water) instead of an egg and ensure your chocolate is dairy-free.
Can I customize these Spooky Spiders for different dietary needs?
Absolutely! If you want to make your Spooky Spiders gluten-free, you can use a gluten-free all-purpose flour blend. For a lower-sugar option, you can reduce the granulated sugar or use a sugar alternative like coconut sugar. The versatility of these treats makes it easy to tailor them to suit various dietary preferences!
Spooky Spiders: Deliciously Creepy Halloween Treats to Enjoy
Ingredients
Equipment
Method
- In a mixing bowl, combine peanut butter, granulated sugar, and brown sugar until smooth. Beat in egg and vanilla extract. Gradually mix in flour and baking soda. Refrigerate dough for about 30 minutes.
- Preheat oven to 350°F (175°C). Line baking sheets with parchment paper. Scoop tablespoon-sized portions of dough, shape into balls, and place on sheets. Use a fork to create crisscross patterns. Bake for 10-12 minutes until golden.
- Melt dark chocolate in a microwave-safe bowl in intervals, stirring until smooth. Allow to cool slightly before use.
- Drizzle melted chocolate over cookies to create spider legs. Add chocolate sprinkles while chocolate is still gooey.
- Before chocolate sets, gently press candy eyes into the top of each cookie. Allow cookies to sit for 30 minutes to set.
- Transfer cookies to a platter for serving or store in an airtight container for up to 5 days.
Leave a Reply