
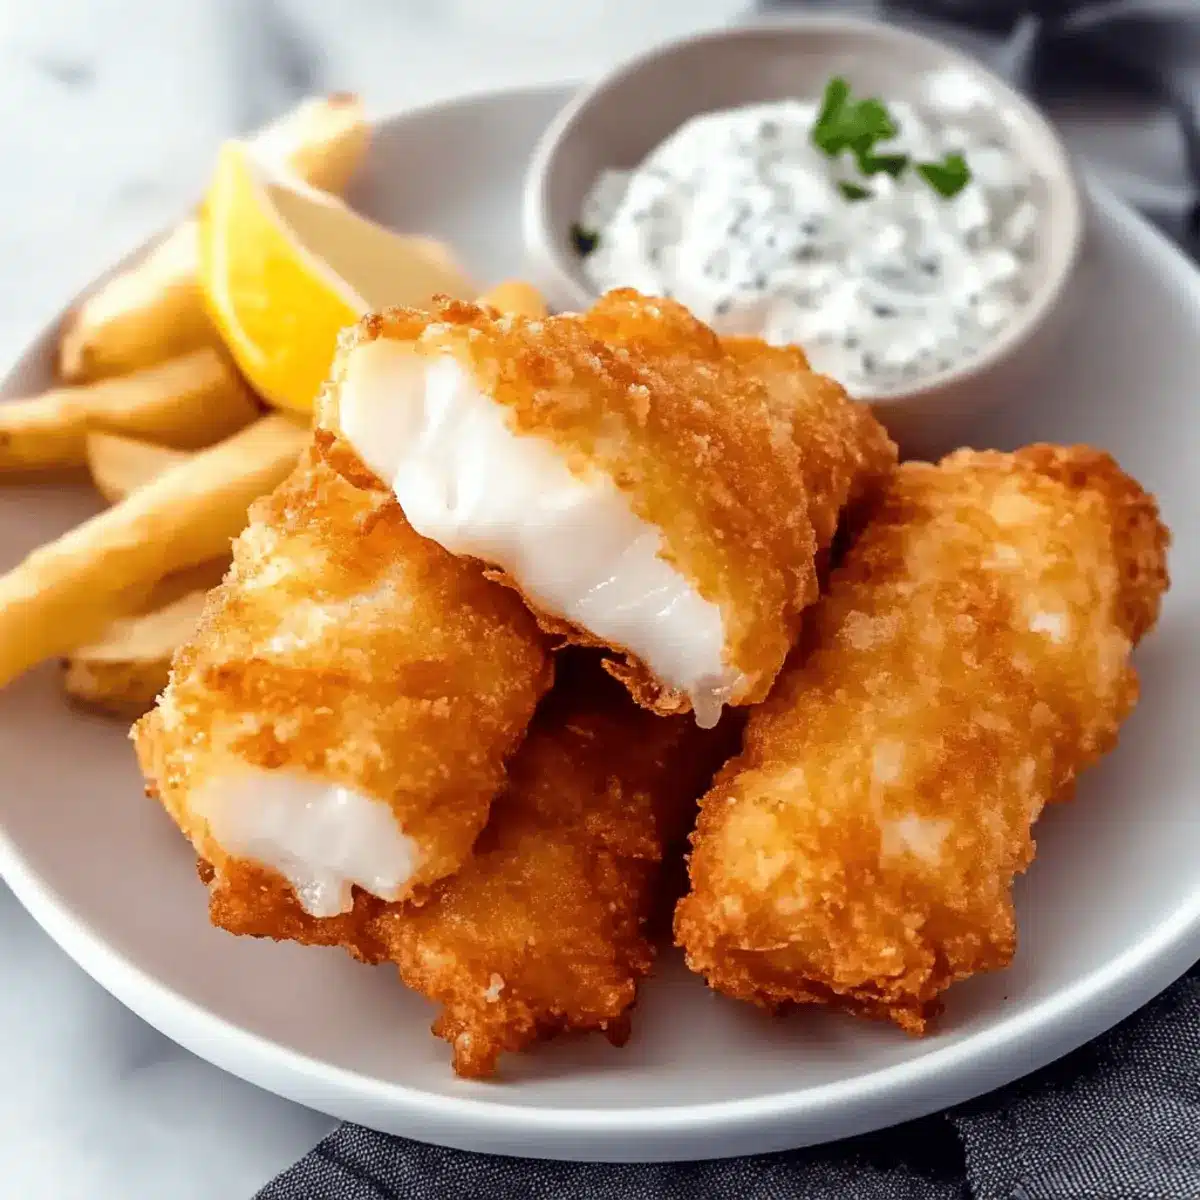
There’s something special about the crackling sound of fish frying in hot oil, isn’t there? It sparks the anticipation of a cozy dinner nearly every time. Today, I’m excited to share my Delicious Beer Battered Halibut recipe—a golden, crispy delight that turns any weeknight into a mini celebration. This dish combines two of life’s greatest pleasures: flaky, tender fish and a light, airy batter that’s perfect for dipping in homemade tartar sauce. Not only is this recipe a quick crowd-pleaser, ideal for those busy evenings, but it also transforms your kitchen into a pub-style haven, serving up nostalgia with each bite. So, are you ready to impress your dinner guests or elevate your fish-and-chips game? Let’s dive in and create something unforgettable!
Why is This Beer Battered Halibut Irresistible?
Crispy Perfection: The beer batter creates a delightfully crunchy exterior that contrasts beautifully with the tender halibut, giving you that perfect bite every time.
Quick and Easy: With just a few ingredients and simple steps, you can whip this up on a busy weeknight without breaking a sweat.
Versatile Delight: Pair it with homemade tartar sauce or enjoy it alongside crispy fries and coleslaw for a complete meal experience that’s sure to satisfy.
Impressive Presentation: Serve this dish to your friends or family, and watch their faces light up as they indulge in this restaurant-quality fare right at home!
Flavor Boost: Enhanced by cold beer, the batter becomes light and crisp—just like you’d find in your favorite local pub. For even more delicious sides, check out Healthy Sautéed Vegetables to keep things balanced or consider adding a touch of flair with some Japchae Sweet Amp on the table!
Delicious Beer Battered Halibut Ingredients
For the Fish
- Halibut Fillets – Provides a flaky base for frying; ensure they’re fresh and without brown spots for the best outcome.
- Salt – Enhances the fish flavor; always season before and after cooking for a burst of taste.
For the Batter
- Cake Flour – Creates a light and crispy batter; can swap with all-purpose flour if needed.
- Baking Soda – Helps aerate the batter for that perfect, light crunch.
- Cold Beer – The secret to achieving crispy texture; use a light lager or ale for optimal results.
For Frying
- Vegetable Oil – Necessary for frying; choose a stable oil with a high smoke point like canola or peanut oil for best frying.
For the Tartar Sauce
- Mayonnaise – A creamy base for your sauce; essential for that classic tartar flavor.
- Chopped Fresh Herbs (Parsley, Tarragon) – Adds freshness and a pop of flavor; feel free to mix it up with your favorites!
- Cornichons – Bring in tanginess and crunch; a perfect complement to the rich fish.
- White Wine Vinegar – Balances the richness; a splash brightens the overall flavor profile.
Dive into this delightful recipe that captures the essence of a delicious beer battered halibut dish that’s sure to become a weekend staple!
Step‑by‑Step Instructions for Delicious Beer Battered Halibut
Step 1: Tartar Sauce Preparation
In a medium bowl, combine chopped parsley, tarragon, minced shallots, cornichons, crumbled hard-boiled egg yolk, diced egg white, white wine vinegar, a pinch of salt, Dijon mustard, and mayonnaise. Mix well until all ingredients are fully integrated. For best flavor, let the tartar sauce sit at room temperature while you prepare the beer battered halibut, allowing the flavors to meld beautifully.
Step 2: Batter Preparation
In a large mixing bowl, sift together the cake flour and baking soda until fully combined. Gradually whisk in the cold beer, mixing gently until the batter is smooth and lump-free. Allow the batter to rest for about 15-20 minutes for the best texture. This step is crucial for achieving that perfect, crispy coating for your delicious beer battered halibut.
Step 3: Oil Heating
Pour vegetable oil into a deep, heavy-bottomed pan, filling it up to 2 inches. Heat the oil over medium-high heat until it reaches 350°F (175°C). To check if the oil is ready, drop a small spoonful of the batter into the oil—if it floats and sizzles, you’re all set to fry. Keep a close eye on the temperature to ensure the oil doesn’t overheat.
Step 4: Fish Preparation
While the oil is heating, take your halibut fillets and gently pat them dry with paper towels for an evenly crispy coating. Season both sides generously with salt to bring out the fish’s natural flavor. This simple step makes a big difference in enhancing the taste of your delicious beer battered halibut.
Step 5: Frying the Fish
With your oil heated to the right temperature, carefully dip each seasoned halibut fillet into the batter, allowing any excess to drip off. Gently lower the fillets one at a time into the hot oil. Fry them in batches to avoid overcrowding, cooking for about 4-5 minutes per side until they are golden brown and crispy. Use a slotted spoon to turn the fish as needed for even cooking.
Step 6: Draining and Serving
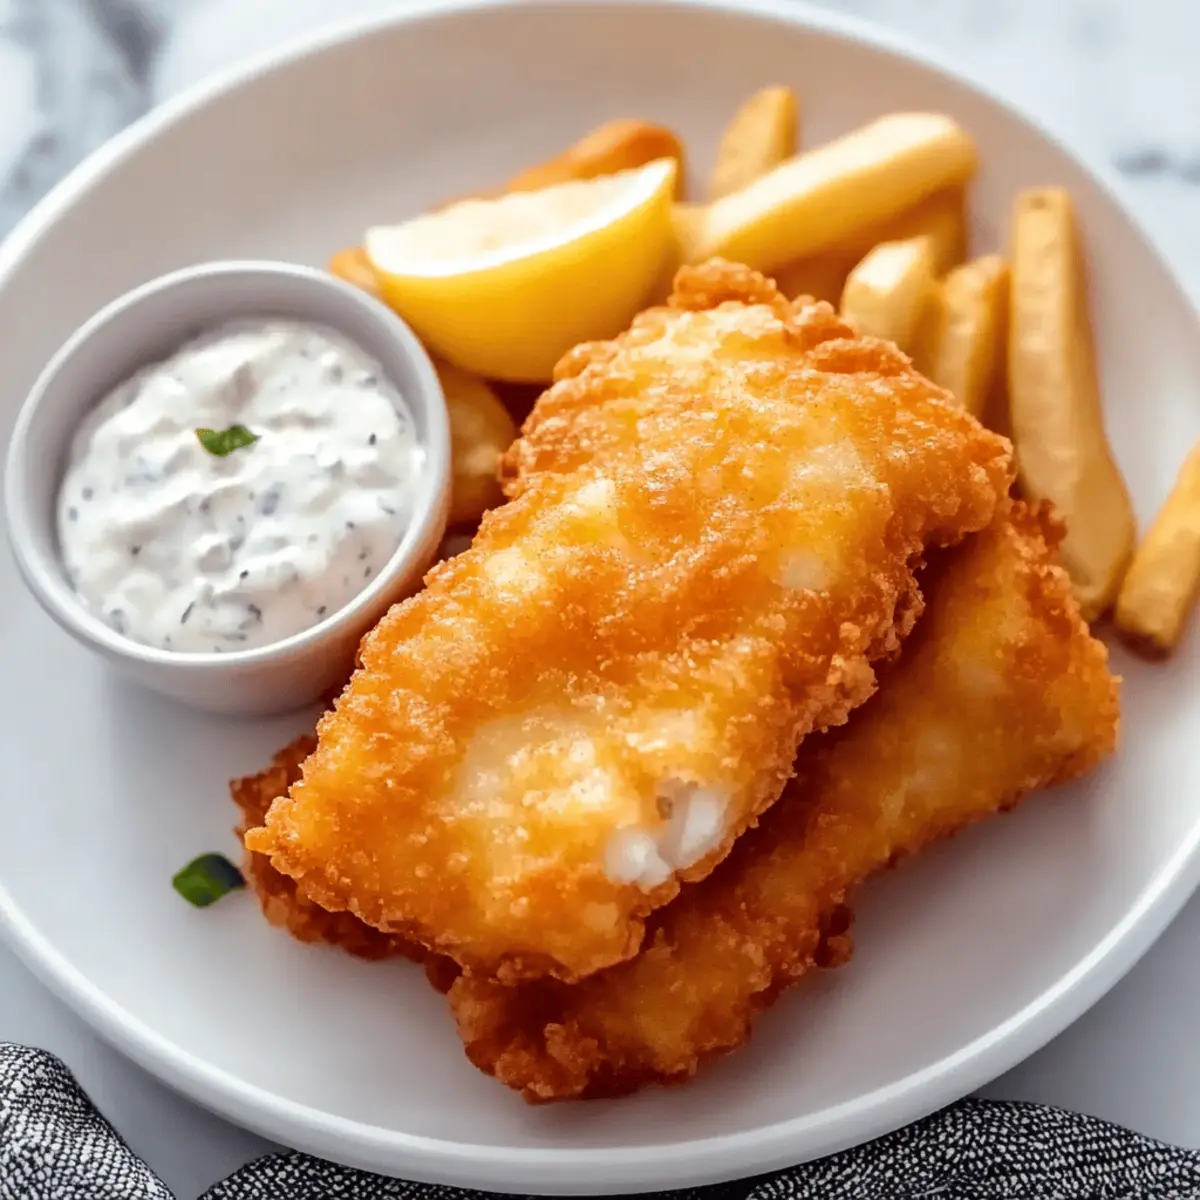
Once golden brown, carefully remove the fried halibut from the oil using a slotted spoon. Place them on a paper towel-lined plate to drain excess oil. Serve the delicious beer battered halibut immediately alongside your homemade tartar sauce, crispy fries, and coleslaw for a complete meal. Enjoy the delightful crunch and tender fish that makes this dish a family favorite!
Delicious Beer Battered Halibut Variations
Feel free to explore these tempting variations that can elevate your beer battered halibut experience into something truly unique!
-
Different Fish: Swap halibut for cod, tilapia, or even shrimp for exciting flavor profiles. With variations in texture, each option adds its own delicious twist.
-
Herb-Infused Batter: Mix in dried herbs like dill or Italian seasoning to the batter for added flavor. This simple addition transforms the flavor profile, bringing more depth to your lovely dish.
-
Spicy Kick: Add cayenne pepper or chili powder to the batter if you enjoy a touch of heat. A spicy dipping sauce can also complement this deliciousness, creating a zesty experience.
-
Panko Coating: For extra crunch, consider coating the batter-dipped fish in panko breadcrumbs before frying. This creates an irresistible texture that you’ll love with every bite.
-
Beer Variety: Experiment with different types of beer like stout or flavored ales for diverse flavors in the batter. Each type of beer contributes its own unique taste, enhancing your overall dish.
-
Zesty Tartar Sauce: Elevate your homemade tartar sauce by adding a hint of lemon zest or a dab of hot sauce. This elevates the sauce to the next level, perfect for pairing with your crispy halibut.
-
Sweet Potato Fries: Serve with crispy sweet potato fries instead of regular fries for a nutritious twist. The sweetness of the fries pairs beautifully with the savory fish, enhancing your meal’s balance.
-
Vegan Option: Create a vegan version using veggie fillets and a plant-based batter for a delicious treat the whole family can enjoy. This way, everyone can enjoy a similar experience without compromising taste.
Don’t forget to consider pairing your beloved dish with sides like Healthy Sautéed Vegetables or a delightful option like Japchae Sweet Amp for a well-rounded meal!
Make Ahead Options
These delicious beer battered halibut are perfect for prepping ahead, saving you time on busy weeknights! You can prepare the tartar sauce up to 3 days in advance; simply mix all ingredients and refrigerate in an airtight container to let the flavors meld beautifully. Additionally, you can prep the batter by whisking together the flour, baking soda, and beer, then refrigerate it for up to 24 hours. To maintain quality, make sure to store the batter in an airtight container to prevent oxidation. When you’re ready to enjoy, simply fry the halibut fillets as instructed, and you’ll have a delicious meal with minimal effort!
What to Serve with Crispy Beer Battered Halibut?
Transform your meal into a delightful feast with these perfect pairings that will elevate the experience.
- Crispy Fries: Golden and crunchy, these fries are the quintessential sidekick, perfectly matching the fish’s texture.
- Creamy Coleslaw: The tangy crunch of coleslaw adds a refreshing contrast that balances the richness of the batter. A hint of sweetness from the dressing lifts the dish beautifully.
- Zesty Lemon Wedges: A squeeze of fresh lemon brightens the entire plate, enhancing the fish’s flavors with its citrusy zing.
- Malt Vinegar: Drizzle this over your fish for an authentic pub experience; its distinct tang pairs flawlessly with the crispy coating.
- Garlic Butter Green Beans: Soft yet crunchy green beans sautéed in garlic and butter offer a delightful earthy taste that complements the halibut beautifully. They bring a touch of vibrant color to your plate, as well.
- Homemade Tartar Sauce: Essential for dipping, this creamy sauce enhances the fish with its herby freshness and slight tang, creating a match made in culinary heaven.
- Crusty Bread: Serve with a side of warm, crusty bread to soak up the delicious remnants on your plate. It’s a comforting addition that invites you to enjoy every last bite!
- Crisp White Wine: A chilled glass of Pinot Grigio or Sauvignon Blanc pairs elegantly, enhancing the flavors without overpowering.
- Apple Crisp: For dessert, indulge in a warm apple crisp that brings sweet and spiced notes to wrap up your meal on a high note. It’s a homey finish after your fish feast!
How to Store and Freeze Delicious Beer Battered Halibut
Fridge: Store leftovers in an airtight container for up to 2 days. To maintain the best flavor, reheat in the oven to restore some crispiness.
Freezer: If you have extra batter, you can freeze it in a sealed bag for up to 1 month. Thaw in the fridge before use for your next delicious beer battered halibut meal.
Reheating: For optimal texture, reheat fried halibut in the oven at 350°F (175°C) for about 10-15 minutes until heated through and crispy again.
Avoid Sogginess: To prevent the coating from becoming soggy, avoid storing the fish in a plastic container without ventilation.
Expert Tips for Delicious Beer Battered Halibut
-
Fish Dryness Matters: Ensure halibut fillets are completely dry before coating to help the batter stick and achieve crispiness.
-
Rest the Batter: Allowing the batter to rest for 15-20 minutes greatly enhances texture, resulting in a fluffier, airier coating for your delicious beer battered halibut.
-
Maintain Oil Temperature: Keep the oil at a steady 350°F (175°C). Fry in small batches to prevent temperature drops and ensure a golden, crispy finish.
-
Proper Seasoning: Salt the halibut before dipping it in the batter for maximum flavor. Season again right after frying for an extra flavor boost.
-
Use Fresh Ingredients: Fresh herbs and ingredients in your tartar sauce can elevate the dish; don’t skip on quality for a standout meal!
Delicious Beer Battered Halibut Recipe FAQs
How do I select the best halibut fillets?
Look for halibut fillets that are fresh and firm, with no brown spots or unpleasant odor. If you’re opting for frozen fillets, ensure they are fully thawed before cooking. I encourage using wild-caught halibut when available for the best flavor and texture!
How should I store leftovers of my beer battered halibut?
Store any leftover delicious beer battered halibut in an airtight container in the refrigerator for up to 2 days. However, keep in mind that the coating may soften over time. To reheat, simply pop it in the oven at 350°F (175°C) for about 10-15 minutes to help restore some crispiness.
Can I freeze beer battered halibut?
Absolutely! If you have extra battered halibut, you can freeze it before frying. Lay the battered fillets on a baking sheet lined with parchment paper, and freeze until solid. Then, place them in a sealed bag or container for up to 3 months. When ready to cook, thaw them in the fridge overnight and fry as instructed!
What if my batter isn’t crispy enough?
If your batter isn’t achieving that desired crispiness, check if your oil is at the right temperature (around 350°F or 175°C). Frying in smaller batches helps maintain the oil temperature and prevents sogginess. Additionally, allow the batter to rest for 15-20 minutes before using, as this improves its texture.
Are there any dietary considerations?
If you’re entertaining guests with allergies or dietary restrictions, consider alternatives for the batter like gluten-free flour blends. Always communicate with your guests about the ingredients in your homemade tartar sauce, especially if they have sensitivities to mayo or herbs.
Can I make the tartar sauce in advance?
Yes, the homemade tartar sauce can be prepared a day in advance! This allows the flavors to meld beautifully, enhancing the taste. Just be sure to store it in an airtight container in the refrigerator. Enjoy the extra convenience, making your meal prep a breeze!
Delicious Beer Battered Halibut: Your New Favorite at Home
Ingredients
Equipment
Method
- In a medium bowl, combine chopped parsley, tarragon, minced shallots, cornichons, crumbled hard-boiled egg yolk, diced egg white, white wine vinegar, a pinch of salt, Dijon mustard, and mayonnaise. Mix well until all ingredients are fully integrated.
- Let the tartar sauce sit at room temperature while you prepare the beer battered halibut.
- In a large mixing bowl, sift together the cake flour and baking soda until fully combined.
- Gradually whisk in the cold beer, mixing gently until the batter is smooth and lump-free.
- Allow the batter to rest for about 15-20 minutes.
- Pour vegetable oil into a deep pan, filling it up to 2 inches. Heat over medium-high until it reaches 350°F (175°C).
- Check if the oil is ready by dropping a small spoonful of the batter into the oil.
- Pat the halibut fillets dry with paper towels and season both sides with salt.
- Dip each seasoned halibut fillet into the batter and allow excess to drip off.
- Carefully lower the fillets into the hot oil and fry for about 4-5 minutes per side until golden brown.
- Remove the fried halibut from the oil using a slotted spoon and place them on a paper towel-lined plate.
- Serve the beer battered halibut immediately with homemade tartar sauce, crispy fries, and coleslaw.
Leave a Reply