
As the warm aroma of baking bread envelops my kitchen, it instantly transports me to memories of family gatherings and cozy dinners. This Garlic Herb Braided Bread is not just a loaf; it’s a culinary experience that combines the enchanting flavors of garlic and herbs into a beautiful artisan treat. What I love most about this recipe is its versatility—whether you enjoy it alongside pasta, as an accompaniment to hearty soups, or simply warm with a pat of butter, it never fails to impress. Plus, it’s beginner-friendly, making it a perfect introduction to the art of bread-making. Are you ready to braid your way to a delicious centerpiece that will wow everyone around the table?
Why is this bread a must-try?
Versatile: This Garlic Herb Braided Bread adapts beautifully to countless meals, making it the perfect partner for dishes like Honey Garlic Chicken or a cozy bowl of soup.
Beginner-friendly: Even if you’re new to bread-making, this recipe is straightforward and easy to follow.
Impressive Presentation: The stunning braided design instantly elevates any dining experience, turning a simple meal into something special.
Mouthwatering Aroma: Baking this bread fills your home with an irresistible aroma that will draw your family to the kitchen.
Gluten-free Options: Enjoy this delightful loaf by simply swapping the flour for a gluten-free blend, making it inclusive for everyone.
Perfect for Sharing: Whether at a family gathering or a casual dinner with friends, this bread is sure to become a crowd favorite!
Garlic Herb Braided Bread Ingredients
For the Dough
- All-purpose or bread flour – Provides structure and texture; substitute with whole wheat flour for a hearty flavor.
- Active dry yeast – Acts as a leavening agent; instant yeast can be used for quicker rise times.
- Warm water – Hydrates the yeast and flour; aim for a temperature around 110°F for optimal activation.
- Olive oil – Adds moisture and richness; can be substituted with melted butter for enhanced flavor.
- Salt – Enhances flavor and controls yeast activity; essential for balanced taste.
- Sugar – Fuels the yeast and aids in browning; can be swapped with honey or agave syrup.
For Flavor
- Garlic (minced or roasted) – Infuses savory flavor; fresh garlic provides a bolder taste while roasted garlic is sweeter and milder.
- Dried mixed herbs (oregano, thyme, basil) or fresh herbs – Adds complexity and aroma; fresh herbs impart a brighter flavor.
- Grated parmesan cheese – Contributes saltiness and umami depth; substitute with pecorino for a sharper taste.
For Finishing
- Melted butter (for brushing) – Gives a glossy finish; an optional addition for enriching crust flavor.
Optional Add-ins
- Red pepper flakes – For a hint of heat.
- Shredded mozzarella – For extra cheesiness.
- Fresh parsley – For a delightful garnish.
Indulge in the delightful process of making Garlic Herb Braided Bread and watch as it becomes the star of your table!
Step‑by‑Step Instructions for Garlic Herb Braided Bread
Step 1: Prepare Dough
In a large bowl, pour in 1 cup of warm water (around 110°F) and add 1 tablespoon of sugar to feed the yeast. Sprinkle 2¼ teaspoons of active dry yeast over the surface and let it sit for 5-10 minutes until it becomes frothy. Then, stir in 2 tablespoons of olive oil, 4 cloves of minced garlic, 1 tablespoon of mixed dried herbs, and 1 teaspoon of salt. Gradually mix in 2½ cups of all-purpose flour until a soft dough forms.
Step 2: Knead Dough
On a lightly floured surface or using a stand mixer, knead the dough for 6-8 minutes until it’s smooth and elastic. Add half of the grated parmesan cheese halfway through kneading, ensuring it’s well incorporated. The finished dough should be slightly tacky but not sticky. Form the dough into a ball, and place it into a lightly greased bowl, covering it with a damp cloth.
Step 3: First Rise
Allow the dough to rise in a warm environment, such as an oven that’s turned off with a light on. Let it rise until doubled in size, which should take about 1 hour. You’ll know it’s ready when it’s fluffy and has visibly expanded. This step is crucial for achieving the airy texture of your Garlic Herb Braided Bread.
Step 4: Shape Loaf
After the first rise, gently punch down the dough to release air. Divide the dough into three equal pieces and roll each into a 14-16 inch rope. Next, braid the three ropes together, tucking the ends under to create a neat finish. Place your beautifully braided loaf on a parchment-lined baking sheet, ensuring it’s spaced comfortably.
Step 5: Second Rise
Cover the braided loaf with a clean kitchen towel and let it rise for an additional 30-40 minutes until puffed. This second rising period ensures the bread becomes tender and light. Check for a nearly doubled size, which will indicate it’s ready for baking.
Step 6: Bake
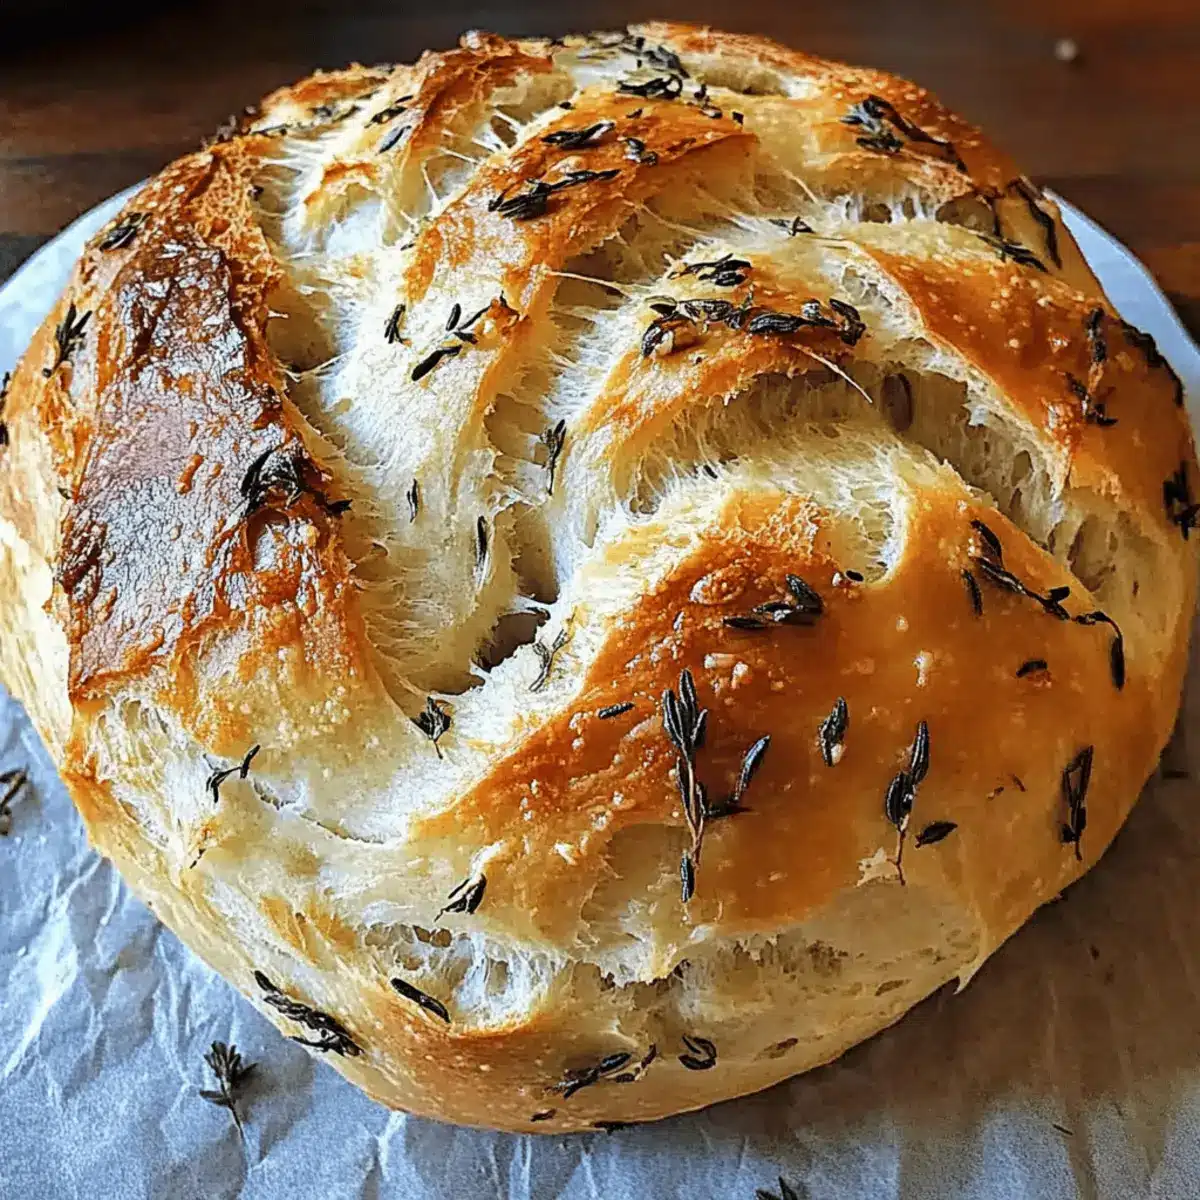
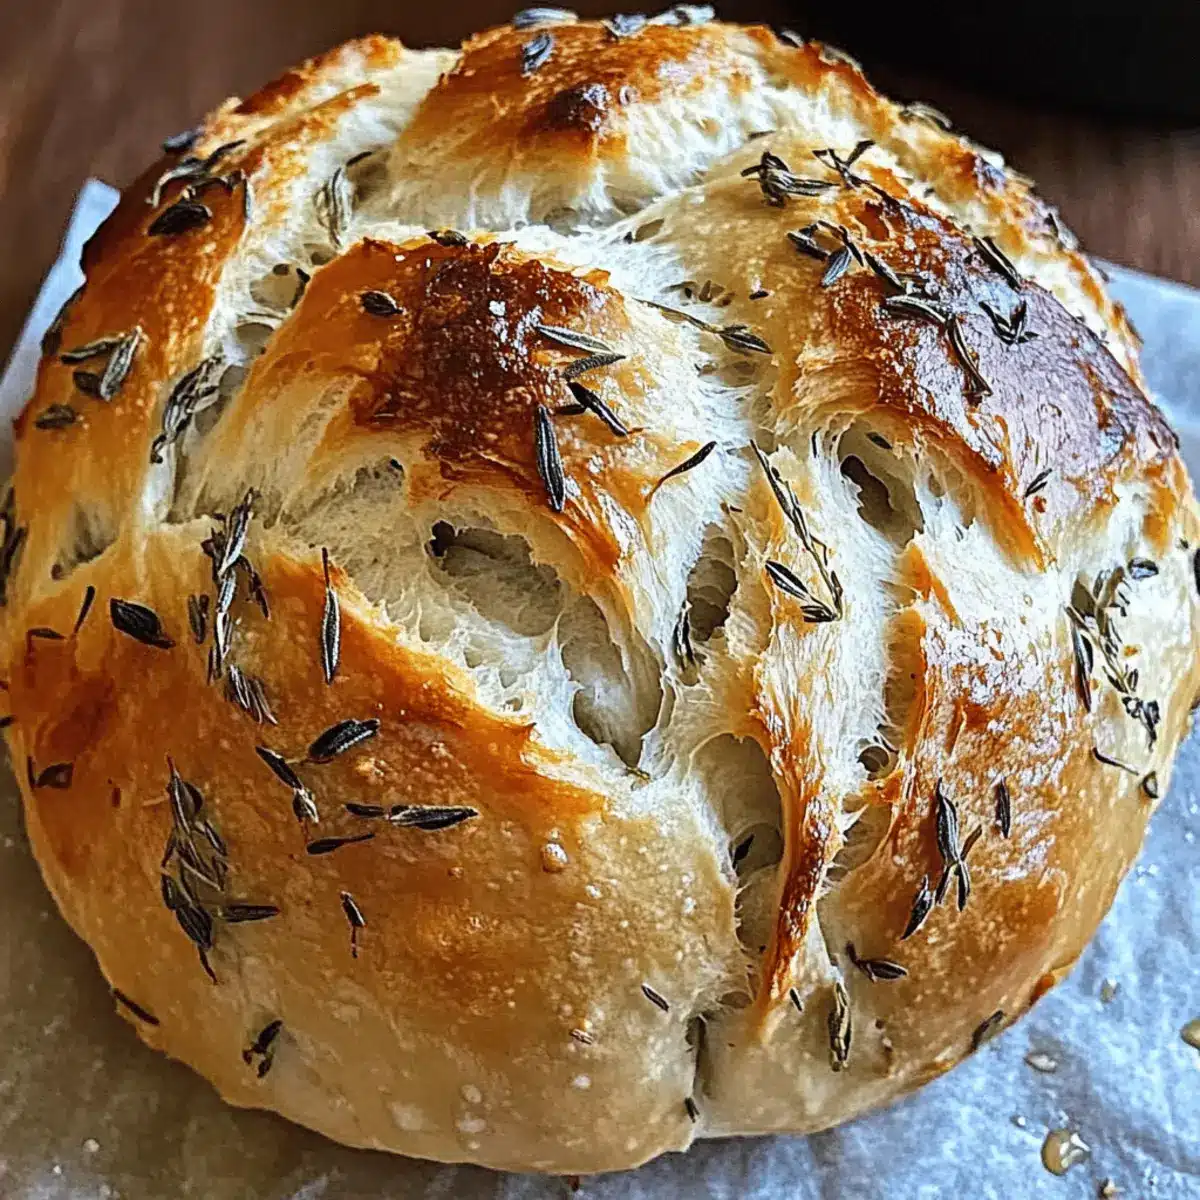
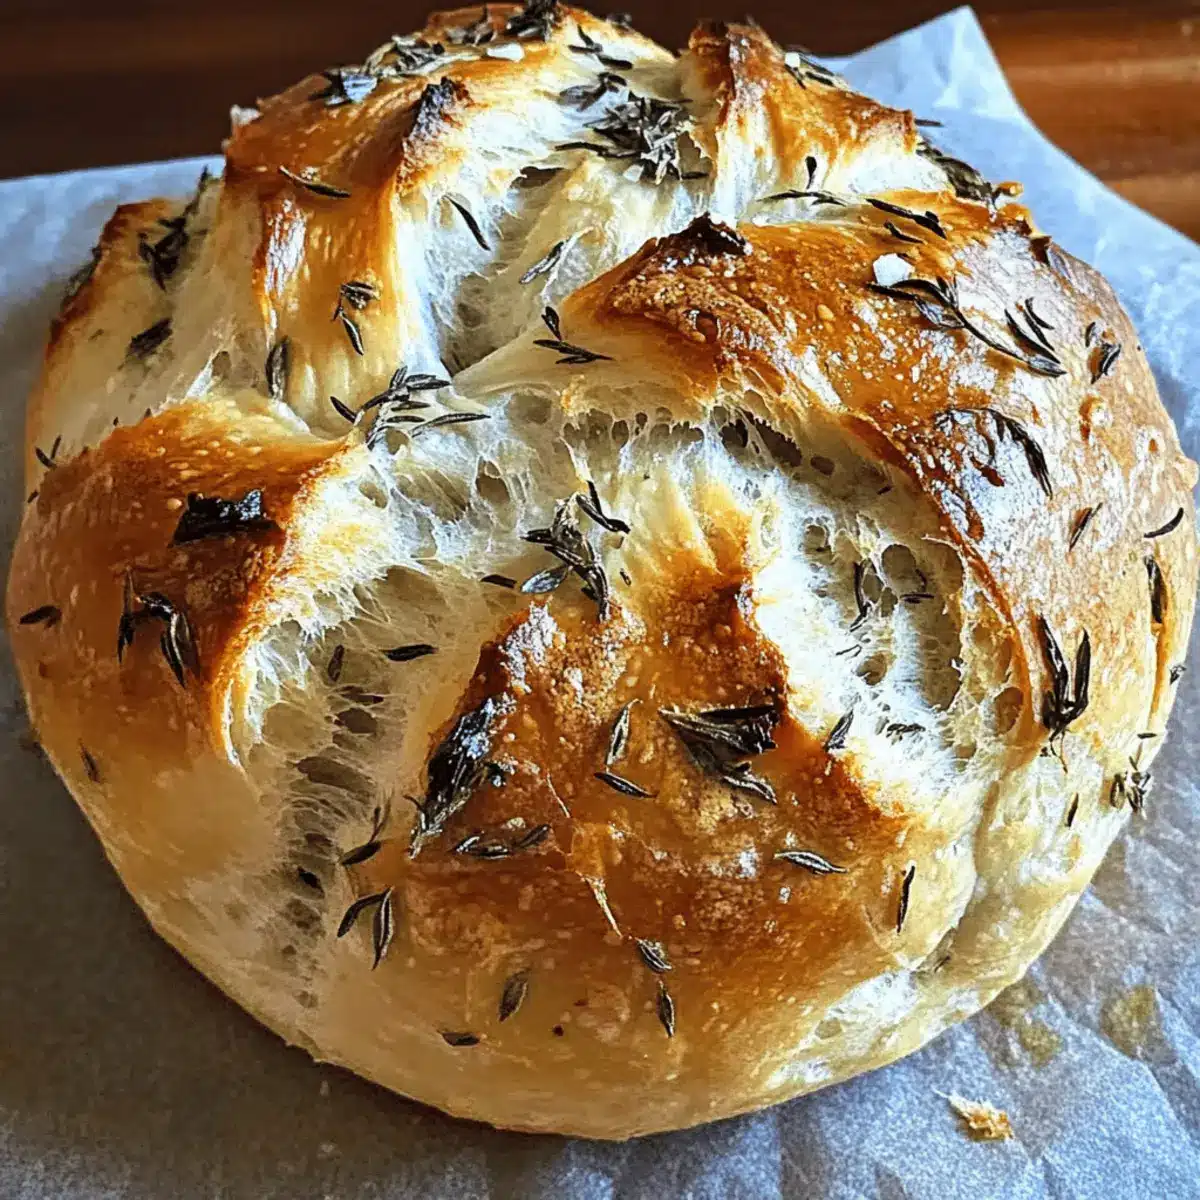
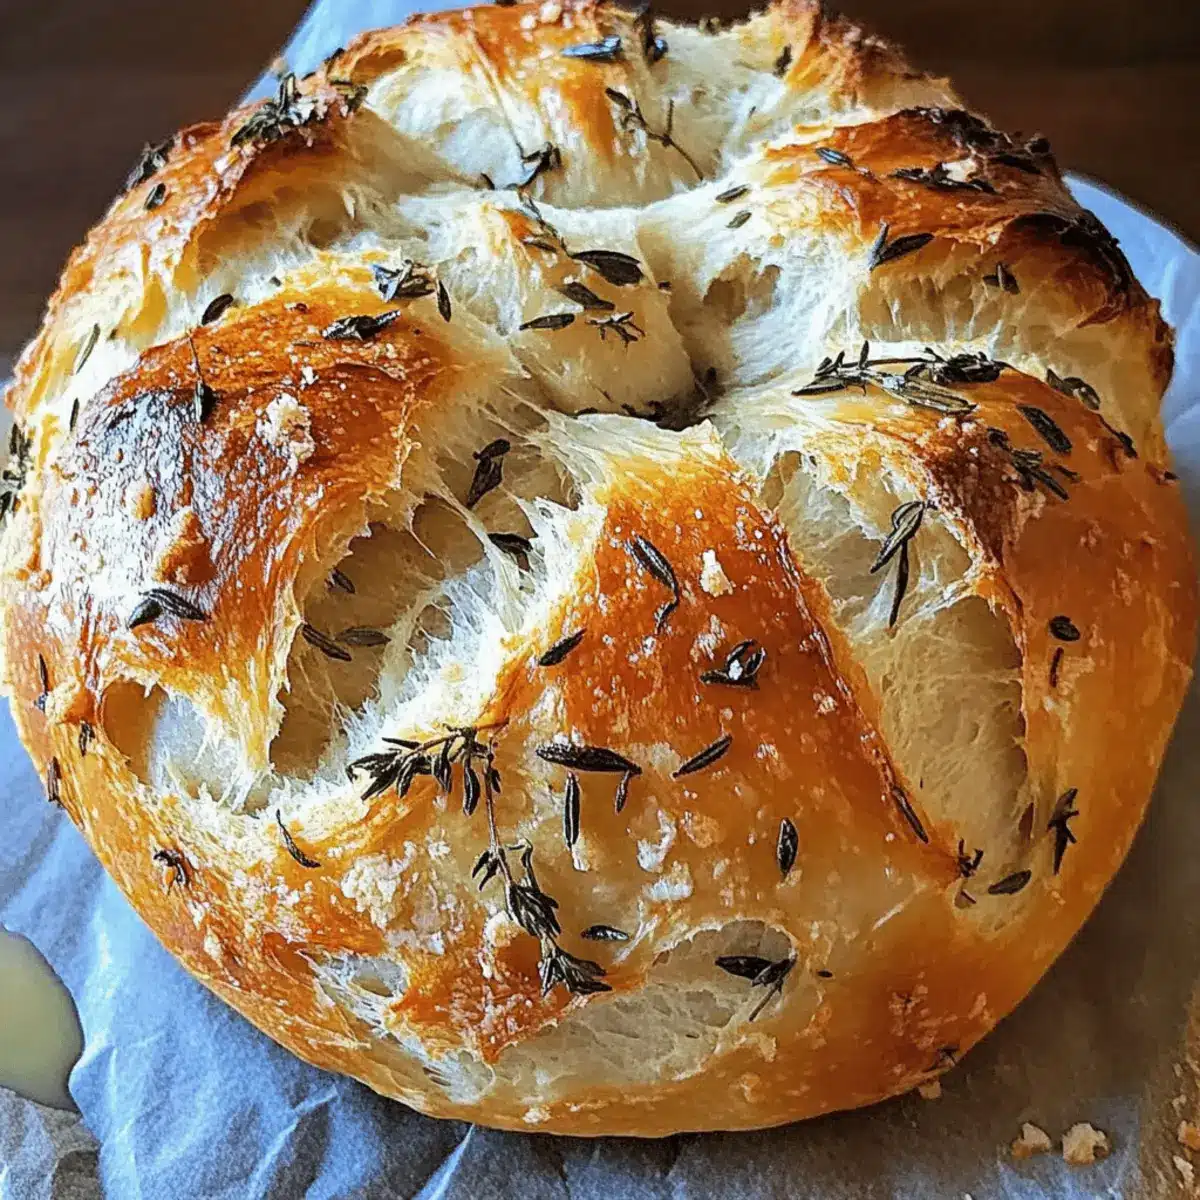
Preheat your oven to 375°F while the loaf is finishing its second rise. Once heated, brush the top of the loaf with melted butter for a shiny finish, and sprinkle remaining parmesan cheese if desired. Bake the Garlic Herb Braided Bread in the oven for 25-30 minutes, or until golden brown and fragrant. Look for a crisp crust with a hollow sound when tapped.
Step 7: Cool & Serve
Once baked, remove the loaf from the oven and let it cool on a wire rack for about 10 minutes. This allows the flavors to settle and the steam to escape. Slice the bread once it has cooled slightly, revealing its beautiful braided structure and herby aroma—perfect for serving alongside your favorite dishes!
How to Store and Freeze Garlic Herb Braided Bread
Room Temperature: Store your Garlic Herb Braided Bread in an airtight container for up to 3 days to maintain its freshness. Make sure it’s completely cooled before sealing to prevent moisture buildup.
Fridge: If you need to extend freshness, refrigerate the bread, but it may dry out faster. Wrap it tightly in plastic wrap, and it will last up to a week.
Freezer: For longer storage, you can freeze the bread. Wrap it tightly in aluminum foil or freezer-safe plastic bags to avoid freezer burn. It will keep well for up to 3 months.
Reheating: To reheat frozen slices, simply pop them in a preheated oven at 350°F for about 10-15 minutes. This will bring back the crispy crust and lovely aroma!
Expert Tips for Garlic Herb Braided Bread
-
Temperature Matters: Ensure your water is about 110°F; too hot will kill the yeast, preventing your bread from rising properly.
-
Kneading Technique: Knead the dough until it’s smooth and elastic. This develops gluten, which contributes to the bread’s delightful texture.
-
Keep It Covered: While your dough rises, cover it with a damp cloth to prevent a hard crust from forming on the surface.
-
Braiding Made Easy: If you’re new to braiding, practice makes perfect. You can also twist instead of braid for a simpler shape.
-
Flavor Infusion: For a stronger garlic flavor, try using roasted garlic instead of fresh, as it adds a subtle sweetness to your Garlic Herb Braided Bread.
-
Storage Tip: Store leftovers in an airtight container at room temperature for up to 3 days, or freeze for longer freshness.
Garlic Herb Braided Bread Variations
Customize this delightful bread to match your cravings and dietary needs, bringing even more flavors to your table!
-
Gluten-Free: Use a 1:1 gluten-free flour blend for a delicious alternative that everyone can enjoy.
-
Cheesy Delight: Add shredded mozzarella inside the braid for a melty, cheesy center that’s irresistible.
-
Herb Swap: Experiment with different herbs like rosemary or dill for a unique twist on flavor that dances on your palate.
-
Olive-Infused: Toss in some chopped olives or sun-dried tomatoes to create a briny flavor explosion that pairs beautifully with Honey Garlic Glazed dishes.
-
Broil for Crisp: After baking, switch to broil for the last few minutes to achieve an extra crispy crust that will lend an outstanding texture to each bite.
-
Sweet Version: Replace garlic with cinnamon and a touch of sugar to create a sweet braided bread perfect for breakfast or dessert, alongside your favorite coffee.
-
Spiced Up: Add red pepper flakes to give this bread a kick that complements heartier meals like a cozy bowl of Chicken Ramen Garlic.
-
Brushed with Flavors: Try brushing the dough with garlic butter just before baking for an infusion of savory goodness that enhances the aroma even more.
Embrace your creativity and these variations as you whip up your very own Garlic Herb Braided Bread, making every loaf a unique masterpiece!
Make Ahead Options
For busy cooks, this Garlic Herb Braided Bread is a fantastic choice for meal prep! You can prepare the dough up to 24 hours ahead and store it in the refrigerator. After mixing the ingredients, simply place the dough in a greased bowl, cover it tightly with plastic wrap, and refrigerate. When you’re ready to bake, allow it to warm at room temperature for about 30 minutes before shaping and braiding. Additionally, you can braid the loaf and let it rise for up to 3 days in the refrigerator. Just remember to cover it well to prevent drying out! Once it’s risen, bake as instructed for fresh, flavorful bread that tastes just as delicious as if made on the same day!
What to Serve with Garlic Herb Braided Bread
As you gather around the table for a meal, let this delicious bread pave the way for warmth and comfort, tantalizing your taste buds.
- Creamy Tomato Basil Soup: The rich flavors and creamy texture contrast beautifully with the crispy, herbed bread. It’s a classic pairing that never disappoints.
- Simple Arugula Salad: A fresh salad with lemon vinaigrette offers a bright and refreshing balance to the hearty bread. Its peppery notes will awaken your palate!
- Savory Garlic Butter Shrimp: This delectable dish highlights garlic in a delightful way, enhancing the bread’s flavor while creating a harmonious dining experience.
- Herbed Olive Oil Dip: For an Italian twist, serve this fragrant mixture alongside the bread. The warm, aromatic oil perfectly complements the garlic and herbs baked within.
- Minestrone Soup: Full of veggies and beans, this comforting soup pairs wonderfully, making every bite of bread even more satisfying when dipped.
- Mediterranean Charcuterie Board: Create a beautiful spread of cured meats, cheeses, olives, and fruits; the braided bread serves as an inviting centerpiece to scoop up flavors.
- Red Wine: A medium-bodied red, like Chianti, enhances the herbal notes of the bread while adding depth to your overall meal.
- Chocolate Fondue: For dessert, this dreamy dip invites your guests to enjoy the leftover bread with sweet, gooey chocolate, creating a surprising twist on flavors!
- Roasted Vegetable Platter: Colorful vegetables drizzled with balsamic glaze add a earthiness that contrasts beautifully with the bread’s flavors and crispy crust.
- Classic Caesar Salad: The creamy dressing and crunchy croutons elevate the dining experience, while the garlic notes create a delightful continuity with the braided bread.
Garlic Herb Braided Bread Recipe FAQs
What type of flour should I use for the best results?
I recommend using all-purpose flour for this Garlic Herb Braided Bread. It provides an excellent balance of structure and texture. If you’re looking for a heartier flavor, whole wheat flour is a great substitute. For those with gluten sensitivities, simply swap in a 1:1 gluten-free flour blend.
How should I store the leftover bread?
Store your Garlic Herb Braided Bread in an airtight container at room temperature for up to 3 days. Be sure it’s completely cooled before sealing to avoid moisture buildup. If you wish to keep it longer, freezing is your best bet—just wrap it tightly in aluminum foil or freezer-safe bags to prevent freezer burn.
Can I freeze this bread and how?
Absolutely! To freeze your Garlic Herb Braided Bread, wrap it tightly in aluminum foil or place it in a freezer-safe plastic bag, removing as much air as possible. It can be frozen for up to 3 months. When you’re ready to enjoy it, just reheat slices in a preheated oven at 350°F for about 10-15 minutes for that fresh-baked aroma and crisp crust!
What if my bread doesn’t rise?
If your dough doesn’t rise, it could be due to the yeast not activating properly. Ensure your water is at the right temperature (around 110°F) when you activate the yeast. If it’s too hot, it can kill the yeast, and if it’s too cold, it won’t activate. You can also try placing the dough in a warmer spot, like an oven with just the light on.
Are there gluten-free options for this recipe?
Yes! You can enjoy this delicious Garlic Herb Braided Bread by substituting the all-purpose flour with a 1:1 gluten-free flour blend. Just make sure the blend contains xanthan gum or another binding agent to help achieve that perfect texture.
Garlic Herb Braided Bread: Your New Favorite Artisan Delight
Ingredients
Equipment
Method
- In a large bowl, pour in warm water and add sugar to feed the yeast. Sprinkle active dry yeast and let it sit for 5-10 minutes until frothy.
- Stir in olive oil, minced garlic, mixed dried herbs, and salt. Gradually mix in flour until a soft dough forms.
- Knead the dough for 6-8 minutes until smooth and elastic. Add half of the grated parmesan cheese during kneading.
- Form dough into a ball, place in a greased bowl, and cover with a damp cloth. Let it rise until doubled, about 1 hour.
- Punch down the dough, divide into three pieces, and roll each into ropes. Braid them together and tuck ends under.
- Cover the loaf with a towel and let it rise for another 30-40 minutes until puffed.
- Preheat oven to 375°F. Brush loaf with melted butter and sprinkle with remaining parmesan cheese. Bake for 25-30 minutes.
- Let the loaf cool on a wire rack for about 10 minutes before slicing.
Leave a Reply