
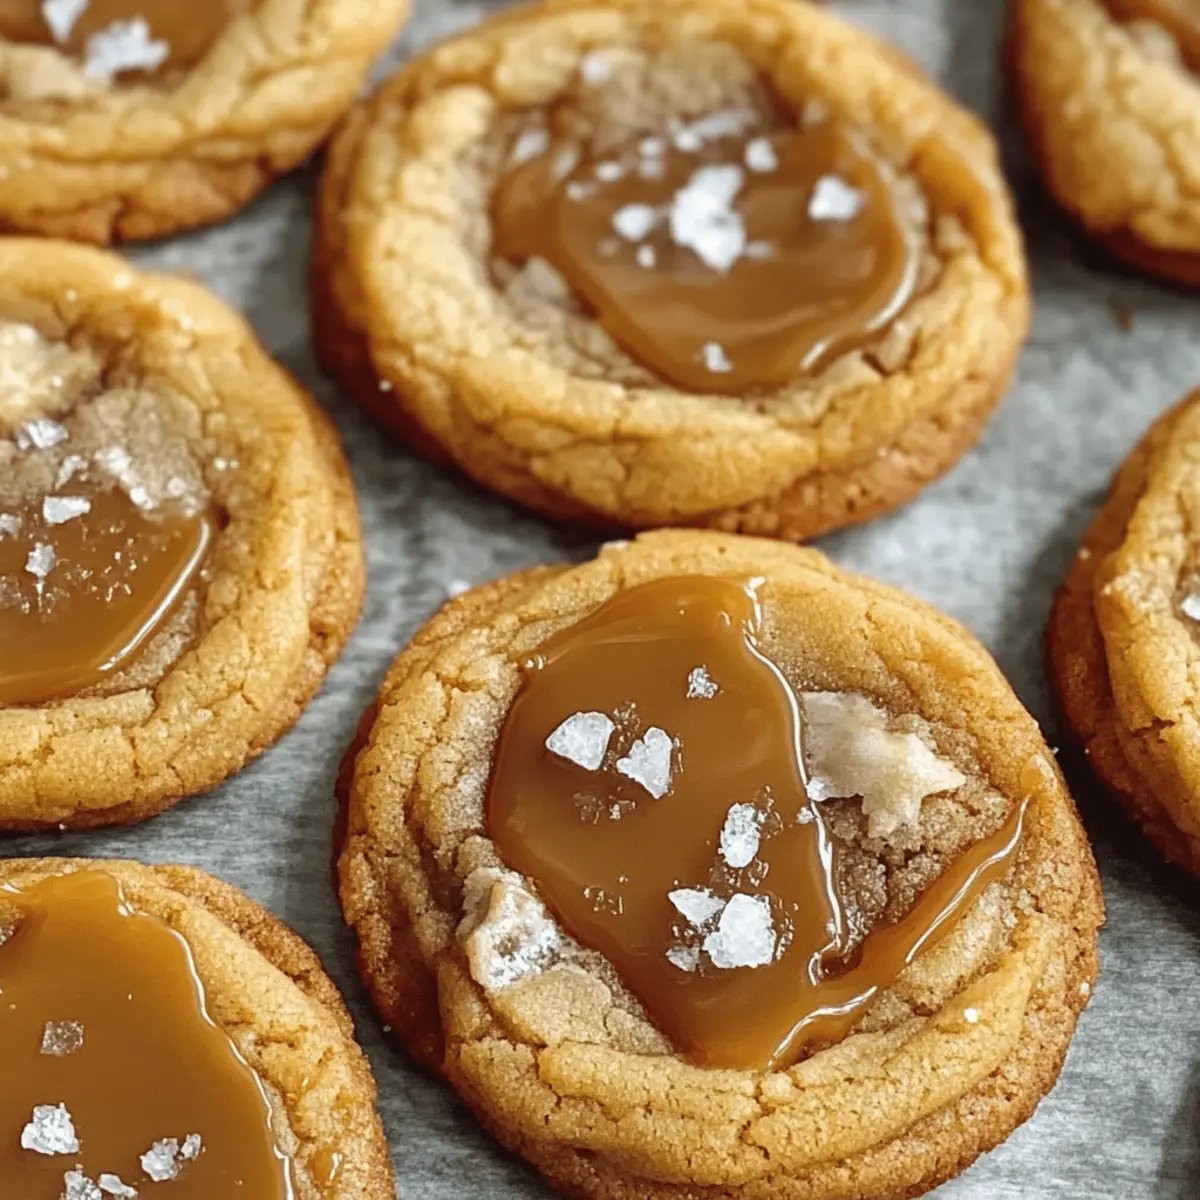
As I nestled into the cozy corner of my kitchen, the aroma of melting butter and sugar whisked me away to my favorite bakery. That tantalizing scent inspired me to create these Irresistible Bakery-Style Salted Caramel Cookies. With an effortless mix of chewy centers, crispy edges, and a sprinkle of flaky sea salt, this easy-to-make recipe is sure to become your new go-to for a delightful indulgence. What I love most about these cookies is their versatile nature; whether you want to add some chocolate chips for a rich twist or throw in a handful of nuts for a satisfying crunch, every batch can be uniquely yours. Perfectly comforting yet elevated enough for gatherings, these salted caramel cookies promise to bring joy to your home and satisfy those sweet cravings. Are you ready to embrace the warm, gooey goodness?
Why Are Salted Caramel Cookies So Irresistible?
Decadent, irresistible treat: These salted caramel cookies combine rich flavors and a melt-in-your-mouth texture that will leave you craving more. Versatile options: Feel free to customize with chocolate chips or nuts for a unique twist every time. Easy to make: With straightforward instructions, you’ll whip up a delightful batch in no time. Crowd-pleaser: Perfect for parties or casual get-togethers, these cookies will impress your guests, no matter the occasion. Serve them warm alongside a scoop of vanilla ice cream for an extra indulgent dessert that rivals any bakery’s offerings. If you love rich sweets, don’t miss trying these Kitchen Sink Cookies or the decadent Caramel Brownie Cheesecake for delightful alternatives!
Salted Caramel Cookie Ingredients
Get ready to gather the essentials for these sweet and salty delights!
For the Cookie Base
- All-Purpose Flour – Provides the structure for your cookies; for a gluten-free version, swap it for a gluten-free flour blend.
- Baking Soda – Helps your cookies rise beautifully; no substitutions recommended.
- Salt – Balances the sweetness and enhances flavor; opt for kosher or sea salt.
- Unsalted Butter – Provides richness and flavor when softened; can switch to vegan butter for a dairy-free option.
- Granulated Sugar – Adds a crisp texture; brown sugar can be used for extra moisture.
- Brown Sugar – Contributes moisture and a deeper caramel flavor; adjust the sweetness by using a higher ratio if desired.
- Large Eggs – Essential for binding the ingredients; consider a flax egg for a vegan substitute.
- Vanilla Extract – Enhances the flavor of your cookies; almond extract can offer a unique twist.
For the Caramel Goodness
- Caramel Chips – Creates gooey caramel pockets that melt in your mouth; butterscotch chips can be a delicious substitute.
- Chocolate Chips – Optional but highly recommended for an added richness; choose dark or white chocolate for variety.
For the Finishing Touch
- Flaky Sea Salt – Provides the signature sweet-salty contrast; use finishing salt for an exquisite effect.
With these ingredients ready, you’re just steps away from baking the most delightful Salted Caramel Cookies that your friends and family will adore!
Step‑by‑Step Instructions for Salted Caramel Cookies
Step 1: Preheat and Prep
Start by preheating your oven to 350°F (175°C) and lining a pair of baking sheets with parchment paper to prevent sticking. This step sets the stage for your salted caramel cookies to bake evenly. Ensure your baking sheets are ready, as you’ll be scooping the dough on them shortly.
Step 2: Whisk Dry Ingredients
In a mixing bowl, whisk together 2 cups of all-purpose flour, 1 teaspoon baking soda, and ½ teaspoon salt until well combined. This step ensures that your dry ingredients are evenly distributed, which helps in achieving consistent texture throughout your Salted Caramel Cookies. Set the bowl aside while you prepare the wet mixture.
Step 3: Cream Butter and Sugars
In a large mixing bowl, cream ½ cup of softened unsalted butter with ½ cup of granulated sugar and ½ cup of brown sugar until the mixture is light and fluffy, approximately 2-3 minutes. The mixture should turn pale and creamy, which adds a lovely richness to your cookies, enhancing their delightful flavor.
Step 4: Incorporate Eggs and Vanilla
Beat in 2 large eggs, one at a time, making sure each egg is well blended before adding the next. Then, mix in 1 teaspoon of vanilla extract until everything is fully combined. This helps bind the ingredients and infuses your salted caramel cookies with a warm, fragrant flavor profile.
Step 5: Combine Wet and Dry Ingredients
Gradually mix the dry ingredient mixture into the wet ingredients until just combined. Avoid overmixing, as this can lead to dense cookies. The dough should come together nicely while still looking slightly moist and fluffy, ensuring a perfect texture for the salted caramel cookies.
Step 6: Fold in Caramel and Optional Chips
Gently fold in 1 cup of caramel chips and, if desired, ½ cup of optional chocolate chips until they are evenly dispersed throughout the dough. This step creates gooey caramel pockets in your cookies, complementing the rich flavors beautifully.
Step 7: Scoop and Space Dough
Using a cookie scoop or tablespoon, drop rounded balls of dough onto your prepared baking sheets, ensuring they are spaced at least 2 inches apart. This spacing allows for even spreading during baking, giving your salted caramel cookies crispy edges and a chewy center.
Step 8: Add Flaky Sea Salt
Before placing the baking sheets in the oven, sprinkle each cookie dough ball with a pinch of flaky sea salt. This finishing touch enhances the sweet-salty contrast that makes these salted caramel cookies so irresistible, adding flavor and visual appeal.
Step 9: Bake to Perfection
Bake in the preheated oven for 10-12 minutes, watching closely until the edges of the cookies turn golden brown while the centers remain soft. Remember, they will continue to cook slightly after removal from the oven, so it’s better to slightly under-bake for that chewy texture.
Step 10: Cool Cookies
Once baked, allow the cookies to cool on the baking sheet for 5 minutes before transferring them to a wire rack. This cooling period helps them set and enhances their delicious chewy centers while still warm, making your salted caramel cookies truly divine!
What to Serve with Irresistible Bakery-Style Salted Caramel Cookies
As you dive into the blissful experience of these sweet and salty delights, consider pairing them with matching flavors and textures that elevate your dessert moment.
-
Cold Glass of Milk: A classic choice, creamy milk balances the sweetness and enhances the gooey caramel goodness of the cookies.
-
Rich Espresso: The bold coffee flavor cuts through the sweetness, making each bite even more indulgent while providing a cozy ambiance.
-
Vanilla Ice Cream: Melting vanilla ice cream with warm cookies creates a delightful contrast of temperatures, elevating your taste buds with every scoop.
-
Chocolate Sauce Drizzle: A warm drizzle of decadent chocolate sauce adds a touch of elegance; it’s truly irresistible alongside the caramel-filled cookies.
-
Fruit Salad: A refreshing mix of berries and citrus adds a burst of freshness, complementing the richness of the salted caramel in a delightful way.
-
Cheesecake Bites: For a luxurious twist, serve miniature cheesecake bites for a creamy, velvety contrast against the crunchy, chewy cookies.
-
Herbal Tea: A fragrant herbal tea, like chamomile or mint, offers a soothing balance, providing tranquility after the rich indulgence of the cookies.
-
Sea Salt Caramel Sauce: Drizzling some extra sea salt caramel sauce on top will enhance the flavors and add an extra touch of extravagance.
Expert Tips for Irresistible Salted Caramel Cookies
-
Brown the Butter: Browning the butter before mixing adds a rich, nutty flavor. Let it cool to room temperature for the best texture before incorporating.
-
Don’t Overmix: To maintain that tender chewiness, mix the dough just until combined. Overmixing can lead to dense cookies.
-
Use Softened Butter: Always ensure your butter is at room temperature for the right consistency. Cold butter can lead to flat cookies that don’t rise properly.
-
Customize Thoughtfully: Feel free to add chocolate chips or nuts, but keep an eye on ratios to preserve the balance of sweet and salty in your salted caramel cookies.
-
Proper Storage: Store your cookies in an airtight container at room temperature to keep them moist and chewy, perfect for enjoying later.
How to Store and Freeze Salted Caramel Cookies
Room Temperature: Keep your salted caramel cookies in an airtight container at room temperature for up to 7 days. This will help retain their soft, chewy texture while keeping them conveniently accessible.
Fridge: If you prefer a longer shelf life, you can store the cookies in the fridge for up to 2 weeks. Just ensure they’re in an airtight container to prevent them from drying out.
Freezer: For longer storage, freeze your salted caramel cookies for up to 3 months. Place them in a single layer in a freezer-safe container or bag, separated by parchment paper to prevent sticking.
Reheating: To enjoy your cookies warm, reheat frozen cookies in a preheated oven at 350°F (175°C) for about 5-7 minutes, or until warmed through. This revives that delicious gooeyness once again!
Make Ahead Options
These Salted Caramel Cookies are perfect for meal prep enthusiasts! You can prepare the cookie dough up to 24 hours in advance by mixing all the ingredients and storing the dough in an airtight container in the refrigerator. If you’re looking to extend your prep even further, you can freeze the uncooked dough balls for up to 3 months. Just scoop the dough onto the baking sheets, freeze until solid, then transfer to a freezer bag. When you’re ready to bake, simply place frozen dough balls on a baking sheet and add a couple of extra minutes to your baking time. This way, you can enjoy freshly baked, gooey Salted Caramel Cookies any night of the week with minimal effort!
Salted Caramel Cookie Variations
Feel free to sprinkle some creativity into your baking and make these cookies uniquely yours!
-
Nuts: Add a handful of toasted pecans or walnuts for a delightful crunch and nutty flavor. This adds an enjoyable texture that’s sure to please.
-
Spice It Up: Incorporate warm spices like cinnamon or a hint of espresso powder for a cozy depth of flavor. You might even find a new favorite!
-
Sandwich Style: Create sandwich cookies by using caramel sauce to fill two cookies together. This turns indulgence up a notch for a fun treat.
-
Chocolate Lovers: Mix in dark or white chocolate chips for an extra rich layer of sweetness. You can even swirl melted chocolate in the dough before baking.
-
Gluten-Free: Substitute all-purpose flour with a gluten-free flour blend for a deliciously inclusive dessert. Your gluten-free friends will thank you!
-
Dairy-Free: Swap regular butter for vegan butter and use dairy-free chocolate chips to make this cookie accessible for those with dietary restrictions.
-
Fruity Twist: Add dried fruit like cranberries or cherries for a surprising burst of flavor that complements the caramel beautifully. It’s a fun and fruity take on a classic cookie.
-
More Salt: If you’re a fan of that sweet-salty combination, add a sprinkle of flaky sea salt on top before baking for an extra punch of flavor.
These variations will keep your salted caramel cookies fresh and exciting each time you bake them. For more delightful ideas, consider trying these Kitchen Sink Cookies or indulging in a slice of Caramel Brownie Cheesecake for a surprising twist!
Salted Caramel Cookies Recipe FAQs
What type of flour should I use for Salted Caramel Cookies?
You can use all-purpose flour, which provides great structure for these cookies. If you’re looking for a gluten-free option, I recommend using a gluten-free flour blend. Make sure to check the packaging for a good substitute; some blends perform better than others.
How long do Salted Caramel Cookies last when stored?
These cookies can be kept in an airtight container at room temperature for up to 7 days. If you refrigerate them, they can last about 2 weeks. Just remember to keep them sealed tightly to maintain their moist and chewy texture.
Can I freeze Salted Caramel Cookies, and if so, how?
Absolutely! You can freeze your salted caramel cookies for up to 3 months. To do this, allow the cookies to cool completely, then lay them out in a single layer on a baking sheet. Freeze them for a few hours and transfer them to a freezer-safe container or bag, ensuring to separate layers with parchment paper to prevent sticking. When you’re ready to enjoy, simply reheat them in a preheated oven at 350°F (175°C) for about 5-7 minutes to restore their gooey goodness.
How can I prevent my cookies from spreading too much when baking?
To avoid spreading, ensure your butter is softened, not melted, during mixing. Also, check that you’re using the correct measurements for flour and sugar—too little flour can lead to flatter cookies. It’s also a good idea to chill the dough for about 30 minutes before baking; this helps solidify the fats and control spread in the oven.
Are these cookies suitable for people with nut allergies?
Great question! The basic recipe is nut-free, but if you decide to add nuts for extra flavor and texture, such as pecans or walnuts, they won’t be suitable for those with nut allergies. Always check for allergies in your guests; you can make delicious variations without nuts while still keeping that signature sweet and salty flavor.
Decadent Salted Caramel Cookies That Melt in Your Mouth
Ingredients
Equipment
Method
- Preheat your oven to 350°F (175°C) and line baking sheets with parchment paper.
- In a mixing bowl, whisk together the flour, baking soda, and salt until combined.
- Cream the softened butter, granulated sugar, and brown sugar until light and fluffy, about 2-3 minutes.
- Beat in the eggs one at a time, then mix in the vanilla extract.
- Gradually mix the dry ingredients into the wet ingredients until just combined.
- Fold in the caramel chips and optional chocolate chips until evenly dispersed.
- Drop rounded balls of dough onto the prepared baking sheets, spaced at least 2 inches apart.
- Sprinkle each dough ball with a pinch of flaky sea salt before baking.
- Bake for 10-12 minutes until edges are golden, but centers remain soft.
- Cool the cookies on the baking sheet for 5 minutes before transferring to a wire rack.
Leave a Reply