
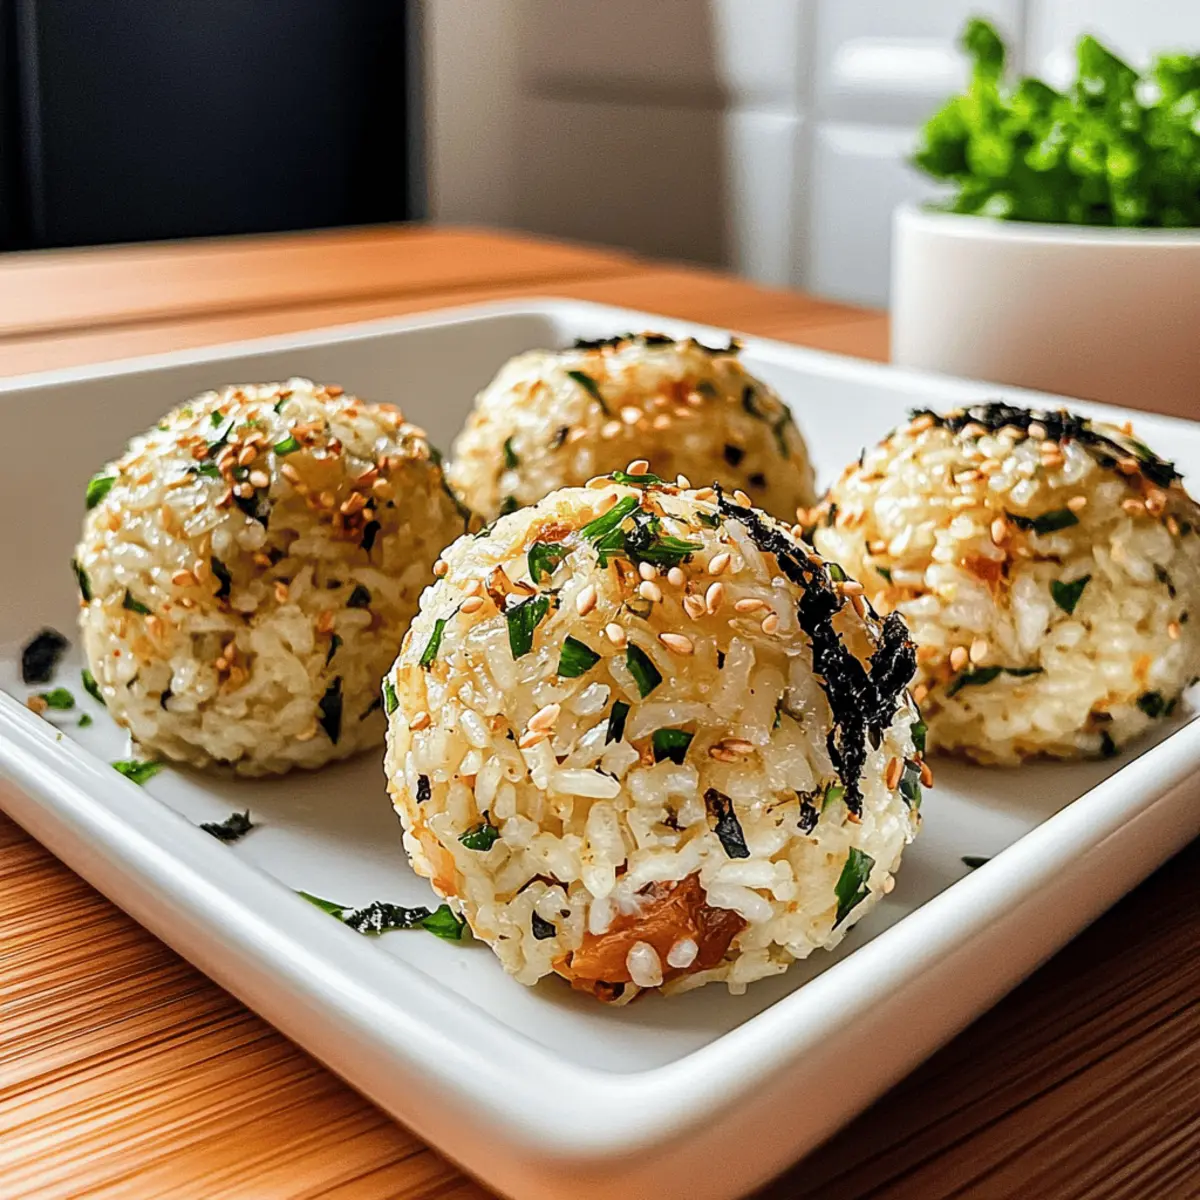
As I rifled through my pantry, a realization hit me—sometimes the simplest ingredients can create something extraordinary. That’s how I stumbled upon the idea for these Customizable Korean Rice Balls, or Jumeokbap. These delightful bites are more than just a meal; they’re a canvas for creativity! With a myriad of filling options like tuna, bulgogi, or kimchi, each rice ball can be uniquely yours. They make for an enticing snack or a nutritious lunchbox staple that’s quick to prepare and easy to store. Plus, they’re gluten-free with the right substitutions! Intrigued by how these versatile globes of flavor can brighten up your dining adventures? Let’s dive into this culinary journey!
Why Try Korean Rice Balls Today?
Endless customization: You’ll love how these Korean rice balls let your imagination run wild with countless filling options! Whether you crave savory tuna or spicy kimchi, there’s something for everyone.
Quick and easy: Whip these up in just a few steps—perfect for busy days when you need a delicious, home-cooked meal without the fuss.
Health meets taste: With gluten-free options and nutrient-rich rice varieties, these rice balls are as good for you as they are delightful to eat.
Perfect for sharing: Make them a part of your next picnic or bento box, and watch them disappear in a flash! Pair them with delicious sides like pickled radish or even try them alongside Chilli Beef Rice for a delightful spread.
Family-friendly: A fun activity for kids and adults alike, get everyone involved in making their own versions! You might also explore the flavors of Greek Turkey Meatballs as a variation for dinner.
Korean Rice Balls Ingredients
For the Rice
• Short-Grain Rice – Provides the essential stickiness, ensuring your Korean rice balls hold their shape beautifully.
• Sesame Oil – Adds a delightful nutty aroma; feel free to substitute with light vegetable or olive oil if needed.
• Salt – Essential for enhancing the flavor; don’t skip this for authentic taste!
For the Filling Options
• Canned Tuna – Great protein source; mix with mayonnaise for a creamier texture if desired.
• Bulgogi Beef – A burst of savory umami richness; finely chopping helps with an even mix.
• Kimchi – Brings a spicy and tangy kick; make sure to squeeze out excess liquid before mixing.
• Cooked Chicken – A versatile filling option; season with soy sauce for added flavor depth.
Additional Ingredients
• Roasted Seaweed Flakes (Gim) – Infuses umami and ocean-like flavor; nori sheets can be a substitute.
• Sesame Seeds – Adds a lovely crunch and nuttiness; optional but highly recommended for texture.
• Soy Sauce – Deepens the overall flavor; opt for low-sodium to keep it a healthier choice.
• Gochugaru (optional) – Provides a touch of heat and vibrant color; skip it for a milder experience.
Feel inspired to create your own Korean Rice Balls filled with your favorite ingredients!
Step‑by‑Step Instructions for Korean Rice Balls
Step 1: Cook the Rice
Rinse 2 cups of short-grain rice under cold water until the water runs clear, then soak for 30 minutes. Cook the rice according to package instructions, usually by steaming or boiling until sticky, about 15-20 minutes. Once the rice is cooked, allow it to cool slightly. You want it warm but not steaming, perfect for mixing.
Step 2: Flavor the Rice
While the rice is still warm, drizzle in 1 tablespoon of sesame oil and sprinkle ½ teaspoon of salt over the top. Using a rice spatula, gently fold the oil and salt into the rice, ensuring it’s well incorporated. The rice should glisten with the oil, adding a rich aroma that will enhance your Korean rice balls’ flavor.
Step 3: Prepare the Filling
Choose your favorite filling—whether it’s canned tuna mixed with mayonnaise, seasoned bulgogi, tangy kimchi, or cooked chicken. In a mixing bowl, combine your chosen filling with your preferred ingredients. Make sure the filling is packed with flavor, and if using any vegetables like chopped carrots or spinach, mix them in thoroughly.
Step 4: Combine Ingredients
Carefully add the prepared filling to the flavored rice. Toss in some roasted seaweed flakes, a sprinkle of sesame seeds, and a dash of soy sauce if desired. Gently mix the rice and filling together until evenly distributed, being careful not to mash the rice. The mixture should look colorful and appetizing, with distinct pockets of your filling.
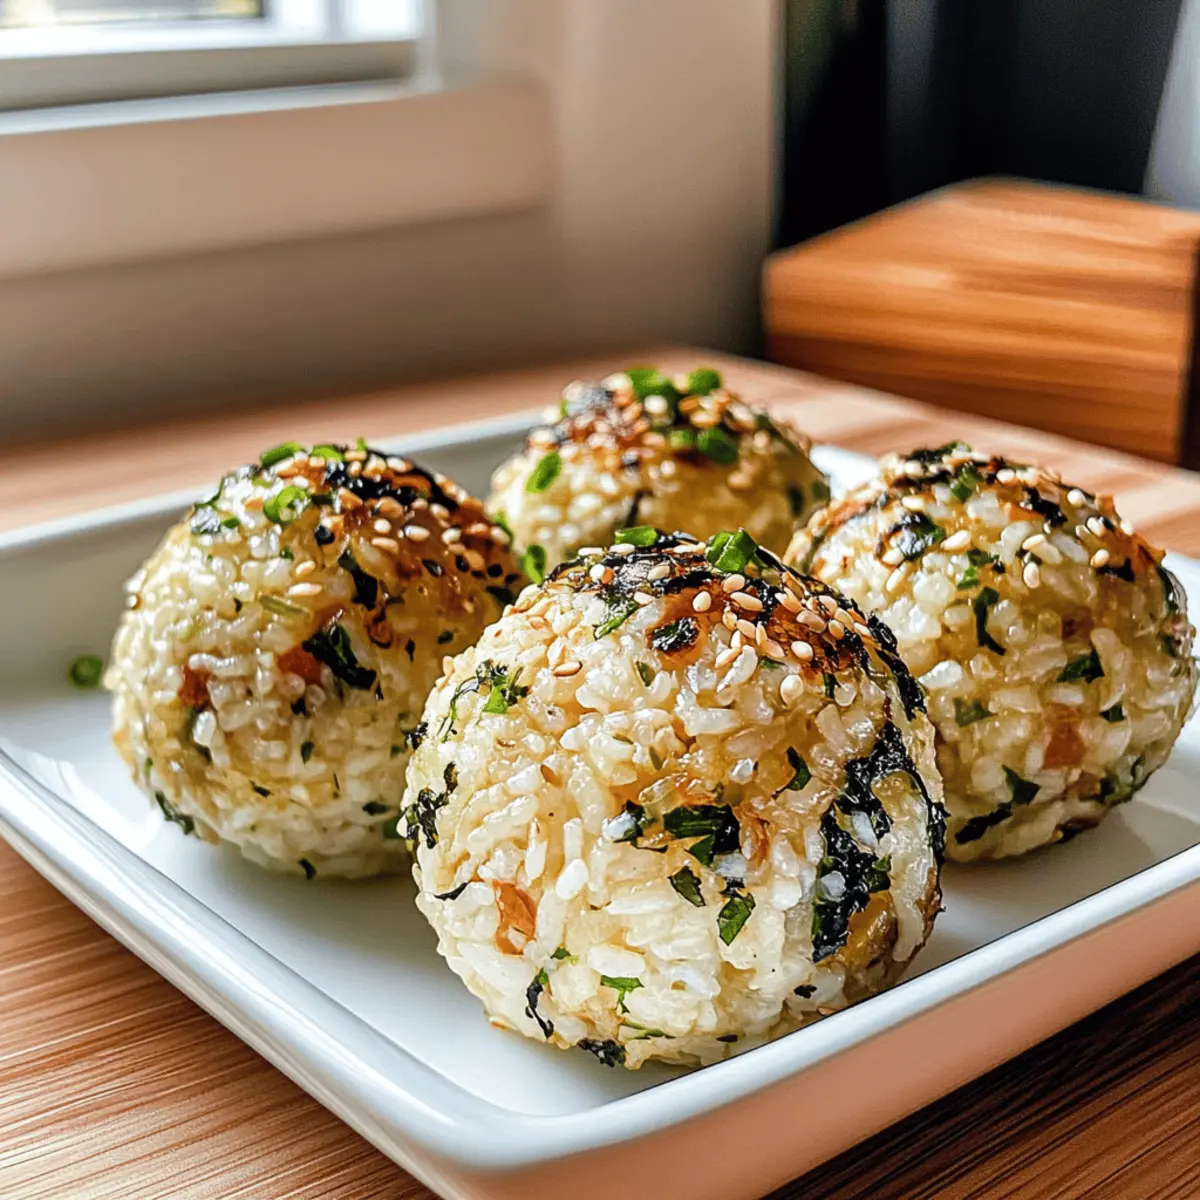
Step 5: Shape the Rice Balls
To form the Korean rice balls, wet your hands with water or sesame oil to prevent sticking. Take about ¼ cup of the rice mixture and gently press it between your palms, forming a compact ball shape. Aim for a firm yet slightly loose texture that holds together without becoming dense. Repeat this process until all the mixture is shaped into delightful rice balls.
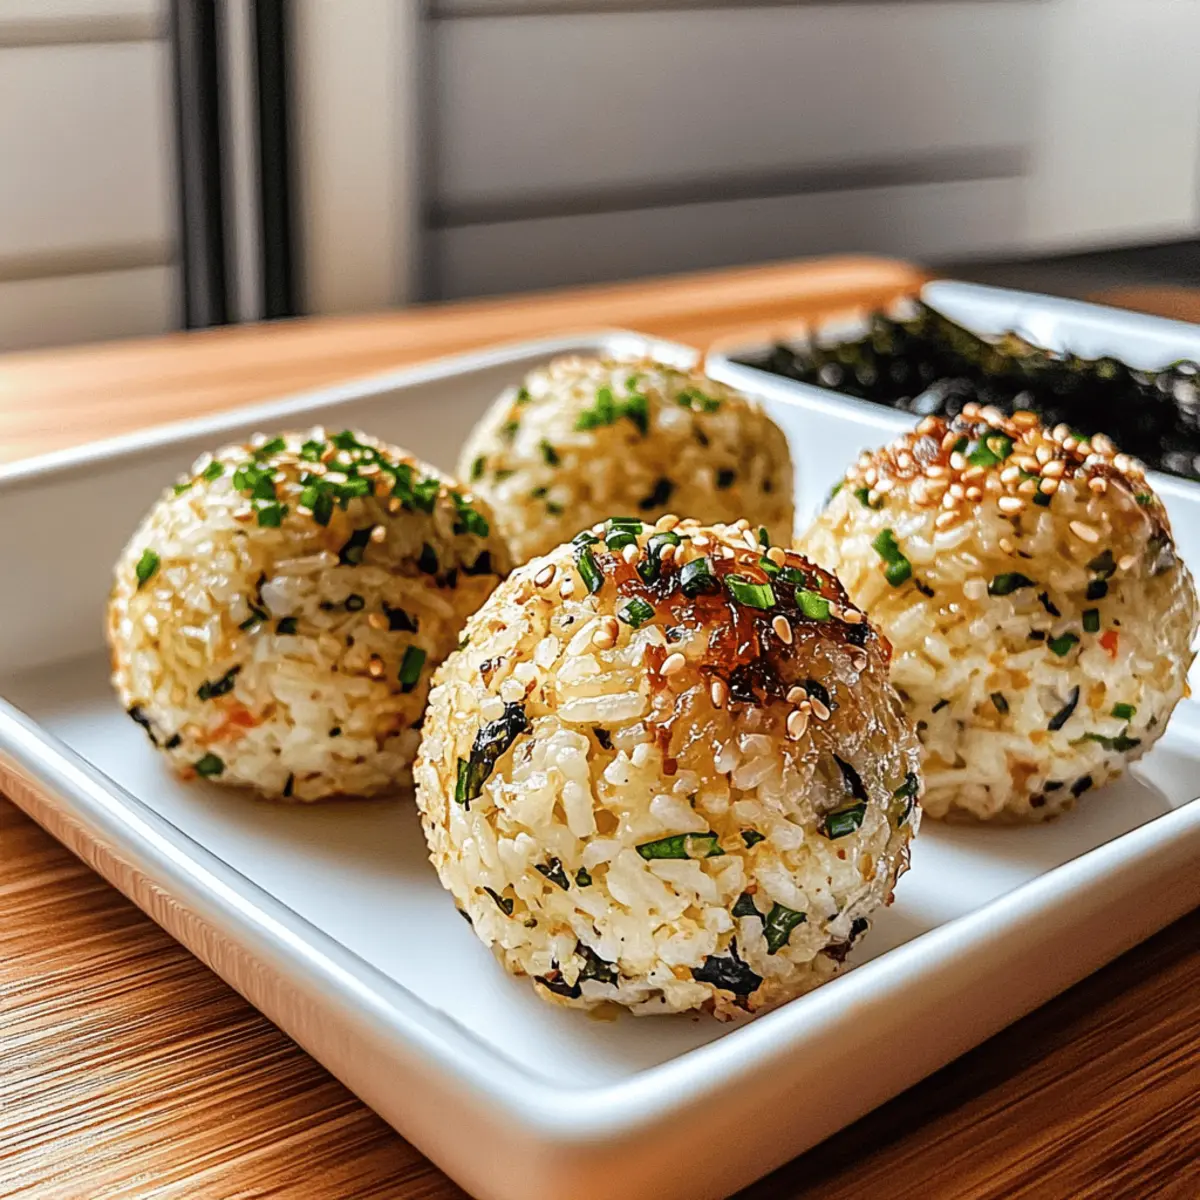
Step 6: Serve or Store
Your Korean rice balls are now ready! Enjoy them immediately while they’re warm and fresh, or wrap each rice ball individually in plastic wrap for later. They can be stored in the refrigerator for up to 24 hours or frozen for up to a month. If storing, reheat gently in the microwave or steam to preserve moisture before enjoying again.
What to Serve with Korean Rice Balls
These delightful rice creations can elevate any meal, offering a celebration of flavor and texture that invites pairing.
-
Pickled Radish: The tanginess cuts through the richness of the rice balls, refreshing your palate with each bite.
-
Boiled Eggs: These creamy, protein-packed gems add a satisfying balance to the chewy bites, making each meal more filling.
-
Fresh Fruit Salad: Bright, juicy pieces of fruit provide contrast and sweetness, complementing the savory goodness of your rice balls.
-
Spicy Dipping Sauce: A zesty mix of soy sauce, chili, and sesame oil enhances the flavors, inviting boldness to every bite.
-
Crunchy Vegetable Sticks: Sliced cucumbers, carrots, or bell peppers add a refreshing crunch, offering a delightful textural contrast. Incorporating these into your meal elevates the overall dining experience.
-
Green Tea: This soothing drink pairs beautifully, helping to cleanse the palate while enhancing the meal with its lightness.
-
Kimchi: For a flavor punch, serve with a side of kimchi; it adds spiciness and an exciting depth that pairs perfectly with the rice balls.
-
Miso Soup: A warm bowl of miso soup rounds out the meal, providing a cozy, savory element that complements the rice.
-
Sesame Noodles: Light yet flavorful, these noodles introduce an Asian twist, bringing balance to the meal with a delightful contrast.
-
Chocolate Mochi: End the meal on a sweet note with chewy, sweet chocolate mochi; a fun dessert that resonates with rice-based delights.
Korean Rice Balls Variations & Substitutions
Feel free to let your culinary creativity shine by customizing your Korean rice balls to suit your tastes!
- Brown Rice: Swap short-grain rice with brown rice for a healthier alternative that adds a delicious nutty flavor.
- Vegetable Medley: Mix in finely chopped carrots, zucchini, or spinach to amp up the nutrition and add vibrant color.
- Vegan Delight: Use plant-based fillings such as seasoned tofu or sautéed mushrooms for a tasty vegan version.
- Spicy Kick: Incorporate chopped jalapeños or a drizzle of sriracha for an extra layer of heat, elevating the flavor profile.
- Savory Duplication: Try filling them with bulgogi beef for that rich umami flavor or think outside the box with spicy tuna!
- Crunch Factor: Coat the rice balls in crushed nuts or seeds for an extra crunchy texture that complements the chewiness of the rice.
- Pickled Surprise: Add a small amount of pickled vegetables inside for a delightful tang that contrasts beautifully with the warm rice.
- Seaweed Swap: Don’t have roasted seaweed flakes? Use crushed nori instead, or even sprinkle in some wasabi for an unexpected twist.
With these variations, you can craft a dish that reflects your unique tastes and dietary needs, ensuring that every bite is a delightful celebration of flavors!
Make Ahead Options
These Korean Rice Balls are perfect for busy home cooks looking to save time during the week! You can prepare the rice and filling up to 24 hours in advance. Simply cook the rice, season it with sesame oil and salt, and combine it with your chosen filling—like seasoned tuna or kimchi. Store the mixture in an airtight container in the refrigerator. When you’re ready to enjoy, shape the rice balls and serve immediately for that fresh, delicious taste! This prep-ahead strategy not only simplifies your meal planning but ensures your Korean Rice Balls remain just as tasty and satisfying, ready to delight your family whenever they need a quick snack or meal.
Expert Tips for Korean Rice Balls
Warm Rice: Ensure the rice is warm but not steaming when mixing; this helps the ingredients meld and makes shaping easier.
Moisten Hands: Keep your hands wet with water or sesame oil to prevent the rice mixture from sticking while shaping the balls.
Gentle Pressing: When forming balls, press gently but firmly to maintain a light texture—too much pressure can make them dense.
Filling Surprise: For added excitement, stuff your filling in the center of a flattened rice scoop, creating a delightful surprise when bitten into.
Crispy Option: For a crunchy twist, coat the rice balls in panko breadcrumbs and air-fry at 375°F for about 10 minutes for a delicious crispy finish.
How to Store and Freeze Korean Rice Balls
Fridge: Store rice balls in an airtight container, individually wrapped in plastic wrap, for up to 24 hours to maintain freshness.
Freezer: Freeze rice balls in a single layer on a baking sheet, then transfer to a freezer-safe bag for up to 1 month. Ensure they are wrapped securely to prevent freezer burn.
Reheating: To reheat, use low microwave power or steam gently to preserve moisture and texture. Enjoy the delightful flavors of your homemade Korean rice balls at any time!
Make-Ahead: Prepare them ahead for busy days; just follow the storage tips for a quick and satisfying meal whenever you need it.
Korean Rice Balls (Jumeokbap) Recipe FAQs
How do I choose the right rice for Korean rice balls?
For the best texture, I recommend using short-grain rice, which provides that necessary stickiness to hold the rice balls together. If you prefer a healthier option, you can mix short-grain with some brown rice or even multigrain rice; just remember that it may alter the final flavor and texture slightly.
What’s the best way to store leftover rice balls?
Store your rice balls in an airtight container, individually wrapped in plastic wrap, to keep them fresh for up to 24 hours in the refrigerator. If you plan to enjoy them later, they can be frozen for up to 1 month. To freeze, place them in a single layer on a baking sheet, then transfer to a freezer bag once they’re solid. This step helps prevent them from sticking together.
Can I reheat frozen Korean rice balls?
Absolutely! When you’re ready to enjoy your frozen rice balls, take them out and reheat gently. I recommend using a microwave on low power or steaming them for just a few minutes. This method will help them stay moist and maintain their delightful texture.
What should I do if my rice balls fall apart?
If your rice balls aren’t holding their shape, it could be due to the rice being too dry or not sticky enough. Make sure the rice is warm during mixing to help it bind. You can also try adding a bit more sesame oil or a little water to help with the stickiness. Press firmly but gently when shaping—this keeps them light without becoming dense.
Are there any dietary considerations for Korean rice balls?
Certainly! If you’re looking for gluten-free options, ensure that the soy sauce is labeled gluten-free and replace sesame oil with light vegetable oil if necessary. Plus, you can customize the fillings to accommodate any allergies; for instance, use plant-based proteins for a vegan option. Just be mindful of any fillings that could contain allergens, like fish or soy.
Can I make these rice balls ahead of time?
Yes! These Korean rice balls are perfect for make-ahead meals. Prepare them a day before and store them properly as mentioned above—this way, you’ll have a quick, delicious meal ready to go for picnics, lunches, or quick snacks anytime!

Delicious Korean Rice Balls: A Flavorful Snack Adventure
Ingredients
Equipment
Method
- Rinse 2 cups of short-grain rice under cold water until clear, soak for 30 minutes. Cook according to package instructions for about 15-20 minutes and let cool slightly.
- While warm, drizzle 1 tablespoon of sesame oil and sprinkle ½ teaspoon of salt, folding gently with a spatula until well incorporated.
- Choose your filling and mix together in a bowl, ensuring full flavor. Add any desired vegetables.
- Combine filling with the flavored rice along with seaweed flakes, sesame seeds, and soy sauce until evenly mixed.
- Wet hands to shape rice balls. Take ¼ cup of the mixture, press gently to form a ball. Repeat until finished.
- Serve warm or wrap each ball for storage. Refrigerate for 24 hours or freeze for 1 month.
Leave a Reply