
The sweet aroma of ripe bananas and luscious strawberries fills the kitchen as I prepare to whip up a delightful Strawberry Banana Pudding Dream. This no-bake dessert is my secret weapon for impressing guests and indulging my family—what better way to satisfy a sweet craving? With just 20 minutes of prep time, it’s a total lifesaver for those hectic evenings when you still want something special, and the best part? It’s vegetarian and can easily be made gluten-free! Each spoonful is a creamy delight, filled with a playful mix of fruit and layers that dance on your palate. Are you ready to create a dessert that will have everyone asking for seconds?
Why is this dessert a must-try?
Creamy, Dreamy Layers: The Strawberry Banana Pudding Dream is a silky delight, balancing layers of whipped topping and rich pudding that melt in your mouth.
No-Bake Convenience: Whip it up in just 20 minutes, perfect for spontaneous gatherings or a refreshing dessert after a busy day.
Fruity Freshness: Fresh strawberries and bananas bring vibrant colors and flavors, making each bite feel like a celebration of summer.
Flexible Ingredients: Easily customize with gluten-free options or explore different fruits for a unique twist. For another fruity treat, check out these Strawberry Cheesecake Cinnabon rolls!
Crowd-Pleaser: This dessert is sure to bring smiles to the table, appealing to both kids and adults alike. It’s the sweet ending everyone will love!
Strawberry Banana Pudding Dream Ingredients
For the Base
• Vanilla Wafers – Provides base structure and slight sweetness. Substitution: Use gluten-free wafers for a gluten-free option.
• Bananas (6 to 8, sliced) – Adds sweetness and texture; essential for layering. Tip: Use ripe bananas for the best flavor.
• Strawberries (1 container) – Adds fresh fruity flavor and vibrant color. Tip: Can use thawed frozen strawberries, but ensure they are drained well.
For the Pudding Mixture
• Milk (2 cups) – Helps to create the creamy pudding texture. Any milk can be used; dairy-free milk works as a substitute for a vegan option.
• French Vanilla Pudding (5 oz box) – Base for the pudding layer that brings flavor and thickness. Tip: Instant pudding works best for this recipe.
• Cream Cheese (8 oz package) – Adds creaminess and richness to the pudding mix. Substitution: Greek yogurt or dairy-free cream cheese for lighter options.
• Sweetened Condensed Milk (14 oz can) – Sweetens and enriches the pudding. No direct substitution; however, homemade sweetened condensed milk can be used.
For the Topping
• Whipped Topping (12 oz container) – Provides lightness and a fluffy finish. Substitution: Whipped coconut cream for a non-dairy option.
Step‑by‑Step Instructions for Strawberry Banana Pudding Dream
Step 1: Prepare the Pudding Mixture
In a mixing bowl, combine 8 oz of softened cream cheese and a 14 oz can of sweetened condensed milk. Using an electric mixer, blend on medium speed for about 2-3 minutes until smooth and creamy, ensuring there are no lumps. Add a 5 oz box of French vanilla pudding mix and 2 cups of milk, continuing to mix until completely combined. The mixture should be thick and luscious.
Step 2: Layer the Base
In a large dish or trifle bowl, start layering the dessert by placing vanilla wafers at the bottom. Arrange the wafers evenly to create a sturdy foundation. This base will provide structure and sweetness to your Strawberry Banana Pudding Dream. Next, slice 6 to 8 ripe bananas and evenly distribute half of them over the wafers, followed by half of a container of fresh strawberries.
Step 3: First Pudding Layer
Pour half of the creamy pudding mixture over the layered fruit, ensuring it covers the bananas and strawberries completely. Use a spatula to spread it evenly, giving a smooth finish. Let the pudding gently soak into the fruit and wafers, creating a delightful blend of flavors. You should see the fresh fruit snugly encased in pudding.
Step 4: Repeat the Layers
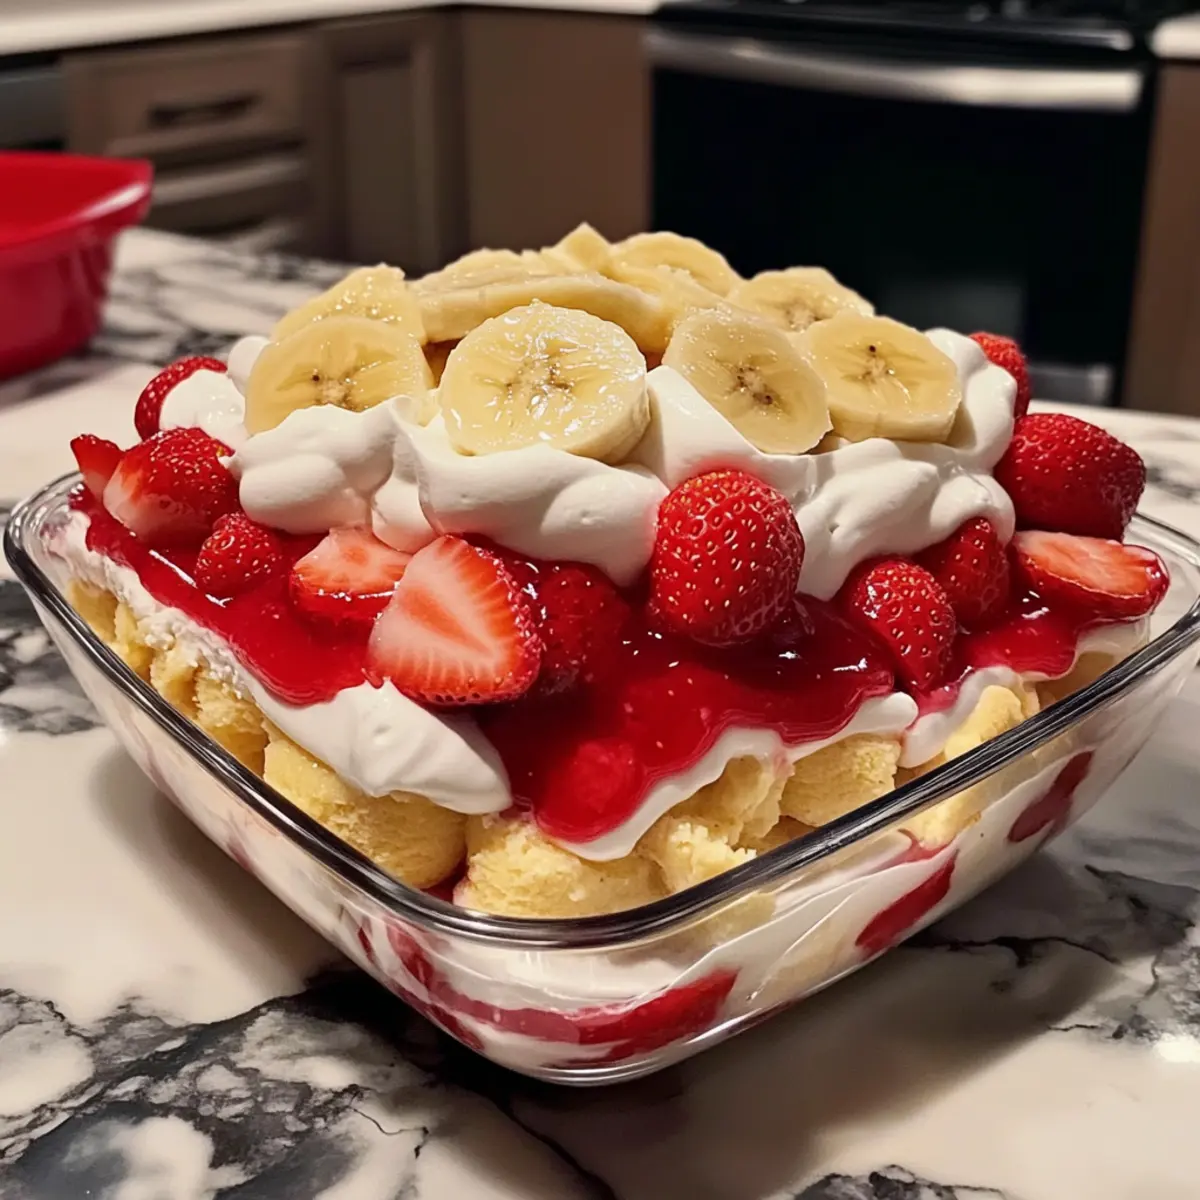
Now, repeat the layering process by adding more vanilla wafers on top of the pudding. Follow with the remaining sliced bananas and strawberries, creating a colorful layer of fruit that pops against the creamy backdrop. Once topped with fruit, pour the rest of the pudding mixture over this second layer. It should be thick and beautifully smooth, ready for the final touch.
Step 5: Add the Whipped Topping
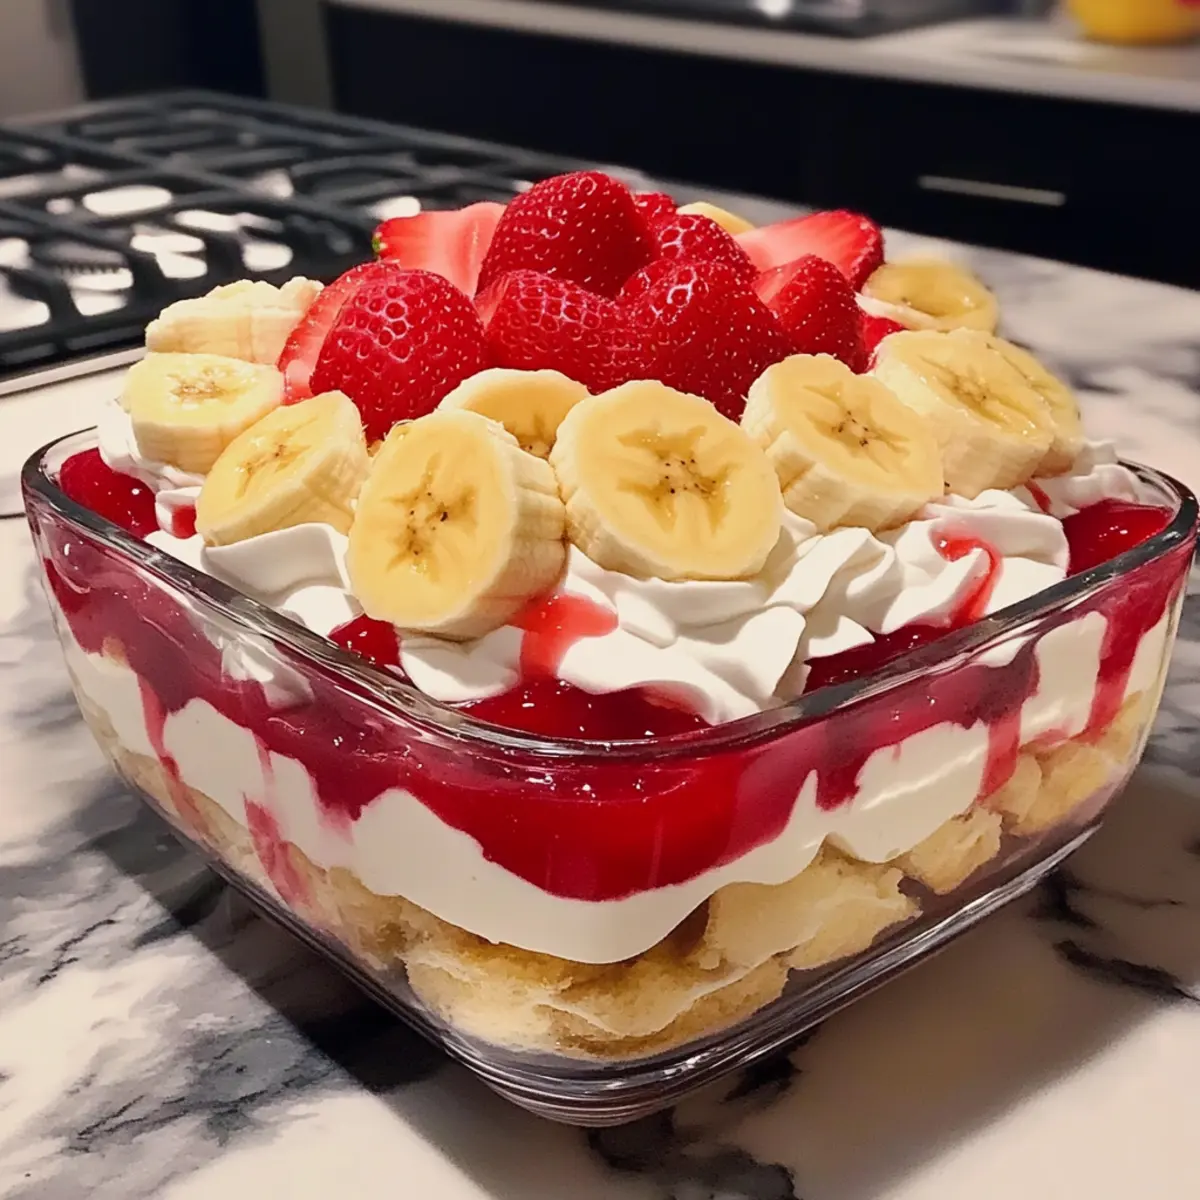
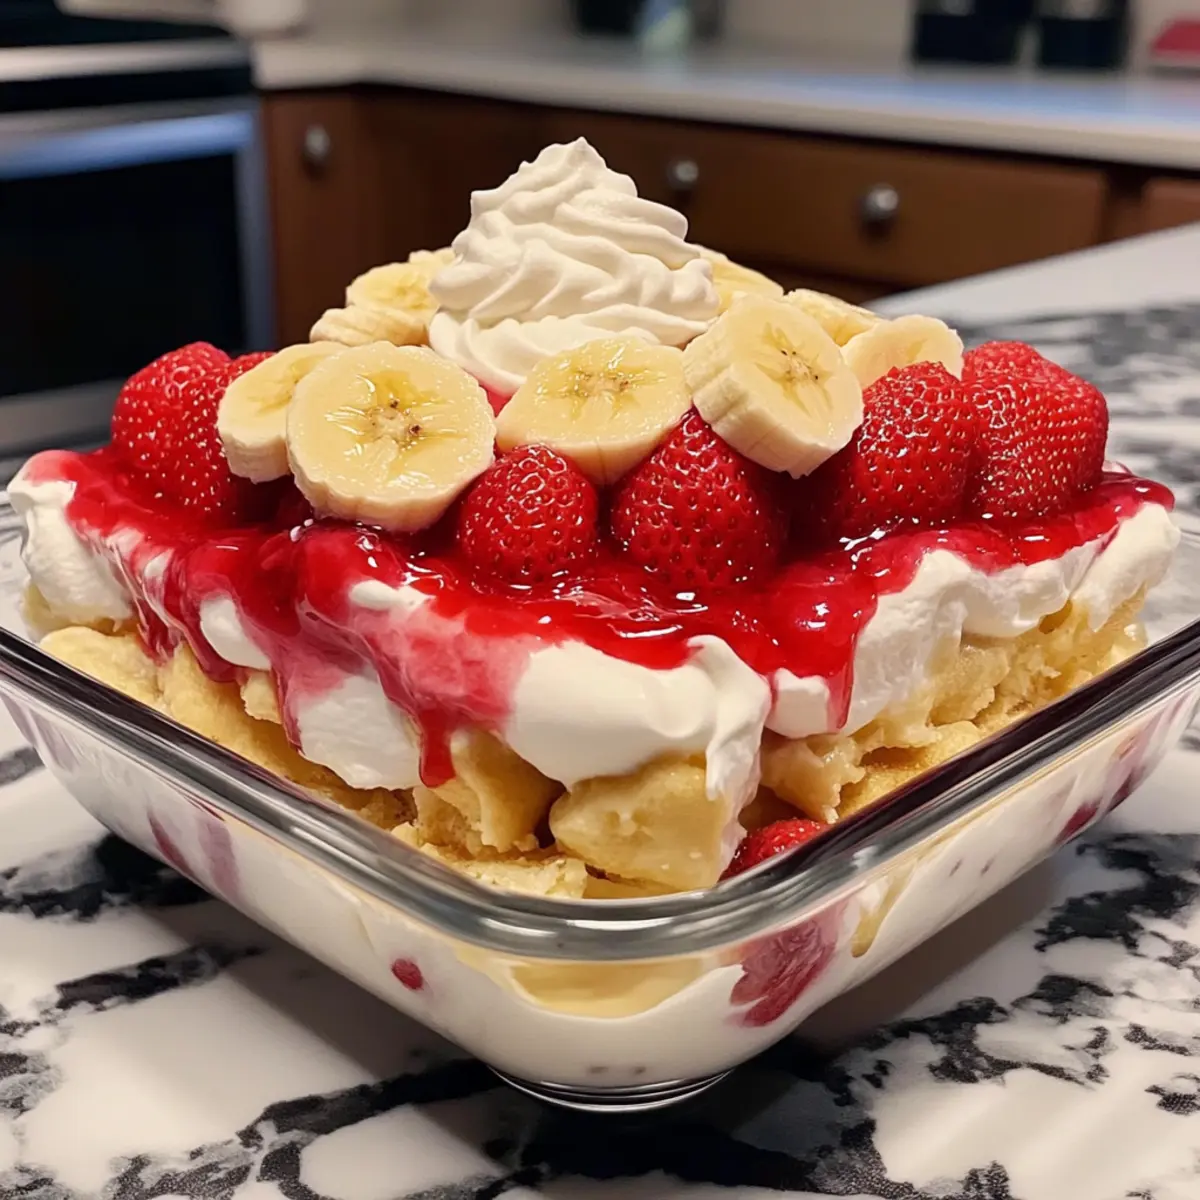
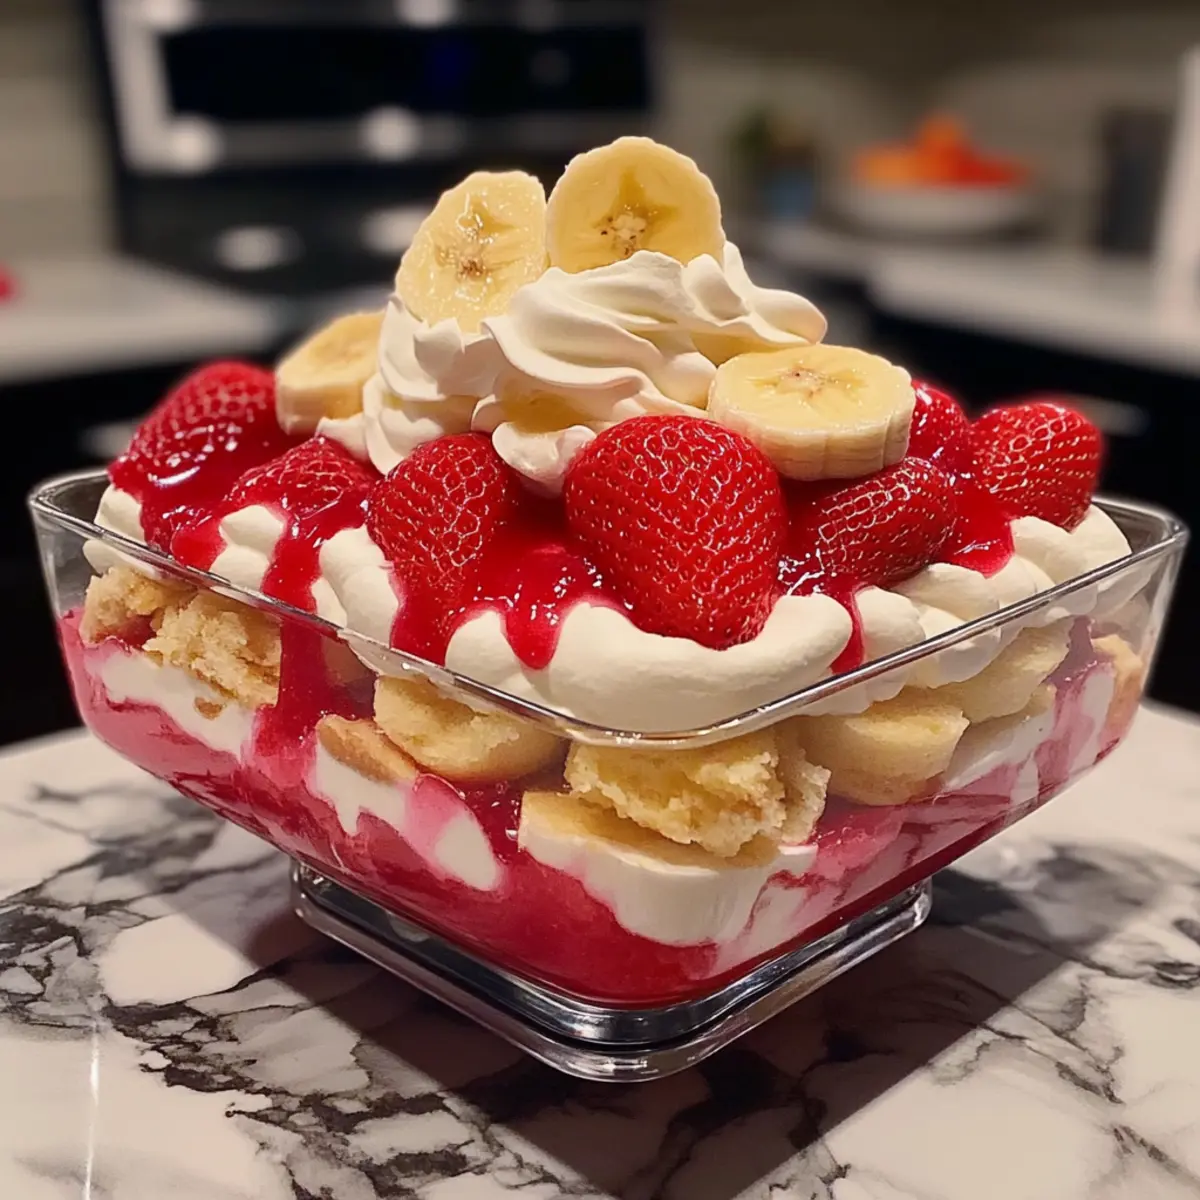
Spread 12 oz of whipped topping over the final pudding layer, gently smoothing it out to cover the creamy goodness completely. This fluffy topping adds lightness and a beautiful aesthetic to your Strawberry Banana Pudding Dream. Use a spatula or the back of a spoon for a seamless finish. If desired, you can create swirls or peaks for added texture.
Step 6: Chill to Perfection
Cover the dessert with plastic wrap or a lid, ensuring it’s airtight to maintain freshness. Refrigerate the Strawberry Banana Pudding Dream for at least 4 hours, or ideally overnight. This chilling time allows the flavors to meld beautifully and the layers to set, resulting in a wonderful treat that is cool and refreshing when served.
How to Store and Freeze Strawberry Banana Pudding Dream
- Fridge: Store the Strawberry Banana Pudding Dream covered in the refrigerator for up to 3 days. Make sure it’s tightly sealed to maintain its freshness and prevent odors from other foods.
- Freezer: While not ideal for this dessert, if you need to freeze it, wrap portions tightly in plastic wrap and foil. It can be stored in the freezer for up to 1 month, but texture may change.
- Reheating: If you choose to freeze, thaw it in the fridge overnight before serving. There’s no need to reheat; enjoy it chilled for the best experience!
- Serving Tips: Remember that fresh fruit tends to deteriorate when frozen, so it’s best to add fresh bananas and strawberries right before serving if you opt for freezing.
Helpful Tricks for Strawberry Banana Pudding Dream
- Chill for Flavor: Refrigerating the Strawberry Banana Pudding Dream for at least 4 hours allows the flavors to meld beautifully, enhancing its taste.
- Use Ripe Fruits: Always select ripe bananas and strawberries; they contribute sweetness and vibrant color, making your dessert more appealing.
- Layer Wisely: Ensure layers are evenly distributed; this creates a balanced dessert and prevents any one ingredient from overpowering the others.
- Prevent Sogginess: If using thawed frozen strawberries, drain them thoroughly to avoid excess moisture that can make your pudding soggy.
- Make Ahead: Preparing the dessert a day in advance not only saves time but also allows the flavors to develop for a richer experience.
What to Serve with Strawberry Banana Pudding Dream
There’s something magical about the sweet aroma of ripe bananas and luscious strawberries; let’s create the perfect meal to enhance your dessert experience.
- Lightly Grilled Chicken: Pair this creamy dessert with succulent grilled chicken for a delightful contrast of flavors, balancing sweetness with savory satisfaction.
- Crispy Fried Plantains: Crispy, sweet plantains provide an exciting textural contrast, making every bite of your main course and dessert more enjoyable.
- Fresh Citrus Salad: A vibrant salad with oranges and grapefruits can bring a bright, refreshing touch that complements the richness of the pudding wonderfully.
- Chocolate Mousse: Luxurious chocolate mousse can be served alongside, creating a pleasing harmony with the fruity freshness of the pudding.
- Fruit Punch: A chilled fruit punch will provide an inviting, fruity refreshment that enhances the bright flavors of your dessert, making it a joyful occasion.
- Vanilla Ice Cream: A scoop of creamy vanilla ice cream adds an extra layer of indulgence, beautifully contrasting with the soft pudding layers and fresh fruit.
- Minted Watermelon Salad: Refreshing and sweet, this salad lightens up the meal while enhancing the fruity notes of the pudding—perfect for summer gatherings!
- Sparkling Lemonade: A delightful sparkler like lemonade can cleanse the palate, allowing the flavors of the pudding to shine even brighter.
- Brownie Bites: Rich and fudgy brownie bites make for a delightful combination of textures and tastes when enjoyed alongside the light and fluffy pudding.
- Lemon Tart: The tangy kick of a lemon tart provides a nice contrast, prompting a delightful flavor explosion when paired with the sweet layers of your masterpiece.
Make Ahead Options
This Strawberry Banana Pudding Dream is a fantastic dessert to prepare ahead, saving you precious time on busy days! You can assemble the pudding layers and refrigerate it for up to 24 hours before serving, which allows all the flavors to meld beautifully. To prep in advance, layer the vanilla wafers, bananas, and strawberries in your dish, then pour the pudding mixture over. Cover it tightly to maintain its freshness and prevent any browning of the fruit. When you’re ready to enjoy, add the whipped topping just before serving for that perfect fluffy finish. With this make-ahead strategy, you’ll have a delightful dessert with minimal effort when it’s time to impress!
Strawberry Banana Pudding Dream Variations
Feel free to make this delightful dessert your own with these fun and easy twists!
-
Fruity Mix: Add other fruits, like blueberries or peaches, to create a medley of flavors. This fruity addition not only enhances the taste but also adds vibrant colors to your dish.
-
Chocolate Delight: Swap in chocolate pudding instead of French vanilla for a decadent twist. Chocolate and bananas are a match made in heaven, and this variation is sure to satisfy any chocolate lover’s cravings.
-
Nutty Crunch: Consider sprinkling crushed nuts or granola between layers for an added crunch. The texture contrast will elevate the experience, providing a wonderful surprise with each bite.
-
Dairy-Free Option: Use dairy-free cream cheese and plant-based milk for a tasty vegan version. This keeps the rich creaminess while accommodating dietary preferences.
-
Zesty Citrus: Add a hint of lemon or orange zest to brighten up the pudding mix. The citrus flavor beautifully complements the sweetness of bananas and strawberries.
-
Coconut Twist: Incorporate shredded coconut into the layers for a tropical feel. This subtle addition brings a delightful chewiness and enhances the overall flavor.
-
Layered Parfaits: Serve in individual glasses for an elegant presentation. Layering in clear cups showcases the beautiful colors and textures, making it perfect for special occasions or gatherings.
-
Ultimate Decadence: Drizzle caramel or chocolate sauce over the whipped topping for an indulgent finish. This extra step transforms your dessert into a luxurious treat that will impress any guest.
For more fruity inspiration, you might also enjoy these delicious Strawberry Matcha Basque or explore the delightful Strawberry Cheesecake Cinnabon rolls for another fun way to indulge your sweet tooth!
Strawberry Banana Pudding Dream Recipe FAQs
What type of bananas should I use in the Strawberry Banana Pudding Dream?
Absolutely! For the best flavor, use ripe bananas that are slightly speckled. They’re the sweetest and provide the perfect texture for your layers. Avoid bananas that are overly ripe or have dark spots all over, as these can make the pudding taste too mushy.
How long can I store the Strawberry Banana Pudding Dream in the fridge?
You can enjoy your delectable dessert for up to 3 days when stored in the refrigerator. Just ensure it’s tightly covered to keep it fresh and free from other odors. This makes it a perfect make-ahead treat for gatherings!
Can I freeze the Strawberry Banana Pudding Dream?
While it’s best enjoyed fresh, you can freeze this dessert if needed. Wrap portions tightly in plastic wrap and aluminum foil to prevent freezer burn, and store for up to 1 month. To thaw, place it in the fridge overnight before serving—don’t reheat it, as it’s best served chilled!
What should I do if the pudding mixture looks lumpy?
Very! If your mixture has lumps, don’t worry! Just whisk it vigorously or use an electric mixer on medium speed to break them apart. Additionally, make sure to mix the pudding with the milk thoroughly before combining it with the cream cheese and sweetened condensed milk.
Is the Strawberry Banana Pudding Dream safe for people with gluten allergies?
Yes, it can be! To make this dessert gluten-free, simply substitute traditional vanilla wafers with gluten-free wafers. You can also use gluten-free pudding mixes to ensure the entire dish remains safe for those avoiding gluten.
Can pets safely eat any ingredients in the Strawberry Banana Pudding Dream?
It’s always best to avoid sharing this dessert with pets. While bananas and strawberries can be safe in small amounts, ingredients like cream cheese and sweetened condensed milk can upset their stomachs. Stick to pet-friendly snacks for our furry friends!
Strawberry Banana Pudding Dream: A Creamy No-Bake Delight
Ingredients
Equipment
Method
- In a mixing bowl, combine 8 oz of softened cream cheese and a 14 oz can of sweetened condensed milk. Using an electric mixer, blend on medium speed for about 2-3 minutes until smooth and creamy, ensuring there are no lumps. Add a 5 oz box of French vanilla pudding mix and 2 cups of milk, continuing to mix until completely combined. The mixture should be thick and luscious.
- In a large dish or trifle bowl, start layering the dessert by placing vanilla wafers at the bottom. Arrange the wafers evenly to create a sturdy foundation. This base will provide structure and sweetness. Next, slice 6 to 8 ripe bananas and evenly distribute half of them over the wafers, followed by half of a container of fresh strawberries.
- Pour half of the creamy pudding mixture over the layered fruit, ensuring it covers the bananas and strawberries completely. Use a spatula to spread it evenly, giving a smooth finish. Let the pudding gently soak into the fruit and wafers, creating a delightful blend of flavors.
- Now, repeat the layering process by adding more vanilla wafers on top of the pudding. Follow with the remaining sliced bananas and strawberries, creating a colorful layer of fruit that pops against the creamy backdrop. Once topped with fruit, pour the rest of the pudding mixture over this second layer.
- Spread 12 oz of whipped topping over the final pudding layer, gently smoothing it out to cover the creamy goodness completely. Use a spatula or the back of a spoon for a seamless finish.
- Cover the dessert with plastic wrap or a lid, ensuring it's airtight to maintain freshness. Refrigerate the Strawberry Banana Pudding Dream for at least 4 hours, or ideally overnight.
Leave a Reply