
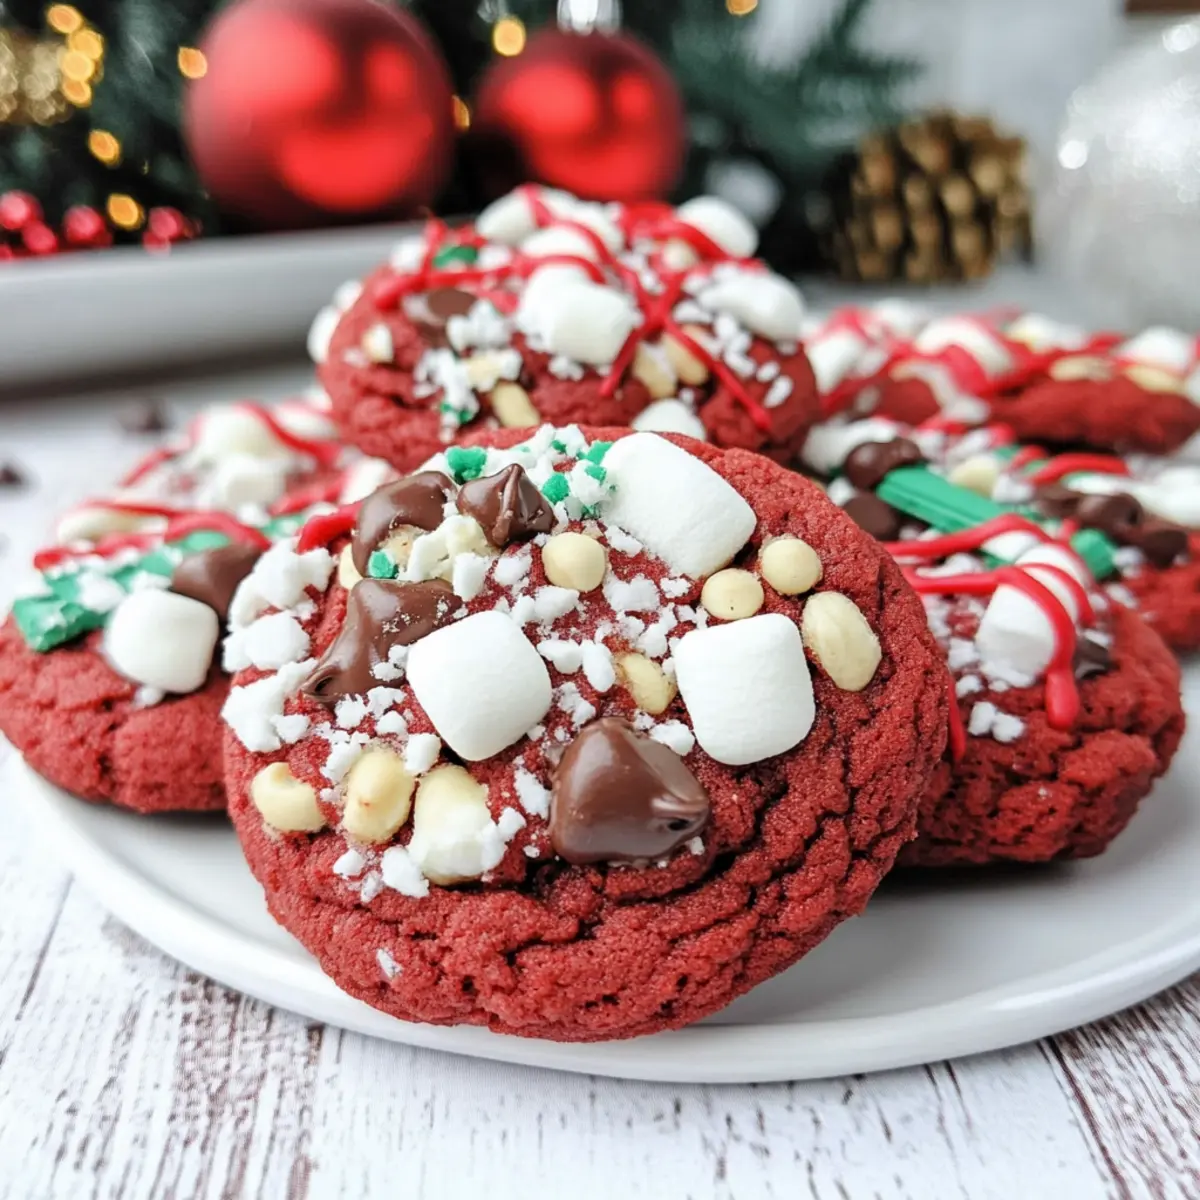
As I unwrapped the festive red cellophane, a captivating aroma wafted through the air, instantly igniting memories of cozy holiday traditions and laughter-filled kitchens. Enter Santa’s Cookies – these Red Velvet Christmas Cookies are not just a treat; they’re a celebration waiting to be shared. Featuring the delightful duo of semi-sweet chocolate chips and mini marshmallows, they embody a soft, chewy texture that’s perfect for festive gatherings. What I love most is how they’re both quick to whip up and versatile enough to accommodate any dietary needs with gluten-free options. Each cookie, adorned with sweet icing and a splash of creativity, is an open invitation for fun in the kitchen, especially with little ones eager to decorate their masterpieces. Are you ready to spread some holiday cheer with a batch of these delightful cookies?
Why Are Santa’s Cookies a Must-Make?
Festive Fun: These Santa’s Cookies are a joyful addition to your holiday celebrations, boasting a vibrant red hue that captures the spirit of the season.
Quick & Easy: The recipe is beginner-friendly, making it perfect for both seasoned chefs and cooking novices alike.
Chewy Goodness: Enjoy the delightful soft center paired with a crisp edge, offering an irresistible texture with every bite.
Customizable Options: With options for gluten-free alternatives, you can cater to everyone’s dietary preferences without sacrificing flavor.
Family-Friendly Activity: Get the kids involved! Decorating these cookies with icing and toppings is a fantastic way to make joyful memories in the kitchen.
Perfect Pair: Serve them with hot chocolate or milk for the ultimate cozy treat that will have everyone clamoring for more. For those who love baking cookies, you might also enjoy trying Red Velvet Crinkle or Christmas Kitchen Sink cookies for even more festive delights!
Santa’s Cookies Red Velvet Ingredients
• Get ready to bake these vibrant treats!
For the Dough
- Unsalted Butter – Provides richness and structure; stick with unsalted to control the saltiness.
- Granulated Sugar – Adds sweetness; try substituting with light brown sugar for a hint of caramel.
- Large Eggs – Binds the ingredients; make sure they’re at room temperature for best mixing.
- Vanilla Extract – Enhances flavor; almond extract can provide a festive twist.
- Super Red Food Coloring – Achieves the signature vivid red of Santa’s Cookies.
- Unsweetened Cocoa Powder – Balances the sweetness and adds depth; no substitutes needed here!
- Baking Soda – Essential for leavening and creating that chewy texture; always check the expiration date.
- Cornstarch – Helps contribute to chewiness and soft texture, reducing spread during baking.
- Kosher Salt – Enhances flavor; omit if using salted butter.
- Cake Flour – Ensures a tender crumb; gluten-free flour can work as a substitute.
- All-Purpose Flour – Provides structure; feel free to swap with gluten-free flour if needed.
For the Mix-ins
- Semi-sweet Chocolate Chips – Adds richness and sweetness; milk or dark chocolate chips are great swaps too.
- Mini Marshmallows – Offer a delightful texture and sweetness; can cut regular marshmallows if that’s what you have on hand.
For Toppings
- Crushed Candy Canes – An optional and festive topping that adds a minty crunch; crush them in a bag for an easy mess-free experience.
- Icing – Mix powdered sugar with milk for a drizzle; cream cheese can be used for a richer alternative.
Baking these Santa’s Cookies Red Velvet Christmas Cookies will surely brighten up your holiday festivities!
Step‑by‑Step Instructions for Santa’s Cookies Red Velvet Christmas Cookies
Step 1: Preheat the Oven
Begin your festive baking by preheating your oven to 350°F (175°C). This essential step ensures even baking for your beautiful Santa’s Cookies Red Velvet Christmas Cookies. While the oven warms up, gather all your ingredients on the counter, to create a smooth workflow as you get ready to whip up this delightful dough.
Step 2: Cream the Butter and Sugars
In a large mixing bowl, combine the cubed unsalted butter and granulated sugar. Using an electric mixer, cream the mixture on medium speed until it becomes light and fluffy, which should take about 2-3 minutes. The fluffiness indicates that the butter is well-aerated, ensuring a soft, rich texture in your cookies.
Step 3: Incorporate the Eggs and Vanilla
Next, add large eggs to the creamed mixture, one at a time, beating well after each addition to ensure they are fully integrated. Follow with the vanilla extract, blending until everything is smooth and creamy. This step adds moisture and flavor, crafting the perfect base for your Santa’s Cookies.
Step 4: Mix in Color and Cocoa
Now, stir in the super red food coloring and unsweetened cocoa powder until fully combined. This vibrant mixture not only enhances the beautiful color of your cookies but also introduces a rich chocolate flavor. Make sure there are no streaks of cocoa powder remaining for a uniform dough.
Step 5: Combine Dry Ingredients
In a separate bowl, whisk together baking soda, cornstarch, cake flour, and all-purpose flour with kosher salt. Gradually add these dry ingredients to your wet mixture, mixing on low speed until just combined. This helps to build structure while keeping your Santa’s Cookies wonderfully soft and chewy when baked.
Step 6: Fold in Chocolate Chips and Marshmallows
Once your dough is formed, gently fold in the semi-sweet chocolate chips and mini marshmallows using a spatula. This adds delightful sweetness and fun texture, making your Santa’s Cookies Red Velvet Christmas Cookies a true holiday treat. Ensure an even distribution throughout the dough for the best taste in every bite.
Step 7: Chill the Dough
To achieve thicker cookies that maintain their shape, scoop the dough into balls using a cookie scoop and place them on a baking sheet. Cover with plastic wrap and chill in the refrigerator for at least 30 minutes. Chilling is a crucial step to prevent over-spreading during baking and guarantees that delicious soft center.
Step 8: Bake the Cookies
Remove the chilled dough from the refrigerator and arrange the balls on a prepared baking sheet lined with parchment paper, spacing them about 2 inches apart. Bake in the preheated oven for 10-12 minutes, or until the edges look set, but the centers may still appear slightly soft. This is key to achieving that perfect chewy texture.
Step 9: Cool and Decorate
Once baked, take the cookies out and allow them to cool on the baking sheet for 5 minutes before transferring them to a wire rack to cool completely. Decorate with sweet icing and optional toppings like crushed candy canes for a festive flair. Let your creativity shine as you make each batch uniquely yours!
What to Serve with Santa’s Cookies Red Velvet Christmas Cookies
As the aromas of these festive delights fill the air, you might find yourself wondering what else would harmonize beautifully with their sweetness.
-
Cold Milk: The classic pairing, cool milk perfectly balances the rich flavors of red velvet, creating a nostalgic experience.
-
Hot Chocolate: Nothing screams festive like a warm cup of hot chocolate, complete with melting marshmallows for that cozy touch.
-
Festive Peppermint Ice Cream: Serve alongside a scoop of peppermint ice cream for a refreshing twist that enhances the holiday spirit.
-
Coffee or Espresso: A rich cup of coffee offers a delightful contrast, enhancing the chocolate notes in the cookies while soothing the sweet tooth.
-
Gingerbread Men: Serve with classic gingerbread cookies to create a delightful dessert platter, inviting a variety of flavors and textures.
-
Fruit Salad: A fresh fruit salad adds a burst of color and tartness, lightening the sweetness of the cookies and providing a refreshing crunch.
-
Cheesecake Bites: These creamy, bite-sized treats create a rich contrast to the soft chewiness of Santa’s Cookies, elevating your dessert table indulgence.
-
Christmas Punch: A festive holiday punch, with notes of cranberry and citrus, pairs beautifully, adding a refreshing touch that complements the cookies’ flavors.
-
Chocolate Fondue: For a fun interactive dessert, serve fondue with fruits and pretzels, allowing guests to dip into the rich chocolate atmosphere.
Let your holiday gatherings shine as you offer these delightful pairings alongside your Santa’s Cookies Red Velvet Christmas Cookies!
Expert Tips for Santa’s Cookies
-
Room Temperature Eggs: Ensure your large eggs are at room temperature for better emulsification, creating a smoother dough for your Santa’s Cookies Red Velvet Christmas Cookies.
-
Chill the Dough: Don’t skip the chilling step! It prevents the cookies from spreading too much, helping maintain that lovely chewy texture everyone loves.
-
Mix-Ins Galore: Feel free to switch up the chocolate chips or add nuts for extra flavor. Get creative with toppings to make each batch unique!
-
Check Baking Time: Keep an eye on your cookies as they bake; they should be set around the edges but slightly soft in the center for optimal chewiness.
-
Proper Storage: Store your cookies in an airtight container to keep them fresh for 1-2 weeks, or freeze for up to 3 months to save some festive joy for later!
Make Ahead Options
These Santa’s Cookies Red Velvet Christmas Cookies are perfect for busy holiday schedules! You can prepare the cookie dough up to 3 days in advance and store it in an airtight container in the refrigerator. Just scoop the dough into balls, cover tightly, and refrigerate until you’re ready to bake. This not only saves you time when you’re ready to indulge but also helps the flavors meld beautifully. When it’s time to bake, simply preheat your oven, place the chilled dough on a baking sheet, and bake as instructed. You’ll have fresh, delicious cookies that are just as delightful as if you had baked them that day—perfect for unexpected guests and festive gatherings!
Santa’s Cookies Red Velvet Christmas Variations
Feel free to play with the recipe and make it truly yours, adding layers of flavor that your family will adore!
-
Gluten-Free: Substitute cake and all-purpose flours with a gluten-free blend. Your cookies will be just as delicious, ensuring everyone can join in on the joy.
-
Nutty Delight: Incorporate chopped pecans or walnuts for a lovely crunchy texture. This adds a wonderful nuttiness that pairs beautifully with the soft cookies.
-
Minty Fresh: Add a few drops of peppermint extract to the dough for a refreshing winter twist. The cool mint flavor will open up a new dimension of holiday cheer.
-
Chocolate Lovers: Swap semi-sweet chocolate chips for dark chocolate or even white chocolate. Each version presents a delightful new taste experience for everyone!
-
Caramel Drizzle: Top your cookies with a rich caramel sauce or drizzle melted caramel over the icing. This addition gives a lavish sweet contrast to the red velvet base.
-
Fruit Infusion: Fold in dried cranberries or cherries for a pop of tartness. Their vibrant color and unique taste will brighten each bite of these festive cookies.
-
Holiday Spices: Enhance the flavor profile by adding a pinch of cinnamon or nutmeg to the dough. These warm spices capture the essence of the holidays beautifully.
-
Decorating Fun: Let creativity flow by using various toppings, like sprinkles or shredded coconut. Involving kids in this can turn baking into a delightful family activity!
For those craving a variety while baking, consider checking out Beer Battered Halibut for a savory twist on delightful food, or explore our festive Christmas Kitchen Sink cookies for another sweet treat!
How to Store and Freeze Santa’s Cookies
Room Temperature: Store Santa’s Cookies in an airtight container for up to 1-2 weeks. This keeps them soft and chewy while preventing them from going stale.
Fridge: For longer freshness, place the cookies in the refrigerator in an airtight container where they can last up to 3 weeks. Just allow them to come to room temperature before serving.
Freezer: You can freeze either baked cookies or unbaked dough balls. For baked cookies, wrap each cookie individually and store in a freezer-safe container for up to 3 months. For the dough, freeze the shaped balls and bake straight from the freezer when craving fresh cookies.
Reheating: To enjoy warm cookies, simply microwave them for 10-15 seconds or place in a preheated oven at 350°F (175°C) for a few minutes. Enjoy the delightful flavors of your Santa’s Cookies Red Velvet Christmas Cookies!
Santa’s Cookies Red Velvet Christmas Cookies Recipe FAQs
What type of butter is best for Santa’s Cookies?
Absolutely! I recommend using unsalted butter for Santa’s Cookies Red Velvet Christmas Cookies. Unsalted allows you to control the salt level in the recipe, ensuring that the sweetness of the cookies shines through beautifully.
How should I store these cookies?
For optimal freshness, store your Santa’s Cookies in an airtight container at room temperature for up to 1-2 weeks. They will remain soft and chewy. If you want them to last longer, refrigerate them for up to 3 weeks; just let them come to room temperature before serving.
Can I freeze Santa’s Cookies dough?
Very! To freeze the dough, scoop it into balls and place them on a baking sheet lined with parchment paper. Freeze until solid, then transfer to a zip-top freezer bag or an airtight container. You can enjoy fresh cookies anytime by baking them directly from the freezer; just add an extra minute or two to the baking time!
Why are my cookies spreading too much?
It’s often due to warm dough. If your dough isn’t chilled before baking, the cookies may spread too thin in the oven. I recommend chilling your dough for at least 30 minutes—trust me, this makes a substantial difference in achieving that chewy center with a crisp edge!
Are these cookies suitable for gluten-free diets?
Absolutely! You can easily adapt Santa’s Cookies Red Velvet Christmas Cookies to be gluten-free by substituting all-purpose flour with a gluten-free flour blend. Make sure the blend includes xanthan gum or add it separately to mimic the texture of the cake flour.
How do I know when my cookies are done baking?
Keep an eye on your cookies as they bake—they should be set around the edges but slightly soft and puffy in the center. This typically takes about 10-12 minutes at 350°F (175°C). Remember, they will continue to firm up as they cool!

Santa's Cookies Red Velvet Christmas Cookies for Festive Joy
Ingredients
Equipment
Method
- Preheat your oven to 350°F (175°C). Gather all your ingredients.
- In a large mixing bowl, cream the cubed unsalted butter and granulated sugar until light and fluffy, about 2-3 minutes.
- Add large eggs, one at a time, and then the vanilla extract, blending until smooth.
- Stir in the super red food coloring and unsweetened cocoa powder until fully combined.
- In a separate bowl, whisk together baking soda, cornstarch, cake flour, all-purpose flour, and kosher salt. Gradually mix into the wet ingredients.
- Fold in the semi-sweet chocolate chips and mini marshmallows until evenly distributed.
- Scoop dough into balls and chill in the refrigerator for at least 30 minutes.
- Arrange dough balls on a prepared baking sheet and bake for 10-12 minutes.
- Cool on the baking sheet for 5 minutes, then transfer to a wire rack to cool completely. Decorate with icing and toppings.
Leave a Reply