
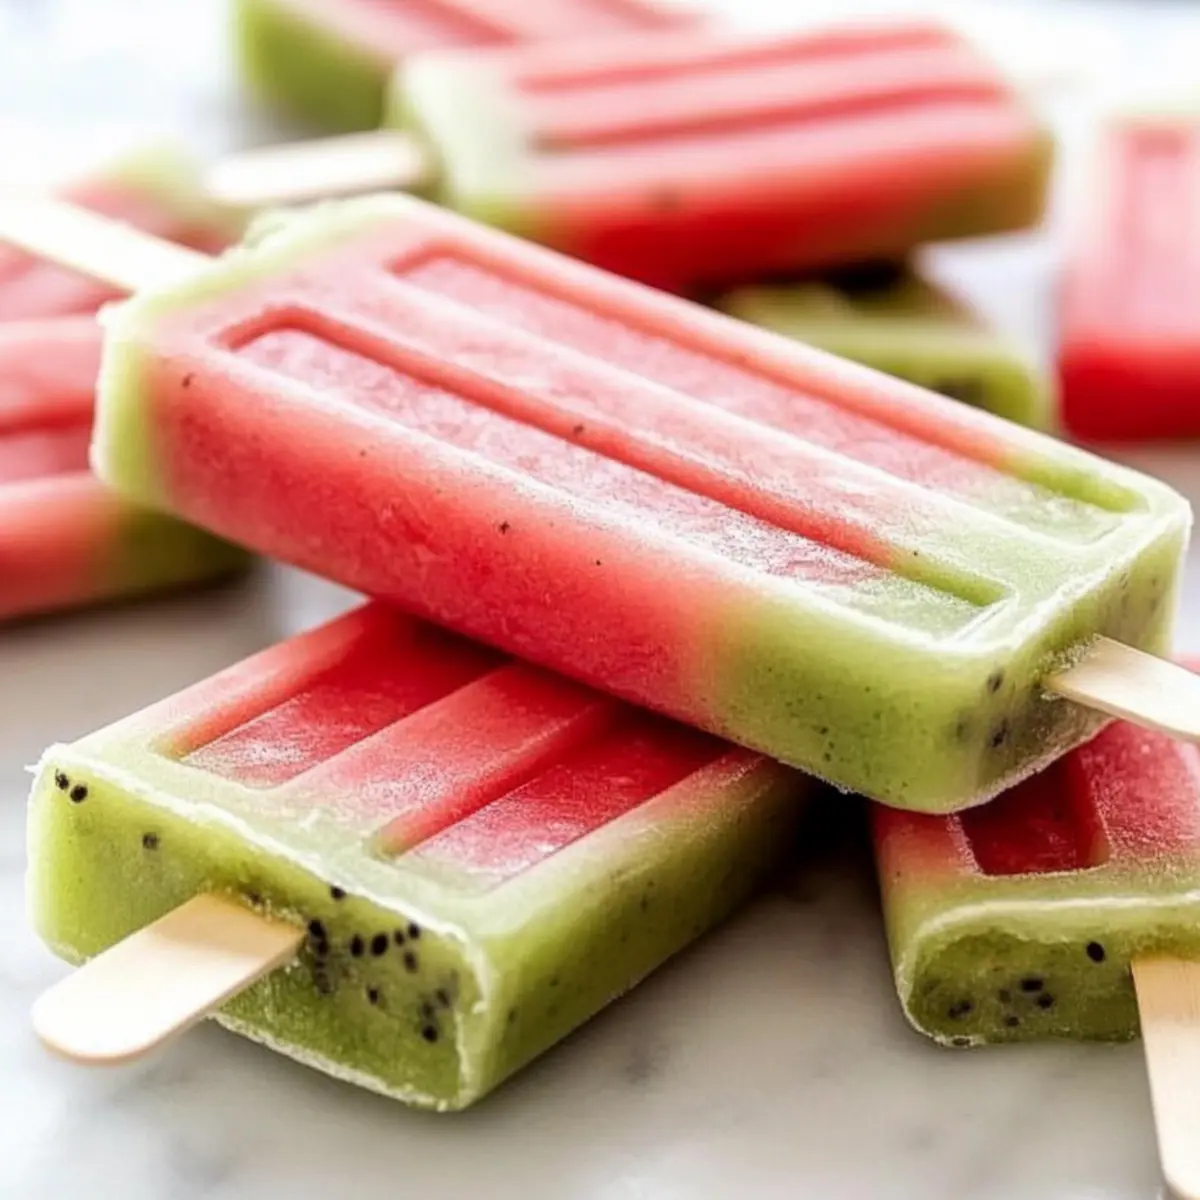
As the sun blazes down and temperatures soar, what could be more delightful than a frozen treat that captures the essence of summer? Enter my Refreshing Watermelon Kiwi Popsicles! This dynamic duo of sweet watermelon and zesty kiwi creates a vibrant snack that’s not just a feast for the eyes but also a guilt-free dessert for both kids and adults alike. With only three simple ingredients and minimal prep time, these popsicles are not only a healthy choice but an absolute breeze to make. Perfect for backyard barbecues or a playful afternoon treat, these popsicles promise to impress and cool everyone down on those hot summer days. Ready to dive into the recipe and beat the heat in style?
Why Are These Popsicles a Must-Try?
Unforgettable Flavor: The combination of juicy watermelon and tart kiwi creates a refreshing taste that’s perfect for summer.
Kid-Friendly Fun: These popsicles are not only easy to make but also a hit with children, making them a delightful addition to any family gathering.
Health-Conscious Snack: With just three ingredients, these treats are a healthier alternative to traditional snacks, offering vitamins A and C without the guilt.
Versatile Options: Feel free to experiment with different fruits like mango or berries for a unique twist. Check out my Watermelon Smoothie Refreshing recipe for more fruity inspiration!
Quick and Easy: With minimal prep time, these popsicles require little effort and can be ready in no time. Enjoy homemade goodness without the fuss!
Watermelon Kiwi Popsicle Ingredients
Unlock the secrets to this delightful summer treat!
For the Popsicles
- 1/2 small seedless watermelon – This versatile ingredient serves as the base flavor and provides a refreshing texture when puréed.
- 4-5 kiwi fruit – These tangy gems add a zesty kick to balance the sweetness of the watermelon.
- 1 tsp honey (or more to taste) – A touch of sweetness to elevate the flavor; you can substitute with maple syrup for a vegan option.
Storage Essentials
- Freezer-safe bags or containers – Ensures your Watermelon Kiwi Popsicles stay fresh and ready for summer snacking.
Enjoy these ingredients and get ready to create your own delicious Watermelon Kiwi Popsicles!
Step‑by‑Step Instructions for Watermelon Kiwi Popsicles
Step 1: Prepare the Watermelon
Begin by cutting the seedless watermelon into large chunks and place them in a blender. Purée until completely smooth, which should give you about 2 cups of vibrant watermelon purée. Pour the purée into a bowl, and enjoy the lovely, refreshing aroma that fills your kitchen!
Step 2: Fill the Popsicle Molds
Carefully pour the watermelon purée into each popsicle mold, filling them about three-quarters full to allow space for the kiwi layer. Gently tap the molds on the counter to remove any air bubbles, ensuring a beautifully layered look. Freeze these filled molds for 30 minutes until the first layer is slightly firm.
Step 3: Prepare the Kiwi Purée
While the watermelon layer freezes, peel and chop the 4-5 kiwi fruits into smaller pieces. Blend the kiwi until smooth, incorporating honey to taste for added sweetness. Aim for about 1 cup of kiwi purée, and bask in the beautiful green color of this tangy layer—perfect for complementing the pops!
Step 4: Layer the Kiwi
Once the watermelon layer has set, carefully remove the molds from the freezer. Pour the kiwi purée over the partially frozen watermelon, filling the molds to the very top. Insert popsicle sticks into each mold, and take a moment to admire the stunning layers of your Watermelon Kiwi Popsicles before returning them to the freezer.
Step 5: Freeze Until Solid
Allow the popsicles to freeze for at least 4 hours, or until they are completely solid and easy to remove. You’ll know they’re ready when they feel firm to the touch. While waiting, you might even want to plan your next batch or decide if you’d like to try other fruity combinations next time!
Step 6: Unmold the Popsicles
To remove the popsicles, quickly dip each mold into a bowl of hot water for about 5 seconds. This gentle heat will help loosen the popsicles without melting them. Carefully pull them out, and relish in the delightful moment of unveiling your gorgeous Watermelon Kiwi Popsicles—just perfect for cooling down on a hot summer day!
Expert Tips for Watermelon Kiwi Popsicles
-
Use Ripe Fruits: Ensure your watermelon and kiwis are fully ripe for the sweetest flavor, which enhances the taste of your Watermelon Kiwi Popsicles.
-
Layer with Care: When filling the molds, freeze the watermelon layer for at least 30 minutes to ensure proper layering and prevent mixing.
-
Sweetness Adjustment: Taste both purées and adjust the honey accordingly. If your watermelon isn’t sweet enough, don’t hesitate to add a little more honey to your popsicles.
-
Creative Variations: Feel free to mix in other fruits like strawberries or mango for a fun twist on your Watermelon Kiwi Popsicles!
-
Storing Tips: Store popsicles in freezer-safe bags for freshness. They taste best if consumed within a week, so share the joy with family and friends!
What to Serve with Watermelon Kiwi Popsicles
These popsicles are the ultimate summer refreshment, and pairing them with complementary flavors elevates your warm-weather gatherings!
-
Coconut Rice Pudding: The creaminess contrasts beautifully with the tartness of the popsicles, creating a delicious balance of flavors. This comfort food ties the tropical theme together perfectly.
-
Minty Fruit Salad: A colorful mix of seasonal fruits tossed with fresh mint enhances the summery vibe while adding vibrant freshness to each bite. Ideal for bringing a touch of brightness to your picnic spread.
-
Lemonade or Iced Tea: Drinks with a hint of citrus or herbal notes refresh the palate, making them a lovely companion to the sweet, fruity popsicles. Serve in pretty glasses for a festive touch.
-
Grilled Chicken Skewers: The savory, smoky flavor of grilled chicken provides a nice counterpoint to the popsicles, making for a balanced meal that satisfies both kids and adults.
-
Chocolate Dipped Pretzels: The salty crunch of pretzels paired with rich chocolate contrasts the popsicles’ refreshing sweetness, perfect for a fun dessert option. These add a playful element to your snack table.
-
Guacamole with Tortilla Chips: The creaminess of guacamole pairs surprisingly well with popsicles, so offer this savory dip to cool down your taste buds between bites. A unique twist that keeps the summer fun going!
Storage Tips for Watermelon Kiwi Popsicles
Freezer: Store your Watermelon Kiwi Popsicles in freezer-safe bags or containers to maintain freshness for up to one week; label them for easy identification.
Reheating: If your popsicles are stuck in the molds, dip them in hot water for about 5 seconds to gently loosen them without melting.
Shelf Life: For the best flavor and texture, enjoy your popsicles within a week of making them; they will start to lose their vibrant taste after that.
Avoid Freezer Burn: Wrap each popsicle tightly with plastic wrap before placing them in the bag or container to prevent freezer burn and preserve their delightful fruity flavor.
Watermelon Kiwi Popsicles Variations
Ready to explore fun twists on your refreshing Watermelon Kiwi Popsicles? Dive into these delightful variations!
-
Berry Blast: Swap kiwi for mixed berries like strawberries or blueberries for a tart burst of flavor. This change creates a colorful, sweet treat that kids will adore.
-
Tropical Twist: Add mango to the mix for a tropical escape! Blend equal parts of mango and kiwi for a luscious, sunny flavor that screams beach vacation.
-
Minty Fresh: Incorporate fresh mint leaves into the kiwi purée for a refreshing herbaceous note. This subtle twist brightens the flavor while giving it a unique flair.
-
Yogurt Layers: Add a layer of yogurt in between the watermelon and kiwi for creaminess. Greek yogurt pairs beautifully with both flavors, making your popsicles extra rich and satisfying.
-
Spicy Kick: For the adventurous, sprinkle a dash of cayenne or chili powder into the watermelon purée. This surprising heat complements the sweetness of the watermelon, adding a fun and zesty twist.
-
Chocolate Drizzle: Before serving, dip the popsicles in melted dark chocolate. Once frozen, it creates a decadent layer that elevates your refreshment into a dessert experience.
-
Nutty Crunch: Sprinkle chopped nuts like almonds or pistachios over the popsicles before freezing to add a satisfying crunch. A little texture goes a long way in these frozen delights!
Feel inspired? Let your creativity run wild and enjoy these fruity, delicious variations. If you loved these popsicles, you may also enjoy my equally refreshing Watermelon Smoothie Refreshing for more summer fun!
Make Ahead Options
These Refreshing Watermelon Kiwi Popsicles are a fantastic option for your busy week! You can prepare the watermelon purée up to 24 hours in advance. Simply blend the watermelon and store the purée in an airtight container in the refrigerator to keep it fresh. The kiwi can also be puréed ahead of time and stored in the fridge for up to 3 days. To make assembly even faster, pour each layer in the molds, freeze until set (about 30 minutes), and then add the next layer. When you’re ready to enjoy, just finish freezing for about 4 hours, and you’ll be rewarded with perfectly delicious popsicles that are just as refreshing as the day you made them!
Watermelon Kiwi Popsicles Recipe FAQs
How do I choose the best watermelon and kiwi?
Absolutely! For the watermelon, look for a seedless variety that feels heavy for its size, with a symmetrical shape and a creamy yellow spot where it rested on the ground—this indicates ripeness. As for the kiwi, select ones that are slightly soft to the touch but not mushy, as this means they’re perfectly ripe and sweet.
How should I store the Watermelon Kiwi Popsicles?
You can keep your Watermelon Kiwi Popsicles in a freezer-safe container or bag to maintain their freshness for up to one week. Make sure to label the container with the date, so you remember when they were made. If you’re not going to eat them right away, it’s best to keep them tightly wrapped to avoid freezer burn!
Can I freeze these popsicles for longer?
Absolutely! While the popsicles are best enjoyed within a week for optimal flavor and texture, you can freeze them for up to three months. Just make sure to wrap each popsicle tightly in plastic wrap before placing them in a freezer-safe container to prevent freezer burn and preserve their delicious fruity taste!
What if my popsicles are hard to remove from the molds?
No worries! If your Watermelon Kiwi Popsicles are sticking to the molds, simply dip them quickly in hot water for about 5 seconds. This will gently loosen them without causing melting. Just make sure not to leave them in the hot water for too long, as it might affect the popsicle’s structure.
Are there any dietary concerns I should be aware of?
Very! This recipe is generally kid-friendly and gluten-free. However, if you or your family members have allergies, ensure that the honey or any substitutes you use are safe for everyone. If you’re accommodating vegan diets, consider using maple syrup or agave nectar in place of honey!
Chill Out with Refreshing Watermelon Kiwi Popsicles
Ingredients
Equipment
Method
- Begin by cutting the seedless watermelon into large chunks and place them in a blender. Purée until completely smooth, which should give you about 2 cups of vibrant watermelon purée.
- Carefully pour the watermelon purée into each popsicle mold, filling them about three-quarters full to allow space for the kiwi layer. Gently tap the molds on the counter to remove any air bubbles.
- While the watermelon layer freezes, peel and chop the 4-5 kiwi fruits into smaller pieces. Blend the kiwi until smooth, incorporating honey to taste for added sweetness.
- Once the watermelon layer has set, carefully remove the molds from the freezer. Pour the kiwi purée over the partially frozen watermelon, filling the molds to the very top.
- Allow the popsicles to freeze for at least 4 hours, or until they are completely solid.
- To remove the popsicles, quickly dip each mold into a bowl of hot water for about 5 seconds. Gently pull them out.
Leave a Reply