
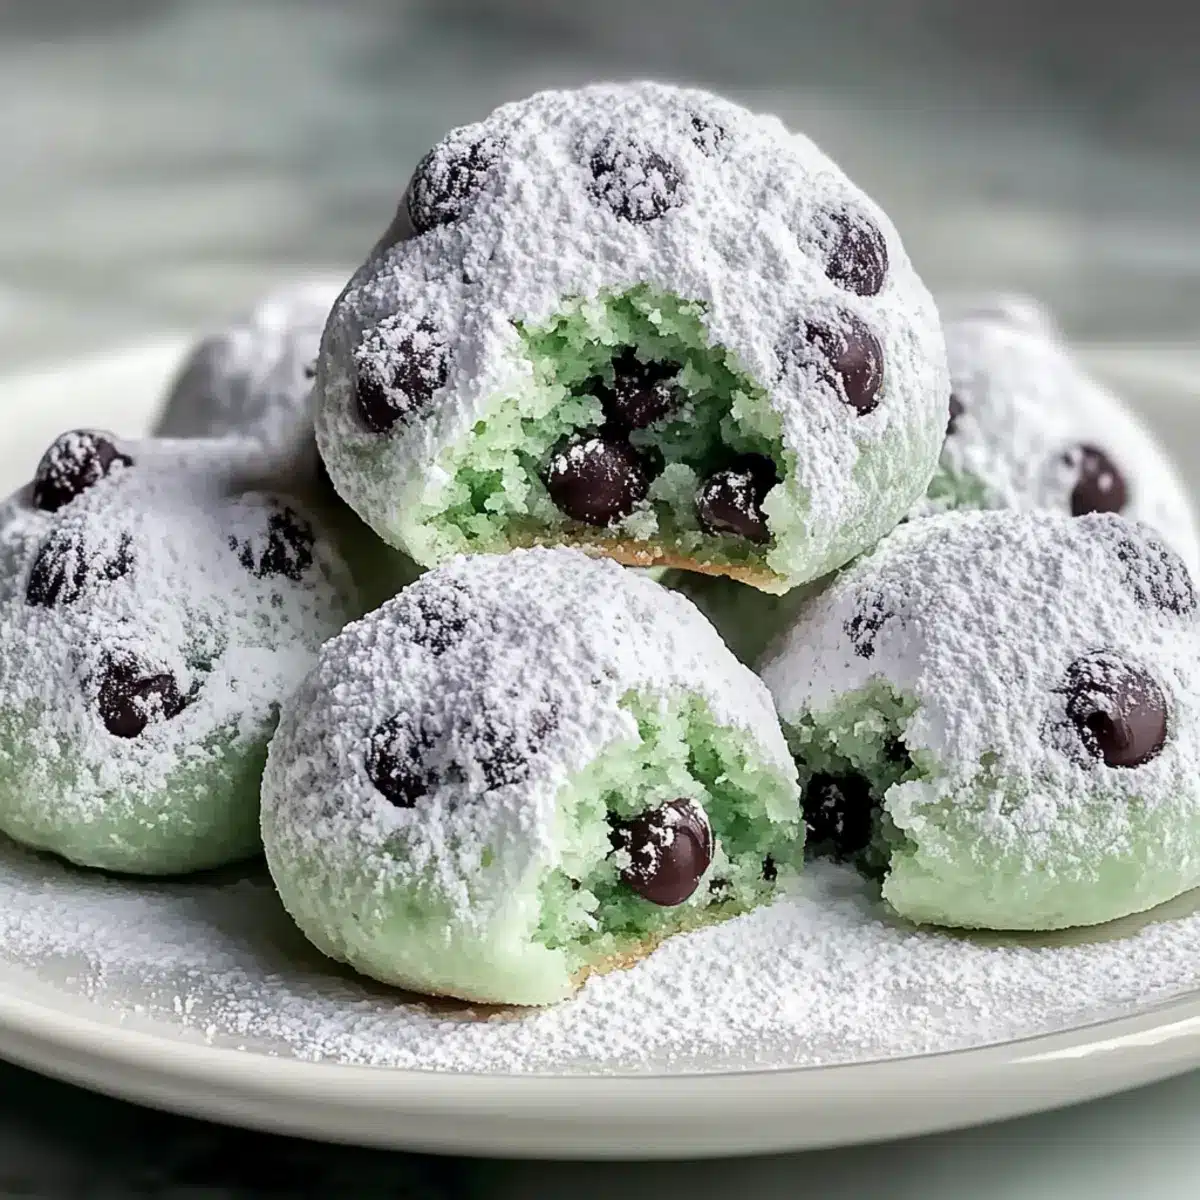
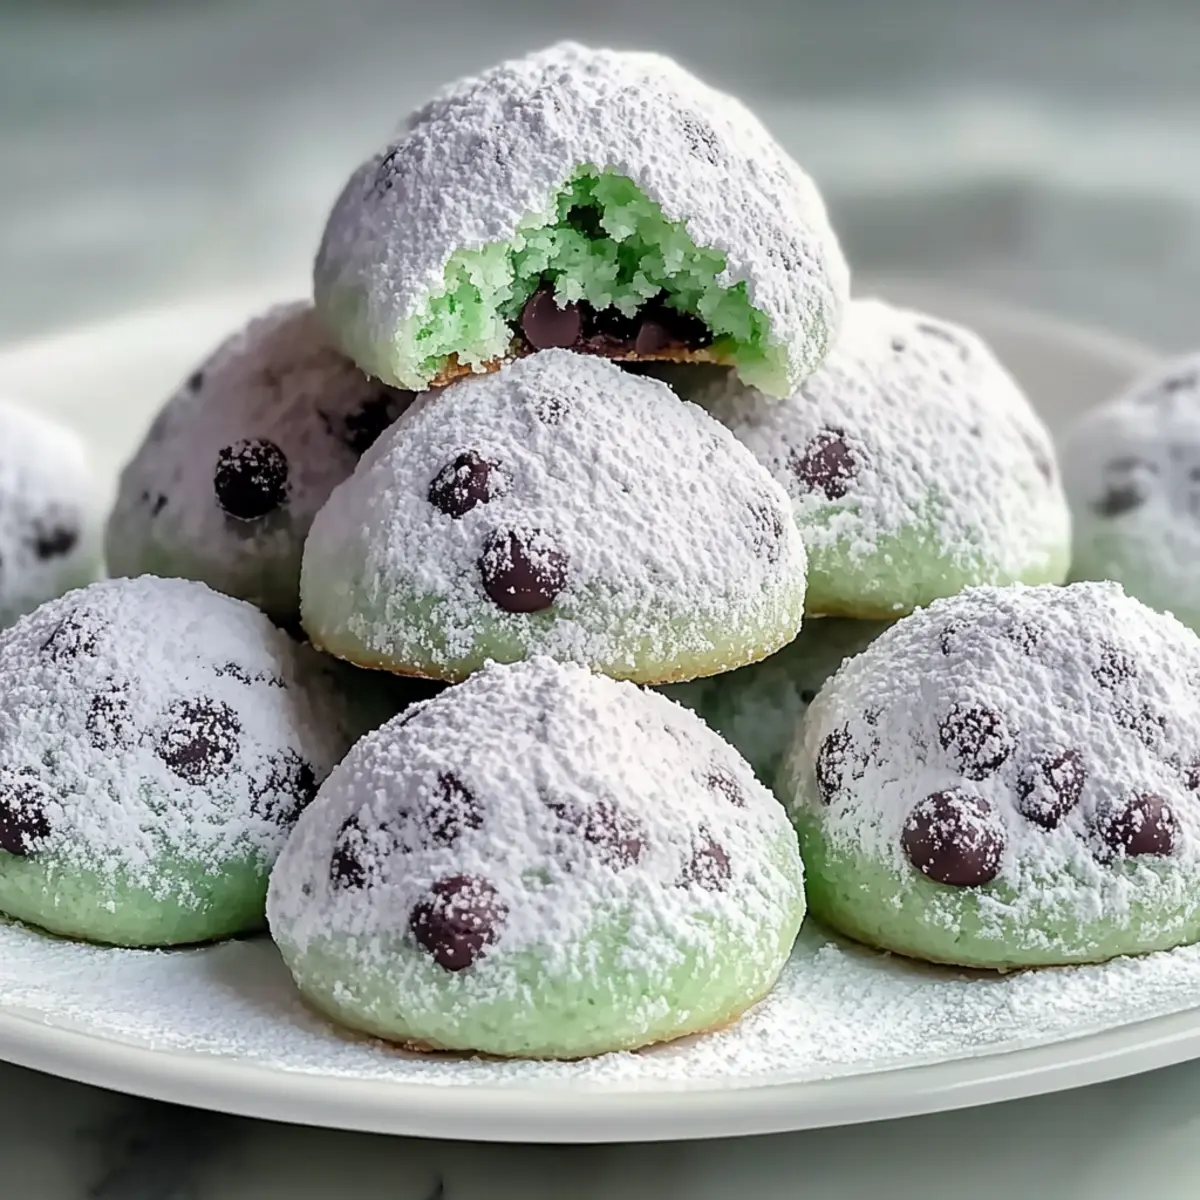
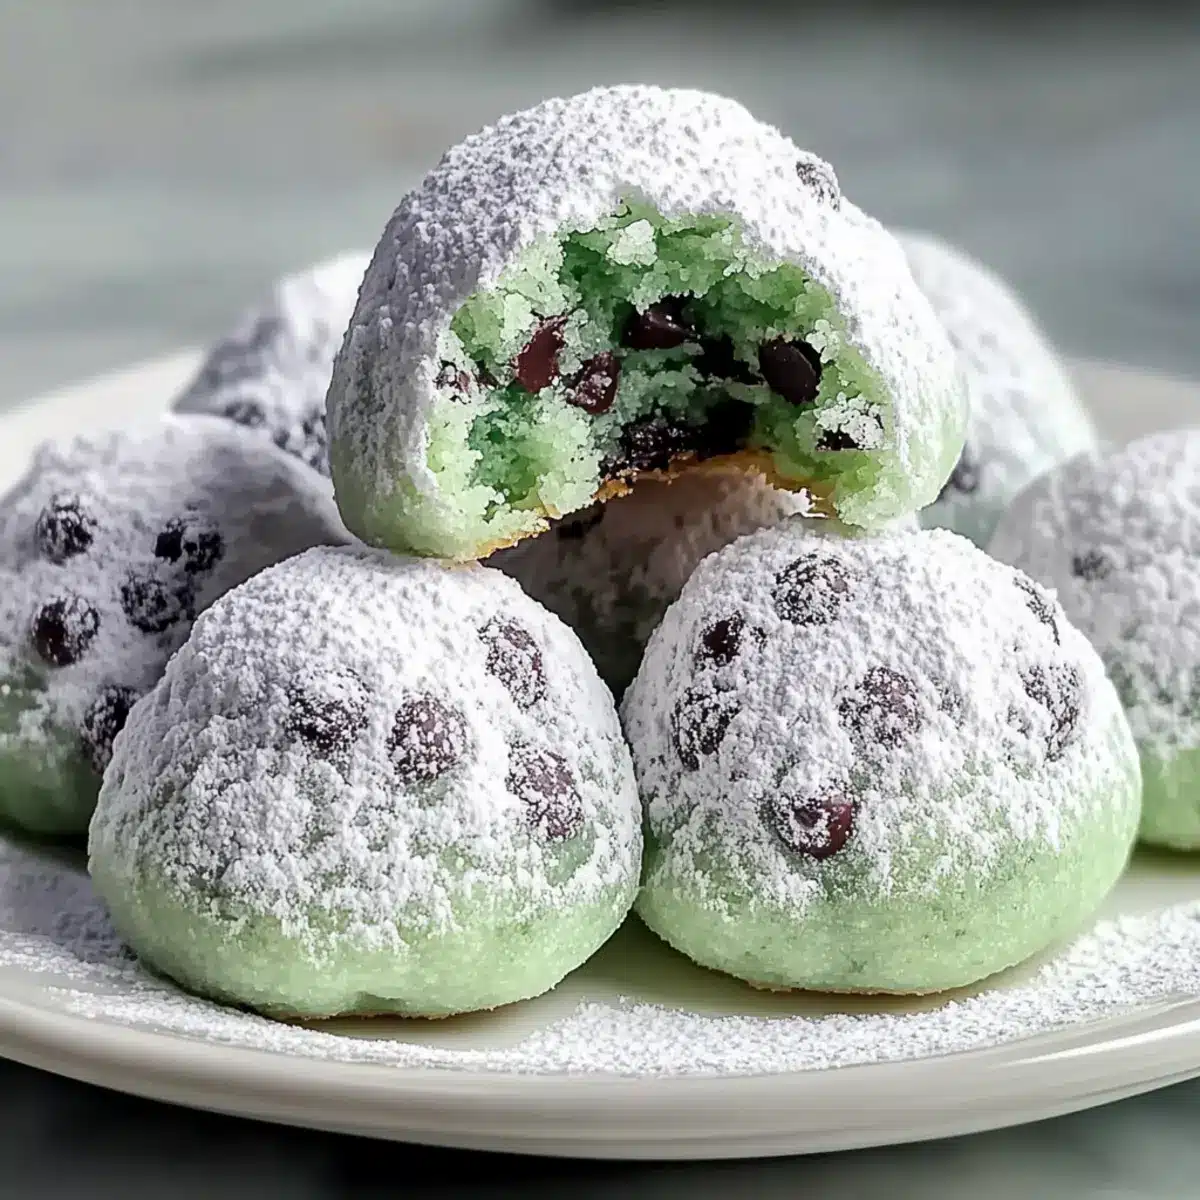
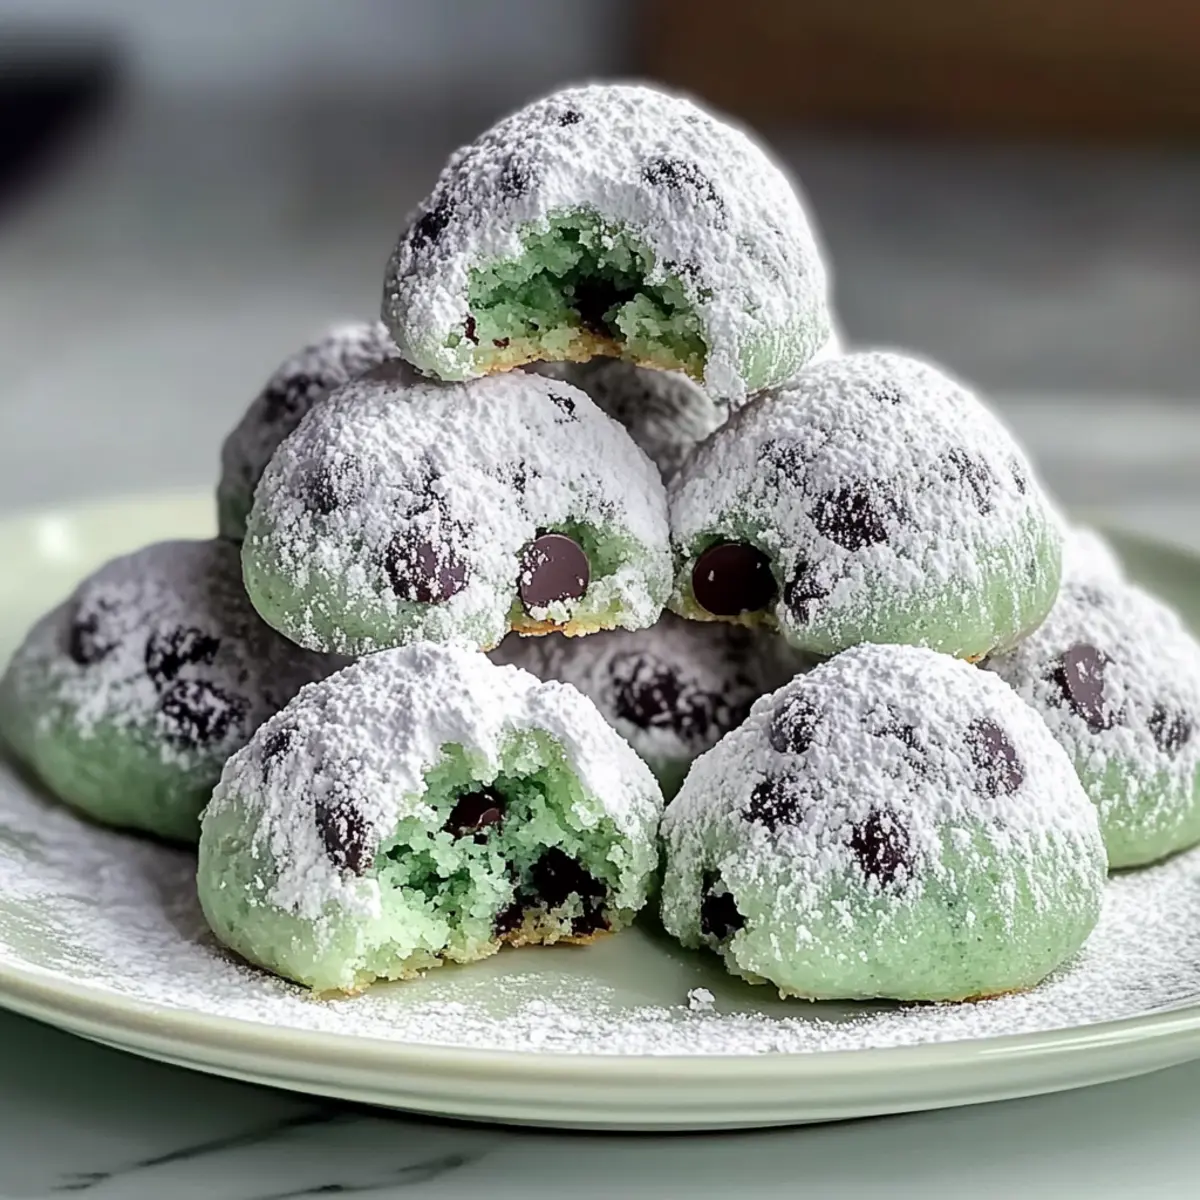
While flipping through holiday baking recipes, I stumbled upon a delightful twist on a classic cookie that instantly sparked joy. These Melt-in-Your-Mouth Mint Chocolate Chip Snowball Cookies are like little bites of winter magic, featuring a perfect blend of refreshing mint and rich chocolate chips. Not only do they offer a melt-in-your-mouth texture that’s beautifully coated in powdered sugar, but they’re also quick to whip up—ideal for busy holiday schedules. Imagine impressing loved ones with these homemade gifts at your next gathering or cozy evening. Are you ready to dive into a cookie experience that will have everyone asking for seconds? Let’s get started!
Why You’ll Crave These Cookies
Irresistible Texture: Each bite delivers a soft, buttery sensation that melts in your mouth, leaving you wanting more.
Customization Options: With various chocolate types and toppings like crushed candy canes, you can easily make these cookies your own.
Quick to Prepare: This recipe is designed for busy bakers, ensuring you spend less time in the kitchen and more time enjoying the festivities.
Perfect for Gifting: Wrap them up for thoughtful homemade gifts that charm anyone who receives them, just like our delicious Chocolate Chip Zucchini or Chocolate Cheesecake Decadent.
Crowd-Pleasing Appeal: Serve them at holiday gatherings, and watch your guests come back for seconds—they’re simply that good!
Holiday Spirit: The vibrant mint flavor combined with snowy powdered sugar makes these cookies not just a treat but an essential part of any festive celebration!
Chocolate Chip Snowball Cookies Ingredients
For the Cookie Base
- Unsalted Butter – Provides rich creaminess; always ensure it’s softened for optimal mixing.
- Granulated Sugar – Adds that perfect sweetness and contributes to a fluffy texture when creamed.
- Pure Vanilla Extract – Enhances the cookie’s flavor depth; opt for pure for the best results.
- Peppermint Extract – Infuses a delightful minty freshness; start with a small amount to adjust to your taste.
- All-Purpose Flour – Acts as the main structure; be careful not to overmix, keeping the cookies tender.
- Salt – Balances sweetness; just a pinch can elevate overall flavors.
For the Chocolatey Goodness
- Mini Chocolate Chips – Add bursts of rich chocolate flavor; feel free to swap with different chocolate varieties based on your preference.
For the Festive Finish
- Powdered Sugar – Creates that iconic snowy coating that makes these cookies irresistible; for an extra festive look, double-dust them!
- Green Food Coloring – Optional but fun; it adds a cheerful touch for holiday presentations.
Get your ingredients ready, and prepare to treat yourself and your loved ones to these beautiful Chocolate Chip Snowball Cookies!
Step‑by‑Step Instructions for Melt-in-Your-Mouth Mint Chocolate Chip Snowball Cookies
Step 1: Preheat the Oven and Prepare Pans
Begin by preheating your oven to 350°F (175°C). While it heats, line two baking sheets with parchment paper to prevent sticking and facilitate easy cleanup. This step is crucial for achieving perfectly baked Chocolate Chip Snowball Cookies, giving them just the right texture without any mess.
Step 2: Whisk Dry Ingredients
In a medium bowl, whisk together the all-purpose flour and salt until combined. This blend will form the dry base for your cookies. Setting this mixture aside now will allow you to focus on creaming the butter and sugar later, ensuring an airy texture that lends itself perfectly to the melt-in-your-mouth experience.
Step 3: Cream Butter and Sugar
Using a hand mixer or stand mixer, cream the softened unsalted butter for about 2 minutes. Slowly add in the granulated sugar while continuing to beat this mixture for approximately 3 minutes, until it becomes light and fluffy. This process incorporates air into the dough, which is essential for creating those soft Chocolate Chip Snowball Cookies.
Step 4: Add Extracts and Coloring
Mix in the pure vanilla extract and peppermint extract until fully combined. If you’re looking to add a festive flair, this is the moment to include green food coloring; start with a drop and mix it until you achieve your desired hue. This step enhances both the flavor and visual appeal of your cookies.
Step 5: Combine Dry Ingredients
Gently add the flour and salt mixture from Step 2 into the creamed butter and sugar. Use a spatula to fold it in until just combined, taking care to avoid overmixing. This step is vital for keeping the cookies tender and contributes to their melt-in-your-mouth quality, ensuring you don’t lose that delightful texture.
Step 6: Fold in Chocolate Chips
Once the dough is combined, gently fold in the mini chocolate chips. These little bursts of chocolate will melt beautifully during baking, offering a rich contrast to the minty flavor of your Chocolate Chip Snowball Cookies. Take your time to ensure the chips are evenly distributed throughout the dough.
Step 7: Chill the Dough
Cover the bowl with plastic wrap or a clean kitchen towel, and place it in the refrigerator for 30-60 minutes. Chilling the dough is essential for preventing the cookies from spreading too much during baking, allowing them to maintain their lovely shape and texture.
Step 8: Scoop and Shape
After chilling, use a cookie scoop or tablespoon to scoop out 1-inch balls of dough. Place these balls spaced apart on the prepared baking sheets. This spacing is important as it allows the cookies room to expand in the oven, resulting in beautifully shaped Chocolate Chip Snowball Cookies.
Step 9: Bake the Cookies
Transfer the baking sheets to the preheated oven and bake for 10-12 minutes. Keep a watchful eye on them; you want the edges to become golden while the centers remain pale and soft. This contrast is what creates the perfect texture, so remove them promptly to ensure that melt-in-your-mouth quality.
Step 10: Cool and Dust
Let the cookies rest on the baking sheets for 5-10 minutes after baking to firm up. Once slightly cooled, roll them in powdered sugar for a delightful snowy coating. For an extra touch, you can roll them again once completely cooled, giving your Melt-in-Your-Mouth Mint Chocolate Chip Snowball Cookies a beautiful, sweet finish.
Step 11: Serve or Store
Transfer the finished cookies to a serving platter to enjoy, or if you are saving them for later, place them in an airtight container. They will stay fresh at room temperature for up to a week. Either way, you’ll be leaving everyone asking for more of these irresistible Chocolate Chip Snowball Cookies!
How to Store and Freeze Chocolate Chip Snowball Cookies
Room Temperature: Store cookies in an airtight container at room temperature for up to 1 week to maintain freshness and texture.
Fridge: For extended freshness, keep them in the fridge for up to 2 weeks. Make sure they’re in a sealed container to prevent drying out.
Freezer: Freeze cookies for up to 3 months. Place them in a single layer in a freezer-safe bag or container, and you can enjoy them later!
Reheating: To enjoy that freshly baked taste, reheat cookies in the oven at 300°F (150°C) for about 5-10 minutes.
Make Ahead Options
These Melt-in-Your-Mouth Mint Chocolate Chip Snowball Cookies are perfect for meal prep! You can prepare the dough up to 24 hours in advance by following the first six steps and then refrigerating it tightly wrapped. Chilling the dough not only prevents spreading but also enhances the flavors. When you’re ready to bake, simply scoop and shape the chilled dough, and proceed with Steps 8-10 for fresh cookies with that delightful melt-in-your-mouth texture. Additionally, you can bake the cookies, let them cool completely, and store them in an airtight container for up to 3 days at room temperature to enjoy later. By prepping ahead, you save precious time during the busy holiday season while ensuring your cookies remain just as delicious!
What to Serve with Melt-in-Your-Mouth Mint Chocolate Chip Snowball Cookies
Indulging in the silky-sweet delight of these cookies is just the beginning—let’s elevate your dessert experience!
-
Creamy Vanilla Ice Cream: A scoop of ice cream alongside these cookies creates a dreamy contrast, balancing the richness and mint perfectly.
-
Rich Hot Cocoa: Pair with a warm cup of hot cocoa, allowing the melted chocolate and whipped cream to enhance your cookie indulgence.
-
Festive Peppermint Tea: The soothing notes from peppermint tea echo the minty flavor in the cookies, making for a wonderfully cozy pairing.
-
Gourmet Milkshake: Blend up a festive milkshake using chocolate or mint flavors to create a decadent drink that complements the cookie’s sweetness.
-
Bourbon or Rum: A splash of bourbon or rum can introduce a warming depth that contrasts beautifully with the cookie’s sweetness—perfect for holiday gatherings.
-
Fruit Platter: Fresh berries or citrus slices provide a bright, refreshing accent to the cookie’s rich flavors, adding a delightful zing to your dessert table.
-
Chocolate Drizzled Pretzels: The salty-sweet combination of crunchy pretzels drizzled with chocolate offers a playful contrast to the soft texture of the cookies.
-
Mini Cheesecakes: Delicate mini cheesecakes bring a creamy richness that pairs enjoyably with the minty, chocolatey flavor of your cookies, making for an indulgent duo.
Expert Tips for Chocolate Chip Snowball Cookies
-
Softened Butter: Ensure the butter is at room temperature, not melted, for a fluffier texture that keeps your cookies from being greasy.
-
Chill the Dough: Don’t skip chilling the dough! It helps prevent excessive spreading, maintaining the desired shape and melt-in-your-mouth magic.
-
Fold Gently: When mixing in the dry ingredients and chocolate chips, fold gently to avoid overmixing, which can lead to tough cookies.
-
Watch the Bake Time: Keep a close eye on your cookies while baking; they should have golden edges with soft, pale centers for the best texture.
-
Double Dusting: Roll cookies in powdered sugar while warm for better adherence, and consider rolling them a second time once cooled for an extra sweet finish.
-
Flavor Adjustments: Feel free to experiment by adding more or less peppermint extract or different chocolate types for your own twist on these Chocolate Chip Snowball Cookies.
Chocolate Chip Snowball Cookies Variations
Embrace your creativity as you transform these delightful cookies into your perfect version, enticing everyone with every bite!
-
White Chocolate: Substitute mini chocolate chips with white chocolate chips for a smooth, creamy twist.
-
Butterscotch Bliss: Use butterscotch chips instead of chocolate for a warm, caramel flavor that beautifully complements the mint.
-
Candy Cane Crunch: Add crushed candy canes into the dough for a festive crunch and enhanced minty flavor.
-
Nutty Surprise: Fold in chopped nuts like walnuts or pecans for added texture and a rich, nutty taste. This little touch elevates the cookies and makes them even more satisfying.
-
Spicy Kick: For those who love a little heat, add a hint of cayenne pepper or cinnamon to the dough for an unexpected spicy warmth.
-
Dairy-Free: Substitute unsalted butter with coconut oil or a dairy-free margarine to make these cookies suitable for lactose-intolerant guests.
-
Gluten-Free: Swap all-purpose flour for a gluten-free flour blend, making it delightful for those with dietary restrictions. You’ll still achieve that melt-in-your-mouth texture!
-
Mint Chocolate Chunk: Instead of mini chips, chop up a mint chocolate bar to incorporate larger chocolate pieces for a more decadent experience. The chunks will create delightful pockets of chocolate in each bite.
With these fun and easy variations, you can make these Chocolate Chip Snowball Cookies uniquely yours. Don’t forget to check out our Kitchen Sink Cookies for more inspiration on customizing your baked delights! Enjoy baking!
Chocolate Chip Snowball Cookies Recipe FAQs
How do I choose the right mint extract?
Absolutely! When selecting mint extract, I recommend using pure peppermint extract for its robust flavor. Always check the label to avoid artificial flavors that can be less effective. Start with a small amount—about ½ teaspoon—and adjust according to your taste, keeping in mind that the flavor intensifies during baking.
What’s the best way to store leftover cookies?
Very good question! To preserve your cookies, store them in an airtight container at room temperature for about 1 week. If you want them to stay fresh longer, pop them in the fridge for up to 2 weeks. Just make sure they are sealed properly to keep that delightful texture intact!
Can I freeze Chocolate Chip Snowball Cookies?
Of course! To freeze these cookies, allow them to cool completely first. Then, place them in a single layer in a freezer-safe container or a zip-top bag, layering parchment paper between if necessary to prevent sticking. They can be frozen for up to 3 months. When you’re ready to enjoy, reheat them in the oven at 300°F (150°C) for about 5-10 minutes for that fresh-baked warmth.
Why do my cookies spread too much during baking?
Oh no! This can happen for a couple of reasons. First, make sure your butter is softened but not melted; it should be creamy and spreadable. Secondly, don’t skip the chilling step! Chilling the dough helps solidify the fats, preventing excessive spreading during baking. Lastly, avoid overmixing after adding the flour, as this can lead to flat cookies.
Are these cookies safe for pets or individuals with allergies?
An important consideration! Generally, ensure that the cookies are kept away from pets, as ingredients like chocolate and certain extracts can be harmful to them. If you’re baking for someone with allergies, make sure to substitute any allergens in the recipe—like using gluten-free flour for those with gluten sensitivity or replacing the chocolate with dairy-free options for those with lactose intolerance. Always check ingredient labels to ensure safety!
Melt-in-Your-Mouth Chocolate Chip Snowball Cookies Delight
Ingredients
Equipment
Method
- Preheat the oven to 350°F (175°C) and line two baking sheets with parchment paper.
- Whisk together the all-purpose flour and salt in a medium bowl until combined.
- Cream the softened unsalted butter for about 2 minutes, then gradually add the granulated sugar and beat until light and fluffy.
- Mix in the pure vanilla and peppermint extracts, and add green food coloring if desired.
- Gently fold the flour and salt mixture into the creamed mixture until just combined.
- Fold in the mini chocolate chips evenly throughout the dough.
- Chill the dough covered in the refrigerator for 30-60 minutes.
- Scoop out 1-inch balls of dough and place them on the prepared baking sheets.
- Bake for 10-12 minutes, until the edges are golden and the centers are soft.
- Let the cookies rest for 5-10 minutes, then roll in powdered sugar.
- Transfer to a serving platter or store in an airtight container.
Leave a Reply