
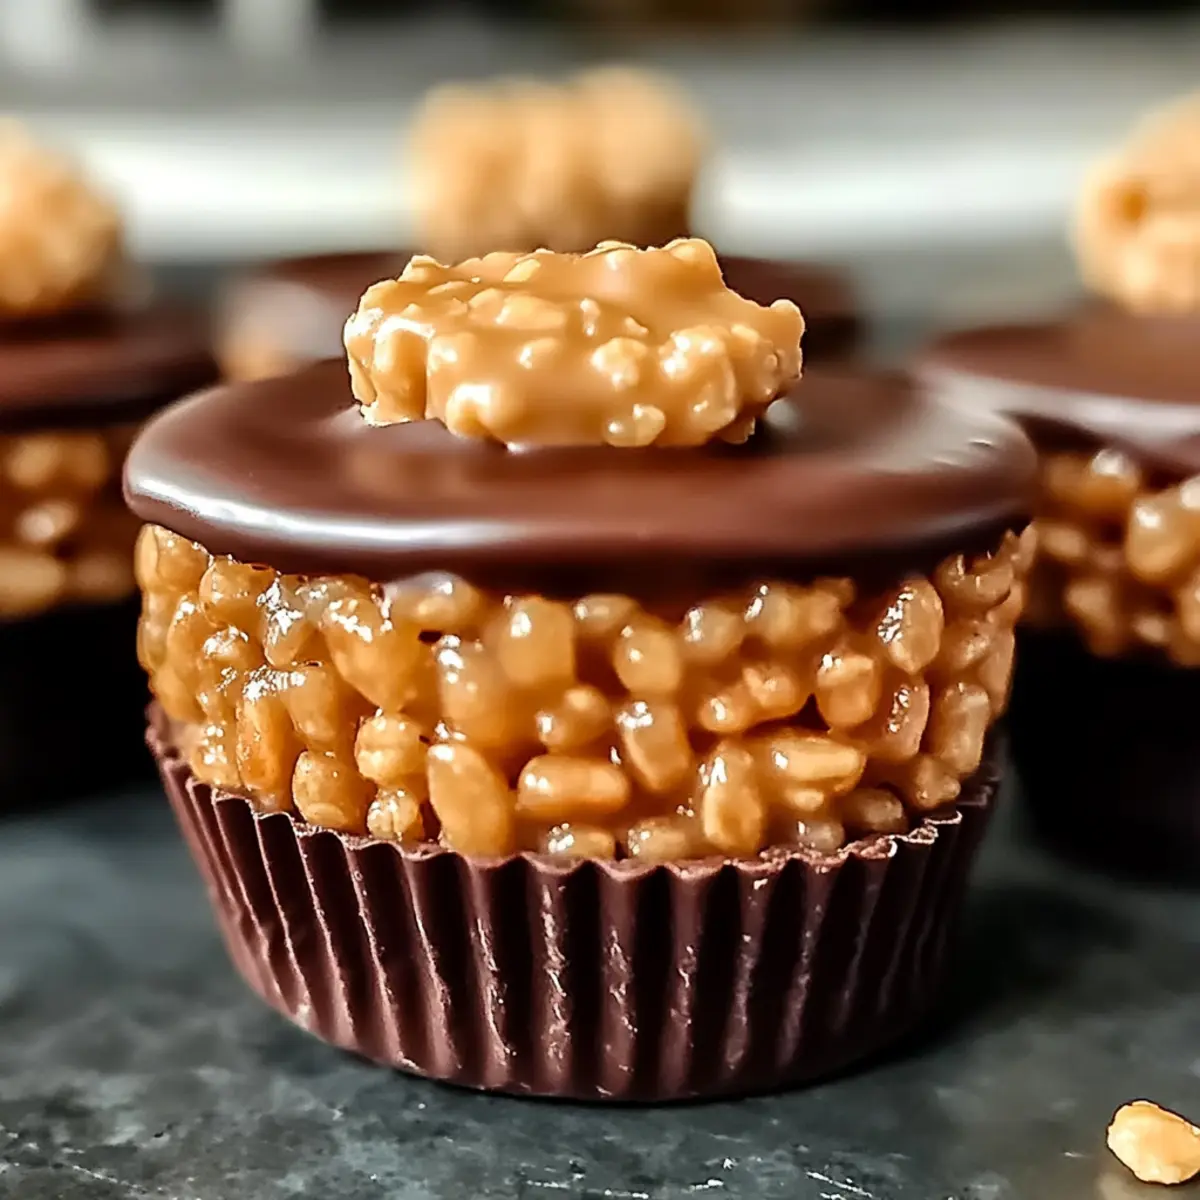
The air was thick with sweet nostalgia as I experimented in the kitchen, a mix of childhood treats inspiring my latest creation: No-Bake Chocolate Peanut Butter Rice Krispie Cups. With a delightful crunch enveloped in layers of creamy peanut butter and rich chocolate, these treats are not just a trip down memory lane—they’re also a quick solution for those bustling weeknights. Best of all, they’re fully customizable! Whether you choose almond butter, a drizzle of caramel, or a sprinkle of sea salt to finish, they’re bound to bring smiles to the whole family. Plus, they’re gluten-free when you opt for the right Rice Krispies, making them a hit for everyone. Ready to dig in? Let’s whip up a batch!
Why are these Rice Krispie Cups a must-try?
Simplicity at its finest: These Chocolate Peanut Butter Rice Krispie Cups are effortlessly easy to make, requiring no baking and minimal kitchen skills.
Customizable fun: Feel free to swap in different nut butters or chocolate to create your perfect treat, just like with my Chocolate Peanut Butter bars or Chocolate Cheesecake Decadent options!
Kid-friendly delight: Perfect for involving kids in the kitchen, these treats can be tailor-made to satisfy even the pickiest eaters.
Quick and easy: Whip these up in mere minutes, making them ideal for a last-minute dessert or snack that everyone will love.
Versatile indulgence: Enjoy them as a dessert or an afternoon pick-me-up, paired with milk or coffee for the perfect treat!
Chocolate Peanut Butter Rice Krispie Cups Ingredients
For the Base
- Unsalted Butter – Binds ingredients and adds a rich flavor; can substitute with margarine or coconut oil for dairy-free options.
- Mini Marshmallows – Provides sweetness and a chewy texture; replace with marshmallow fluff or vegan marshmallows for a dairy-free version.
- Creamy Peanut Butter – Delivers a delightful flavor and texture; switch to crunchy peanut butter for an extra crunch.
- Rice Krispies – Gives structure and crunch; consider alternative crispy cereals, including gluten-free varieties, for customization.
For the Topping
- Chocolate Chips – Adds a sweet and indulgent layer; use dark chocolate for a healthier option.
- Vanilla Extract (Optional) – Enhances the flavor profile; feel free to omit if desired.
- Sea Salt (Optional) – Balances sweetness and elevates overall flavor; a small sprinkle can make a big difference in taste.
These Chocolate Peanut Butter Rice Krispie Cups are not just a treat for the tastebuds, but also a canvas for your creativity in the kitchen!
Step‑by‑Step Instructions for Chocolate Peanut Butter Rice Krispie Cups
Step 1: Melt Base
In a medium saucepan over low heat, combine 3 tablespoons of unsalted butter and 4 cups of mini marshmallows. Stir continuously for about 5-7 minutes until the mixture is completely melted and smooth, ensuring no lumps remain. This melted base will be the foundation of your Chocolate Peanut Butter Rice Krispie Cups, so keep a close eye to prevent burning.
Step 2: Add Peanut Butter
Once the marshmallow mixture is smooth, remove the saucepan from the heat. Immediately mix in 1 cup of creamy peanut butter, stirring vigorously until it becomes glossy and fully incorporated. This step adds that rich, nutty flavor to your Chocolate Peanut Butter Rice Krispie Cups, blending beautifully with the marshmallow for a velvety texture.
Step 3: Mix with Cereal
Gently fold in 6 cups of Rice Krispies into the peanut butter mixture. Use a spatula to ensure the cereal is evenly coated without crushing it, taking care to maintain that delightful crunch. This will create the perfect base for your no-bake treat, providing a wonderful contrast to the creamy chocolate and peanut butter layers.
Step 4: Shape Cups
Line a muffin tin with paper liners, and using a spoon, fill each cup two-thirds full with the Rice Krispie mixture. Press down lightly to shape the mixture into cups, creating a little well for the chocolate topping. This step is crucial for forming the distinct shape of your Chocolate Peanut Butter Rice Krispie Cups, ensuring they hold together when set.
Step 5: Add Chocolate Layer
In a microwave-safe bowl, melt 1 cup of chocolate chips in 30-second intervals, stirring between each until the chocolate is smooth and completely melted. Once melted, spoon the chocolate over each filled Rice Krispie cup, allowing it to flow into the well. Optionally, sprinkle a pinch of sea salt on top for an added flavor boost and to enhance the sweetness.
Step 6: Set & Serve
Allow the Chocolate Peanut Butter Rice Krispie Cups to cool at room temperature for approximately 30 minutes, or refrigerate for 20 minutes for a quicker set. Once firm, carefully remove the cups from the muffin tin and peel away the liners. Your indulgent treats are now ready to be enjoyed, bringing smiles to faces young and old!
Make Ahead Options
These Chocolate Peanut Butter Rice Krispie Cups are a fantastic option for meal prep! You can prepare the Rice Krispie base up to 24 hours in advance; simply melt the butter and marshmallows, mix in the peanut butter, and fold in the Rice Krispies, then store it in an airtight container. To preserve their crunchiness, avoid mixing in the chocolate layer until you’re ready to serve. When you’re ready to enjoy, just press the mixture into muffin tins, add the melted chocolate topping, and let them set for about 30 minutes at room temperature or 20 minutes in the refrigerator. This way, you can have these delightful treats ready with minimal effort, saving you time on busy weeknights!
What to Serve with Chocolate Peanut Butter Rice Krispie Cups
Indulge your senses by pairing these delightful treats with complementary flavors and textures to create a memorable meal experience.
-
Creamy Milk: A classic pairing that enhances the richness of the cups. The coolness of the milk balances the sweetness perfectly.
-
Fresh Strawberries: Their juicy and tart flavor contrasts beautifully with the sweet chocolate and peanut butter, bringing freshness to your treat.
-
Vanilla Ice Cream: Try serving these cups alongside a scoop of smooth vanilla ice cream for a cold, creamy twist that will take you over the top.
-
Nutty Granola: Add a crunchy topping of nutty granola for a wholesome, textural experience that complements the soft and chewy aspects of the cups.
-
Espresso Shots: For an adult twist, a shot of espresso pairs wonderfully, balancing the sweetness with a rich, bitter profile that mocha lovers will enjoy.
-
Coconut Milk Smoothie: Blend up a creamy coconut milk smoothie for a tropical flair that adds a refreshing layer to your dessert time.
-
Hot Cocoa: A warm cup of hot cocoa filled with marshmallows resonates with comfort, making your snack time feel just like a cozy, nostalgic retreat.
-
Chocolate-Covered Pretzels: The salty crunch of chocolate-covered pretzels brings a delightful contrast, echoing the flavors of your Chocolate Peanut Butter Rice Krispie Cups while adding a bit of crunch.
How to Store and Freeze Chocolate Peanut Butter Rice Krispie Cups
Room Temperature: Store the cups in an airtight container at room temperature for up to 3-5 days. Keep them away from direct sunlight to maintain freshness.
Fridge: For a cooler treat, refrigerate the cups in an airtight container for up to a week. This helps them maintain their shape and keeps them deliciously cool.
Freezer: Freeze the Chocolate Peanut Butter Rice Krispie Cups by placing them in a single layer in an airtight container or wrapped in plastic wrap for up to one month.
Thawing: To enjoy, simply thaw the cups in the refrigerator overnight before serving. This ensures they retain their delicious texture and flavor.
Expert Tips for the Best Chocolate Peanut Butter Rice Krispie Cups
- Damp Hands: Use slightly damp hands when shaping the cups to prevent the mixture from sticking to your fingers, ensuring smooth cups every time.
- Melt Cautiously: Keep a close eye on the melted marshmallow mixture to avoid burning; heat it slowly over low heat for the best results.
- Ingredient Checks: Always check that your ingredients, especially marshmallows and chocolate, are allergen-free if making for guests with dietary restrictions.
- Gentle Folding: When mixing in the Rice Krispies, gently fold to preserve their crunch; excessive mixing can lead to crushed cereal and a mushy texture.
- Cup Variations: Feel free to experiment with different nut butters and chocolate types to customize your Chocolate Peanut Butter Rice Krispie Cups for unique flavors and textures.
Chocolate Peanut Butter Rice Krispie Cups Variations
Make these Chocolate Peanut Butter Rice Krispie Cups your own by exploring your unique flavor combinations and substitutions!
-
Nut Butter Swap: Try almond or cashew butter for a different nutty flavor profile. This is a fun way to switch things up and please different crowds.
-
Chocolate Twist: Opt for white chocolate chips for a creamy and sweet finish. A drizzle of melted white chocolate transforms these treats into a delightful dessert!
-
Crunchy Add-Ins: Boost the texture by mixing in chopped nuts like pecans or walnuts. This adds a satisfying crunch and depth of flavor, complementing the creamy peanut butter perfectly.
-
Sweet Surprise: Include butterscotch or peanut butter chips alongside your chocolate for added sweetness. It brings a little something extra, elevating your cups to next-level indulgence.
-
Spicy Kick: A sprinkle of cinnamon or a dash of cayenne pepper for a hint of heat can create an unexpected yet delightful contrast. It’s the perfect way to spice up the classic!
-
Cereal Variety: Experiment with Cheerios or Rice Chex instead of Rice Krispies for different textures. Each option provides its unique crunch, making for a fun surprise in each bite.
-
Mini Treats: Use a mini muffin tin for bite-sized versions, perfect for parties or lunchboxes. These little pops of joy are sure to win hearts without the guilt!
-
Topping Fun: Top your cups with a drizzle of caramel sauce or melted chocolate for an extra indulgent layer. It’s the perfect finishing touch for those sweet-toothed family members!
Dive into creativity with these delectable variations, and don’t forget to pair your treats with a glass of milk or a cup of coffee to enhance your delightful experience! For more inspiration, try out my Chocolate Chip Zucchini or explore the deliciousness of Lemon Butter Fish as a light meal before dessert!
Chocolate Peanut Butter Rice Krispie Cups Recipe FAQs
How do I select the best ingredients for my Rice Krispie Cups?
Absolutely! For the best Chocolate Peanut Butter Rice Krispie Cups, choose fresh mini marshmallows without any dark spots or hard pieces, as these could affect the texture. When selecting peanut butter, opt for a natural brand that uses minimal ingredients for a more wholesome taste. If you’re going for the gluten-free option, double-check that your Rice Krispies are labeled gluten-free as well!
How should I store my Rice Krispie Cups after making them?
These delectable treats can be stored at room temperature in an airtight container for about 3 to 5 days. For an extra chilled delight, keep them in the refrigerator for up to a week. Just make sure they are well-sealed to avoid drying out—nobody wants a stale treat!
Can I freeze my Chocolate Peanut Butter Rice Krispie Cups?
Yes, you can! To freeze, place the cups in a single layer in an airtight container or wrap them tightly with plastic wrap, then cover with foil. They’ll hold up well in the freezer for up to one month. When you’re ready to enjoy them, simply thaw the cups in the refrigerator overnight for the best texture and flavor.
What if my Rice Krispie mixture is too sticky?
Very! If your mixture feels overly sticky, consider using slightly damp hands when shaping the cups, as this will help prevent them from sticking to your fingers. Additionally, allowing the mixture to cool a tad before shaping can help make it more manageable. If all else fails, a light coating of cooking spray on your hands can work wonders!
Are there any dietary restrictions to consider for my Rice Krispie Cups?
Absolutely! When making these treats, it’s essential to check the labels on your marshmallows and chocolate for any allergens, particularly if you’re sharing with guests who have food sensitivities. For gluten-free options, look for certified gluten-free Rice Krispies. You can also keep these treats nut-free by opting for sun butter or other seed butters instead of peanut butter.
Irresistible Chocolate Peanut Butter Rice Krispie Cups Recipe
Ingredients
Equipment
Method
- In a medium saucepan over low heat, combine 3 tablespoons of unsalted butter and 4 cups of mini marshmallows. Stir continuously until melted and smooth, about 5-7 minutes.
- Remove from heat and immediately mix in 1 cup of creamy peanut butter until glossy and fully incorporated.
- Gently fold in 6 cups of Rice Krispies until evenly coated without crushing.
- Line a muffin tin with paper liners, fill each cup two-thirds full with the mixture, and press down lightly to shape.
- Melt 1 cup of chocolate chips in a microwave-safe bowl in 30-second intervals, stirring until smooth, then spoon over the Rice Krispie cups.
- Allow to cool at room temperature for approximately 30 minutes, or refrigerate for 20 minutes.
Leave a Reply