
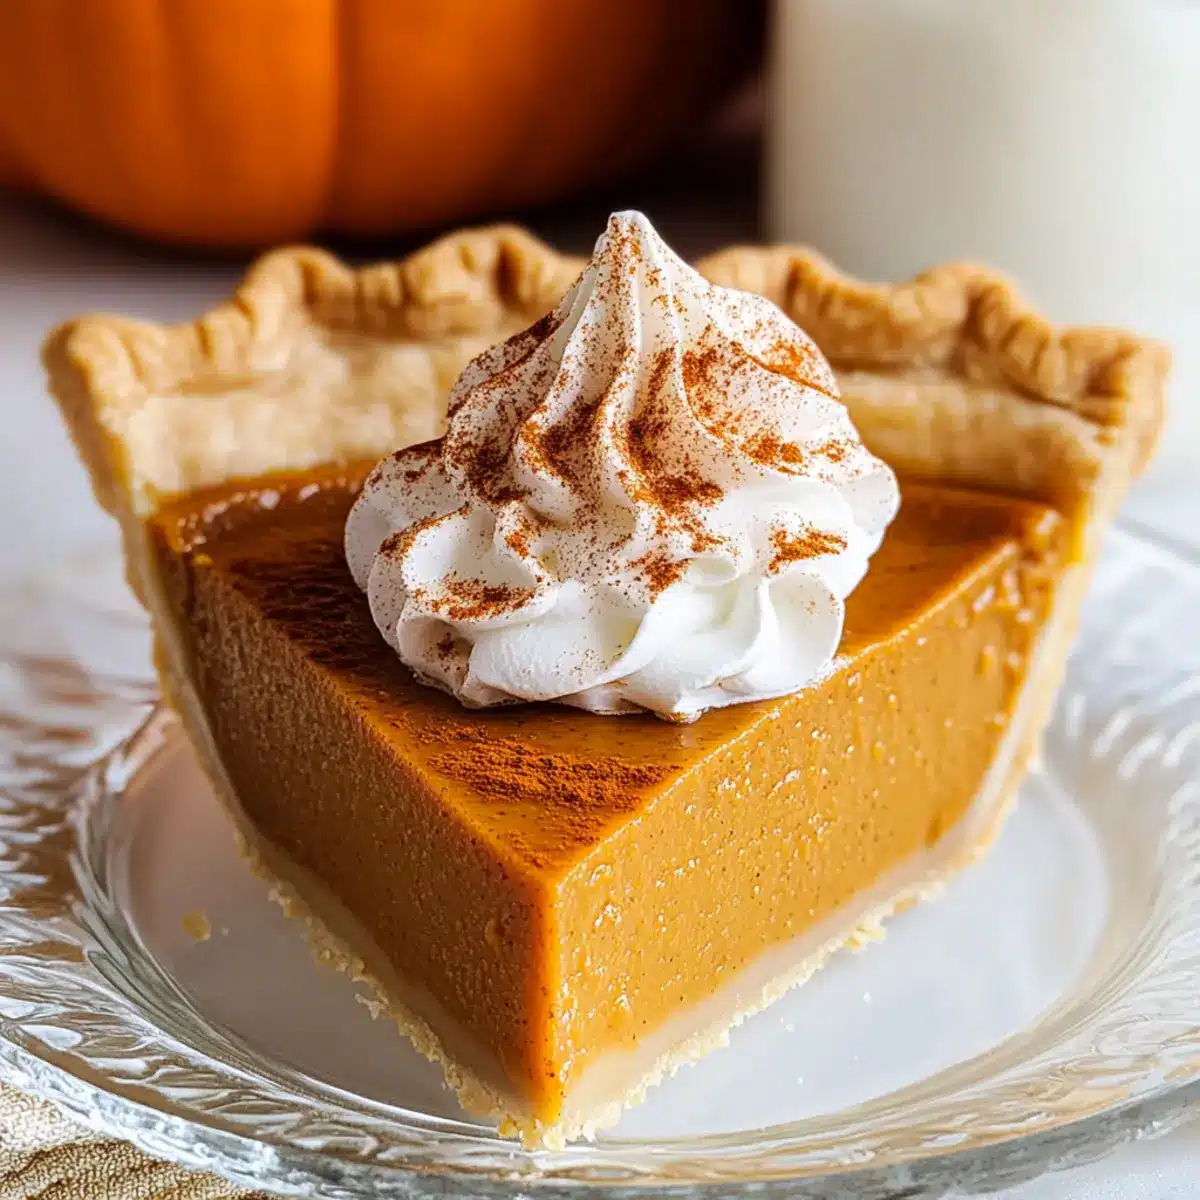
As I whisked together the velvety filling of my Creamy Pumpkin Pie, a delightful aroma filled my kitchen, wrapping me in the comforting embrace of fall. This recipe isn’t just a tribute to my love for pumpkin; it brings the warmth of holiday gatherings to life, perfect for anyone tired of fast food. With its easy prep and deliciously creamy texture, my pie is a game-changer. You can even customize it to suit your dietary needs, offering vegan and gluten-free options without sacrificing flavor. Whether you’re planning for Thanksgiving or simply indulging in fall vibes, this pie will not only satisfy your sweet tooth but also allow you to prepare ahead of time—making it freezer-friendly. Curious about the secret to achieving that silky-smooth filling? Let’s dive into the details!
Why Is This Pumpkin Pie Special?
Evocative Flavors: The Creamy Pumpkin Pie Recipe captures classic autumn flavors perfectly, thanks to the blend of warm spices and creamy richness.
Customizable Options: This pie is versatile! You can easily make it vegan or gluten-free, allowing everyone to enjoy it.
Make-Ahead Magic: A fantastic make-ahead dessert, it can be prepared 1-2 days in advance, allowing flavors to deepen—perfect for busy holiday schedules.
Effortless Preparation: With just a handful of ingredients and simple steps, even novice bakers can impress their guests.
Crowd-Pleasing Indulgence: Whether you serve it with fresh whipped cream or a scoop of vanilla ice cream, this pie is sure to become a favorite—just like my Oreo Milkshake Indulgence.
Freezer-Friendly: This recipe makes it easy to whip out a slice whenever the craving strikes; freeze it for more deliciousness later!
Creamy Pumpkin Pie Ingredients
For the Filling
• Canned Pumpkin Puree – This is the star ingredient providing the rich pumpkin essence; Libby’s brand is often recommended for optimal results.
• Evaporated Milk – This adds that creaminess and richness you love; avoid sweetened condensed milk as a substitute.
• Granulated Sugar – Sweetens the filling beautifully; swap it with erythritol or stevia for low-glycemic options.
• Eggs – Essential for structure and setting; make sure they’re at room temperature to prevent curdling.
• Pumpkin Pie Spice Blend – Provides delightful warmth; add extra cinnamon or nutmeg for personalization.
• Cinnamon – Enhances the flavors; adjust the amount based on your spice preference.
For the Crust
• Refrigerated Pie Crust – A convenient choice to simplify prep time; opt for a gluten-free crust if needed!
With these ingredients in hand, you’re well on your way to creating a delightful Creamy Pumpkin Pie Recipe that everyone will love!
Step‑by‑Step Instructions for Creamy Pumpkin Pie Recipe
Step 1: Prepare Pie Crust
Start by preheating your oven to 375°F (190°C). If you prefer a crispier crust, blind bake your refrigerated pie crust for 15 minutes with pie weights. Carefully remove the weights and return it to the oven for another 5 minutes, or until lightly golden. This initial baking ensures a flaky texture that contrasts beautifully with the creamy pumpkin filling.
Step 2: Make Filling
In a large mixing bowl, combine your canned pumpkin puree, evaporated milk, granulated sugar, eggs, pumpkin pie spice, and cinnamon. Use a whisk to mix until smooth and creamy—this should take about 2-3 minutes, just enough to blend thoroughly without overbeating. The mixture should be velvety and free of lumps, ready to become the luscious filling of your Creamy Pumpkin Pie.
Step 3: Bake Pie
Once your filling is ready, carefully pour it into the prepared pie crust, spreading it evenly. Bake in the preheated oven at 350°F (175°C) for 50-60 minutes. The pie is done when the edges are set, but the center still has a slight jiggle—this will create that perfect creamy texture after cooling, so keep an eye on it as it bakes!
Step 4: Cool
After baking, remove your pie from the oven and allow it to cool at room temperature for about 1 hour. This cooling time is essential, as it helps the filling set properly. Once cooled, you can refrigerate the pie for a few hours or overnight to deepen the flavors—this step is perfect for your make-ahead plans!
Step 5: Serve
When you’re ready to serve your Creamy Pumpkin Pie, garnish each slice with a dollop of whipped cream for an extra touch of indulgence. The combination of the silky filling with the light, fluffy cream enhances the experience, making your pie a festive centerpiece at any gathering. Enjoy the blend of flavors and warmth that this seasonal favorite brings!
Expert Tips for Creamy Pumpkin Pie
-
Perfect Crust: Ensure a golden crust by blind baking it first. This prevents sogginess and adds delicious texture to your Creamy Pumpkin Pie.
-
Avoid Overbaking: The key to a silky filling is to pull the pie when the center is slightly jiggly. This helps maintain that creamy texture without cracks.
-
Flavor Balance: Don’t hesitate to adjust sugar and spices according to your taste. Tasting the filling before baking lets you fine-tune the flavor to your liking.
-
Storage Wisely: Keep leftovers covered in the fridge to maintain moisture and freshness. Reheat slices at 375°F for just 8-10 minutes to restore texture.
-
Make-Ahead Advantage: This pie tastes even better after a day in the fridge, allowing the flavors to meld beautifully—perfect for your meal prep!
Make Ahead Options
These Creamy Pumpkin Pie preparations are perfect for meal prep enthusiasts! You can make the pie up to 2 days in advance; simply follow all the steps until cooling, and then refrigerate the pie to allow the flavors to deepen. If you prefer, you can also prepare the filling up to 24 hours ahead—mix all the ingredients and store it in an airtight container in the refrigerator. To maintain quality, keep the filled pie covered with plastic wrap to prevent drying. When ready to serve, simply bake the pie according to the instructions and add your favorite garnishes. This way, you’ll have a delicious dessert ready with minimal effort, perfect for busy holiday celebrations!
Creamy Pumpkin Pie Recipe Variations
Feel free to explore these tempting variations to tailor the Creamy Pumpkin Pie to your unique taste or dietary preferences!
-
Vegan Option: Substitute evaporated milk with full-fat coconut milk and use flax eggs for an equally rich filling. This option is both creamy and indulgent, without the dairy!
-
Gluten-Free Crust: Use a gluten-free pie crust, ensuring everyone at your table can enjoy a slice without worry. You won’t lose out on flavor with this smart swap!
-
Low-Glycemic Sweeteners: Swap granulated sugar for erythritol or stevia to create a healthier dessert option. This allows those watching their sugar intake to savor every bite without guilt.
-
Extra Spices: Experiment by adding extra cinnamon, nutmeg, or even a hint of cardamom to the filling for an aromatic twist. It brings an exciting depth to the beloved classic!
-
Alternative Crust: Make a homemade graham cracker crust for a delightful change in texture and flavor. However, remember this may not hold up as well once refrigerated, so serve fresh!
-
Caramelized Topping: For a touch of elegance, caramelize sugar atop the cooled pie using a kitchen torch. This adds a beautiful crispy layer that impresses at any gathering.
-
Chocolate Drizzle: Drizzle warm chocolate sauce over individual slices for a decadent dessert that will wow chocolate lovers. The combination of pumpkin and chocolate is simply divine!
-
Mini Pies: Create individual-sized mini pumpkin pies in muffin tins for a fun, portable option. They’re perfect for gatherings or as a delightful personal treat!
If you’re interested in making delicious desserts like this, consider trying my recipes for a stunning Corn Pasta Salad or an indulgent Steak with Creamy Garlic Sauce. Enjoy customizing your Creamy Pumpkin Pie Recipe!
What to Serve with Creamy Pumpkin Pie
Indulging in a slice of this luscious dessert is just the beginning of a delightful fall feast.
-
Whipped Cream: A classic topping that adds a light, airy contrast to the creamy filling, enhancing its richness.
-
Vanilla Ice Cream: Its icy sweetness complements the warm spices, creating a beautiful balance of temperatures and flavors.
-
Spiced Chai Latte: The aromatic spices in chai echo the pumpkin pie’s flavors, making every sip a cozy experience.
-
Pecan Pie Bites: The crunchy, nutty goodness of these bites provides a lovely texture contrast to the silken pie.
-
Roasted Sweet Potatoes: Their natural sweetness and caramelization pair beautifully with the warm spices of the pumpkin pie.
-
Ginger Snap Cookies: These crisp, spiced cookies add a delightful crunch while echoing the ginger and cinnamon in your pie.
-
Hot Apple Cider: A warm drink that encapsulates the essence of fall, perfectly balancing the richness of the pumpkin pie.
-
Cheesecake Bars: Their creamy goodness and slight tanginess make a wonderful pairing, creating a delicious dessert duo for gatherings.
How to Store and Freeze Creamy Pumpkin Pie
Fridge: Store your leftovers in the refrigerator, loosely covered with plastic wrap or foil, for up to 3 days. This helps keep the flavors fresh without drying out the pie.
Freezer: To freeze your Creamy Pumpkin Pie, wrap it tightly in plastic wrap and then foil to prevent freezer burn. It can be stored for up to 2 months.
Reheating: When you’re ready to enjoy again, preheat your oven to 375°F (190°C) and heat individual slices for about 8-10 minutes for the best texture and flavor restoration.
Make-Ahead: You can prepare the pie 1-2 days in advance. Allowing it to chill in the refrigerator enhances the flavor while making it a convenient option for holiday gatherings.
Creamy Pumpkin Pie Recipe FAQs
How do I choose the right canned pumpkin puree?
Absolutely! For the best results in your Creamy Pumpkin Pie Recipe, I highly recommend using Libby’s brand of canned pumpkin puree. It has the ideal consistency and flavor that perfectly captures the essence of pumpkin. Avoid using pumpkin pie filling, as it is sweetened and spiced already, which could throw off your pie’s flavor balance.
What’s the best way to store leftovers?
Very good question! Store your leftover Creamy Pumpkin Pie in the refrigerator, loosely covered with either plastic wrap or foil. This will maintain moisture without making the crust soggy. It’s best to consume it within 3 days for optimal freshness and taste.
Can I freeze the pumpkin pie?
You can certainly freeze it! To do so, wrap your Creamy Pumpkin Pie tightly in plastic wrap followed by a layer of aluminum foil. This double wrapping protects it from freezer burn. It can be frozen for up to 2 months. When you’re ready to enjoy a slice, just thaw in the fridge overnight before reheating!
What should I do if my pumpkin pie cracks?
Cracking can happen, but there’s a way to prevent it! Be careful not to overbake the pie; remove it from the oven when the center is still slightly jiggly. Cooling gradually at room temperature also helps minimize the risk of cracking. If cracks form, a sprinkle of whipped cream can mask them beautifully!
How can I make this recipe suitable for allergies?
Absolutely! You can easily adapt the Creamy Pumpkin Pie Recipe for various dietary needs. For a dairy-free option, swap evaporated milk with full-fat coconut milk, and use flax eggs to replace the eggs. Ensure you choose a gluten-free pie crust as well if needed. It’s important to check all labels to avoid cross-contamination for specific allergies.
Can I adjust the sweetness and spiciness in this recipe?
Certainly! Feel free to taste the filling before baking. This is a great opportunity to adjust the sweetness or spice levels to your preference! If you’re looking for a more spiced flavor, add extra cinnamon or nutmeg to make your pie uniquely yours—after all, the more the merrier!
Deliciously Creamy Pumpkin Pie Recipe You'll Love Making
Ingredients
Equipment
Method
- Preheat your oven to 375°F (190°C). Blind bake the pie crust for 15 minutes with weights, then remove weights and bake for another 5 minutes.
- In a large mixing bowl, combine canned pumpkin puree, evaporated milk, granulated sugar, eggs, pumpkin pie spice, and cinnamon. Whisk until smooth.
- Pour the filling into the prepared pie crust and bake at 350°F (175°C) for 50-60 minutes until edges are set.
- Remove from oven and cool at room temperature for about 1 hour, then refrigerate for a few hours or overnight.
- Garnish with whipped cream before serving.
Leave a Reply