
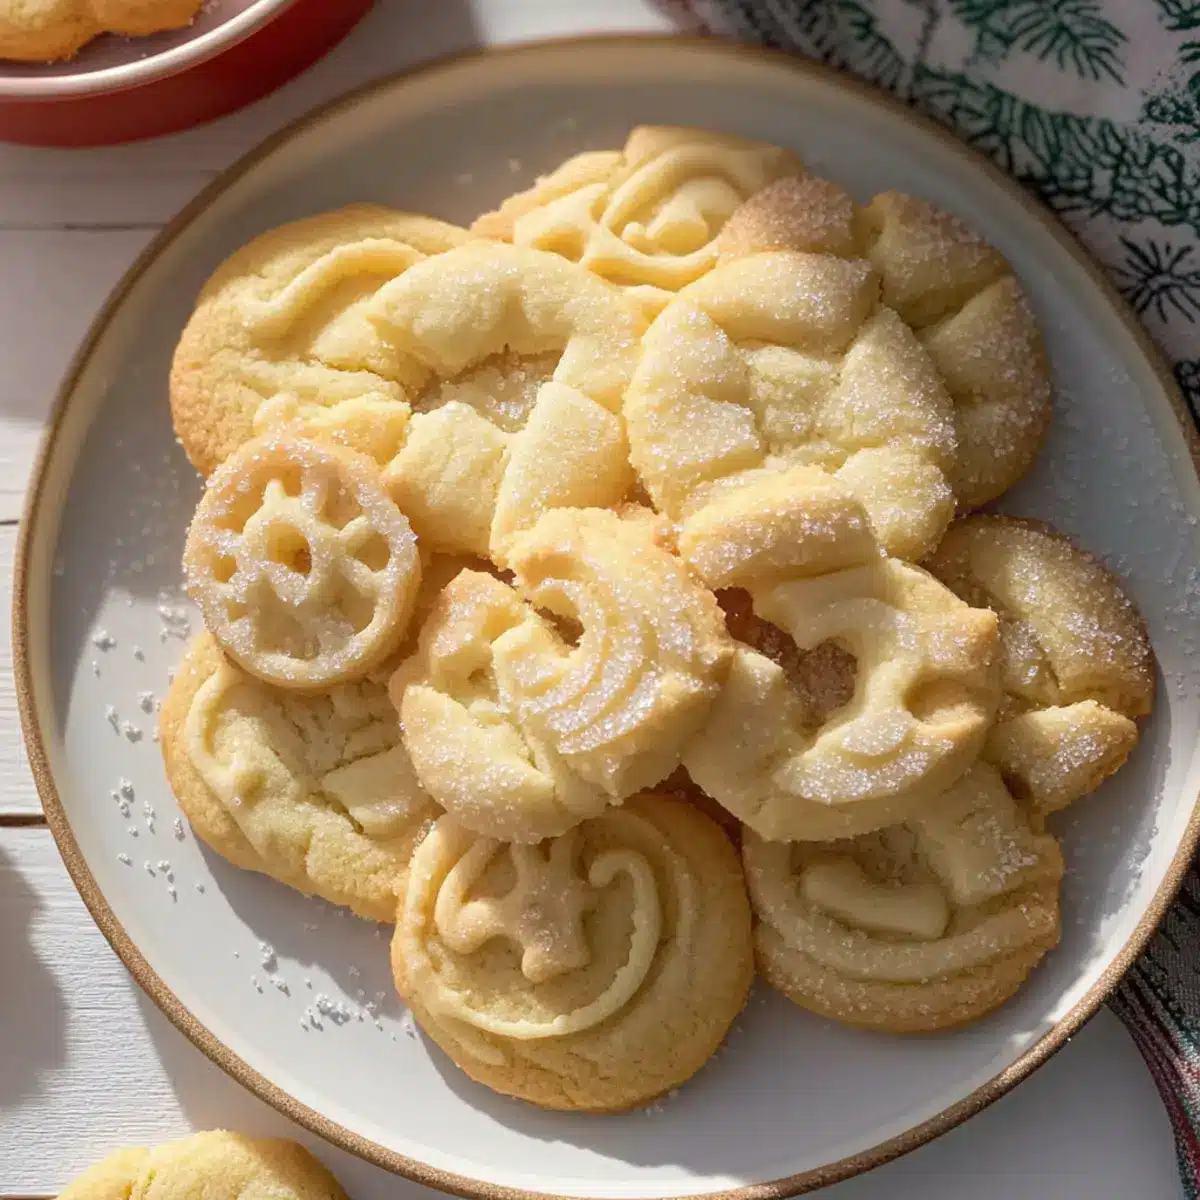
As I stood in my kitchen, the enticing aroma of butter melting on the stove transported me back to those cozy holiday gatherings. There’s something magical about making Melt-in-Your-Mouth Danish Butter Cookies that not only fills my home with warmth but also creates a sense of nostalgia with every crumbly, buttery bite. This recipe is a delightful way to take a break from store-bought options and indulge in a simple yet elegant treat that’s perfect for gifting. With quick prep and an effortless allure, these cookies make holiday baking a joy rather than a chore. Are you ready to whip up a batch that will leave everyone asking for more? Let’s dive in!
Why Are Danish Butter Cookies Irresistible?
Tradition: These cookies are a nostalgic favorite, evoking memories of holiday cheer and gatherings.
Unmatched melt-in-your-mouth texture: Each bite brings a delicate crumble, leaving you wanting more.
Quick prep time: Whip up a batch in no time, making them perfect for last-minute holiday treats!
Versatile gifting option: Beautifully packaged, they make thoughtful gifts that delight friends and family.
Simple ingredients: With just a few pantry staples, you can create a gourmet masterpiece that outshines any store-bought cookie.
Danish Butter Cookies Ingredients
-
For the Dough
-
European Salted Butter – Provides richness and a buttery flavor; for best results, use European butter due to its higher fat content.
-
Granulated Sugar – Sweetens the cookies and contributes to the crumbly texture; no known substitutions for this classic cookie.
-
Salt – Enhances the flavor; can be omitted if using salted butter.
-
Egg Yolks – Adds richness and moisture, helping bind the ingredients together; ensure they are at room temperature for even mixing.
-
Vanilla Extract – Imparts a warm, aromatic essence; pure vanilla is recommended for the best taste.
-
Whole Milk – Softens the batter for the right consistency; adjust as needed based on thickness.
-
All-Purpose Flour – The main structural component; can substitute with 260 grams of all-purpose flour if cake flour is unavailable.
-
Cake Flour – Contributes to a tender, melt-in-your-mouth texture; highly recommended for optimal results.
-
For Decoration
-
Coarse Sugar – Adds a sparkling finish for decoration; optional, but enhances presentation for those delightful Danish butter cookies.
Step‑by‑Step Instructions for Melt-in-Your-Mouth Danish Butter Cookies
Step 1: Preparation
Start by chilling your ingredients. Preheat the refrigerator to help the butter firm up slightly and prepare two baking sheets by lining them with parchment paper. This will ensure that your Melt-in-Your-Mouth Danish Butter Cookies don’t stick while baking and allow for easy release, making the process smoother.
Step 2: Creaming
In a stand mixer, add your room temperature European salted butter, granulated sugar, and salt. Beat on medium speed for about 3-5 minutes, or until the mixture is light and fluffy. This is crucial for the texture, as proper creaming ensures your cookies will melt beautifully in your mouth, so don’t rush this step!
Step 3: Mixing Wet Ingredients
Once your butter mixture is fluffy and delightful, add the egg yolks, vanilla extract, and whole milk. Mix on low speed until all the wet ingredients are fully incorporated, which should take about 1-2 minutes. The mixture should appear creamy and well-blended. Ensuring everything is at room temperature helps the batter combine seamlessly.
Step 4: Combining Dry Ingredients
In a separate bowl, whisk together the all-purpose and cake flour. Gradually incorporate this flour mixture into your creamy butter mixture, stirring gently until no flour streaks remain, about 2-3 minutes. Adjust the consistency with a splash of milk if it feels too thick. The dough should be smooth and easy to work with, perfect for piping.
Step 5: Piping the Cookies
Next, transfer your cookie dough into a piping bag fitted with a star tip. Pipe 2-inch shapes onto your prepared baking sheets, leaving enough space between each cookie for spreading. Chill the piped cookies in the refrigerator for 20-30 minutes. This step is essential as it helps maintain the shape of your Danish Butter Cookies during baking.
Step 6: Baking
Preheat your oven to 350°F (175°C) and once ready, carefully place your chilled cookies inside. Bake for 10-15 minutes, or until the edges turn lightly golden. Keep an eye on them, as they can quickly go from perfect to overdone. Once baked, let the cookies cool on the sheets for a few minutes before transferring them to a wire rack to cool completely.
Make Ahead Options
These Melt-in-Your-Mouth Danish Butter Cookies are perfect for meal prep aficionados! You can make the cookie dough up to 3 days in advance and keep it refrigerated, ensuring to wrap it tightly in plastic wrap to maintain its freshness. Additionally, you can pipe the cookies onto sheets and chill them for up to 24 hours before baking. This simple step helps keep their shape and texture intact while saving you time on busy baking days. When ready to bake, just preheat your oven, pop the chilled cookies in, and enjoy restaurant-quality results with minimal effort—truly a delightful treat that’s just as delicious as freshly made!
Danish Butter Cookies Variations & Substitutions
Customize these delightful Danish butter cookies to suit your taste and occasion! With a few simple swaps or additions, you can create a whole new experience with each crumbly bite.
-
Gluten-Free: Substitute all-purpose flour with a 1:1 gluten-free blend to accommodate gluten sensitivities—just as buttery and delicious!
-
Dairy-Free: Use coconut oil or vegan butter in place of European salted butter. You won’t miss the dairy, I promise!
-
Enhanced Flavor: Add a teaspoon of almond extract alongside the vanilla for a nutty twist that pairs beautifully with the buttery base.
-
Citrus Zest: Stir in a tablespoon of lemon or orange zest into the dough for a bright, refreshing flavor, perfect for summer gatherings.
-
Chocolate Lovers: Fold in mini chocolate chips or chunks for a deliciously indulgent variation. Just imagine the delightful blend of butter and chocolate melting in your mouth!
-
Spiced Delight: Add a pinch of cinnamon or nutmeg to the dough for a warm, spicy undertone, enhancing the cookies’ cozy appeal.
-
Festive Coating: Instead of coarse sugar, use colored sprinkles or edible glitter on top before baking for a fun festive flair—perfect for holidays!
-
Chewy Texture: Incorporate a bit of cornstarch into the flour mix for a slightly chewy texture that still retains that melt-in-your-mouth magic.
Feel free to mix and match these ideas, or check out my recipes for Chocolate Peanut Butter Bars and Kitchen Sink Cookies for more inspiration! Each variation brings out different flavors that can elevate your holiday baking experience.
What to Serve with Melt-in-Your-Mouth Danish Butter Cookies?
These delicate, buttery delights are not just a treat—they’re a centerpiece for your holiday gatherings, calling for delightful companions to enhance every bite.
-
Hot Cocoa: Rich and creamy, hot cocoa pairs perfectly with the buttery texture, providing a comforting warmth on chilly evenings. You can even top it with a dollop of whipped cream for extra indulgence!
-
Spiced Mulled Wine: With fragrant spices like cinnamon and clove, this festive drink complements the cookies’ buttery richness, creating a warm and cozy atmosphere.
-
Fruit Platter: Fresh fruits like strawberries and citrus provide a refreshing contrast to the richness of the cookies, adding a bright burst of flavor and color.
-
Cheese Board: Soft cheeses like brie or mild cheddar balance the sweetness of the cookies and offer a delightful contrast in texture and taste, making every bite intriguing.
-
Coffee: The deep, bold flavors of a freshly brewed cup of coffee enhance the cookie’s melt-in-your-mouth experience, creating a perfect afternoon pick-me-up.
-
Chocolate Dipping Sauce: Drizzle warm chocolate sauce over these cookies for a decadent twist that’ll have dessert lovers swooning.
-
Gingerbread Latte: The spices in a gingerbread latte echo the warmth of the holiday season, creating an irresistible pairing with the melt-in-your-mouth cookies.
-
Vanilla Ice Cream: Serve these cookies alongside a scoop of creamy vanilla ice cream for a blissful combination that’s both rich and refreshing.
These pairings will elevate your holiday desserts, ensuring every gathering is unforgettable!
How to Store and Freeze Danish Butter Cookies
Room Temperature: Keep cookies in an airtight container at room temperature for up to 5 days. This preserves their buttery flavor and melt-in-your-mouth texture.
Freezer: For longer storage, freeze Danish butter cookies in a single layer, then transfer to a freezer-safe bag. They can last for up to 3 months without losing their delightful quality.
Reheating: If desired, reheat frozen cookies in a preheated oven at 300°F (150°C) for about 5-10 minutes to refresh their softness before serving.
Unbaked Dough: Chilled piped cookies can be stored in the refrigerator for 2 days before baking. You can also freeze unbaked dough for later use, ensuring a fresh batch of cookies whenever you crave them.
Expert Tips for Danish Butter Cookies
-
Room Temperature Matters: Always use room temperature butter and eggs to ensure a smooth batter and the best melt-in-your-mouth texture.
-
Avoid Over-Mixing: Gently mix the ingredients until just combined. Over-mixing can result in tough cookies rather than the delicate crumb you desire.
-
Chill for Perfection: Chilling the piped cookies before baking is crucial. It helps maintain shape and prevents them from spreading too much in the oven.
-
Watch the Bake Time: Ovens can vary. Keep a close eye on your cookies as they bake, particularly during the final minutes, to avoid overbaking.
-
Use Quality Ingredients: Opt for high-quality European salted butter and pure vanilla extract; they make a world of difference in the flavor of your Danish Butter Cookies.
Danish Butter Cookies Recipe FAQs
How do I choose the right butter for Danish Butter Cookies?
I recommend using European salted butter for the richest flavor and perfect texture due to its higher fat content. If unavailable, unsalted butter works just fine; just add an extra ¼ teaspoon of salt to the mix to enhance the flavor.
How long can I store Danish Butter Cookies at room temperature?
You can store your Melt-in-Your-Mouth Danish Butter Cookies in an airtight container at room temperature for up to 5 days. This keeps them fresh and delicious, perfect for snacking or gifting during the holidays.
Can I freeze Danish Butter Cookies?
Absolutely! You can freeze your Danish butter cookies for up to 3 months. To do this, place them in a single layer on a baking sheet until frozen solid. Then transfer the cookies to a freezer-safe bag, making sure to remove as much air as possible.
What’s the best way to handle unbaked dough?
Chilled piped cookies can be kept in the refrigerator for up to 2 days before baking. Alternatively, for longer storage, freeze the unbaked dough wrapped tightly in plastic wrap or in an airtight container for up to 3 months. When ready to bake, let it thaw in the fridge overnight before piping and baking as usual.
Are there any common baking issues with Danish Butter Cookies?
If your cookies spread too much, it might be that they weren’t chilled enough before baking or that the butter was too soft. Make sure your piped cookies are well-chilled for at least 20-30 minutes before placing them in the oven to help them retain their beautiful shapes.
Are these cookies suitable for dietary restrictions?
While Danish Butter Cookies generally contain gluten and dairy, you can substitute ingredients to cater to allergies. For a gluten-free version, use a gluten-free flour blend. For dairy-free cookies, try using a plant-based butter alternative. Always check ingredient labels to ensure they meet your specific dietary needs.
Melt-In-Your-Mouth Danish Butter Cookies for Holiday Bliss
Ingredients
Equipment
Method
- Chill ingredients and preheat the refrigerator.
- Line two baking sheets with parchment paper.
- Cream room temperature butter, sugar, and salt together in a stand mixer until light and fluffy, about 3-5 minutes.
- Add egg yolks, vanilla extract, and whole milk, then mix until fully incorporated, about 1-2 minutes.
- In a separate bowl, whisk all-purpose and cake flour together. Gradually combine the flour with the butter mixture, stirring gently until no flour streaks remain, about 2-3 minutes.
- Transfer cookie dough into a piping bag fitted with a star tip and pipe 2-inch shapes onto prepared baking sheets.
- Chill piped cookies in the refrigerator for 20-30 minutes to maintain shape.
- Preheat the oven to 350°F (175°C) and bake cookies for 10-15 minutes or until edges are lightly golden.
- Allow cookies to cool on the sheets for a few minutes before transferring them to a wire rack to cool completely.
Leave a Reply