
The leaves are turning, and a delightful chill fills the air—it’s that time of year when we get to indulge in all things spooky and sweet! I’m thrilled to share with you these 12 imaginative Halloween desserts that will captivate your guests, from kids to adults. One standout treat is the Halloween Dirt Cups, a fun and easy-to-make dessert that combines creamy chocolate pudding with crunchy, crushed Oreos and colorful gummy worms. Not only are they quick no-bake recipes, but they also bring a playful touch to your Halloween festivities! Trust me, these spooky treats are sure to create lasting memories and spark joy around any party table. So, are you ready to awaken your inner monster chef and trick out your dessert table this Halloween?
Why Are Halloween Dirt Cups a Must-Try?
Irresistible Fun: Halloween Dirt Cups are perfect for all ages, combining whimsy and deliciousness in one delightful treat.
Quick No-Bake: With minimal effort and no baking required, these cups come together in minutes, allowing you to focus on the fun of Halloween.
Creative Layering: The visual appeal of layers of rich chocolate pudding and crushed Oreos creates a striking dessert that’s almost too cute to eat.
Gummy Worm Surprise: Topping off the treats with gummy worms adds a playful touch that kids will adore, making them an instant party favorite.
Adaptable Treat: Feel free to switch up the fillings and decorations—try swapping in vanilla pudding or adding themed sprinkles for a personalized twist! For more spooky inspiration, be sure to check out our Spooky Spiderweb Brownies for an extra spooky delight.
Halloween Dirt Cups Ingredients
For the Pudding Layer
• Chocolate Pudding – Provides a rich, creamy base for the Halloween Dirt Cups; vanilla pudding works wonderfully for a lighter taste.
• Vanilla Extract – Enhances the sweetness of the pudding; almond extract can add an intriguing flavor twist.
For the Crunchy Layer
• Crushed Oreos – Mimics dirt in the cups; gluten-free options are available for those with dietary restrictions.
For the Toppings
• Gummy Worms – Fun, colorful garnish that brings a playful touch; sour gummy worms can add an extra zing!
• Candy Eyes – A spooky addition for decorating; use colorful varieties or chocolate eyes for added fun.
Optional Decorations
• Chocolate Sprinkles – Perfect for an extra layer of texture and a festive look; swap in themed sprinkles for more Halloween spirit.
• Whipped Cream – Adds a light, fluffy texture on top; can be replaced with a dairy-free alternative for dietary needs.
Dive into making these delightful Halloween Dirt Cups and let your creativity shine!
Step‑by‑Step Instructions for Halloween Dirt Cups
Step 1: Prepare the Pudding
In a mixing bowl, whisk together chocolate pudding mix and cold milk according to package instructions, typically for about two minutes until thickened and smooth. Make sure there are no lumps. This rich chocolate layer is the heart of your Halloween Dirt Cups, ready to create a delicious foundation.
Step 2: Crush the Oreos
Take a package of Oreos and place them in a zip-top bag. Use a rolling pin to crush them into fine crumbs, resembling dirt, which should take about 5-7 minutes. This crunchy layer adds texture and fun to your Halloween Dirt Cups, creating that perfect contrast with the creamy pudding.
Step 3: Layer the Ingredients
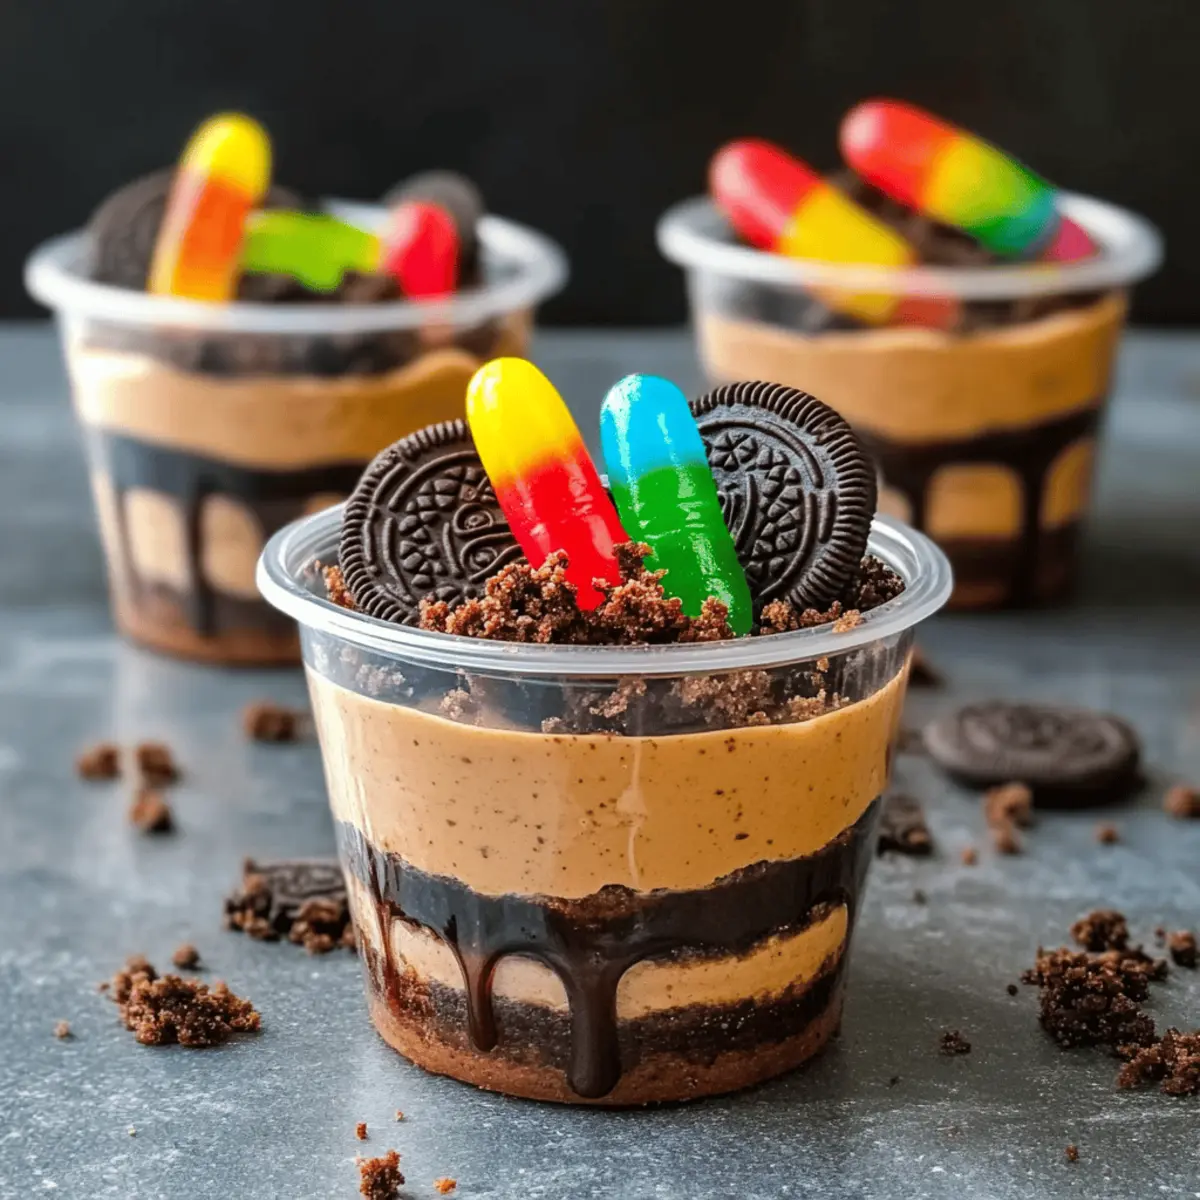
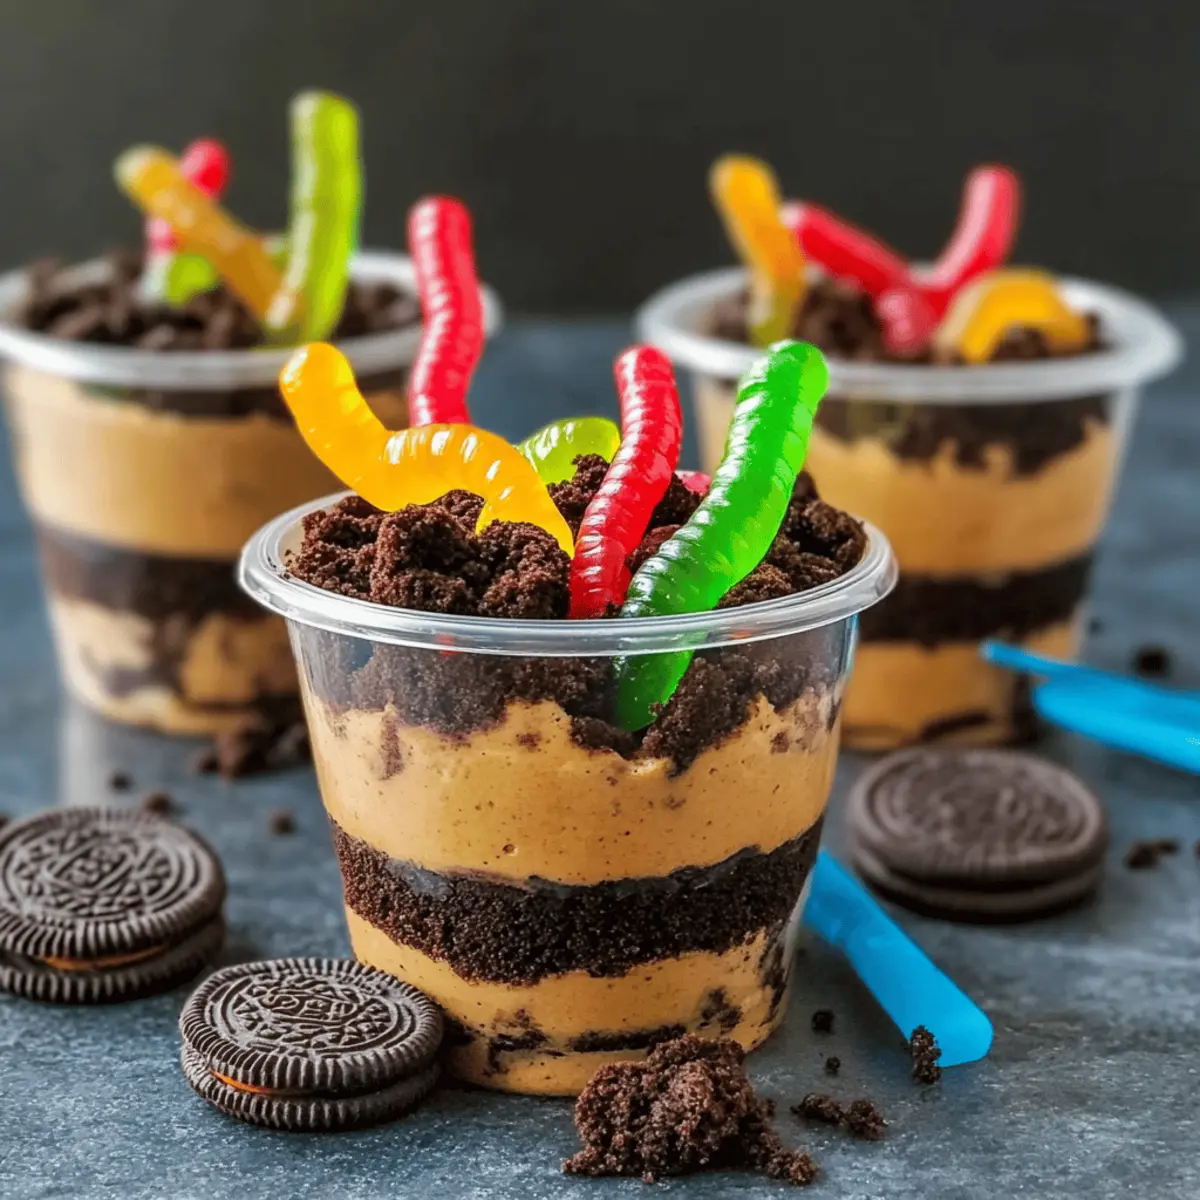
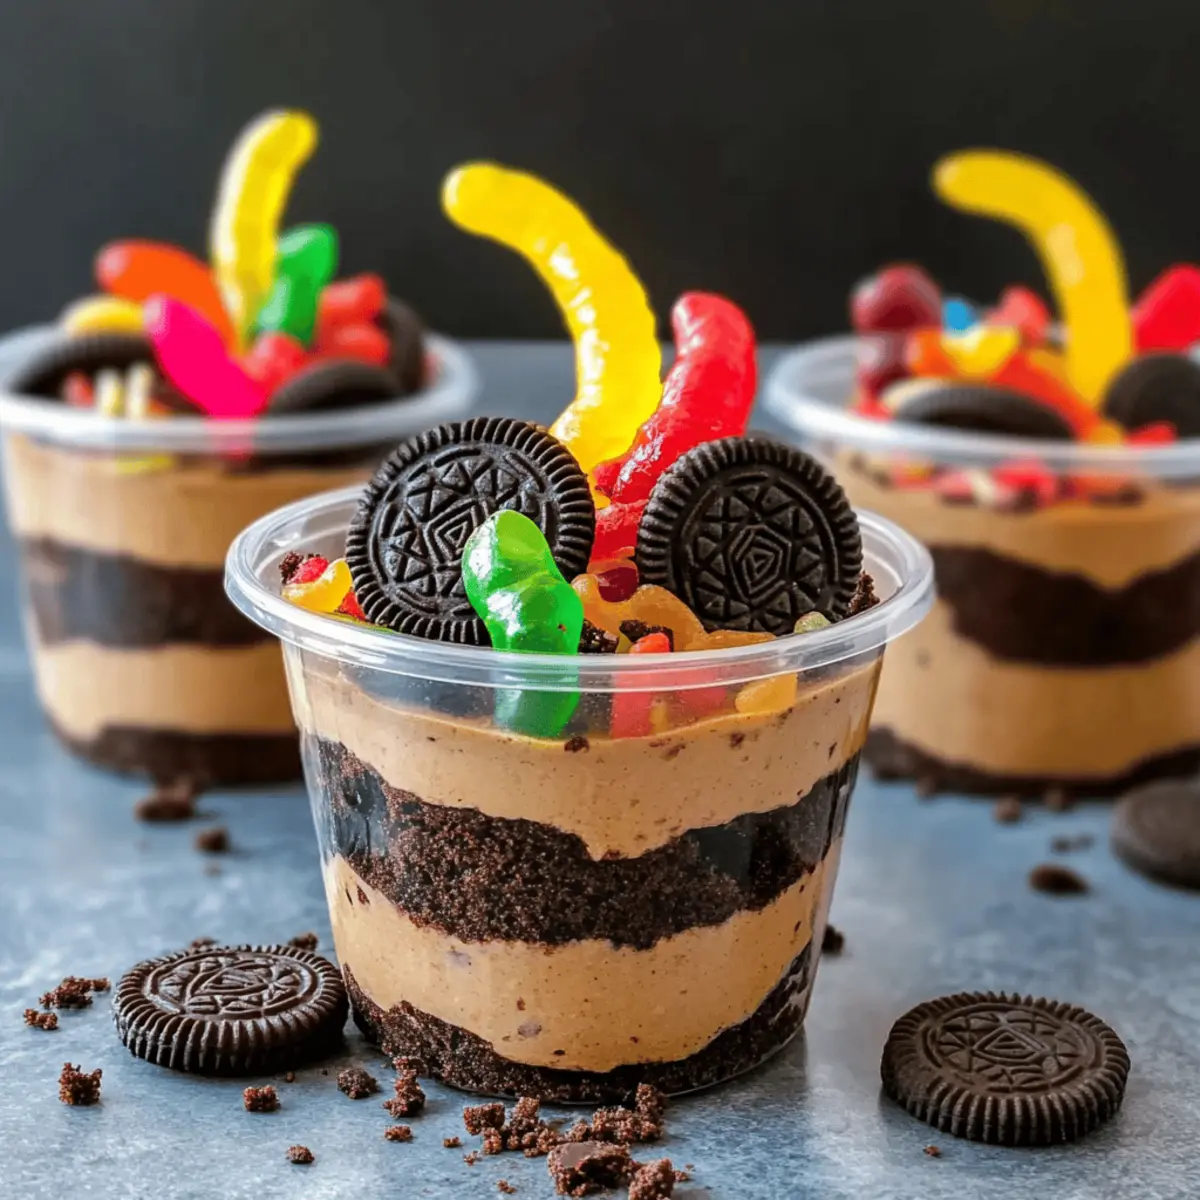
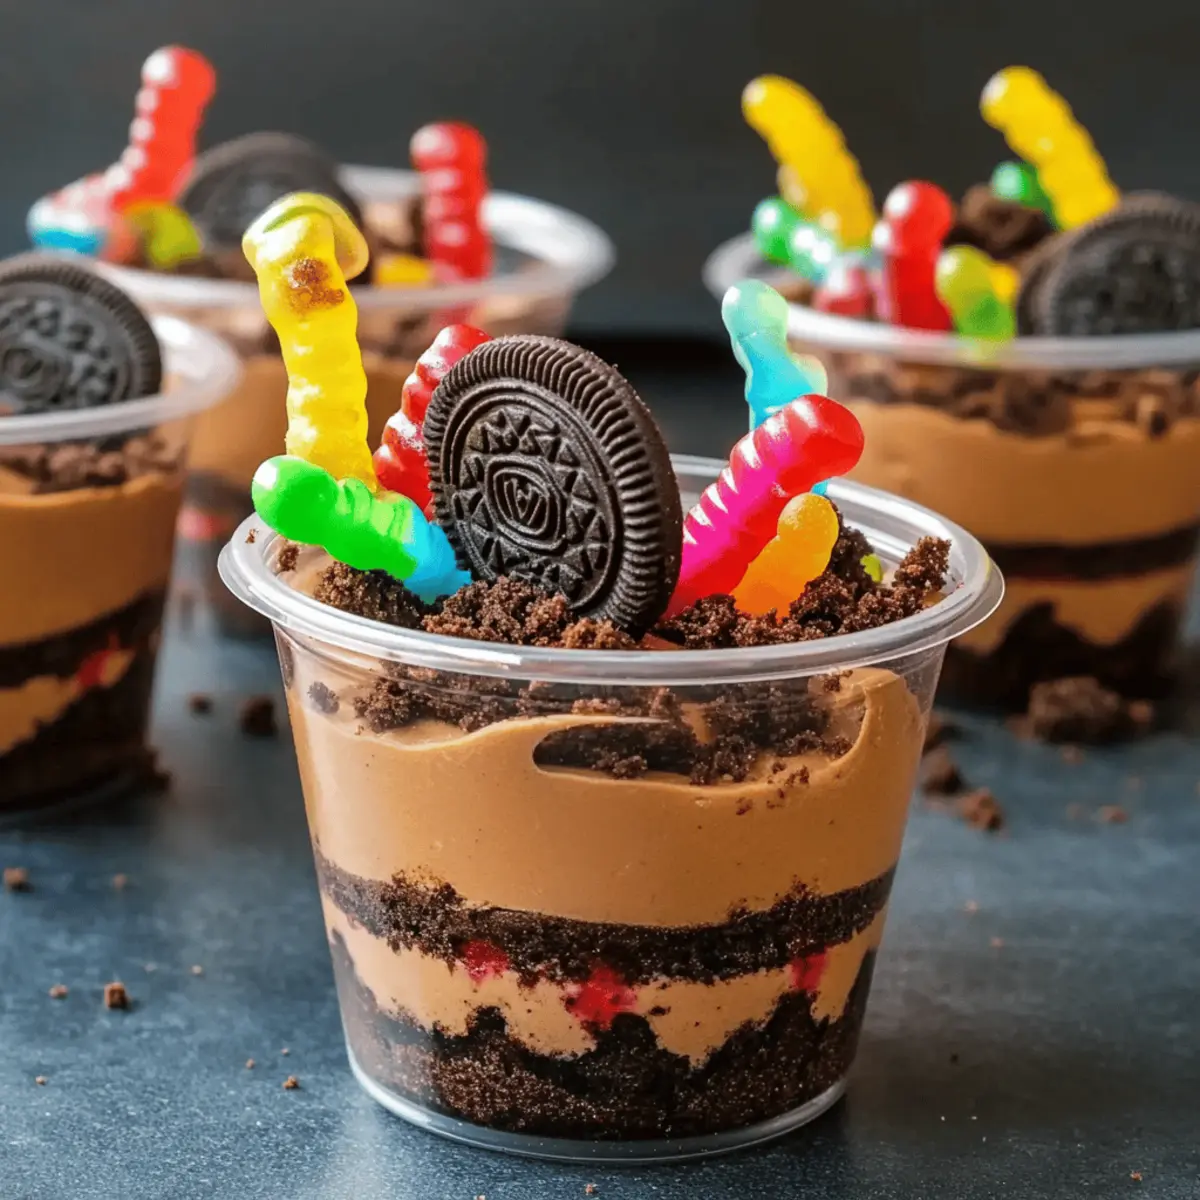
Grab clear cups or jars, and start by adding a generous spoonful of chocolate pudding at the bottom of each. Follow it up with a layer of crushed Oreos, about an inch thick. Alternate the layers until you reach the top of the cup, leaving enough space for your fun toppings. This visual layering makes your Halloween Dirt Cups enticing and playful!
Step 4: Add the Toppings
Once all layers are assembled, it’s time to have fun decorating your Halloween Dirt Cups. Top each cup with extra crushed Oreos for a “dirt” look, then place gummy worms creatively on top. You might also add candy eyes for a spooky surprise! The colorful gummy worms peeking out will truly elevate these whimsical treats.
Step 5: Chill the Cups
To set the layers and enhance the flavors, place your assembled Halloween Dirt Cups in the refrigerator for at least 30 minutes. This chilling period helps the pudding firm up slightly, making it easier to enjoy each delicious bite when it’s time to serve, and adds to the excitement of the spooky reveal.
Step 6: Present Your Treats
Before serving, consider adding a dollop of whipped cream or a sprinkle of chocolate sprinkles on top for an extra festive touch. Arrange your Halloween Dirt Cups on a decorative platter to captivate your guests at the Halloween party. The striking visual presentation will make these delightful treats hard to resist!
Make Ahead Options
These Halloween Dirt Cups are a lifesaver for busy home cooks looking to streamline their Halloween festivities! You can prepare the chocolate pudding layer and crush the Oreos up to 24 hours in advance. Simply cover the pudding tightly with plastic wrap to prevent a skin from forming, and keep the crushed Oreos in an airtight container to maintain their crunchiness. When it’s time to serve, just layer the pudding and Oreos in cups, top with gummy worms and any decorative elements like candy eyes or sprinkles. With this make-ahead strategy, you’ll enjoy delicious, fun Halloween Dirt Cups without the last-minute rush!
Expert Tips for Halloween Dirt Cups
• Crush Oreos Properly: Aim for fine crumbs to achieve a realistic “dirt” look; larger pieces may disrupt the layering.
• Chilling Time Matters: Ensure you chill the cups for at least 30 minutes so the pudding sets properly, making them easier to eat.
• Pudding Alternative: If chocolate isn’t your favorite, switch to vanilla pudding for a lighter flavor and a fun contrast with the Oreos.
• Decoration Ideas: Get creative with toppings! Use edible eyeballs, themed sprinkles, or even gummy spiders for an extra spooky flair.
• Container Choice: Serve in clear cups or jars to showcase the beautiful layers—this will captivate your guests and add to the festive spirit!
• Make-Ahead Magic: Prepare these Halloween Dirt Cups a day in advance; just keep them covered in the fridge to maintain freshness.
Halloween Dirt Cups Variations & Substitutions
Feel free to get creative and personalize your Halloween Dirt Cups with these fun and tasty twists!
-
No-Bake Option: Use instant pudding mix for speed and convenience, cutting down prep time dramatically.
-
Gluten-Free: Swap out Oreos for gluten-free cookies or crushed graham crackers, ensuring everyone can indulge in the fun.
-
Fruity Layer: Mix in layers of fresh fruit, like mashed bananas or diced strawberries, to add a burst of color and flavor.
-
Nutty Crunch: Incorporate crushed nuts, such as walnuts or pecans, between layers for an added crunch and rich flavor.
-
Halloween Sprinkles: Decorate with themed sprinkles or colored sugar for a festive touch—perfect for kids and party atmosphere!
-
Vegan Twist: Use dairy-free chocolate pudding and coconut whipped cream for a delicious vegan version, so everyone can enjoy!
-
Spicy Kick: Add a sprinkle of chili powder to your crushed Oreos for a surprising twist that adds both heat and flavor.
-
Cake Pop Option: Instead of cups, turn your dirt cups into cake pops, layering the ingredients into a cohesive handheld treat.
Remember, the joy of cooking is in the exploration—so let these variations inspire your very own spooky masterpiece, and for another creepy creation, check out our Dirty Fries Indulge to scare up some culinary fun!
What to Serve with Halloween Dirt Cups?
Creating a spine-chilling dessert table doesn’t have to be a daunting task—let’s make it a culinary adventure!
- Spooky Themed Punch: A vibrant, fruity punch with floating eyeball gummies enhances the spooky spirit of your dessert table.
- Monster Marshmallow Pops: These fun treats, dipped in chocolate and decorated with candy eyes, bring a playful touch that kids love.
- Witch’s Broomstick Snacks: Pair your dirt cups with these clever treats made from pretzel sticks and string cheese that are healthy yet festive.
- Cheesy Mummy Wraps: These savory bites wrapped in crescent dough masquerade as mummies and complement the sweetness of the cupcakes beautifully.
- Pumpkin Shaped Cheese Balls: This creamy, orange-colored treat adds a savory contrast, with the pumpkin shape perfectly enhancing your Halloween display.
Serve these yummy accompaniments alongside your Halloween Dirt Cups, and watch as they enchant your guests, making every bite feel like a celebration of the season!
How to Store and Freeze Halloween Dirt Cups
Fridge: Store your prepared Halloween Dirt Cups in the refrigerator, tightly covered with plastic wrap or in an airtight container for up to 3 days. This keeps them fresh and delicious!
Make-Ahead: You can assemble the cups a day before your Halloween party. Just add the gummy worms and decorations right before serving to maintain their fun appearance!
Freezer: If you’ve made extra pudding, you can freeze the chocolate pudding base in an airtight container for up to 2 months. Thaw in the fridge before layering them into dirt cups.
Reheating: These spooky treats are meant to be served cold, so there’s no need to reheat. Just enjoy the creamy, chilled layers as a refreshing dessert!
Halloween Dirt Cups Recipe FAQs
How do I select the right chocolate pudding?
Absolutely! When choosing chocolate pudding for your Halloween Dirt Cups, look for one with a rich, creamy texture. Many brands offer instant versions that are easy to whisk together, but be sure to check the ingredient list for quality cocoa content. Substituting with a vanilla pudding can also offer a lighter base if you prefer!
How should I store leftover Halloween Dirt Cups?
You can easily store your remaining Halloween Dirt Cups in the refrigerator, tightly covered with plastic wrap or in an airtight container. They’ll stay fresh and delicious for up to 3 days. Just remember to add your gummy worms and any decorations right before serving to keep them looking fun and festive!
Can I freeze any parts of the Halloween Dirt Cups?
Yes! If you’ve made extra chocolate pudding, you can freeze it in an airtight container for up to 2 months. When you’re ready to use it, simply thaw it in the fridge overnight. However, keep in mind that once assembled with Oreos and toppings, these delightful cups are best enjoyed fresh and chilled rather than frozen.
What do I do if the pudding is too lumpy?
Very! If your pudding turns out lumpy, don’t worry! Just whisk it vigorously until smooth or use a hand mixer to ensure there are no lumps. You can also pass it through a fine-mesh strainer to achieve a silky consistency. For a smoother experience, make sure to adequately stir it as you combine the pudding mix and milk.
Are there any allergy considerations for Halloween Dirt Cups?
Definitely! If you’re serving guests with dietary restrictions or allergies, consider substituting the Oreo cookies with gluten-free cookies or using alternative toppings like fruit for a healthier twist. Additionally, if you’re inviting someone who has nut allergies, be sure to confirm the ingredients in your gummy worms and any other toppings like nut butters.
How far in advance can I prepare Halloween Dirt Cups?
You can assemble your Halloween Dirt Cups a day before the event! Just prepare them as instructed but hold off on adding any gummy worms or decorations until right before serving. By doing this, you can save time on the day of your party while ensuring that everything stays fresh and visually appealing!
Delicious Halloween Dirt Cups That Kids Will Love
Ingredients
Equipment
Method
- In a mixing bowl, whisk together chocolate pudding mix and cold milk according to package instructions until thickened and smooth.
- Take a package of Oreos and crush them into fine crumbs in a zip-top bag using a rolling pin.
- Layer clear cups with a generous spoonful of chocolate pudding followed by a layer of crushed Oreos, alternating until the cup is full.
- Top each cup with extra crushed Oreos, then add gummy worms and candy eyes for decoration.
- Chill the assembled cups in the refrigerator for at least 30 minutes to set the layers.
- Serve with a dollop of whipped cream or a sprinkle of chocolate sprinkles on top for extra festivity.
Leave a Reply