
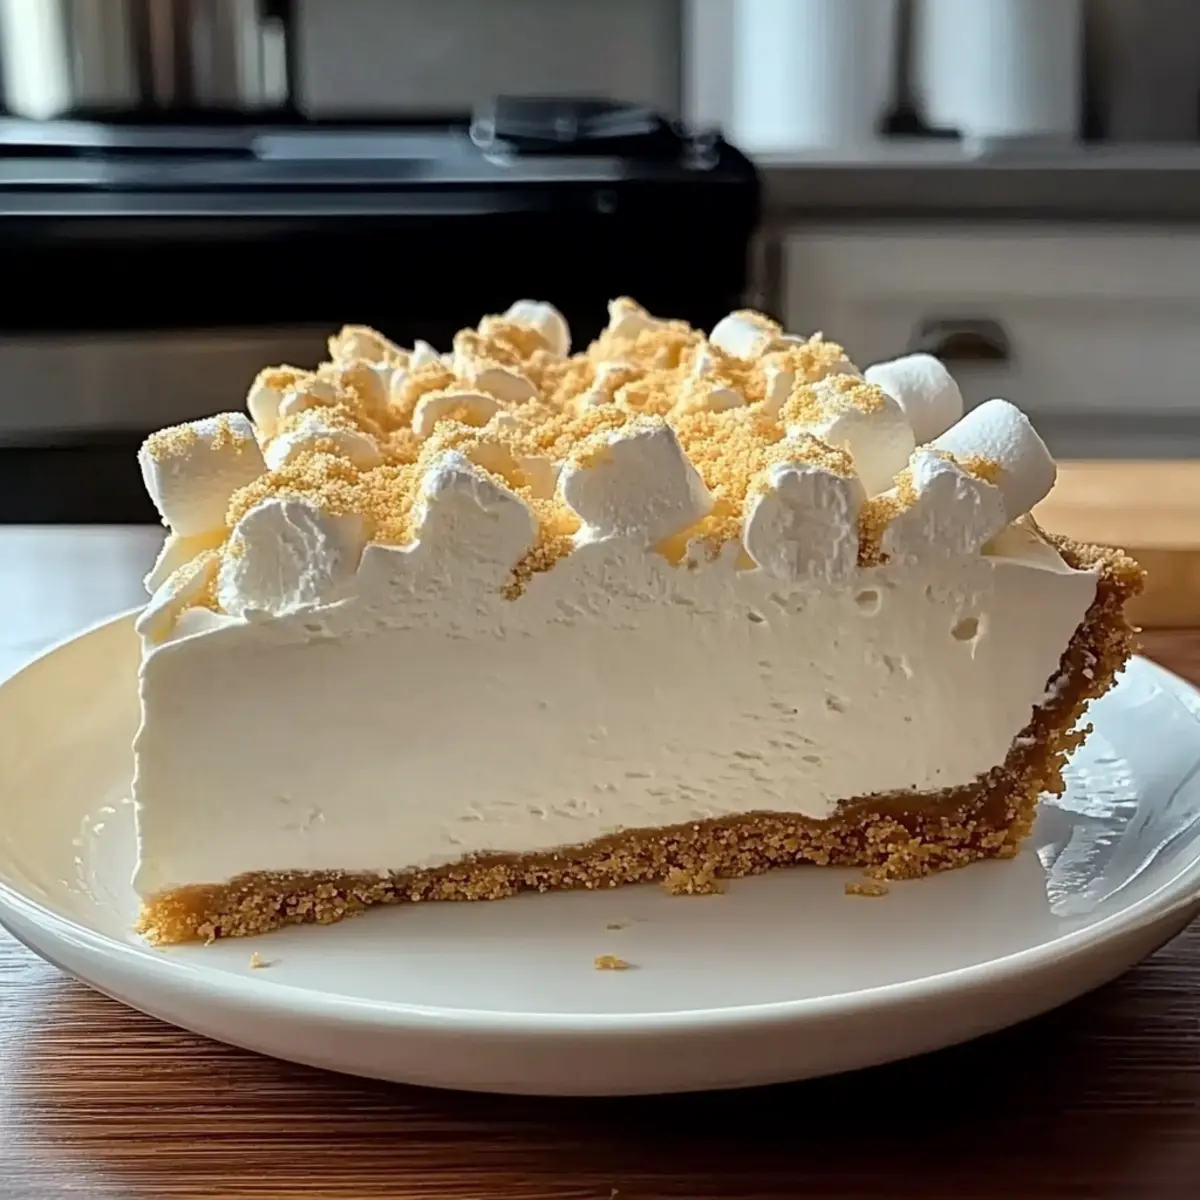
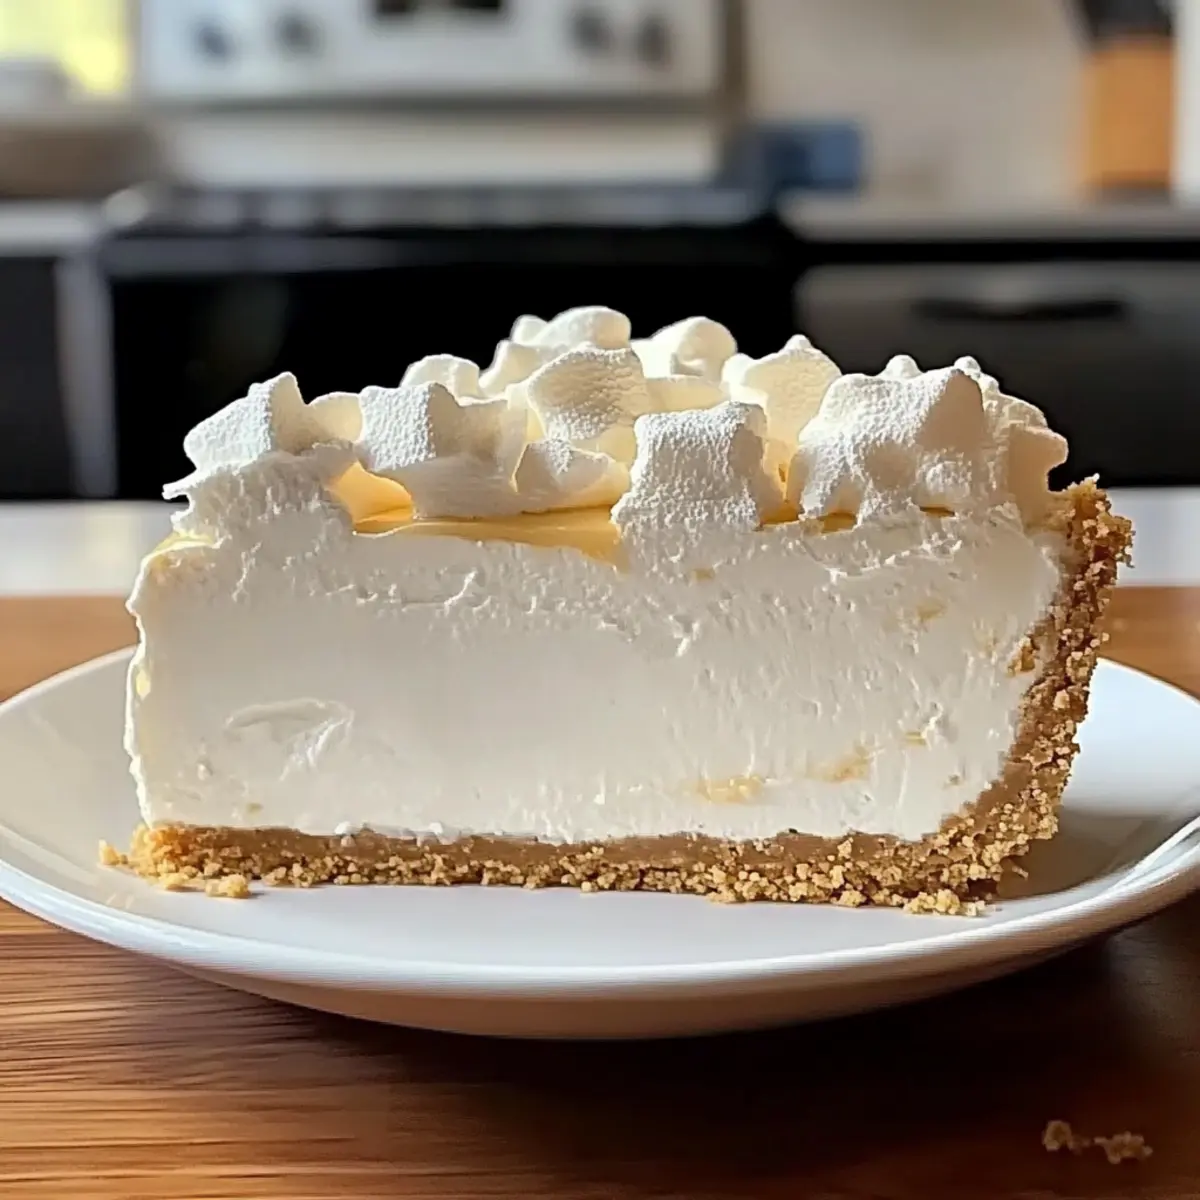
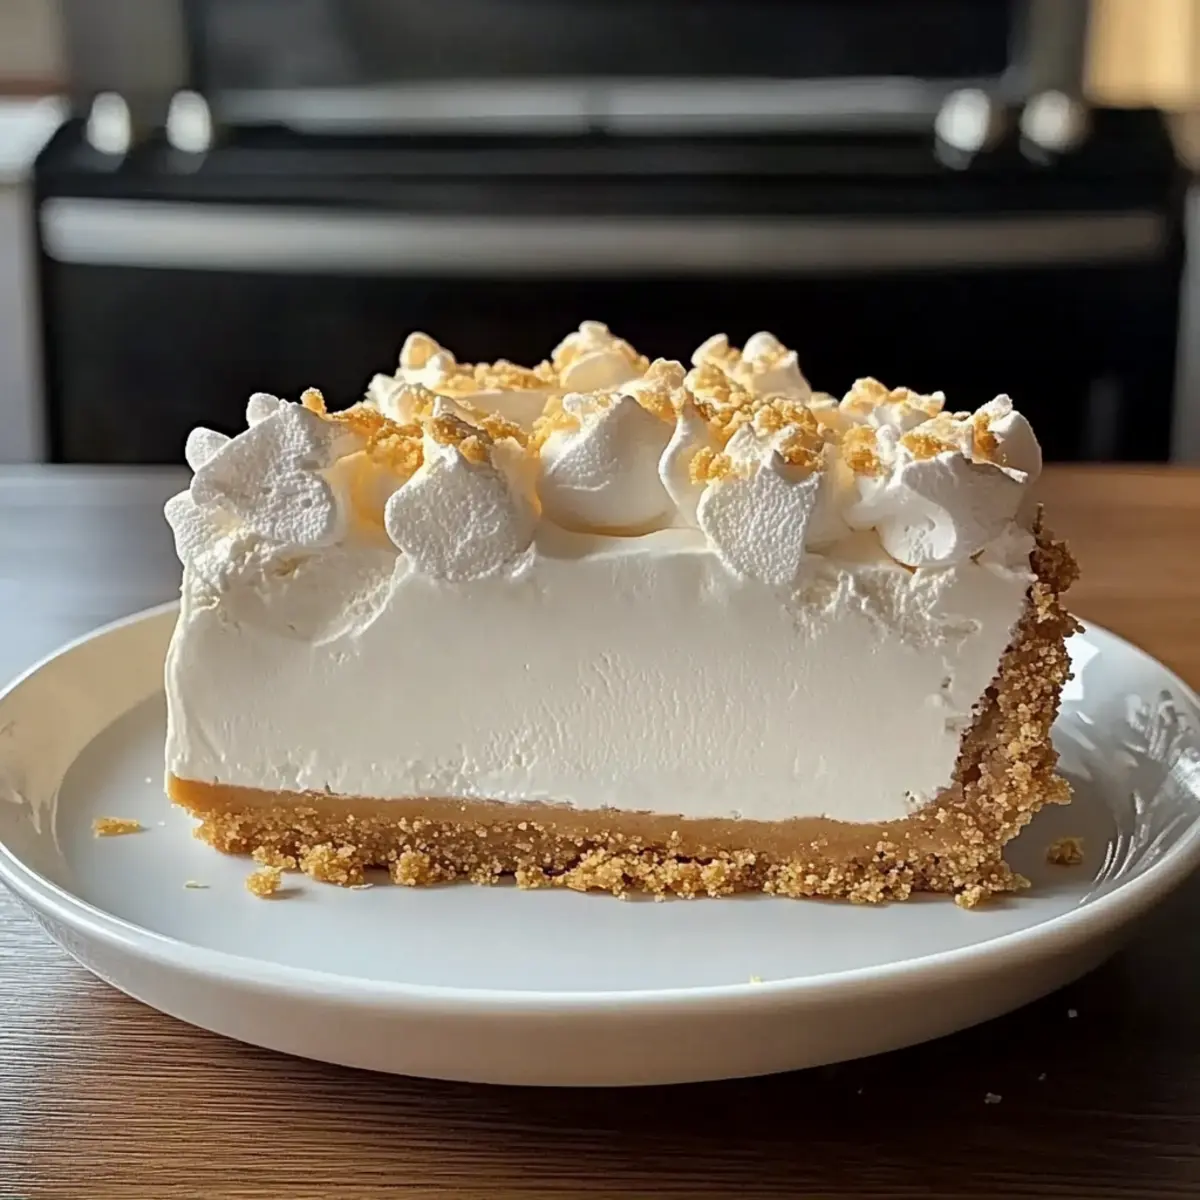
As I was revisiting some of my favorite childhood treats, I found myself captivated by the idea of a light and fluffy dessert that’s perfect for any occasion: the no-bake Marshmallow Whip Cheesecake. With its airy texture and creamy filling, it conjures up memories of warm summer nights and sweet campfire indulgences. What I love most about this recipe is its ease — no oven is required, making it a go-to, make-ahead-friendly option for gatherings or a simple weeknight treat. Plus, with a buttery graham cracker crust and the nostalgic flavor of marshmallow fluff blended with cream cheese, every bite is an absolute delight. Curious about how to whip this up for your next sweet craving? Let’s dive in!

Why is this cheesecake a crowd-pleaser?
Effortless Preparation: You won’t need to turn on the oven for this gem; it’s as simple as mixing, folding, and chilling!
Nostalgic Flavor: The combination of fluffy marshmallow and creamy cheese will transport you back to childhood days.
Versatile Toppings: Customize every serving with fresh berries or rich chocolate drizzle to impress your guests!
Make-Ahead Friendly: Perfect for busy schedules, this cheesecake can be prepared in advance and stored in the fridge for up to 5 days.
Whether it’s a summer gathering or a cozy family dinner, this delicious Marshmallow Whip Cheesecake is sure to be a hit, much like our Strawberry Cheesecake Cinnabon or the ever-popular Chocolate Cheesecake Decadent.
Marshmallow Whip Cheesecake Ingredients
• Discover the essentials for a creamy delight!
For the Crust
- Graham cracker crumbs – Base structure for the crust; substitute with chocolate wafer cookies for a richer flavor.
- Sugar – Sweetener for the crust; reduce the amount for a less sweet base.
- Butter – Binds the crust together; use coconut oil for a dairy-free option.
For the Filling
- Cream cheese – Adds richness and creaminess to the filling; opt for a low-fat version for a lighter cheesecake.
- Marshmallow fluff – Primary flavor and sweetness in the filling; homemade whipped cream can replace it for a fresher taste.
- Vanilla extract – Enhances overall flavor; optional, but highly recommended for depth.
- Whipped topping – Provides lightness to the cheesecake; substitute with homemade whipped cream for a fresher taste.
Optional Toppings
- Fresh fruits – Enhance presentation and flavor; strawberries or blueberries work wonderfully.
- Mini marshmallows – Add a whimsical touch on top of each slice; perfect for a nostalgic feel.
- Chocolate drizzle – For an extra indulgent finish; melted chocolate adds richness and sophistication.
Now you have all the necessary ingredients to create this delightful Marshmallow Whip Cheesecake! Let’s get cooking and create something truly unforgettable.
Step‑by‑Step Instructions for Marshmallow Whip Cheesecake
Step 1: Prepare the Crust
In a medium bowl, combine graham cracker crumbs and sugar, mixing well to ensure even distribution. Melt your butter and stir it into the crumb mixture until fully combined. Firmly press this mixture into the bottom of a 9-inch springform pan, creating an even layer. Chill the crust in the refrigerator for at least 30 minutes until set.
Step 2: Beat the Cream Cheese
While the crust chills, take a separate mixing bowl and beat the cream cheese using an electric mixer on medium speed until smooth and creamy. This should take about 2-3 minutes. Scrape down the sides of the bowl to make sure there are no lumps, then add the marshmallow fluff and vanilla extract, continuing to beat until the mixture is completely combined and fluffy.
Step 3: Fold in the Whipped Topping
Once the filling is smooth, gently fold in the whipped topping using a spatula. Be careful not to overmix; you want to keep the mixture airy and light to achieve that delightful texture in your Marshmallow Whip Cheesecake. This step should take just a minute or two.
Step 4: Assemble the Cheesecake
Remove the chilled crust from the refrigerator and spread the marshmallow filling evenly over it. Use a spatula to smooth the top for a nice finish. Make sure the filling reaches the edges of the crust, creating a beautiful presentation.
Step 5: Chill the Cheesecake
Cover the assembled cheesecake with plastic wrap and place it in the refrigerator. Allow it to chill for a minimum of 4 hours, or better yet, overnight. This resting time helps the flavors meld and the filling set properly for the perfect slice.
Step 6: Add Toppings and Serve
Before serving, remove the cheesecake from the refrigerator and carefully detach the springform ring. Feel free to decorate the top with your choice of fresh fruits, mini marshmallows, or a drizzle of chocolate for an eye-catching appearance. Slice, serve chilled, and watch as everyone indulges in the creamy goodness of your Marshmallow Whip Cheesecake!
Expert Tips for Marshmallow Whip Cheesecake
• Room Temperature Cream Cheese: Ensure your cream cheese is at room temperature for smoother blending and to avoid lumps in your filling.
• Customize the Sweetness: If you prefer a less sweet cheesecake, consider reducing the sugar in both the crust and filling without sacrificing flavor.
• Fold Gently: When incorporating the whipped topping, fold gently to keep the mixture airy. Overmixing can lead to a denser cheesecake.
• Chill Time is Key: Chill the cheesecake for at least 4 hours, but overnight is best to allow flavors to meld perfectly in your Marshmallow Whip Cheesecake.
• Try Variations: Experiment with different flavored extracts, like almond or coconut, to give your cheesecake a unique twist!
How to Store and Freeze Marshmallow Whip Cheesecake
Fridge: Store the cheesecake in an airtight container or cover it tightly with plastic wrap. It will stay fresh for up to 5 days, perfect for those unexpected sweet cravings.
Freezer: For long-term storage, wrap the cheesecake tightly in plastic wrap and place it in a freezer-safe container. It can be frozen for up to 1 month without losing its delightful creamy texture.
Reheating: When ready to indulge, simply remove the cheesecake from the freezer and let it thaw in the fridge overnight before serving. Enjoy the same airy and creamy goodness of your Marshmallow Whip Cheesecake!
Make Ahead Options
These Marshmallow Whip Cheesecake delights are absolutely perfect for make-ahead meal prep! You can prepare the crust and refrigerate it for up to 3 days in advance, ensuring it remains crisp and flavorful. The filling can also be made up to 24 hours ahead; simply keep it covered in the fridge to maintain its airy texture. When you’re ready to serve, pour the filling over the chilled crust, smooth the top, and let it set in the refrigerator for at least 4 hours or preferably overnight. Just remember to garnish with your favorite toppings right before serving to keep them fresh and visually appealing. Enjoy the time-saving benefits of this no-bake cheesecake, perfect for busy weeknights or special gatherings!
Marshmallow Whip Cheesecake Variations
Feel free to get creative and customize this delightful cheesecake to suit your tastes and dietary needs!
-
Chocolate Crust: Use chocolate wafer cookies instead of graham crackers for a rich, chocolatey base that will set your dessert apart.
-
Lighter Version: Opt for low-fat cream cheese and reduce the sugar to create a guilt-free indulgence everyone can enjoy.
-
Fresh Fruit Toppings: Top your cheesecake with fresh berries like strawberries or blueberries for a burst of color and natural sweetness.
-
Nutty Crunch: For added texture, sprinkle crushed nuts such as pecans or almonds over the top before serving.
-
Flavor Boost: Try adding a teaspoon of almond or coconut extract to the filling for an unexpected twist, enhancing its flavor profile delightfully.
-
Mini Desserts: For a fun twist, pour the filling into cupcake liners in a muffin tin to create individual mini cheesecakes—perfect for gatherings!
-
Swirled Goodness: Swirl in some raspberry or strawberry jam before chilling for a visually stunning dessert that adds fruitiness to each bite.
-
Extra Creamy: Swap out whipped topping with homemade whipped cream for an irresistible freshness, elevating this dessert to the next level.
Whichever variation you choose, each delectable bite will remind you of our Caramel Brownie Cheesecake or even a cozy Coffee Cheesecake experience! Keep these ideas in mind, and let your imagination run wild as you create your perfect Marshmallow Whip Cheesecake!
What to Serve with Marshmallow Whip Cheesecake
Elevate your dessert experience with delightful pairings that perfectly complement this creamy treat!
-
Fresh Berries: Their bright flavor and juicy texture balance the sweetness of the cheesecake, adding a refreshing contrast to each bite. Strawberries, raspberries, and blueberries make vibrant garnishes that invite a touch of nature’s sweetness.
-
Whipped Cream: A dollop of homemade whipped cream enhances the light, airy texture of the cheesecake. Its creamy richness complements the fluffiness, offering an indulgent experience that is simply irresistible.
-
Chocolate Sauce: Drizzling warm chocolate sauce over the cheesecake adds a luxurious touch. The deep, rich flavor of chocolate melds beautifully with the marshmallow notes, creating an elevated dessert moment.
-
Mint Leaves: Fresh mint leaves add a pop of color and a refreshing twist. Their cool aroma brightens the palate and contrasts delightfully with the cheesecake’s sweet creaminess, making every slice refreshing.
-
Nutty Biscotti: Pair with crispy almond or hazelnut biscotti for some crunch. Dipping the biscotti in coffee before indulging in the cheesecake brings a delightful interplay of flavors and textures that will captivate your taste buds.
-
Sparkling Rosé: The light, fruity notes of sparkling rosé make it an excellent drink choice. The bubbles will cleanse your palate, while the sweetness enhances the nostalgic flavors of your Marshmallow Whip Cheesecake.
-
Coconut Macaroons: These chewy delights echo the fluffy texture of the cheesecake while introducing a tropical flair. With their coconut richness, they harmoniously tie together the flavors of nostalgia and indulgence.
-
Mini Marshmallows: Scatter mini marshmallows on top for whimsy and added sweetness. They not only enhance the visual appeal but also amplify the nostalgic marshmallow flavor in the cheesecake, ensuring a fun, playful presentation.
Enjoy crafting your perfect dessert spread to make every gathering memorable!
Marshmallow Whip Cheesecake Recipe FAQs
How do I know if my marshmallow fluff is fresh?
Absolutely! Fresh marshmallow fluff should be smooth and spreadable without any visible separation or dark spots. If it appears thick and hard to scoop, it may be past its prime. Always check the expiration date on the jar for reassurance!
What’s the best way to store leftovers of the cheesecake?
Very! Store any leftover Marshmallow Whip Cheesecake in an airtight container, or you can cover it tightly with plastic wrap. It will remain fresh in the refrigerator for up to 5 days. Just make sure to keep it chilled to maintain its creamy texture!
Can I freeze Marshmallow Whip Cheesecake, and how?
Definitely! For longer storage, wrap the cheesecake tightly in plastic wrap, then place it in a freezer-safe container. This keeps it fresh for up to 1 month. When you’re ready to enjoy, simply let it thaw overnight in the refrigerator before serving for that perfect creamy bliss.
What should I do if my cheesecake filling is too runny?
If your filling turns out too runny, it may be due to overmixing or using cold ingredients. To fix this, try refrigerating the filling for about 30 minutes to thicken it up before spreading it onto the crust. If it’s still not firm, you can mix in more whipped topping to help stabilize it.
Are there any dietary considerations for my cheesecake?
Yes! If you have guests with dietary restrictions, consider using low-fat cream cheese or a dairy-free alternative like coconut cream to cater to lactose intolerance. Additionally, you might use sugar substitutes for a healthier take, accommodating those watching their sugar intake. Always ask about allergies, especially for ingredients like marshmallow fluff.
Can I make mini cheesecakes using this recipe?
Absolutely! To make delightful mini cheesecakes, simply use a muffin tin lined with cupcake liners instead of a springform pan. Divide the crust and filling equally among the liners, and follow the same chilling instructions. They make for charming individual desserts that’ll impress anyone!
Delightful Marshmallow Whip Cheesecake for Effortless Bliss
Ingredients
Equipment
Method
- In a medium bowl, combine graham cracker crumbs and sugar, mixing well to ensure even distribution. Melt your butter and stir it into the crumb mixture until fully combined. Firmly press into the bottom of a 9-inch springform pan and chill for at least 30 minutes until set.
- Beat the cream cheese in a separate bowl using an electric mixer on medium speed until smooth and creamy, about 2-3 minutes. Add marshmallow fluff and vanilla extract, continuing to beat until fluffy.
- Gently fold in the whipped topping using a spatula. Be careful not to overmix.
- Spread the marshmallow filling evenly over the chilled crust and smooth the top with a spatula.
- Cover the cheesecake with plastic wrap and chill for a minimum of 4 hours, or overnight for best results.
- Remove the cheesecake from the refrigerator, detach the springform ring, and decorate with fresh fruits, mini marshmallows, or chocolate drizzle before serving.
Leave a Reply