
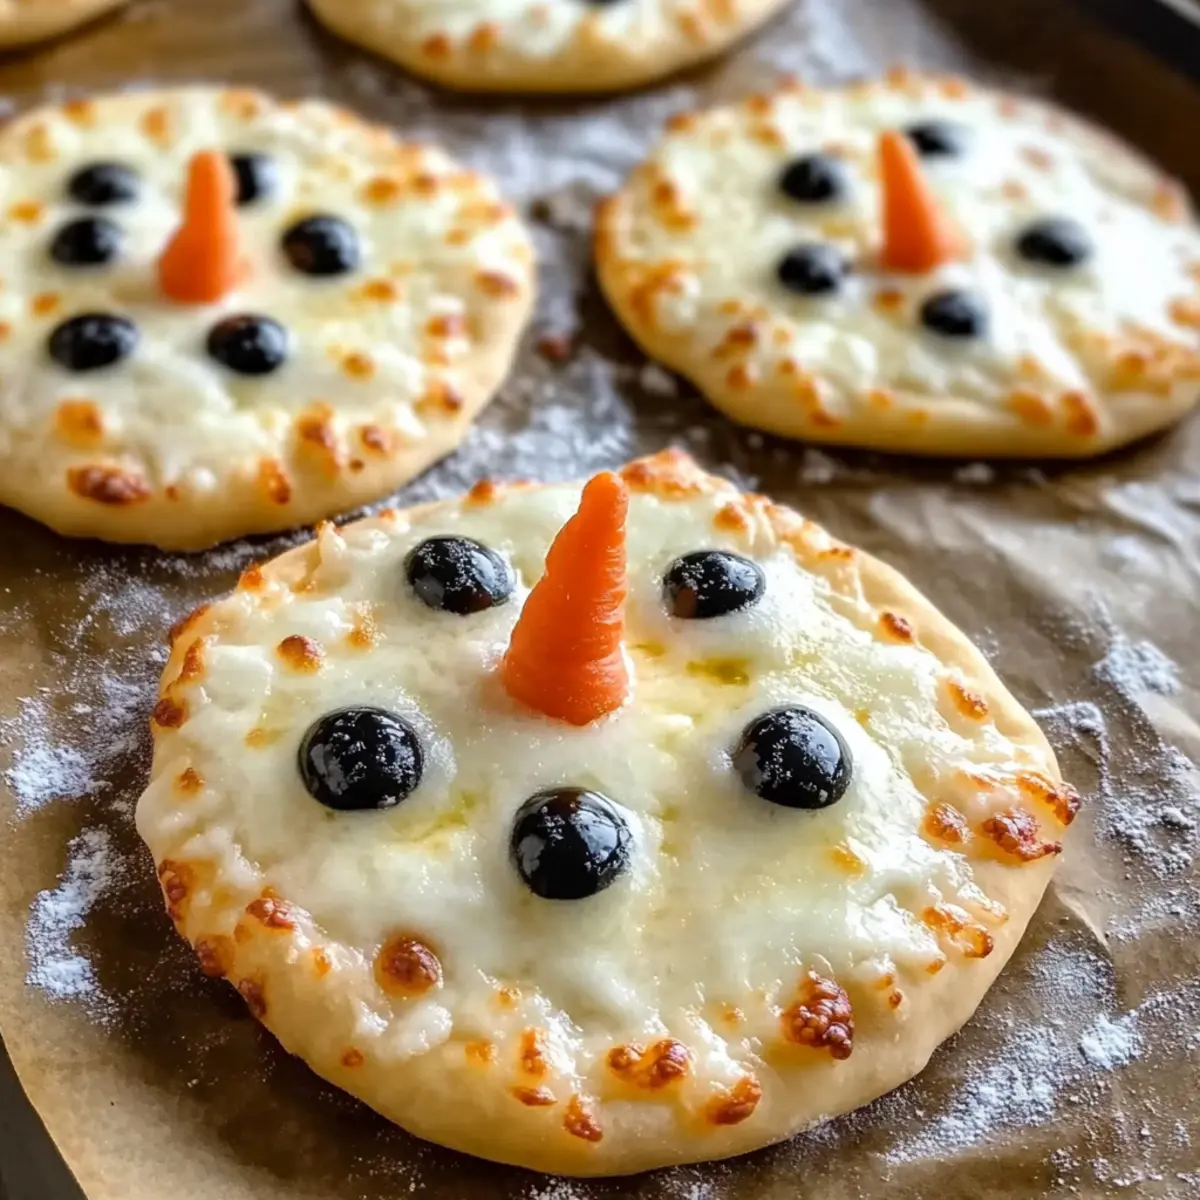
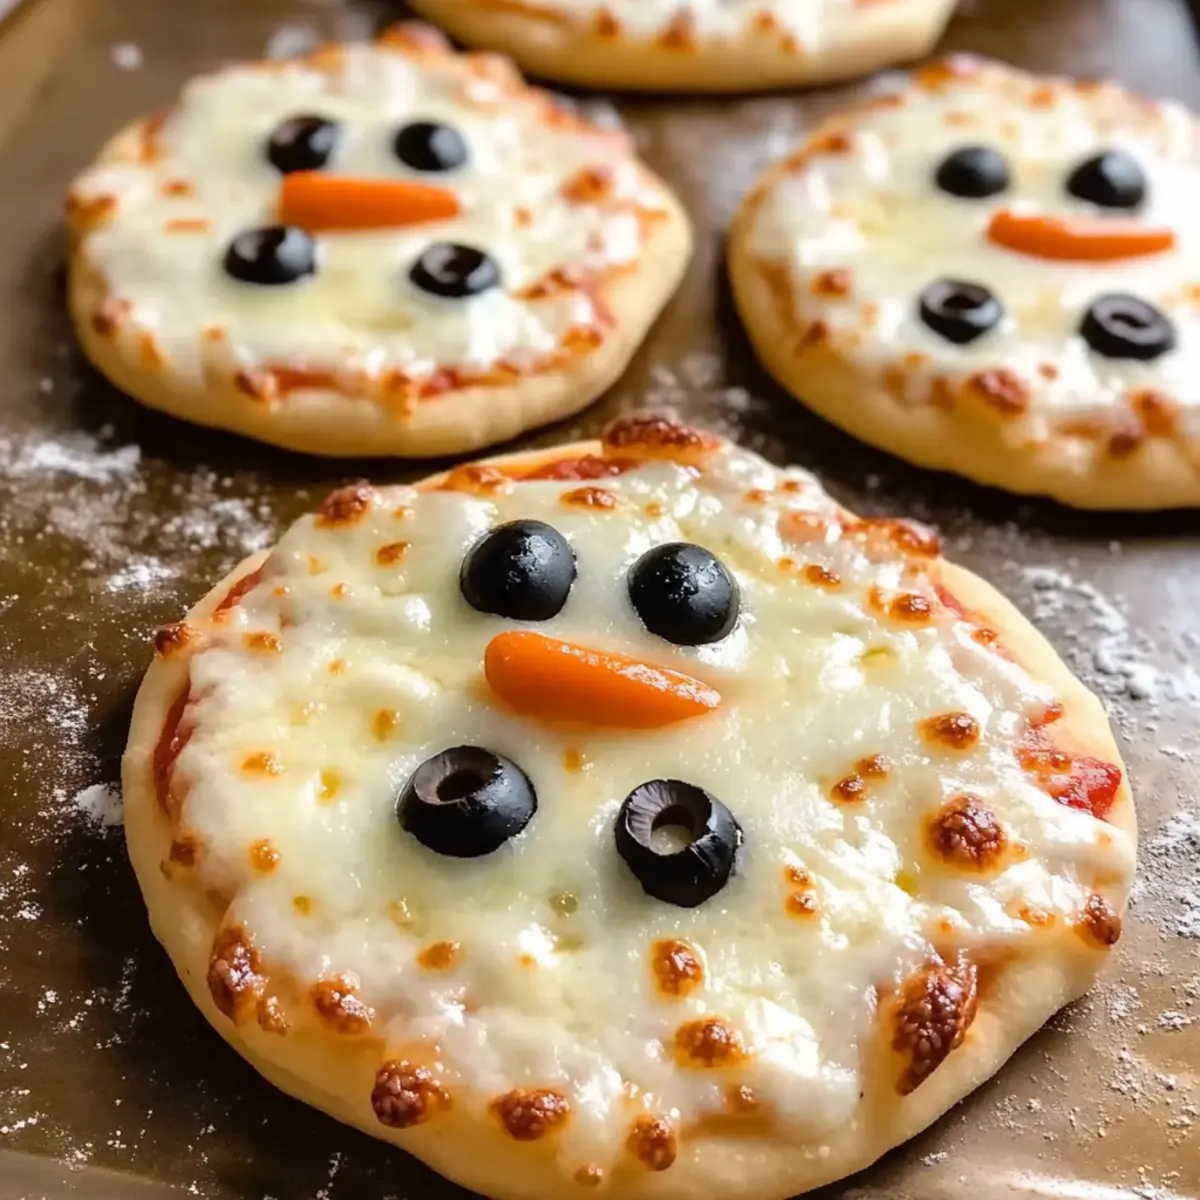
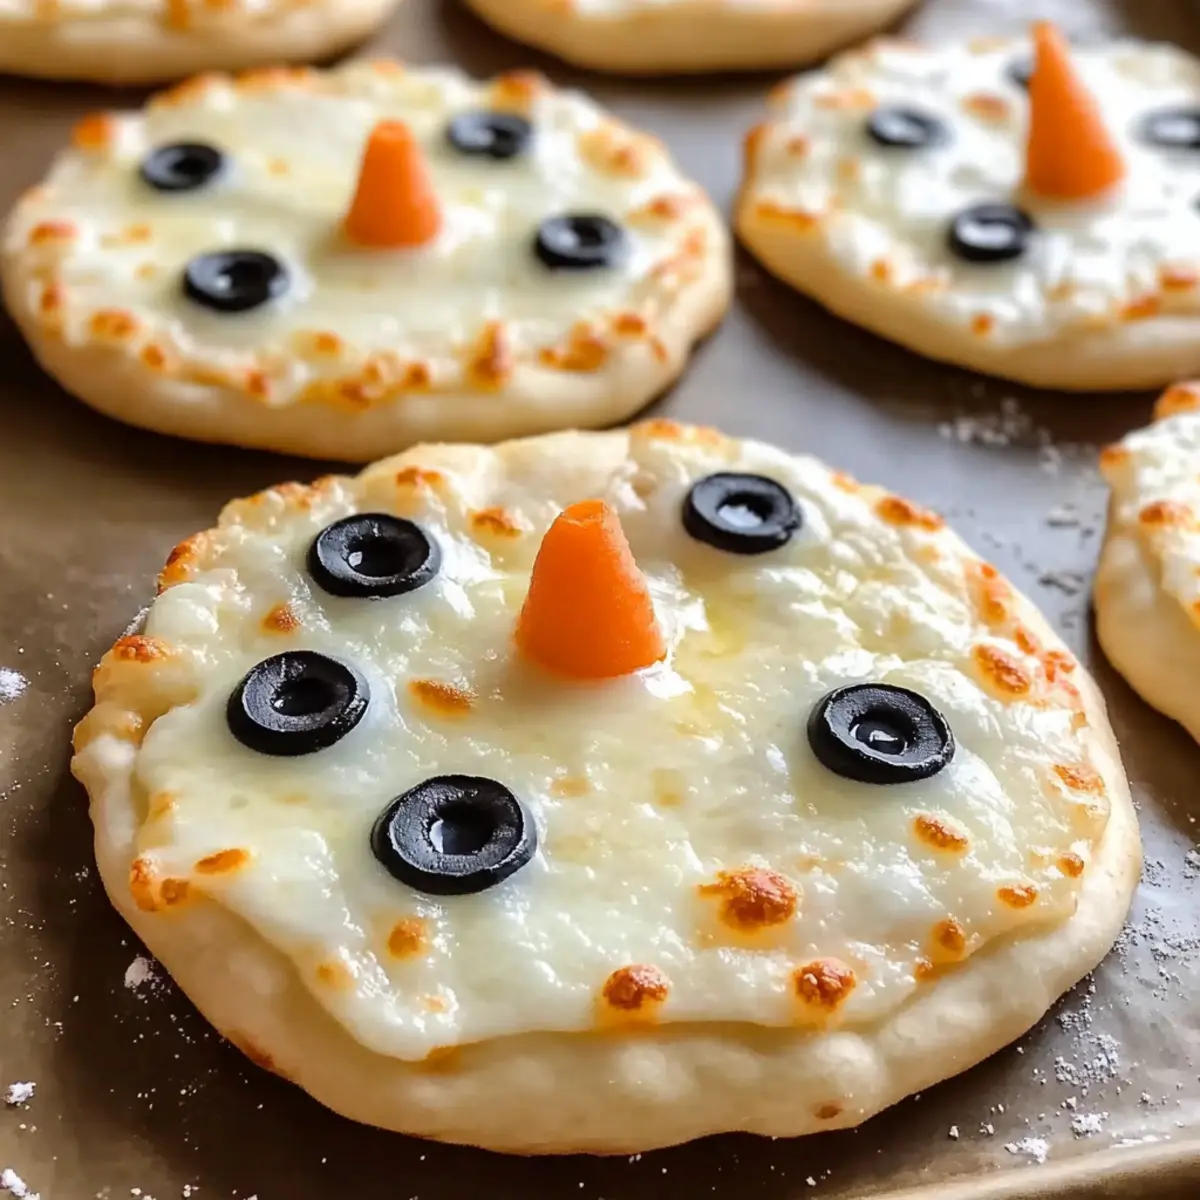
As I flipped through my favorite holiday cookbook, I stumbled upon a gem that instantly sparked joy—Mini Snowman Pizzas! These adorable creations are not just a treat for the eyes but also a fun cooking activity that brings a sprinkle of creativity to your kitchen. Perfect for little hands, this kid-friendly recipe transforms ordinary ingredients into whimsical snowman shapes, ensuring they not only eat well but also enjoy the process. The melted mozzarella serves as a warm, inviting hug on a chilly day, and you can easily customize them with toppings for added flavor and health. Whether you’re preparing for a festive gathering or just looking for a playful lunch idea, these Mini Snowman Pizzas are sure to bring smiles all around. What unique toppings will you choose to create your snowman masterpiece?

Why Are Mini Snowman Pizzas So Fun?
Unforgettable fun: This recipe turns a routine meal into a playful experience, engaging kids in the kitchen.
Creativity unleashed: Each snowman can be uniquely decorated, encouraging children to express their artistic side with toppings.
Quick and easy: With simple ingredients and steps, Mini Snowman Pizzas come together in no time—perfect for busy weeknights!
Kid-friendly: These adorable pizzas are not only delicious but also appeal to young palates, making mealtime enjoyable.
Perfect for gatherings: Whether it’s a family lunch or a festive get-together, these whimsical pizzas are guaranteed to be a hit.
Check out our Mini Oreo Cheesecakes for another delightful treat that’s sure to impress your guests!
Mini Snowman Pizzas Ingredients
For the Dough
- Pizza Dough – This provides structure for the pizza base; you can use store-bought or homemade for convenience.
For the Sauce
- Pizza Sauce – Adds flavor and moisture; feel free to substitute with marinara or pesto for a twist.
For the Toppings
- Mozzarella Cheese – Creates a melty, cheesy topping perfect for these Mini Snowman Pizzas; try vegan cheese for a dairy-free option.
- Black Olives – Ideal for the snowman’s eyes and buttons; you can replace them with peppercorns or other small toppings.
- Carrot – Serves as the snowman’s charming nose; other vegetables like bell peppers can add a colorful substitute.
Step‑by‑Step Instructions for Mini Snowman Pizzas
Step 1: Preheat the Oven
Begin by preheating your oven to 400°F (200°C). This ensures that your Mini Snowman Pizzas will bake evenly and become wonderfully golden brown. While the oven heats, line a baking sheet with parchment paper to prevent sticking and make cleanup a breeze.
Step 2: Prepare the Dough
Take your pizza dough and roll it out on a lightly floured surface until it achieves an even thickness. Using two different-sized round cookie cutters, cut out a larger circle for the snowman’s body and a smaller one for the head. This step is crucial for shaping your adorable Mini Snowman Pizzas.
Step 3: Arrange the Dough Shapes
Gently place the larger dough circle on the prepared baking sheet, ensuring enough space around it for the smaller circle. Position the smaller circle slightly overlapping the larger one, creating the snowman’s distinctive head and body shape. Visualize their snowy appearance as you finalize this fun arrangement.
Step 4: Add the Sauce and Cheese
Spoon pizza sauce generously onto each dough shape, spreading it evenly with the back of the spoon. Then, sprinkle a hearty amount of mozzarella cheese over the sauce, allowing it to cover every inch. This melty goodness is essential for your Mini Snowman Pizzas, ensuring a delicious flavor that kids will love.
Step 5: Decorate the Snowmen
Take your black olives and chop them into small pieces for the eyes and buttons of the snowman. Cut a small triangle from the carrot to serve as the nose. Carefully press these toppings onto the cheese, creating charming snowman faces that will bring smiles to everyone’s faces before baking.
Step 6: Bake to Perfection
Place the baking sheet in the preheated oven and bake the Mini Snowman Pizzas for 10–12 minutes. Keep an eye on them; they are ready when the cheese is bubbly and the crust turns a lovely golden brown. The excitement of watching them bake will fill your kitchen with delightful scents.
Step 7: Cool and Serve
Once baked, carefully remove the Mini Snowman Pizzas from the oven, allowing them to cool slightly on the sheet for a minute or two. This cooling time will help avoid any burns from hot cheese. Once ready, transfer the pizzas to plates and serve warm, sharing this joyous creation with family!
Mini Snowman Pizzas Variations & Substitutions
Feel free to explore new flavors and shapes while crafting your Mini Snowman Pizzas, turning this festive activity into a personal masterpiece!
-
Cheese Swap:
Use cheddar cheese for a sharp flavor. This adds a fun twist to the classic taste that kids will love. -
Vegan Version:
Opt for vegan cheese if you want a plant-based pizza. It melts wonderfully and keeps the delightful look without the dairy. -
Whole Wheat Dough:
Substitute with whole wheat pizza dough for a healthier option. Not only does it boost nutrition, but it also adds a nutty flavor to the base. -
Creative Toppings:
Add pepperoni or cooked sausage for a heartier pizza. These additions can create a snowman with a meatier personality that pleases more mature palettes. -
Veggie Delight:
Use sliced bell peppers instead of carrots for the nose. They provide a crunchy texture and vibrant color that makes each snowman pop! -
Spicy Kick:
Introduce jalapeño slices for a touch of heat. This variation is great for spicy food lovers and adds an exciting surprise for adults. -
Mini Cheesecakes:
For dessert, pair your whimsical pizzas with delicious Mini Oreo Cheesecakes that make any gathering even sweeter. -
Olive Alternatives:
Replace black olives with peppercorns for the eyes and buttons. These tiny spheres provide a whimsical look while accommodating diverse taste preferences.
Remember, the sky’s the limit when it comes to creating your Mini Snowman Pizzas! Each version can be as unique as the imagination of the little chefs behind them.
What to Serve with Mini Snowman Pizzas
Transform your fun meal into a delightful feast with these tasty sides that complement the charming pizzas perfectly.
- Fresh Garden Salad: Crunchy and vibrant, a simple salad is a refreshing balance to the cheesy goodness of the pizzas. Toss in your favorite veggies for extra color!
- Garlic Breadsticks: Warm, buttery breadsticks bring that comforting feel, creating a delightful mix of textures alongside your Mini Snowman Pizzas. Kids will love dipping them in extra pizza sauce!
- Fruit Skewers: Bright and fruity, these skewers add a burst of sweetness that lightens the meal. Pairing fresh fruit with your pizzas will create a colorful, enjoyable plate for everyone.
- Carrot and Celery Sticks: Crisp vegetables provide a healthy crunch, encouraging balanced eating. Serve with ranch or hummus for tasty dipping options that kids adore.
- Chocolate Dipped Marshmallows: For dessert, these sweet treats add a fun and festive touch to your meal. They’re easy to make and are sure to be a hit with the little ones!
- Hot Chocolate: Warm up with a mug of rich hot chocolate, perfectly complementing your fun-themed meal. It’s a great drink to accompany a cozy family gathering!
Expert Tips for Mini Snowman Pizzas
-
Even Cheese Distribution: Ensure the mozzarella cheese is evenly spread across the pizzas. This will help achieve consistent melting, creating a gooey texture.
-
Creative Toppings: Let kids choose toppings beyond olives and carrots. Experiment with bell peppers, or cooked sausage to encourage creativity and customize each mini snowman.
-
Avoiding Burnt Cheese: Let the Mini Snowman Pizzas cool for a minute after baking. This prevents accidents from hot cheese and makes them safer for little hands.
-
Dough Thickness: Roll the dough to an even thickness for uniform baking. Too thick or too thin can lead to unevenly cooked pizzas; aim for about ¼ inch.
-
Baking Sheet Spacing: Arrange the pizzas with enough space between them on the baking sheet. This allows heat to circulate, ensuring they brown nicely without sticking together.
How to Store and Freeze Mini Snowman Pizzas
Fridge: Place leftover Mini Snowman Pizzas in an airtight container and store them in the fridge for up to 2 days. This keeps them fresh while you plan your next family fun day.
Freezer: If you want to store them for longer, freeze unbaked Mini Snowman Pizzas by assembling them but not baking. Wrap tightly in plastic wrap and foil, then store for up to 2 months.
Reheating: When ready to enjoy, bake the frozen pizzas directly from the freezer for about 12-15 minutes until bubbly and golden. This way, you still get that delightful, fresh-out-of-the-oven taste!
Packing for Lunch: Cut into smaller pieces and pack in lunch boxes for a fun treat that kids will love at school or during playdates.
Make Ahead Options
These Mini Snowman Pizzas are perfect for meal prep, making busy weeknights a breeze! You can prepare the pizza dough shapes and assemble them with sauce and cheese up to 24 hours in advance. Simply assemble the pizzas on a baking sheet, cover them tightly with plastic wrap, and refrigerate until you’re ready to bake. To maintain the quality, avoid adding the toppings like olives and carrots until just before baking to prevent sogginess. When you’re ready to serve, just pop the prepped pizzas in a preheated oven at 400°F (200°C) for 10-12 minutes, and enjoy delicious, whimsical creations without the hassle!
Mini Snowman Pizzas Recipe FAQs
How should I choose my ingredients?
Absolutely! For the best flavor, select fresh ingredients. Use pizza dough that’s flexible, a vibrant tomato sauce, and high-quality mozzarella cheese. For the olives, look for ones without dark spots, and choose firm carrots for the nose. Fresh ingredients enhance the taste and presentation of your Mini Snowman Pizzas!
What’s the best way to store leftovers?
Great question! After you’ve enjoyed your Mini Snowman Pizzas, place any leftovers in an airtight container and refrigerate them for up to 2 days. This keeps them fresh. For best results, reheat them in an oven or air fryer to restore that crispy crust, making them just as delightful as when they were freshly baked.
Can I freeze Mini Snowman Pizzas?
Yes, you can! To freeze unbaked Mini Snowman Pizzas, assemble them as per the recipe but avoid baking. Wrap them tightly in plastic wrap, followed by aluminum foil to prevent freezer burn. Store them in the freezer for up to 2 months. When you’re ready to bake, preheat your oven and bake directly from frozen for about 12-15 minutes, until bubbly and golden.
What if the pizzas are sticking to the baking sheet?
No worries! To prevent sticking, ensure you line your baking sheet with parchment paper prior to adding the Mini Snowman Pizzas. Additionally, rolling out the dough to a consistent thickness helps with even cooking, and spacing them apart on the sheet allows for proper air circulation.
Are there any dietary considerations I should be aware of?
Very much so! If you or your family members have dietary restrictions, there are several easy tweaks you can make. For lactose intolerant kids, swap mozzarella for a dairy-free cheese. Always double-check the ingredients of pre-made sauces and dough for potential allergens. Customize your toppings to cater to any allergies, ensuring a safe and fun cooking experience for everyone!
How can I make these Mini Snowman Pizzas even more fun?
The more the merrier! Encourage creativity by letting kids choose additional or alternative toppings, including colorful bell peppers or unique proteins like shredded chicken or turkey sausage. You could also host a pizza-making party, allowing everyone to assemble their own snowman and decorate it to their heart’s content. Happy cooking!
Delightful Mini Snowman Pizzas for a Cozy Family Fun Day
Ingredients
Equipment
Method
- Preheat your oven to 400°F (200°C). Line a baking sheet with parchment paper.
- Roll out your pizza dough until even, and cut out larger and smaller circles for the body and head.
- Place the larger dough circle on the baking sheet, then put the smaller circle on top, slightly overlapping.
- Spread pizza sauce on the dough shapes, then cover with mozzarella cheese.
- Chop black olives for eyes and buttons, and cut a triangle from the carrot for the nose. Place on the cheese.
- Bake for 10–12 minutes until cheese is bubbly and crust is golden brown.
- Allow to cool slightly before serving warm.
Leave a Reply