
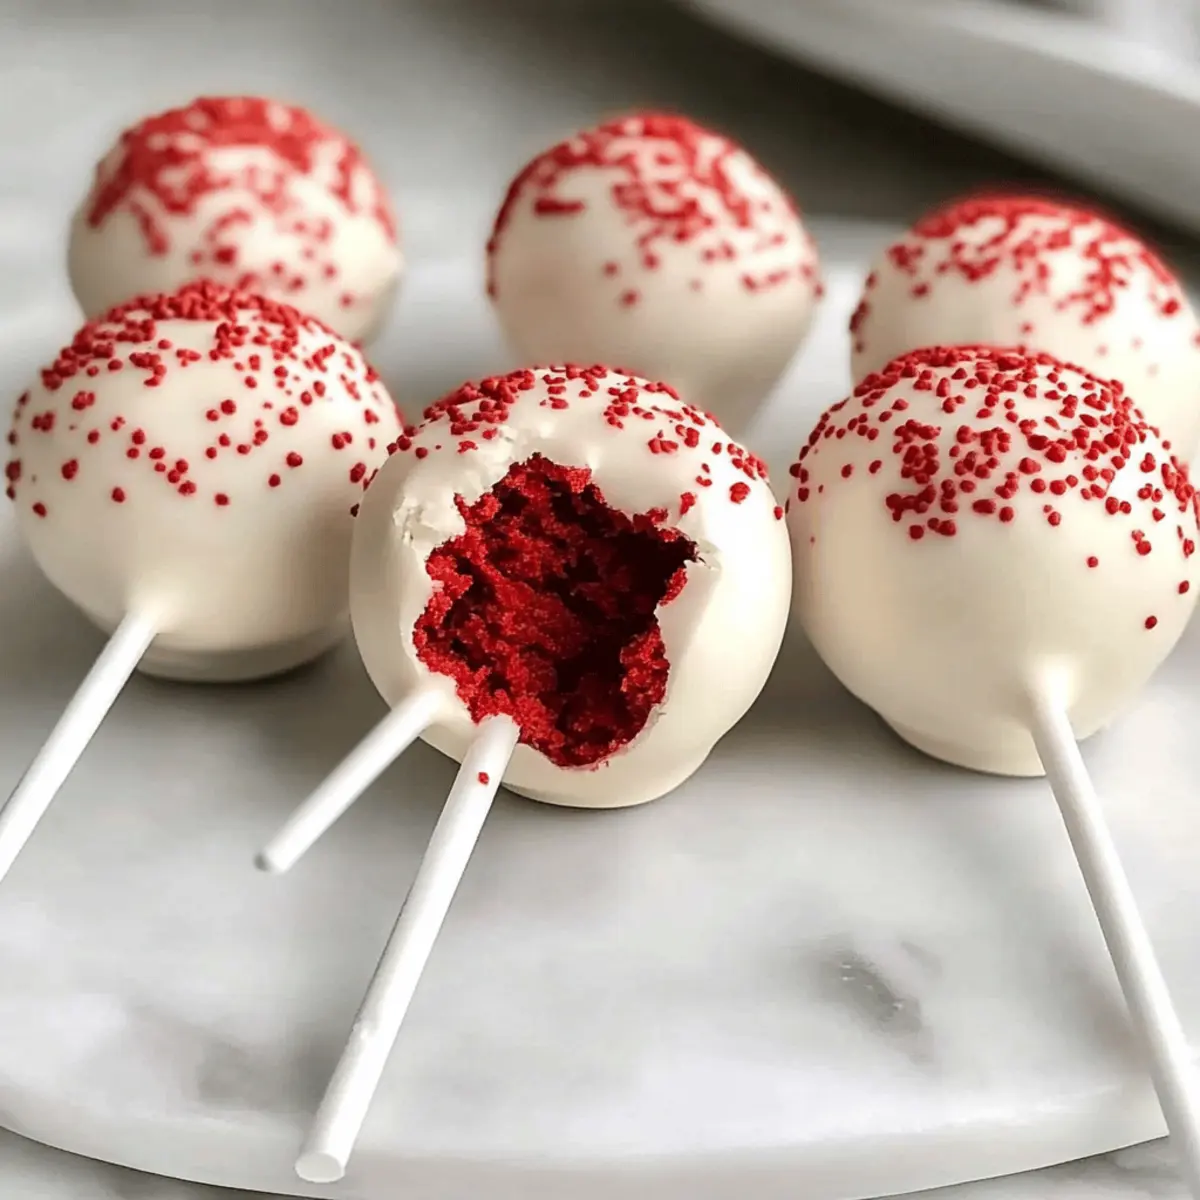
“Can you believe it? Cake pops are taking over the dessert world!” These delightful bites, especially when made as Moist Red Velvet Cake Pops, are not just eye-catching—their vibrant red hue tells a story of decadence and celebration. With their simple preparation using a box cake mix, these treats are perfect for a stress-free baking experience. The irresistible benefits keep coming: they not only satisfy your sweet tooth but also make for gorgeous additions to any party spread. Whether you’re a seasoned baker or just diving into homemade delights, these cake pops will surely impress your guests and bring smiles all around. So, are you ready to dive into this vibrant world of fun treats? Let’s get started!
Why Are Cake Pops So Popular?
Irresistible Treats: These Moist Red Velvet Cake Pops are not only adorable but also bursting with flavor, making them a standout choice for any gathering.
Effortless Preparation: With a simple box cake mix as the base, you’ll be enjoying delightful treats in no time—even novice bakers will shine!
Endless Customization: Tailor these pops to your taste—try using Healthy Carrot Cake mix or unique frosting for exciting variations.
Perfect Party Bites: Their bite-sized nature means guests can enjoy these pops without the fuss of traditional cake.
Crowd-Pleasing Appeal: Whether it’s a kid’s birthday or an adult gathering, these cake pops will have everyone reaching for seconds!
Moist Red Velvet Cake Pop Ingredients
• Delight in crafting these vibrant cake pops with ease!
-
For the Cake Mixture
-
Red Velvet Cake Mix – This is the base flavor and texture; feel free to choose any brand you adore!
-
Water – Hydrates the cake mix; stick to the package instructions for the best results.
-
Vegetable Oil – Ensures moisture and richness; you can swap it with melted coconut oil for a different flavor.
-
Eggs – These help bind your ingredients together; using room temperature eggs enhances mixing.
-
For the Frosting
-
Cream Cheese Frosting – Adds sweetness and binds the cake crumbs; adjust the amount based on how moist you want your cake balls.
-
For the Coating
-
Candy Melts – Create a sweet, smooth outer shell for the pops; chocolate chips or confectionery coating can work as substitutes.
-
Coconut Oil (optional) – A little of this can help thin the candy melts for a silky finish.
These Moist Red Velvet Cake Pops are sure to steal the show at any gathering with their delicious flavor and stunning appearance!
Step‑by‑Step Instructions for Moist Red Velvet Cake Pops
Step 1: Prepare the Cake Batter
Start by preheating your oven to 350°F (175°C). In a large mixing bowl, combine your red velvet cake mix with the required water, vegetable oil, and eggs. Use a whisk or electric mixer to blend these ingredients until smooth—about 2-3 minutes. Pour the batter into a greased 9×9-inch dish or two 8-inch round cake pans, spreading it evenly to ensure even baking.
Step 2: Bake the Cake
Place the cake in the preheated oven and bake for 25-30 minutes, or until a toothpick inserted in the center comes out clean. Keep an eye on it during the last few minutes for that perfect bake. Once done, remove the cakes from the oven and let them cool in the pans for about 10 minutes before transferring them to a wire rack to cool completely.
Step 3: Crumble the Cake
Once your cake is completely cooled, crumble it into a large mixing bowl using your hands or a fork. Aim for fine crumbs without any large chunks. Reserve about ½ cup of crumbled cake for decoration later. The texture should resemble wet sand—this will help create the perfect consistency for your Moist Red Velvet Cake Pops.
Step 4: Mix with Frosting
Add your cream cheese frosting to the crumbled cake, starting with a small amount and mixing thoroughly until well combined. You want to achieve a play-dough-like consistency that holds together—feel free to add more frosting gradually if needed. The mixture should be moist yet firm enough to roll without falling apart.
Step 5: Form the Cake Balls
With the mixture ready, take portions of dough and roll them into uniform balls, roughly the size of a ping-pong ball. This step is crucial for that perfect bite! Once shaped, place the cake balls on a lined baking sheet and freeze them for about 1-2 hours, or until they are firm and set.
Step 6: Melt the Candy Coating
While the cake balls are freezing, melt your candy melts according to the package instructions—usually, a microwave or double boiler works great. If using a microwave, heat in 30-second intervals, stirring in between to achieve a smooth, liquid consistency without overheating. If it’s too thick, stir in a little coconut oil to ensure a sleek coating.
Step 7: Insert Lollipop Sticks
Remove the cake balls from the freezer. Dip the tip of each lollipop stick into the melted candy to coat it lightly. This helps to secure the stick firmly once inserted. Carefully push the stick into the center of each cake ball until it feels secure, ensuring not to push all the way through.
Step 8: Dip into Candy Coating
Now, dip each cake ball into the melted candy coating, fully covering the cake pop. Allow the excess coating to drip off gently—this helps prevent clumping. If desired, you can sprinkle the reserved crumbled cake on top right after dipping for a decorative touch.
Step 9: Set Cake Pops
For setting, place the dipped cake pops upright in a styrofoam block or a cardboard box lined with parchment paper. Let them sit until the chocolate coating hardens completely. This usually takes about 15-30 minutes, depending on your kitchen temperature. Your Moist Red Velvet Cake Pops are now ready to brighten up any gathering!
How to Store and Freeze Moist Red Velvet Cake Pops
-
Room Temperature: Keep your cake pops in an airtight container at room temperature for up to 2 days. This will help maintain their delicious texture without drying out.
-
Fridge: For longer storage, place them in the fridge in an airtight container where they will stay fresh for up to 1 week. Just be sure to allow them to come to room temperature before serving for the best flavor.
-
Freezer: Freeze your Moist Red Velvet Cake Pops for up to 6 weeks. Wrap each pop in parchment paper and store them in a freezer-safe container to prevent freezer burn.
-
Reheating: There’s no need to reheat cake pops; just let them thaw in the fridge or at room temperature before enjoying for the best experience!
Expert Tips for Moist Red Velvet Cake Pops
-
Chill Time Matters: Allow your cake balls to freeze solid before dipping. This prevents them from crumbling in the warm coating and ensures clean, perfect pops.
-
Frosting Balance: Begin with less frosting when mixing, adding more gradually. Too much frosting will make the cake balls overly soft, leading to messy cake pops.
-
Avoid Overheating: When melting candy melts, use lower power settings and stir frequently. Overheating can cause the coating to become thick and difficult to work with for your Moist Red Velvet Cake Pops.
-
Stick Quality: Use sturdy lollipop sticks to ensure your cake pops hold up. If they wobble, they may fall apart when dipped, leading to frustration!
-
Decorative Touches: Experiment with various toppings like sprinkles or nuts just after coating. This adds visual flair and helps create a custom look for your cake pops.
What to Serve with Moist Red Velvet Cake Pops
Elevate your dessert experience by pairing these delightful cake pops with flavors that will enchant your taste buds.
-
Creamy Hot Chocolate: Indulge in a rich cup of hot chocolate; its warmth beautifully complements the velvety sweetness of the cake pops.
-
Classic Vanilla Ice Cream: The cool, creamy texture of vanilla ice cream adds a comforting touch, balancing the rich flavors of the red velvet.
-
Sparkling Apple Cider: Celebrate with bubbly apple cider, as its fruity notes enhance the cake pops’ sweetness while providing a refreshing contrast.
-
Fruity Berry Salad: A light, fresh salad of mixed berries adds the perfect burst of acidity, cutting through the richness and refreshing your palate.
-
Chocolate Dipped Strawberries: Continue the chocolate theme with fresh strawberries; their juicy sweetness pairs perfectly with the cake pop’s rich layers.
-
Coffee or Espresso: Sip on a warm cup of coffee or espresso; the slight bitterness balances the sweetness, creating a delightful combination for any gathering.
-
Coconut Macaroons: Add some tropical flair with chewy coconut macaroons; their texture and flavor create a lovely contrast with the cake pops.
-
Mini Cheesecakes: For a more decadent treat, mini cheesecakes bring a creamy richness that harmonizes beautifully without overshadowing the cake pops.
-
Red Velvet Milkshake: Indulge in a rich milkshake made with red velvet ice cream; this playful dessert mirrors your cake pops while elevating the experience.
Make Ahead Options
These Moist Red Velvet Cake Pops are perfect for meal prep enthusiasts! You can prepare the cake and crumble it up to 3 days in advance, storing the crumbled cake in an airtight container in the refrigerator to maintain its moisture. Additionally, you can roll the cake mixture into balls and freeze them for up to 1 month; this will keep them just as delicious until you’re ready to dip. When you’re ready to serve, simply melt the candy coating, insert lollipop sticks into the frozen balls, dip them in the coating, and let them set. This way, you’ll enjoy the sweet benefits of these delightful pops with minimal effort on busy weeknights!
Moist Red Velvet Cake Pop Variations
Explore the delicious world of cake pops by customizing them to fit your flavor preferences and dietary needs!
-
Flavor Swap: Change the cake mix to chocolate or vanilla for a fun twist. Who says red velvet has to steal the spotlight?
-
Frosting Flair: Switch up the frosting with chocolate buttercream or even a tangy lemon frosting for a zesty surprise. Let your imagination run wild; the combination possibilities are endless!
-
Colorful Coating: Use different colored candy melts to fit any occasion. Vibrant colors can elevate your cake pops for birthdays, holidays, or themed parties—perfect for impressing your guests or kids!
-
Dairy-Free Delight: Substitute eggs and frosting with avocado or a plant-based alternative to create a delicious dairy-free version of your cake pops. Not only will it suit dietary needs, but it’s also a hidden health twist.
-
Nutty Addition: Incorporate crushed nuts into your cake batter for a delightful crunch that enhances texture. Walnuts or pecans add a wonderful flavor note that beautifully complements red velvet.
-
Spicy Kick: For those who love a little heat, mix in a pinch of cayenne pepper to the cake mixture or dust with chili powder for a surprising and unique flavor burst!
-
Chocolate Lovers: Dip your cake pops in dark chocolate instead of candy melts for a richer, more indulgent treat. Just picture those dark chocolate-covered delights melting in your mouth!
-
Serve with Style: Pair your cake pops with a glass of milk, coffee, or a delightful Moist Chantilly Cake for a charming dessert platter that resonates with everyone.
However you choose to enhance your Moist Red Velvet Cake Pops, they’re bound to be a hit at your next gathering!
Moist Red Velvet Cake Pops Recipe FAQs
How do I choose the right red velvet cake mix?
Absolutely! When selecting a red velvet cake mix, look for one that has a vibrant color and a rich cocoa flavor. Brands like Betty Crocker or Duncan Hines are popular choices among home bakers. Always check the expiration date on the box for freshness, ensuring that your baked treats will come out perfect every time.
How should I store leftover cake pops?
For the best freshness, store your Moist Red Velvet Cake Pops in an airtight container at room temperature for up to 2 days. If you want them to last longer, refrigerate them for up to 1 week. Just allow them to come to room temperature before serving to really bring out their flavors!
Can I freeze my cake pops? If so, how?
Yes, you can freeze your cake pops! They will stay fresh for up to 6 weeks in the freezer. To freeze, wrap each cake pop in parchment paper and place them in a freezer-safe container to prevent freezer burn. When you’re ready to enjoy, simply let them thaw in the fridge or at room temperature—no need to reheat!
What should I do if my cake balls fall apart when dipping?
Very! If your cake balls crumble in the candy coating, it’s often because they were too soft. To troubleshoot, ensure your cake balls are thoroughly chilled before dipping—about 1-2 hours in the freezer typically does the trick. Also, take care not to add too much frosting, as that can make them too gooey. Stick to the play-dough-like consistency for perfect results!
Are these cake pops suitable for people with nut allergies?
Absolutely! As long as you check the ingredient labels for your cake mix, frosting, and candy melts, these Moist Red Velvet Cake Pops can be made nut-free. Opt for brands that are specifically labeled as nut-free to ensure everyone can enjoy these delicious treats without worry.
Moist Red Velvet Cake Pops That Steal the Show at Parties
Ingredients
Equipment
Method
- Preheat your oven to 350°F (175°C). In a large mixing bowl, combine red velvet cake mix with water, vegetable oil, and eggs. Blend until smooth, about 2-3 minutes. Pour into a greased 9x9 dish or two 8-inch round pans.
- Bake for 25-30 minutes, or until a toothpick inserted comes out clean. Let the cakes cool in the pans for 10 minutes before transferring to a wire rack.
- Crumble the cooled cake into a large mixing bowl aiming for fine crumbs. Reserve about ½ cup for decoration.
- Mix the crumbled cake with cream cheese frosting until it resembles a play-dough-like consistency.
- Roll the mixture into uniform balls, place on a lined baking sheet, and freeze for 1-2 hours until firm.
- Melt candy melts according to package instructions, stirring in intervals. If too thick, add coconut oil.
- Dip the tip of each lollipop stick into the melted candy before inserting it into the cake ball.
- Dip each cake ball into the melted candy coating, allowing excess coating to drip off. Optionally sprinkle reserved crumbled cake on top.
- Place the dipped pops upright in a styrofoam block or cardboard box and let them sit until hard.
Leave a Reply