
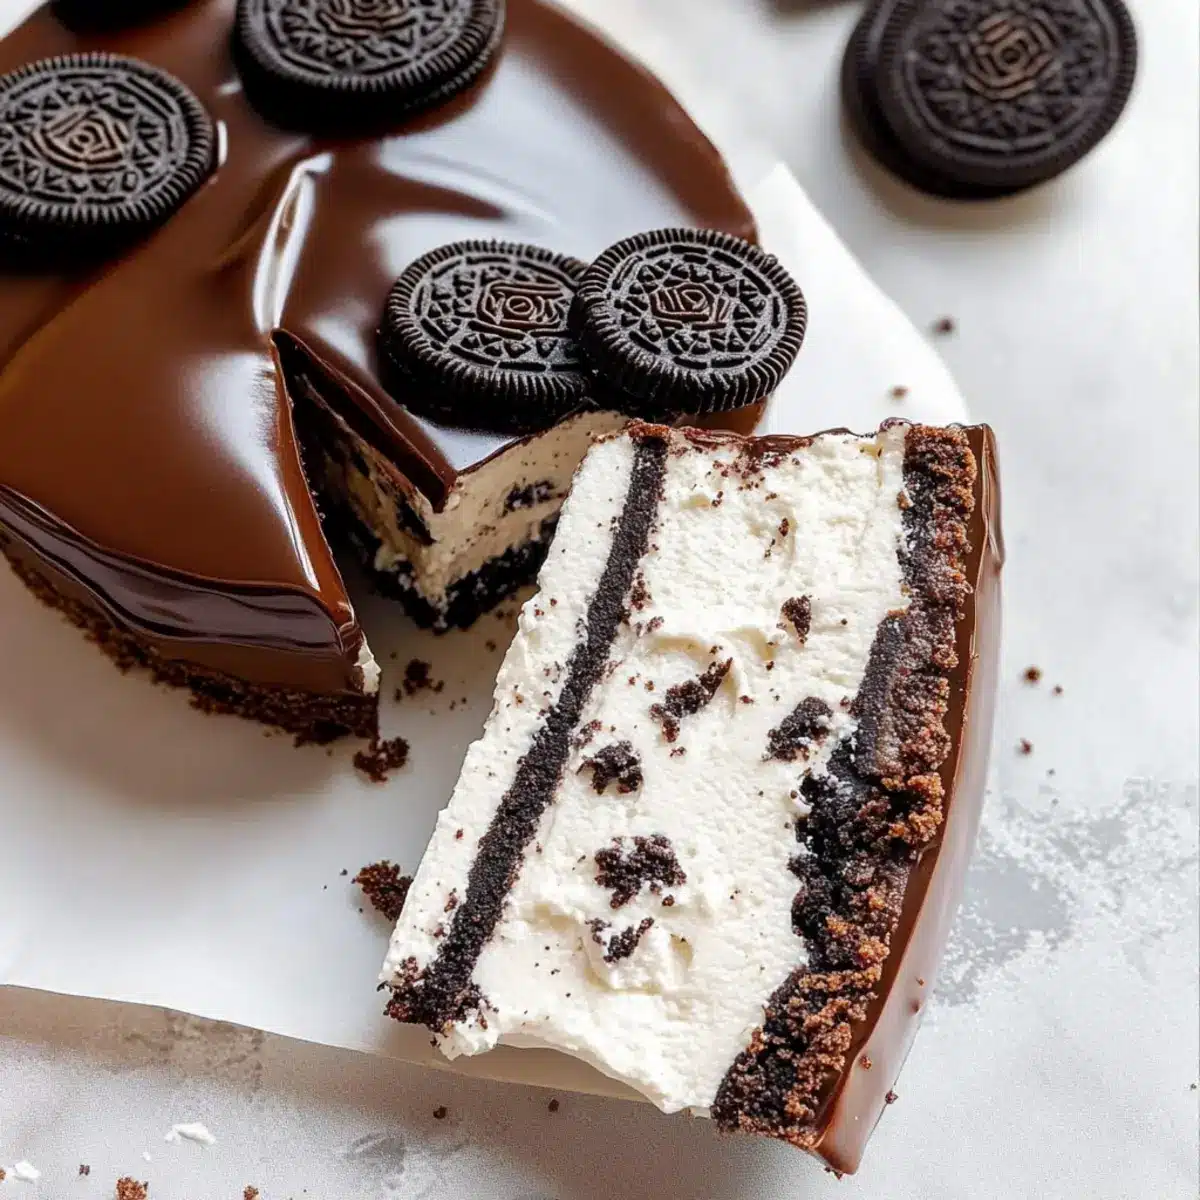
As I stood in my kitchen, the sweet aroma of melting chocolate began to waft through the air, and I couldn’t help but smile. There’s something incredibly satisfying about crafting a No-Bake Oreo Cheesecake that not only delights the senses but is also effortless to whip up. This creamy dessert features a rich Oreo crust and a silky filling that just melts in your mouth, making it the ultimate treat for Oreo enthusiasts. With quick prep on your side, you’ll love how this recipe turns an ordinary gathering into a celebration. Plus, it requires no baking—who could resist that? Are you ready to dive into a world of Oreo-infused bliss? Let’s get started!
Why is Everyone Raving About This Cheesecake?
Decadent Delight: This No-Bake Oreo Cheesecake offers a rich and creamy experience that your taste buds will thank you for.
Easy to Make: With no baking required, this recipe is perfect for both novice and seasoned chefs seeking a quick, satisfying dessert option.
Chocolate Lovers Dream: The smooth dark chocolate ganache on top elevates the flavors, making each bite a chocolatey delight.
Versatile Treat: Want to switch things up? Try using Chocolate Cheesecake Decadent cookies for a different flavor profile.
Crowd-Pleaser: Whether it’s a birthday, holiday, or just a Tuesday, this cheesecake is sure to impress guests of all ages.
Make Ahead Convenience: Prep this dessert a day in advance, letting it chill overnight for a hassle-free serving, giving you more time to enjoy the occasion!
No-Bake Oreo Cheesecake Ingredients
• Ready to create your own decadent no-bake Oreo cheesecake? Here’s everything you need!
For the Crust
- Oreo Cookies – The essential base for the crust, offering a rich chocolate flavor.
- Butter – Binds the crust together and adds a delectable richness to the dessert.
For the Filling
- Cream Cheese – Creates the creamy texture that gives cheesecake its signature mouthfeel; full-fat is best!
- Powdered Sugar – Sweetens the filling and ensures a smooth, luscious consistency.
- Vanilla Paste – Adds a warm, aromatic flavor that enhances the cheesecake; vanilla extract works too.
- Heavy Cream – Whipped for a fluffy texture, gives richness to the filling, and must be cold for best results.
- Crumbled Oreo Pieces – Fold these into the filling for delightful bites of cookie throughout the cheesecake.
For the Ganache
- Semi-sweet Dark Chocolate – Provides a rich layer of chocolate flavor that perfectly complements the cheesecake.
- Butter – Adds an extra creaminess to the ganache, helping it to blend smoothly.
- Cold Heavy Cream – Mixes into the ganache for that perfect pourable shine.
For Topping
- Mini/Regular Oreos – Use these for decoration to make your cheesecake look irresistibly adorable!
Step‑by‑Step Instructions for No-Bake Oreo Cheesecake
Step 1: Prepare the Springform Pan
Begin by lightly greasing a 9-inch springform pan to prevent sticking. Line the bottom with parchment paper for added security. Set the pan aside while you prepare the crust, creating a smooth base for your No-Bake Oreo Cheesecake.
Step 2: Make the Oreo Crust
In a food processor, blend 24 Oreo cookies until they turn into fine crumbs, resembling sand. Melt 60g of unsalted butter in the microwave or on the stovetop, then combine it with the cookie crumbs. Press this mixture firmly into the prepared pan’s bottom. Refrigerate for about 15 minutes to allow the crust to firm up.
Step 3: Prepare the Cheesecake Filling
In a large mixing bowl, beat 600g of cold cream cheese with 150g of powdered sugar and 1½ teaspoons of vanilla paste until the mixture is completely smooth and creamy. Gradually pour in 360g of cold heavy cream, beating until stiff peaks form, which should take about 2-3 minutes. Finally, gently fold in 14 roughly broken Oreo pieces.
Step 4: Assemble the Cheesecake
Carefully pour the creamy cheesecake filling over the chilled Oreo crust. Use an offset spatula to smooth the top, ensuring an even layer. Cover the springform pan tightly with plastic wrap, then refrigerate for 6-8 hours, allowing the No-Bake Oreo Cheesecake to set completely.
Step 5: Make the Ganache
In a heatproof bowl, melt 100g of semi-sweet dark chocolate with 10g of butter. Once melted, mix in 100g of cold heavy cream until the ganache is smooth and glossy. Let it cool slightly before pouring it over the cheesecake, ensuring it doesn’t melt the filling as you spread it evenly.
Step 6: Decorate
Whip 200g of heavy cream in a clean bowl until stiff peaks form, perfect for piping. Use a piping bag to decorate the edges of the cheesecake with rosettes or swirls. Finish by garnishing with mini Oreos or halved regular Oreos, adding a delightful touch to your No-Bake Oreo Cheesecake before serving.

Make Ahead Options
These No-Bake Oreo Cheesecake options are perfect for busy home cooks looking to save time! You can prepare the Oreo crust and cheesecake filling up to 24 hours in advance; simply keep them tightly wrapped in the refrigerator to maintain freshness. Assemble the cheesecake in your springform pan and let it set in the fridge for 6-8 hours; this allows the flavors to meld beautifully and the cheesecake to firm up. When you’re ready to serve, just make the ganache and pour it over the chilled cheesecake. This way, you’ll enjoy a delicious treat with minimal last-minute effort, keeping your serving stress-free and enjoyable!
Storage Tips for No-Bake Oreo Cheesecake
Fridge: Store your No-Bake Oreo Cheesecake tightly wrapped in plastic wrap in the refrigerator for up to 3-4 days to maintain its creamy texture and flavor.
Freezer: For longer storage, you can freeze the cheesecake for up to 2 months. Be sure to wrap it well in plastic wrap, followed by aluminum foil to prevent freezer burn.
Reheating: While it’s best enjoyed cold, if you prefer a slightly softened texture, let the cheesecake sit at room temperature for about 20-30 minutes before serving.
Make Ahead: This cheesecake is perfect for making ahead of time. Prepare it a day or two before the occasion to let the flavors meld beautifully while chilling!
What to Serve with No-Bake Oreo Cheesecake
Prepare to elevate your dessert experience as you complement this rich and creamy treat with delightful accompaniments that tantalize the taste buds.
- Fresh Berries: Juicy strawberries or raspberries add a pop of color and a tart contrast that balances the sweetness of the cheesecake. Their vibrant flavors awaken the palate.
- Chocolate Sauce: Drizzling warm chocolate sauce over each slice enhances the chocolatey goodness, intensifying the flavor while adding an indulgent touch.
- Whipped Cream: A dollop of freshly whipped cream brings a light and airy counterpart to the dense cheesecake, creating a harmonious texture.
- Coffee or Espresso: A steaming cup pairs beautifully, its bold flavors cutting through the richness of the cheesecake and providing the perfect finishing touch.
- Mint Sprigs: Garnishing with fresh mint not only adds a splash of color but also offers a refreshing burst that complements the creamy layers.
- Crunchy Nuts: Chopped walnuts or hazelnuts sprinkled on top add delightful crunch and a nutty dimension that contrasts beautifully with the buttery Oreo crust.
- Milkshakes: For a fun twist, serve alongside an Oreo milkshake, turning your dessert into an unbeatable sweet treat combo that all ages will love!
Expert Tips for No-Bake Oreo Cheesecake
-
Chill Properly: Allow the cheesecake to chill for the full 6-8 hours. Skipping this step might result in a softer filling that won’t hold its shape.
-
Use Cold Ingredients: Start with cold cream cheese and heavy cream for the filling. This helps achieve the perfect whipped texture, essential for a luscious no-bake Oreo cheesecake.
-
Watch the Ganache: Let the ganache cool slightly before pouring it over the cheesecake to avoid melting the filling. A warm ganache can ruin the creamy layers below.
-
Oreo Variations: Experiment with different types of Oreos for a fun twist! Golden Oreos or mint-flavored versions can change the flavor without altering the basic recipe.
-
Stabilizing the Whipped Cream: For a firmer filling, consider adding a stabilizer such as gelatin to the whipped cream, ensuring it maintains its structure for longer.
No-Bake Oreo Cheesecake Variations
Feel free to personalize your cheesecake experience with these delightful twists that will elevate your dessert game!
- Gluten-Free: Swap classic Oreos for gluten-free Oreos to cater to gluten sensitivities without sacrificing flavor.
- Flavor Infusion: Try using Chocolate Cheesecake Decadent cookies for the crust to bring an extra layer of rich chocolate flavor.
- Fruit Fusion: Add a layer of fresh strawberries or raspberries between the crust and cheesecake filling for a refreshing burst of fruitiness.
- Nutty Crunch: Fold in crushed nuts, like pecans or walnuts, into the crust for a delightful crunch that contrasts beautifully with the creamy filling.
- Minty Fresh: Use mint-flavored Oreos to inject a refreshing mint flavor throughout the cheesecake—perfect for those who love a hint of coolness!
- Caramel Drizzle: Drizzle some caramel sauce on top of the ganache before adding your whipped cream for an indulgent caramel twist.
- Spicy Kick: Add a pinch of cayenne pepper or espresso powder to the filling for an unexpected warm spice that beautifully complements the chocolate.
- Dairy-Free: Replace cream cheese with a dairy-free alternative and use coconut cream for a vegan-friendly adaptation without losing precious creaminess.
With so many variations to explore, each bite of your No-Bake Oreo Cheesecake can be a unique adventure! And if you’re seeking more inspiration, don’t miss out on our delicious Mini Oreo Cheesecakes and indulgent Oreo Milkshake recipes for even more Oreo goodness.
No-Bake Oreo Cheesecake Recipe FAQs
What type of Oreo cookies should I use?
You can use classic Oreo cookies for a rich chocolate flavor. If you’re looking for a gluten-free option, simply swap these with gluten-free Oreos. For a twist, try using Golden Oreos or mint-flavored ones for a different taste!
How should I store my cheesecake?
Store your No-Bake Oreo Cheesecake tightly wrapped in plastic wrap in the refrigerator for up to 3-4 days. This keeps it fresh and maintains its creamy texture. Make sure to avoid any odors in the fridge by ensuring it’s covered well!
Can I freeze the cheesecake?
Absolutely! You can freeze your cheesecake for up to 2 months. Wrap it tightly in plastic wrap, followed by a layer of aluminum foil to prevent freezer burn. When ready to enjoy, let it thaw in the refrigerator overnight for the best results.
What if my filling doesn’t set properly?
If your filling is too soft, it could be due to warm ingredients or insufficient chilling time. Always start with cold cream cheese and heavy cream for best results. If the cheesecake hasn’t set after chilling for 8 hours, consider re-blending it with a bit of gelatin for stabilization before reassembling, or use the filling immediately in a parfait!
Is this cheesecake safe for pets or those with allergies?
This recipe contains ingredients like cream cheese and chocolate that are not safe for dogs and could be concerning for those with lactose intolerance or dairy allergies. Always check labels for allergens if you’re serving guests with specific dietary restrictions.
Can I make this cheesecake ahead of time?
Yes, this no-bake cheesecake is perfect for making ahead of time! You can prepare it a day or two before your event, allowing it to chill and let the flavors meld beautifully. Just make sure it’s well-wrapped in the refrigerator until it’s time to serve.
Delicious No-Bake Oreo Cheesecake That Anyone Can Make
Ingredients
Equipment
Method
- Lightly grease a 9-inch springform pan and line the bottom with parchment paper.
- In a food processor, blend 24 Oreo cookies until they turn into fine crumbs.
- Melt 60g of unsalted butter and combine it with the cookie crumbs. Press mixture into the prepared pan's bottom.
- Refrigerate for about 15 minutes to allow the crust to firm up.
- In a large mixing bowl, beat 600g of cold cream cheese with 150g of powdered sugar and 1½ teaspoons of vanilla paste until smooth.
- Gradually pour in 360g of cold heavy cream, beating until stiff peaks form.
- Gently fold in 14 crumbled Oreo pieces.
- Pour the cheesecake filling over the chilled Oreo crust and smooth the top.
- Cover with plastic wrap and refrigerate for 6-8 hours.
- Melt 100g of semi-sweet dark chocolate and 10g butter in a heatproof bowl, then mix in 100g of cold heavy cream for the ganache.
- Let it cool slightly before pouring it over the cheesecake.
- Whip 200g of heavy cream until stiff peaks form and use a piping bag to decorate the edges with rosettes.
- Garnish with mini Oreos or halved regular Oreos before serving.
Leave a Reply