
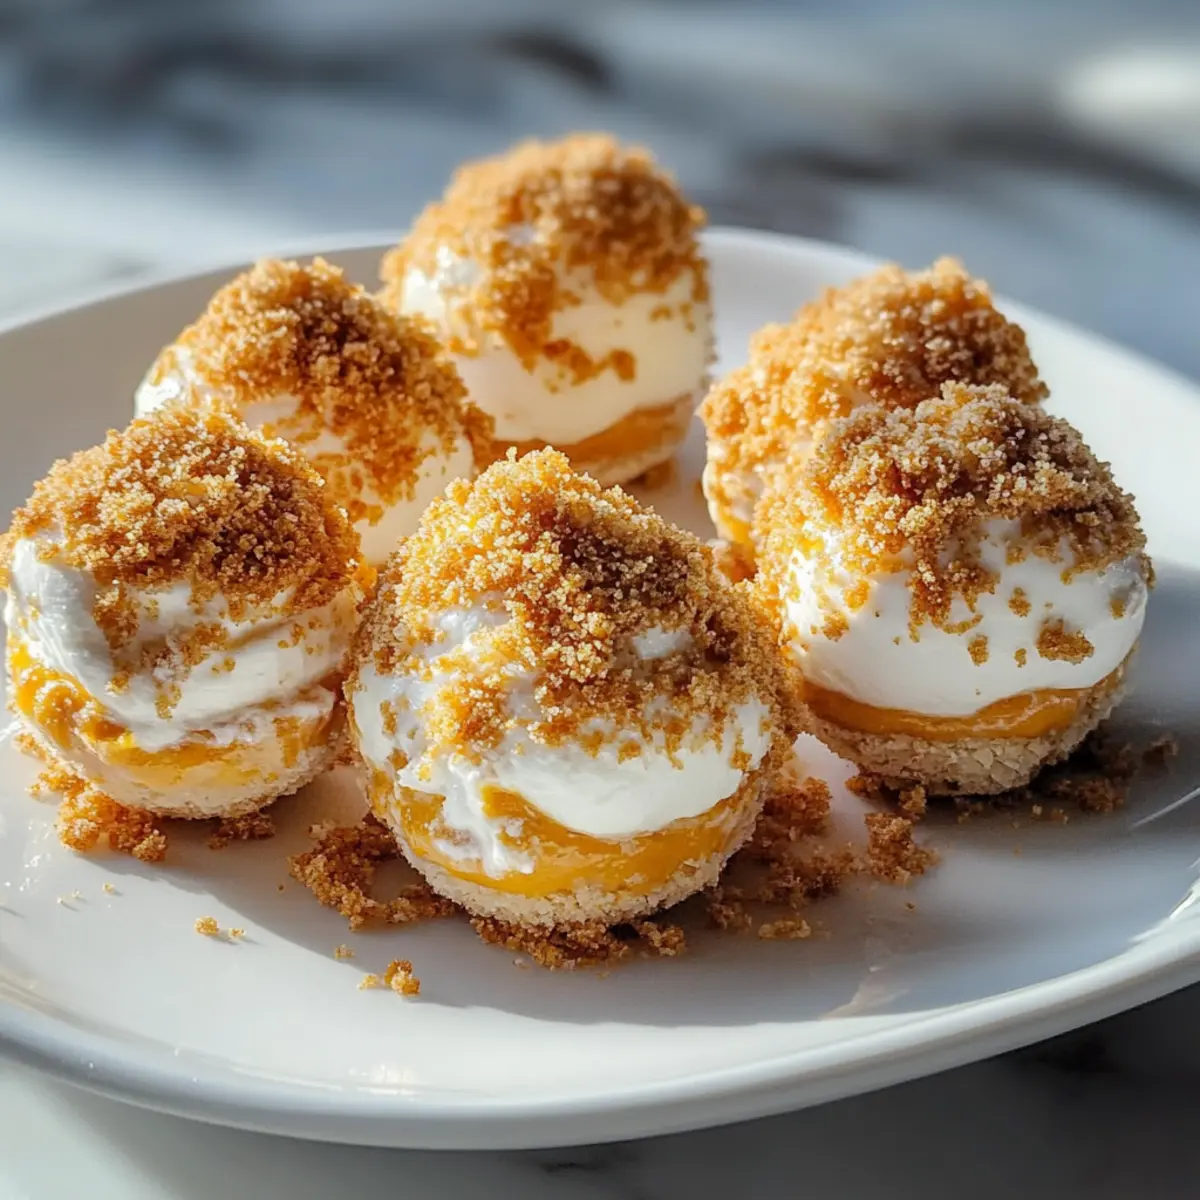
As the crisp autumn air wraps around us, there’s a certain magic in the kitchen—especially when it comes to creating cozy treats. This season, I’m excited to share my Easy No Bake Pumpkin Cheesecake Balls, a delightful twist on traditional desserts that brings all the warm, spiced flavors of fall without the oven fuss. Perfect for anyone seeking a quick, crowd-pleasing snack, these bite-sized morsels offer the creamy richness you love in cheesecake, all while being completely portable and refrigerator-friendly. Plus, they’re easily customizable: whether you’re rolling them in chocolate, nuts, or cinnamon sugar, each variation can reflect your personal touch. So, are you ready to indulge in a sweet little bite of autumn? Let’s get started!
Why Love No Bake Pumpkin Cheesecake Balls?
Irresistible Flavor: Each bite bursts with creamy pumpkin goodness, laced with warm autumn spices that evoke nostalgia.
No Oven Required: With a simple mixing process, you can make these delightful treats without the hassle of baking—a true timesaver!
Customizable Coatings: Whether you prefer chocolate, nuts, or cinnamon sugar, these cheesecake balls adapt to your cravings.
Ideal for Gatherings: Perfectly portable and adaptable, they shine as a standout dessert at parties and potlucks just like our popular Chocolate Cheesecake Decadent.
Make-Ahead Magic: These treats can be stored in the fridge, making them a stress-free option for busy hosts and home chefs!
Get ready to impress your guests with these delightful no-bake bites and embrace the flavors of fall!
No Bake Pumpkin Cheesecake Balls Ingredients
For the Cheesecake Mixture
- Cream Cheese – Provides a creamy base for the cheesecake balls; ensure it is softened for easier mixing.
- Pumpkin Puree – Adds moisture and classic fall flavor; substitute with butternut squash puree if needed.
- Powdered Sugar – Sweetens the mixture, contributing to creaminess; can be reduced for a lower-sugar option.
- Vanilla Extract – Enhances flavor; substitute with almond extract for a different profile.
- Pumpkin Pie Spice – Infuses the balls with classic autumn spices; homemade spice blend can also work.
For the Coating
- Graham Cracker Crumbs – Used for rolling the balls, adding texture and crunch; gluten-free crumbs can be used as a substitute.
- Chocolate – Melted chocolate can coat the balls for a richer taste; choose dark, milk, or white chocolate according to your preference.
- Chopped Nuts – Adds a delightful nutty crunch; options like pecans or walnuts complement the pumpkin flavors beautifully.
- Cinnamon Sugar – A sweet sprinkle of cinnamon sugar can offer a warm, aromatic finish; simply mix cinnamon with sugar for a quick blend.
These No Bake Pumpkin Cheesecake Balls are not only easy to whip up but also customizable for your taste!
Step‑by‑Step Instructions for No Bake Pumpkin Cheesecake Balls
Step 1: Mix Base
In a large mixing bowl, use an electric mixer to beat 8 ounces of softened cream cheese until smooth and creamy, about 2 minutes. Gradually add 1 cup of pumpkin puree, ¾ cup of powdered sugar, 1 teaspoon of vanilla extract, and 1 teaspoon of pumpkin pie spice. Continue mixing until all ingredients are well combined and creamy—this creates the luscious filling for your No Bake Pumpkin Cheesecake Balls.
Step 2: Chill Mixture
Once your cheesecake mixture is perfectly blended, cover the bowl with plastic wrap and refrigerate for at least 1 hour. Chilling helps the mixture firm up, making it easier to shape into balls later. Check the mixture after 30 minutes to see if it’s thickened; it should hold its shape when scooped.
Step 3: Shape Balls
After chilling, use a small cookie scoop or your hands to form balls roughly 1 inch in diameter, rolling them gently to ensure they are smooth. Place the formed balls on a parchment-lined baking sheet. This will be the start of your delightful No Bake Pumpkin Cheesecake Balls, which will be ready for coating next.
Step 4: Coat Balls
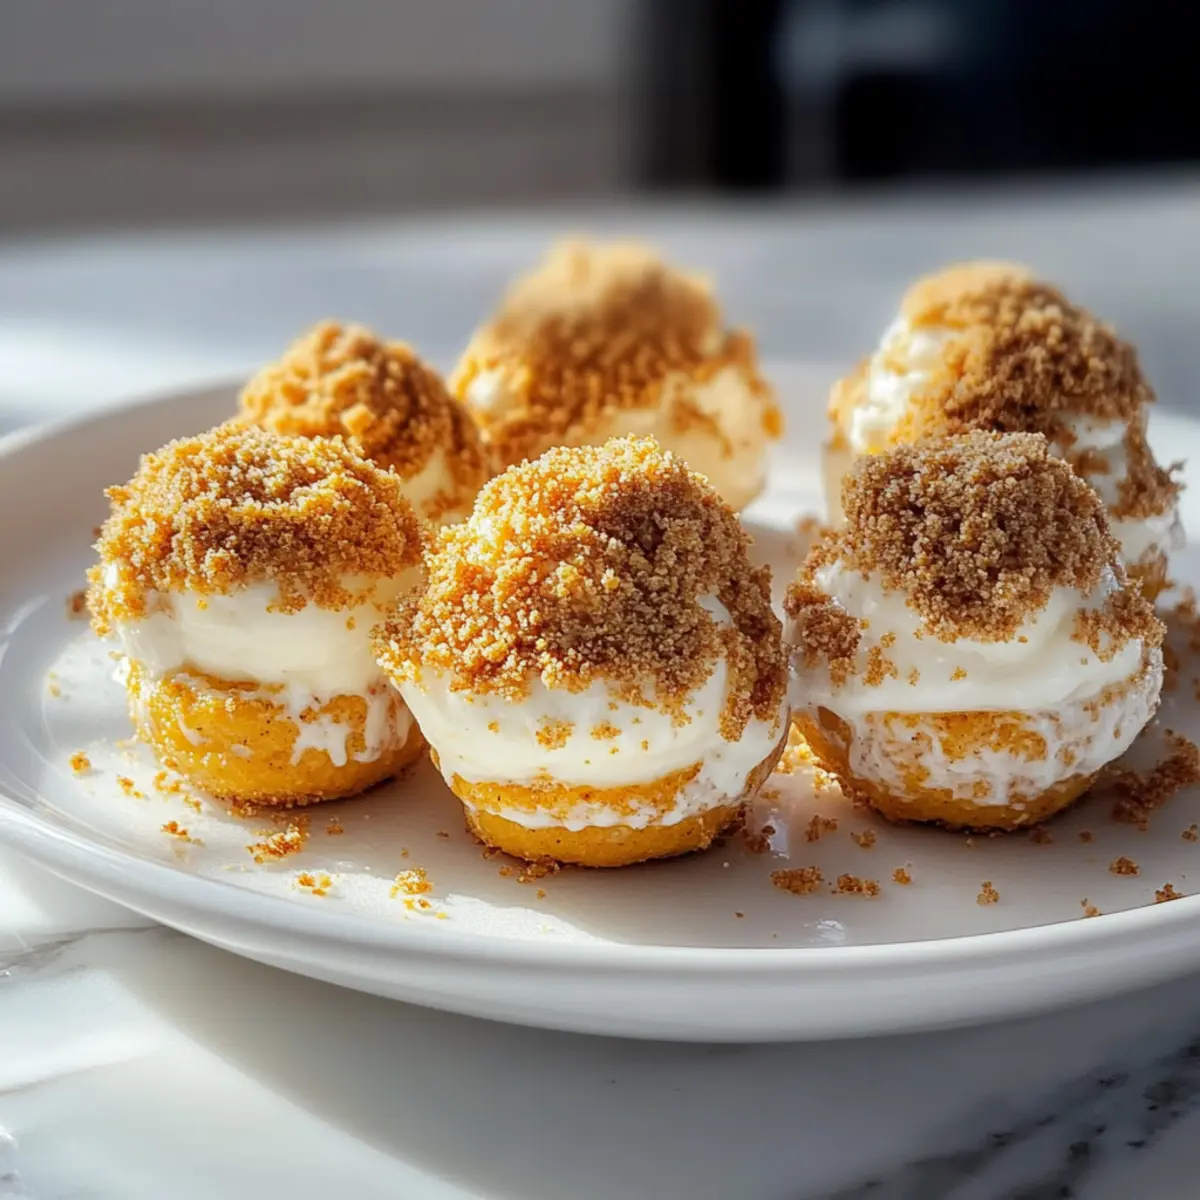
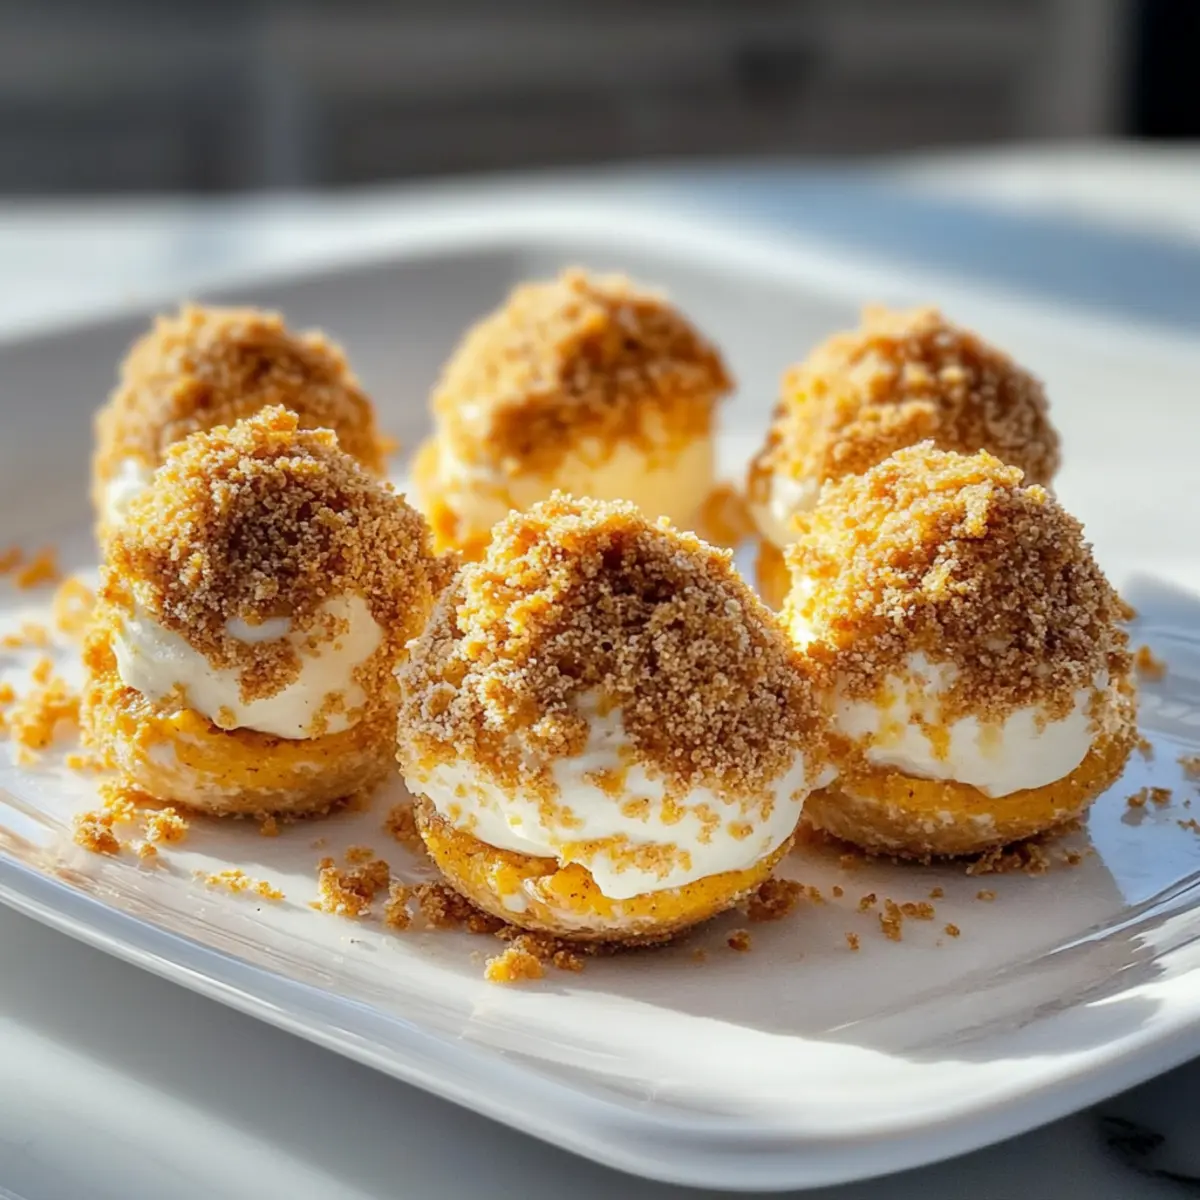
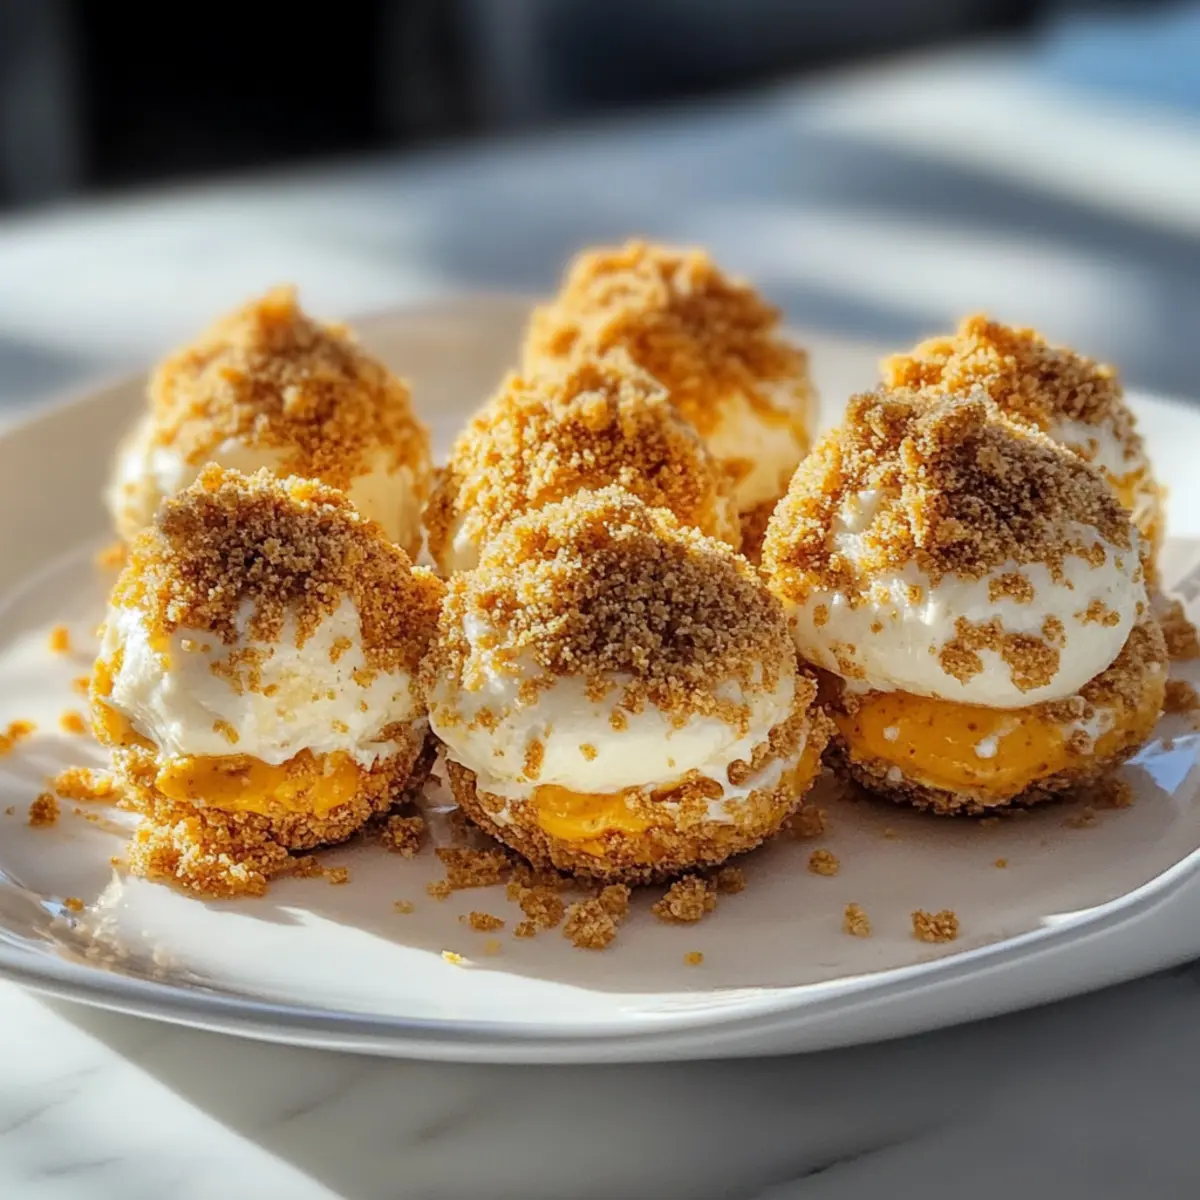
Once all your pumpkin cheesecake balls are shaped, prepare your coating by using 1 cup of graham cracker crumbs. Roll each ball in the crumbs until fully coated, pressing gently to adhere the crumbs. This adds a delightful crunch and texture, enhancing the creamy interior of your No Bake Pumpkin Cheesecake Balls.
Step 5: Set
After coating, arrange the cheesecake balls back on the parchment-lined baking sheet. Cover and refrigerate them for at least 30 minutes before serving. This final chilling step helps the flavors meld and ensures they’re perfectly chilled, making them a delightful treat to enjoy at your next gathering!
What to Serve with No Bake Pumpkin Cheesecake Balls
As you create a sweet indulgence, consider these delightful pairings to elevate your fall gatherings.
- Creamy Mashed Potatoes: A savory counterpoint, the creamy texture and buttery flavor balance the sweetness of the cheesecake balls. Perfect for any festive table!
- Roasted Brussel Sprouts: Crispy, caramelized sprouts add a touch of earthy goodness, enhancing the warm spices in the cheesecake balls while introducing a wholesome crunch.
- Apple Cider: Sipping on this seasonal drink with hints of cinnamon and nutmeg creates a cozy atmosphere, complementing the autumn flavors beautifully.
- Caramel Sauce: Drizzling a bit of warm caramel on top adds an extra layer of sweetness that pairs wonderfully with the creamy texture of each cheesecake ball.
- Spiced Nuts: A mix of lightly salted nuts tossed with cinnamon offers a satisfying crunch, creating a delightful contrast to the rich and creamy bites.
Serving these with your No Bake Pumpkin Cheesecake Balls will bring a festive harmony to your dessert table this fall!
Storage Tips for No Bake Pumpkin Cheesecake Balls
Fridge: Store your No Bake Pumpkin Cheesecake Balls in an airtight container in the refrigerator for up to 7 days. This keeps them fresh and ready to enjoy!
Freezer: To freeze, place the balls in a single layer on a baking sheet until firm, then transfer them to a freezer-safe container. They can be frozen for up to 3 months.
Thawing: When ready to enjoy, simply remove the frozen cheesecake balls from the freezer and let them thaw in the fridge for a few hours before serving.
Reheating: These treats are best enjoyed chilled. Avoid reheating to preserve their creamy texture and delightful taste!
No Bake Pumpkin Cheesecake Balls Variations
Feel free to get creative with these No Bake Pumpkin Cheesecake Balls—your imagination is the only limit!
-
Chocolate Coated: Dip the cheesecake balls in melted chocolate for an extra-rich flavor; choose dark, milk, or white chocolate based on your preference.
-
Nutty Delight: Roll the balls in crushed pecans or walnuts for a delicious nutty crunch that complements the creamy filling beautifully.
-
Cinnamon Sugar Twist: Mix cinnamon and sugar for an aromatic coating that adds a sweet, warm finish. Simply roll the balls in this blend for an extra touch of fall.
-
Spicy Kick: For those who love a little heat, mix in a pinch of cayenne pepper or extra nutmeg into the cheesecake filling for a pleasant surprise.
-
Caramel Drizzle: Drizzle your favorite caramel sauce over the coated balls before serving to add a decadent touch, just like the flavors found in our Caramel Brownie Cheesecake.
-
Pumpkin Spice Blitz: Enhance the spiced flavor by sprinkling more pumpkin pie spice over the finished cheesecake balls for an aromatic finish.
-
Coco-Nutty: Roll in shredded unsweetened coconut for a tropical twist, adding a chewy texture that contrasts with the creamy filling.
-
Pomegranate Seeds: For a fresh, tart contrast, serve alongside pomegranate seeds. Their juicy crunch will elevate the flavors of the cheesecake balls!
These variations will keep your No Bake Pumpkin Cheesecake Balls exciting and ensure there’s something for everyone to enjoy as you cozy up with your loved ones this fall!
Make Ahead Options
These No Bake Pumpkin Cheesecake Balls are perfect for meal prep enthusiasts looking to save time! You can prepare the creamy filling and chill it in the refrigerator up to 24 hours in advance, which allows the flavors to meld beautifully. Just shape the balls and coat them right before serving to maintain their delightful texture. Additionally, you can refrigerate the completed balls for up to 3 days, ensuring they stay just as delicious. For longer storage, consider freezing the uncoated balls and thaw them overnight in the refrigerator before rolling them in graham cracker crumbs. This way, you can enjoy a sweet bite of autumn with minimal effort on busy days!
Expert Tips for No Bake Pumpkin Cheesecake Balls
-
Smooth Cream Cheese: Ensure your cream cheese is at room temperature for easy mixing—cold cream cheese can lead to a lumpy filling.
-
Chill for Firmness: Don’t skip the chilling step! This allows the mixture to thicken and firm up, making it easier to shape your No Bake Pumpkin Cheesecake Balls.
-
Avoid Sticky Hands: If the mixture feels too sticky while shaping, refrigerate it for an additional 15 minutes; it helps with rolling into neat balls.
-
Coating Variety: Feel free to get creative with the coatings! Melted chocolate, crushed nuts, or even a sprinkle of cinnamon sugar can take your No Bake Pumpkin Cheesecake Balls to the next level.
-
Check Refrigeration: Allow enough time for setting in the fridge after coating. This helps the flavors meld beautifully and gives a pleasant chill when served!
No Bake Pumpkin Cheesecake Balls Recipe FAQs
How do I select the best pumpkin puree for this recipe?
Absolutely! Choose canned pumpkin puree that is 100% pure and free from added sugars or spices for the best flavor. If using fresh pumpkin, look for a small variety like sugar pie pumpkins, which have a sweeter, denser flesh. Ensure it’s fully cooked and smooth for a creamy texture in your cheesecake balls.
What’s the best way to store No Bake Pumpkin Cheesecake Balls?
You can store your No Bake Pumpkin Cheesecake Balls in an airtight container in the refrigerator for up to 7 days. Be sure to place parchment paper between layers if stacking to prevent sticking. Keeping them chilled not only preserves their taste but also enhances their creamy delight.
Can I freeze these cheesecake balls? If so, how?
Very! To freeze, place the shaped but uncoated cheesecake balls on a parchment-lined baking sheet and freeze them until firm, about 1 to 2 hours. Then, transfer to a freezer-safe container or zip-top bag, separating layers with parchment paper, and freeze for up to 3 months. When you’re ready to enjoy, simply thaw them overnight in the fridge before serving.
What should I do if my cheesecake mixture is too sticky?
If your mixture feels a bit too sticky, don’t worry! Just chill it for an additional 15-30 minutes. This will help the mixture firm up, making it much easier to scoop and roll into balls without making a mess. If it’s still challenging, a light dusting of powdered sugar on your hands can help!
Are there any dietary considerations I should be aware of?
Definitely! If you’re catering to specific dietary needs, make sure to check for allergies related to cream cheese, as it contains dairy. For gluten-free options, substitute regular graham cracker crumbs with gluten-free crumbs. I often suggest experimenting with non-dairy cream cheese alternatives for a vegan-friendly version, though this may slightly alter the taste and texture.
Can I use sweeteners other than powdered sugar?
Yes, you can substitute the powdered sugar with alternatives like coconut sugar or a sugar-free sweetener. Just keep in mind that these substitutions might affect the texture and sweetness, so adjust according to your taste. For a lower-calorie option, try reducing the amount used while tasting the mixture to ensure it meets your sweetness preference!
No Bake Pumpkin Cheesecake Balls for Effortless Fall Indulgence
Ingredients
Equipment
Method
- In a large mixing bowl, use an electric mixer to beat 8 ounces of softened cream cheese until smooth and creamy, about 2 minutes.
- Gradually add 1 cup of pumpkin puree, ¾ cup of powdered sugar, 1 teaspoon of vanilla extract, and 1 teaspoon of pumpkin pie spice. Continue mixing until all ingredients are well combined and creamy.
- Cover the bowl with plastic wrap and refrigerate for at least 1 hour.
- After chilling, shape the mixture into balls roughly 1 inch in diameter, placing them on a parchment-lined baking sheet.
- Roll each ball in 1 cup of graham cracker crumbs until fully coated.
- Arrange the cheesecake balls back on the parchment-lined baking sheet and refrigerate for at least 30 minutes before serving.
Leave a Reply