
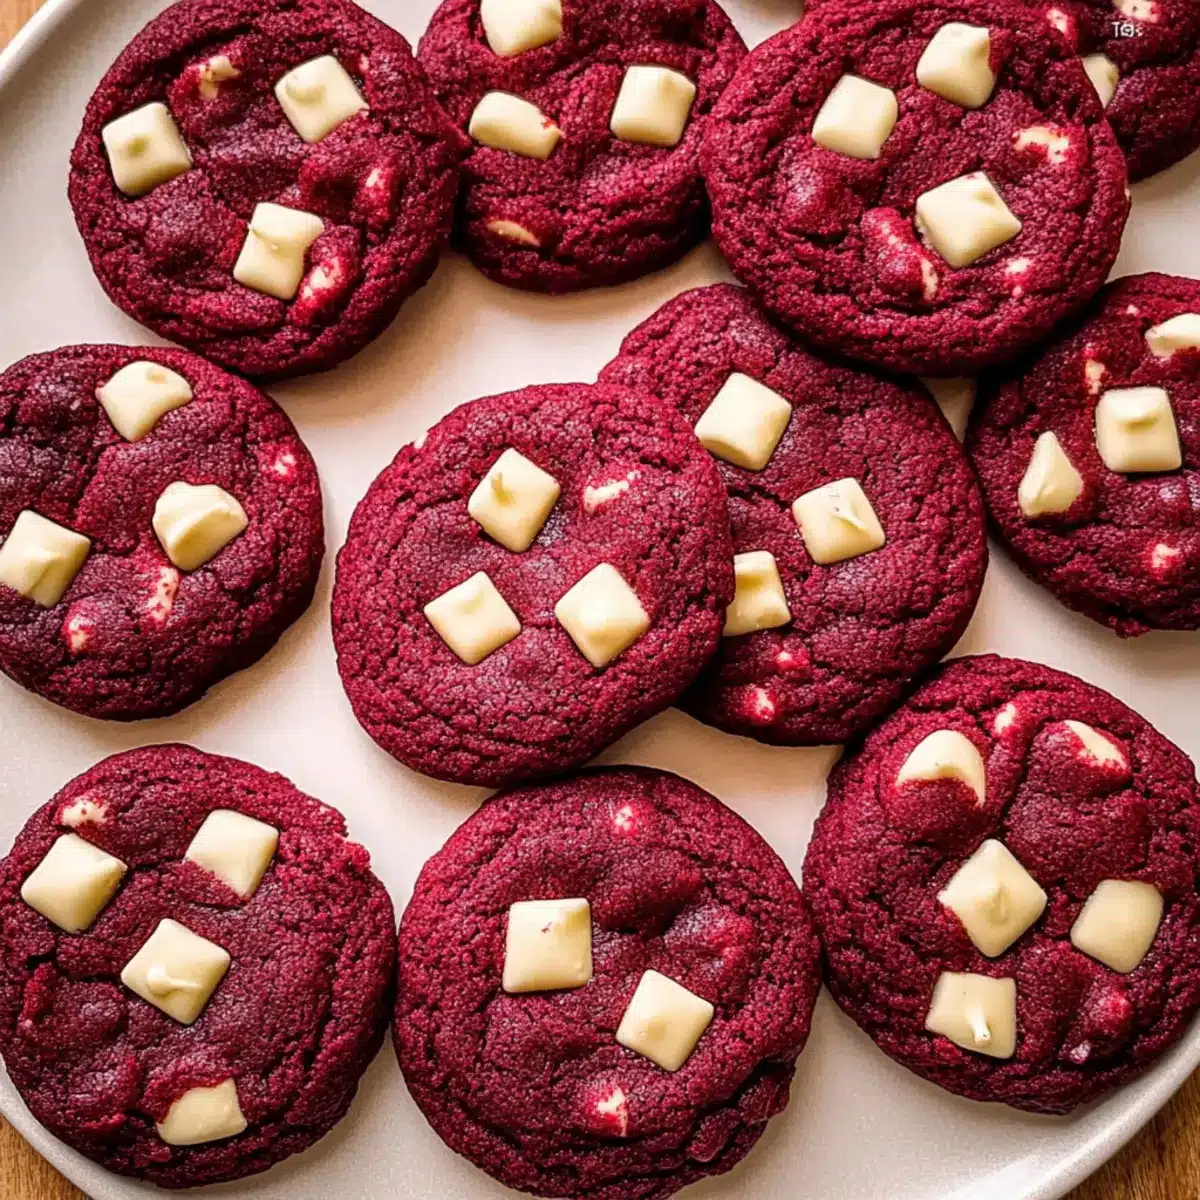
As I stood in my kitchen, a vivid memory surfaced of a cozy café, where the air was imbued with the sweet aroma of fresh-baked treats. That moment inspired me to recreate the delight of chewy Red Velvet Cookies, adorned with luxurious white chocolate chunks. This recipe is a game-changer, allowing you to conjure up a batch in under 30 minutes—no chilling time necessary! Perfect for impressing loved ones on any occasion, these cookies offer not only a fun twist on the classic cake but also a heartwarming indulgence that’s bound to be a crowd-pleaser. Curious about the secret to achieving that ideal chewy texture? Let’s dive into the details!
What Makes These Cookies Irresistible?
Unbeatable Flavor: The combination of rich cocoa and sweet white chocolate creates a mouthwatering treat that satisfies your cravings in every bite.
Quick and Easy: With no chilling time needed, you can whip up these delightful cookies in under 30 minutes, making them perfect for impromptu gatherings or a cozy night in.
Versatile Appeal: Whether it’s a festive occasion or just a treat for yourself, these cookies fit any scenario. Plus, try out variations with semi-sweet chocolate or a hint of cream cheese frosting for extra flair!
Perfectly Chewy Texture: Enjoy the balance of chewy centers and crispy edges, delivering the classic red velvet experience in cookie form.
Crowd-Pleasing Delight: Serve them up warm with a glass of milk, and watch how quickly they disappear! For more cookie inspiration, you might also enjoy our Kitchen Sink Cookies or the decadent Red Velvet Crinkle.
Red Velvet Cookies Ingredients
For the Cookie Base
• All-Purpose Flour – Base structure of the cookies; measure correctly to avoid excess.
• Dutch Process Cocoa Powder – Provides a deep chocolate flavor; regular cocoa can be substituted but may alter the taste.
• Baking Soda – Leavens the cookies to create a chewy texture.
• Baking Powder – Works alongside baking soda for proper rise.
• Salt – Enhances flavor and balances sweetness.
For the Dough
• Salted Butter – Adds richness and moisture; unsalted butter can be substituted, but adjust for salt.
• Light Brown Sugar – Adds depth of flavor and moisture; can be replaced with dark brown sugar for a richer taste.
• Granulated Sugar – Sweetens the cookies, balancing the rich flavors.
• Egg Yolks – Provide moisture and help with the cookie structure; ensure they are at room temperature for best results.
• Vanilla Extract – Imparts flavor; using pure vanilla enhances taste—no substitutions.
• Red Gel Food Coloring – Key for the signature red color; liquid coloring can be used, but may affect the cookie’s consistency.
For the Sweet Addition
• Chopped White Chocolate – Melty chunks enhance sweetness and contrast with the cocoa; white chocolate chips may be used as a substitution.
These delightful Red Velvet Cookies are sure to impress and bring a smile to anyone’s face!
Step‑by‑Step Instructions for Chewy Red Velvet Cookies with White Chocolate Chunks
Step 1: Preheat and Prepare
Begin by preheating your oven to 350°F (175°C). Meanwhile, line two baking sheets with parchment paper to ensure your cookies release easily after baking. This step is crucial for achieving the perfect chewy texture in your Red Velvet Cookies, so make sure your oven is fully preheated and your baking sheets are ready to go.
Step 2: Mix Dry Ingredients
In a medium bowl, whisk together the all-purpose flour, Dutch process cocoa powder, baking soda, baking powder, and salt until well combined. This mixture provides the foundation for your cookies, enriching their flavor and texture. Set this dry mixture aside while you prepare the wet ingredients, ensuring a smooth dough later on.
Step 3: Cream Butter and Sugars
In a large mixing bowl, cream together the softened salted butter, light brown sugar, and granulated sugar using an electric mixer. Beat them on medium speed for about 2 minutes, until the mixture is light and fluffy. This step is vital for ensuring your Red Velvet Cookies have a rich, melt-in-your-mouth texture that everyone will love.
Step 4: Add Egg Yolks and Flavor
Next, incorporate the egg yolks, vanilla extract, and red gel food coloring into the creamed butter and sugar mixture. Mix everything on medium speed until the mixture is fluffy and well combined, which should take another 2 minutes. The addition of the red gel food coloring not only enhances the visual appeal but contributes to the signature taste of the Red Velvet Cookies.
Step 5: Combine Dry and Wet Ingredients
Gradually add the dry ingredient mixture to the wet ingredients, stirring until just combined. Be careful not to overmix, as this can affect the final texture of your cookies. The dough should come together beautifully, creating a vibrant red hue that reflects the signature charm of these delightful Red Velvet Cookies.
Step 6: Fold in White Chocolate
Gently fold in the chopped white chocolate until evenly distributed throughout the dough. This step adds delicious pools of melting sweetness that contrast perfectly with the rich cocoa flavor of the cookies. Make sure every bite gets a taste of those decadent white chocolate chunks for an indulgent treat.
Step 7: Scoop and Shape the Cookies
Using a cookie scoop, portion the dough into 18 balls and place them 2 inches apart on the prepared baking sheets. The spacing is important to allow the cookies to spread evenly while baking. You’ll want to see those lovely rounded tops, which will become crisp on the edges while remaining chewy in the center.
Step 8: Bake to Perfection
Bake the cookies in the oven for 10-12 minutes, keeping a close eye on them. For that perfect chewy texture, take them out when the edges are set but the centers look slightly underbaked. This will ensure your Red Velvet Cookies stay soft and gooey inside, with just the right amount of crispness around the edges.
Step 9: Cool and Transfer
Once baked, let the cookies cool on the baking sheet for about 5 minutes. This allows them to firm up slightly before transferring them to a cooling rack. Don’t skip this step, as it helps achieve the ideal chewy texture and prevents them from breaking apart when moved. After cooling, watch the smiles appear when you share these delicious Red Velvet Cookies!
Make Ahead Options
These Chewy Red Velvet Cookies are ideal for meal prep enthusiasts! You can prepare the dough up to 3 days in advance by scooping it into balls and placing them on a baking sheet lined with parchment. Cover the dough tightly with plastic wrap and refrigerate to maintain freshness. When you’re ready to bake, simply let the dough sit at room temperature for 15-20 minutes while preheating your oven to 350°F. This ensures the cookies bake evenly and retain their chewy texture. Additionally, you can freeze the scooped dough for up to 2 weeks; just bake them straight from the freezer, adding a minute or two to the baking time. These thoughtful make-ahead options save you time while guaranteeing delicious, fresh-baked cookies whenever the craving strikes!
What to Serve with Chewy Red Velvet Cookies with White Chocolate Chunks
Looking to elevate your cookie experience? These delightful treats pair beautifully with a range of flavors and textures that will make your taste buds sing.
-
Creamy Vanilla Ice Cream: A scoop of rich, creamy vanilla ice cream enhances the sweetness of the cookies while balancing out their chewy texture. The contrast is divine!
-
Fresh Berries: Juicy strawberries or raspberries offer a refreshing tartness that complements the sweetness of the cookies perfectly. Their vibrant color also adds a festive touch to your dessert table.
-
Classic Milk: A tall glass of cold milk feels utterly nostalgic and adds a comforting element to the cookie experience. It’s a timeless combination that brings back warm memories!
-
Mocha Coffee: The robust flavors of a mocha coffee work harmoniously with the red velvet cookies, especially with their hints of cocoa. A sip of coffee pairs just right with the sweetness of the cookies.
-
Cream Cheese Frosting: Adding a dollop of cream cheese frosting on top transforms each cookie into an indulgent treat. This pairs excellently with the existing flavor profile, creating a luscious dessert experience.
-
Light Citrus Salad: A zesty salad of oranges and grapefruits provides a refreshing, citrusy contrast to the richness of the cookies. The bright flavors will cleanse your palate and elevate your dessert game!
Make these pairings part of your cookie celebrations, and watch them disappear quicker than you can imagine!
How to Store and Freeze Red Velvet Cookies
Airtight Container: Store your red velvet cookies in an airtight container at room temperature for up to 3 days to maintain their chewy texture and flavor.
Refrigerator: If you prefer, you can keep them in the fridge for up to a week; just allow them to come to room temperature for the best taste when serving.
Freezer: Freeze cookies in a single layer on a baking sheet before transferring them to a zip-top bag or airtight container. They can be frozen for up to 2 weeks.
Reheating: When ready to enjoy, simply let the cookies thaw at room temperature or warm in the microwave for 10-15 seconds for that freshly-baked feel.
Red Velvet Cookies Variations
Feel free to get creative with these chewy red velvet cookies, transforming them into delightful new treats for any occasion!
-
Semi-Sweet Chocolate: Substitute semi-sweet chocolate chunks for an added richness that complements the cocoa beautifully, giving you a new flavor dimension.
-
Colorful Twist: Experiment with different shades of food coloring to make your cookies pop for celebrations, like green for St. Patrick’s Day or blue for a baby shower.
-
Cream Cheese Frosting: Pipe a swirl of cream cheese frosting on top for an indulgent upgrade that dresses up your cookies beautifully, making them party-ready.
-
Nuts Galore: Add chopped pecans or walnuts for a delightful crunch and added texture, contrasting with the soft cookie base.
-
Spicy Surprise: Introduce a pinch of cayenne pepper or cinnamon for a warm, spicy kick that balances the sweetness of the cookies, intriguing your taste buds.
-
Oreo Crumbles: Mix in crushed Oreo cookies for an exciting twist, fusing two decadent desserts into one irresistible treat.
-
Peanut Butter Swirl: Create a delightful peanut butter ribbon through your dough before baking for a sweet and savory experience that everyone will love.
-
Gluten-Free Option: Use a gluten-free flour blend to make these cookies accessible for friends with dietary restrictions, ensuring no one misses out on the fun!
For more delicious cookie ideas, don’t miss our indulgent Red Velvet Crinkle or the delightful Kitchen Sink Cookies. They’ll inspire your next batch of treats!
Expert Tips for Red Velvet Cookies
• Measure Flour Accurately: Properly measure flour by spooning it into your measuring cup instead of scooping to avoid excess, which can lead to dry cookies.
• Room Temperature Eggs: Ensure your egg yolks are at room temperature; this helps incorporate air more effectively for a fluffier texture in your Red Velvet Cookies.
• Avoid Overmixing: Mix the dough just until combined. Overmixing can cause tough cookies instead of the desired chewy texture.
• Baking Time Watch: Keep an eye on your cookies while baking; for chewier centers, take them out when the edges are set and the middle looks slightly underbaked.
• Shape While Warm: If cookies spread too much, use a circular cookie cutter to gently reshape them while still warm for a perfect round look.
• Storage Secrets: Store cookies in an airtight container for up to 3 days or freeze for up to 2 weeks to maintain freshness and flavor!
Red Velvet Cookies Recipe FAQs
How do I choose the right cocoa powder for my Red Velvet Cookies?
Absolutely! To achieve the rich chocolate flavor in your Red Velvet Cookies, it’s best to use Dutch process cocoa powder. This type of cocoa has been treated to neutralize its acidity, resulting in a deeper, more robust chocolate taste. If you only have regular cocoa powder on hand, you can use it, but be aware that it may create a slightly different flavor profile and could cause the cookies to be less tender.
How should I store my Red Velvet Cookies?
To keep your Red Velvet Cookies fresh and chewy, store them in an airtight container at room temperature for up to 3 days. If you want to extend their shelf life, consider refrigerating them for up to a week. Just remember to let them come to room temperature before indulging for the best taste!
Can I freeze Red Velvet Cookies? If so, how?
Very well! Freezing your Red Velvet Cookies is an excellent way to keep them fresh for longer. First, let the cookies cool completely. Then, place them in a single layer on a baking sheet and freeze until solid, about 1-2 hours. Once frozen, transfer them to a zip-top bag or airtight container for up to 2 weeks. When you’re ready to enjoy, let them thaw at room temperature, or heat them in the microwave for about 10-15 seconds to restore that freshly-baked warmth.
What should I do if my dough feels too dry or crumbly?
If you find that your Red Velvet Cookie dough is too dry, do not hesitate to add a little more moisture. Start by incorporating one teaspoon of milk at a time until the dough reaches the desired consistency. Alternatively, ensure your butter is softened at room temperature for better mixing. Remember, the dough should be slightly sticky but still hold its shape.
Are there any allergy considerations I should be aware of with this recipe?
Very much so! This recipe contains common allergens such as gluten (from all-purpose flour) and dairy (from butter and white chocolate). If you need a gluten-free option, you may substitute the all-purpose flour with a gluten-free flour blend. Additionally, if you’re making this for someone with a milk allergy, consider using dairy-free butter and chocolate alternatives that fit their dietary needs. Always check labels to ensure all ingredients are safe.
Can I make these cookies vegan?
Absolutely! To make these Red Velvet Cookies vegan, you can replace the butter with a plant-based alternative and use flax eggs instead of egg yolks. For one flax egg, mix 1 tablespoon of ground flaxseed with 2.5 tablespoons of water; let it sit for a few minutes until it thickens. Just be mindful that using vegan substitutes may alter the flavor and texture slightly, but they will still be delicious!
Deliciously Chewy Red Velvet Cookies in Under 30 Minutes
Ingredients
Equipment
Method
- Preheat your oven to 350°F (175°C) and line two baking sheets with parchment paper.
- In a bowl, whisk together the flour, cocoa powder, baking soda, baking powder, and salt until combined.
- Cream together butter, brown sugar, and granulated sugar until light and fluffy, about 2 minutes.
- Mix in the egg yolks, vanilla extract, and red food coloring until the mixture is fluffy.
- Gradually add the dry ingredients to the wet ingredients, stirring until just combined.
- Fold in the chopped white chocolate until evenly distributed throughout the dough.
- Scoop the dough into 18 balls and place them 2 inches apart on the prepared baking sheets.
- Bake for 10-12 minutes until edges are set but centers look slightly underbaked.
- Let cookies cool on the baking sheet for about 5 minutes before transferring them to a cooling rack.
Leave a Reply