
Amidst the bustling chatter of Halloween preparations, I couldn’t help but catch a glimpse of the excitement bubbling over at a recent party. As it turns out, the key to a memorable gathering lies not just in spooky costumes but also in the treats you serve. Enter the Spooky Graveyard Cake, a show-stopping dessert that’s as enchanting as it is easy to whip up. With its fun, layered design and rich flavors, this cake is sure to captivate your guests and become the highlight of your Halloween festivities. Not only is it a crowd-pleaser that allows for customization, but it also offers a healthier twist compared to traditional desserts, making it perfect for everyone. Ready to stir up some festive creativity in the kitchen? Let’s make this Halloween the sweetest yet!
Why Is This Graveyard Cake Spooky?
Unique Presentation: The Spooky Graveyard Cake features a captivating design that will surely draw attention at any Halloween party.
Flavorful Layers: Incorporating rich chocolate and creamy fillings creates a deliciously indulgent treat that keeps guests returning for more.
Customizable Beauty: You can easily swap ingredients to make it healthier or to cater to different dietary preferences, allowing everyone to enjoy a slice.
No Bake Required: This dessert is perfect for guests who love a neat and easy recipe, combining delightful flavors without the fuss of extensive baking.
Perfect Party Centerpiece: Its striking visuals make it an excellent centerpiece, setting the mood for your festive gathering and sparking conversations among friends.
Elevate your Halloween fun and consider pairing this cake with delightful treats like my Spooky Spiderweb Brownies or Ube Mochi Cake for a varied dessert spread!
Spooky Graveyard Cake Ingredients
For the Cake
• Chocolate Cake Mix – A rich base for the graveyard effect; use your favorite box mix or homemade recipe.
• Eggs – Essential for structure; follow package instructions for the right number.
• Water – Helps moisten the cake; use as directed in your mix.
• Vegetable Oil – Ensures a moist finish; can substitute with melted butter for added richness.
For the Filling
• Chocolate Pudding – Provides a luscious layer; using instant pudding mix makes it quick and easy.
• Cream Cheese – Adds a creamy texture to your filling; opt for softened cream cheese to blend smoothly.
• Powdered Sugar – Sweetens the filling; adjust based on your sweetness preference.
For the Topping
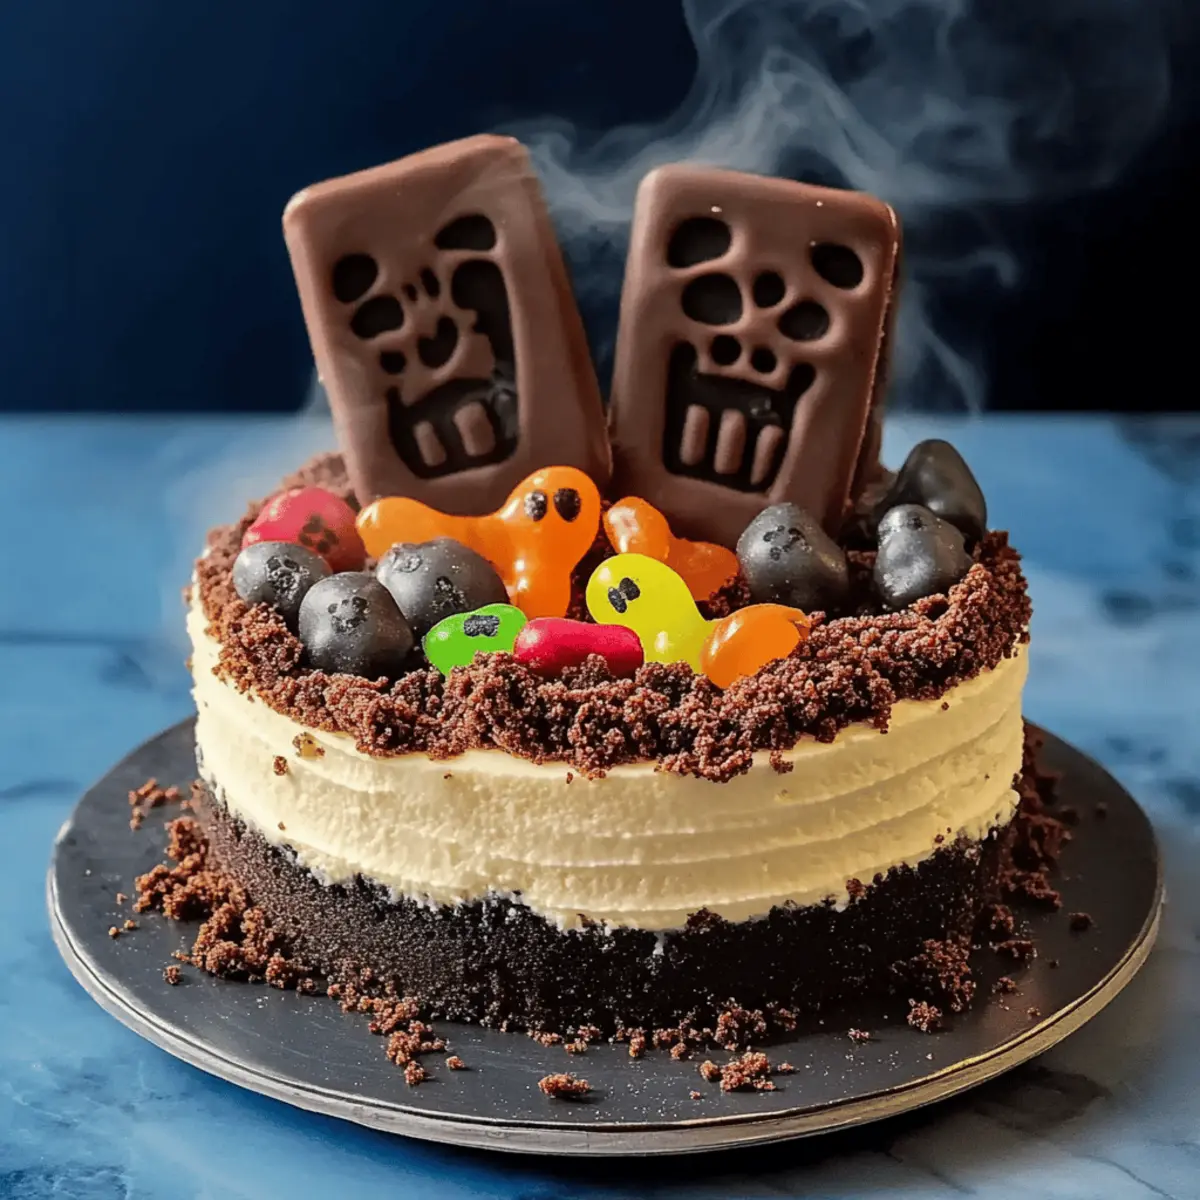
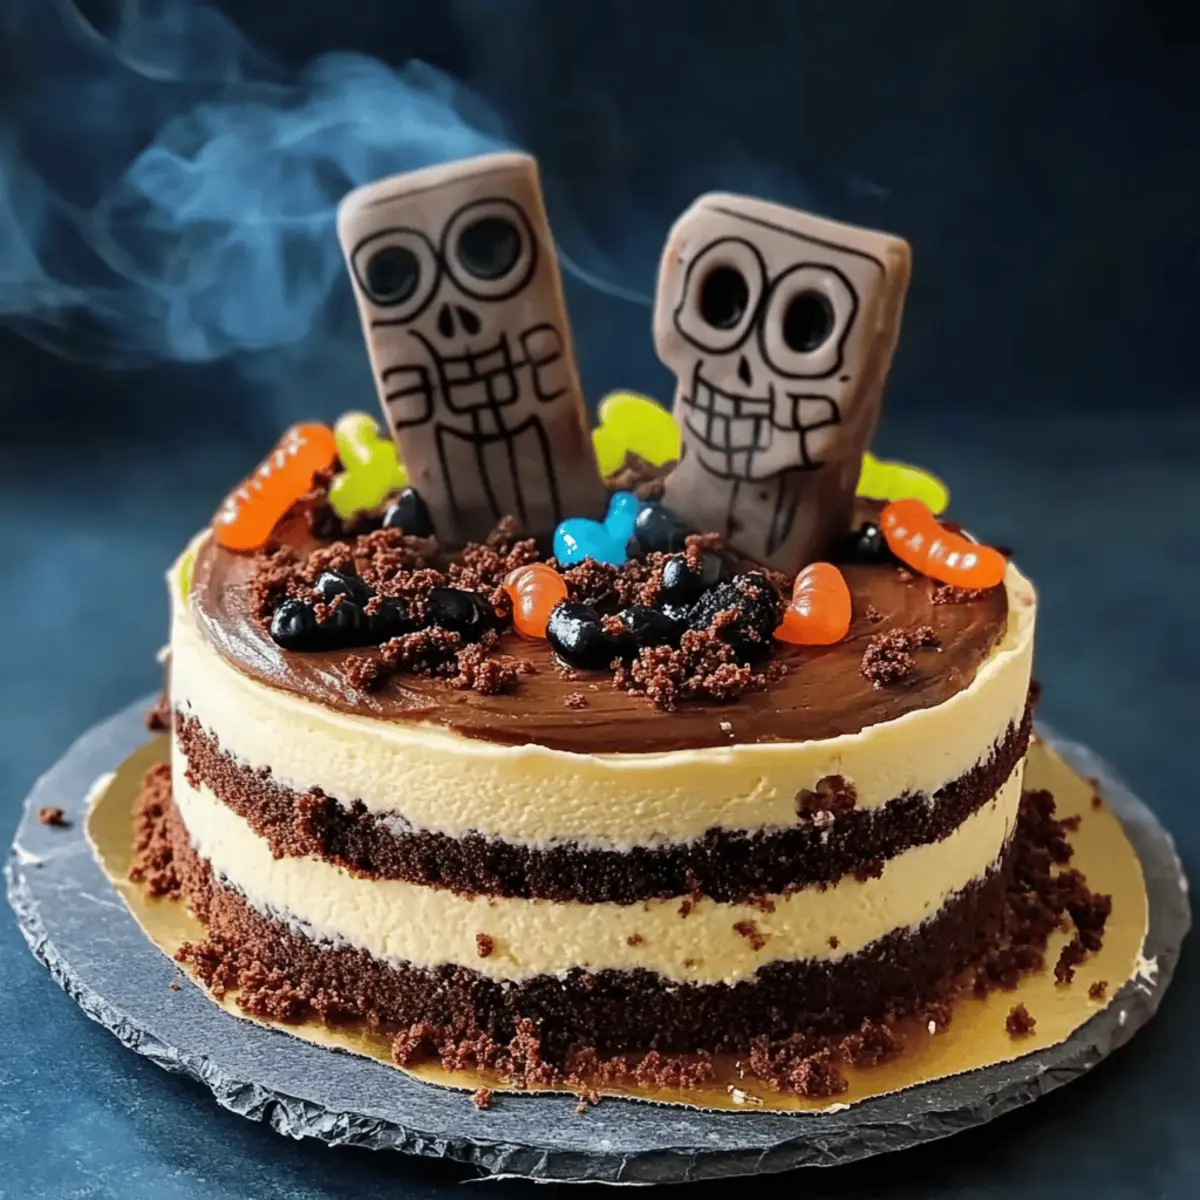
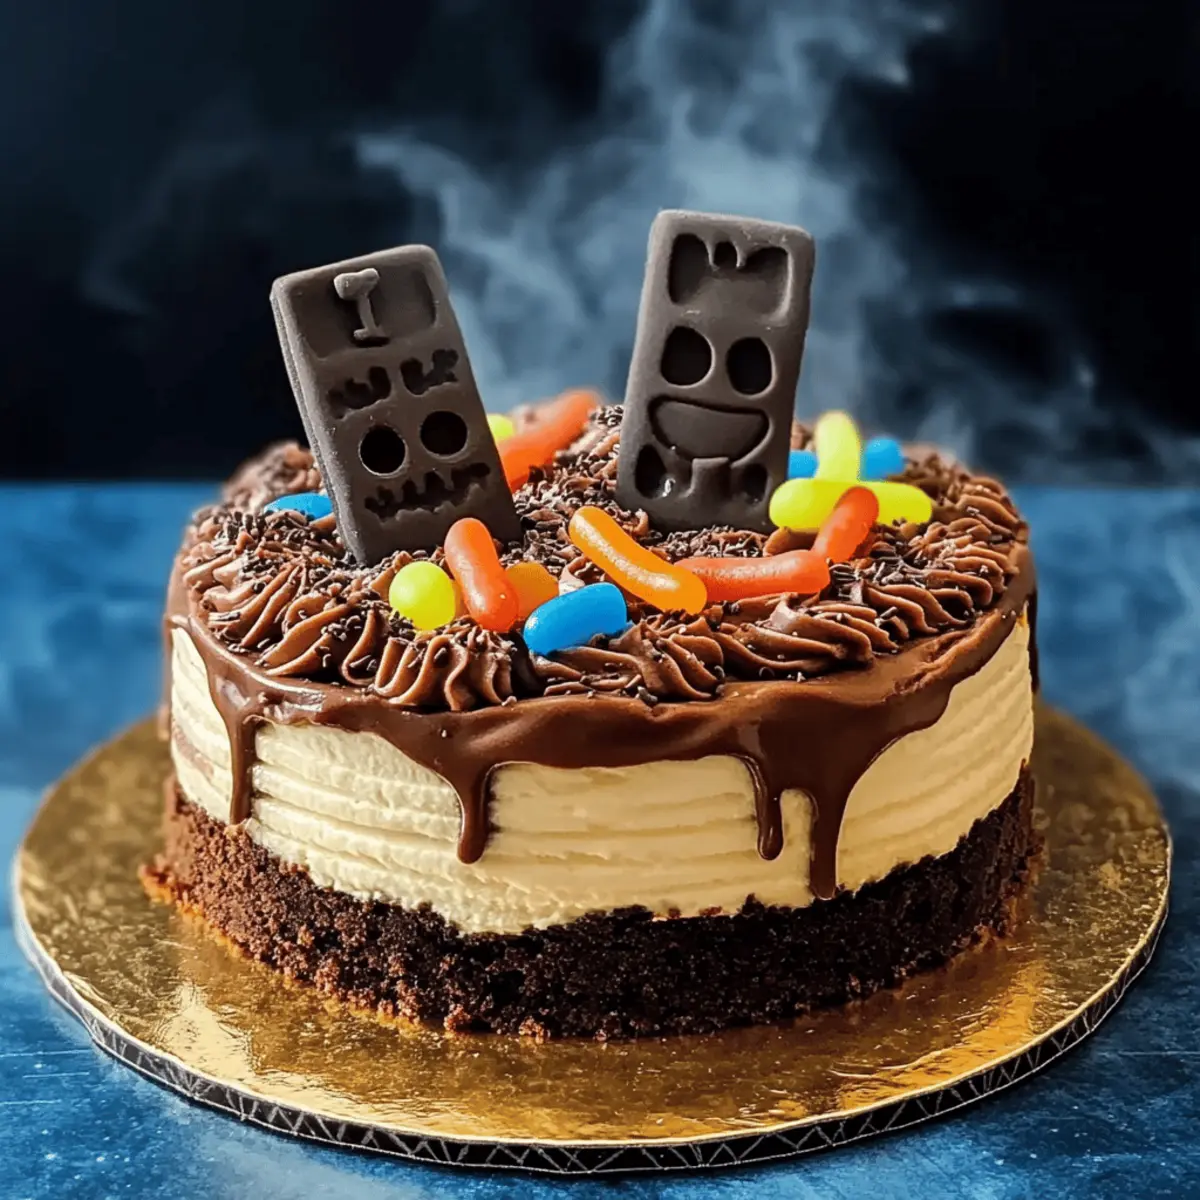
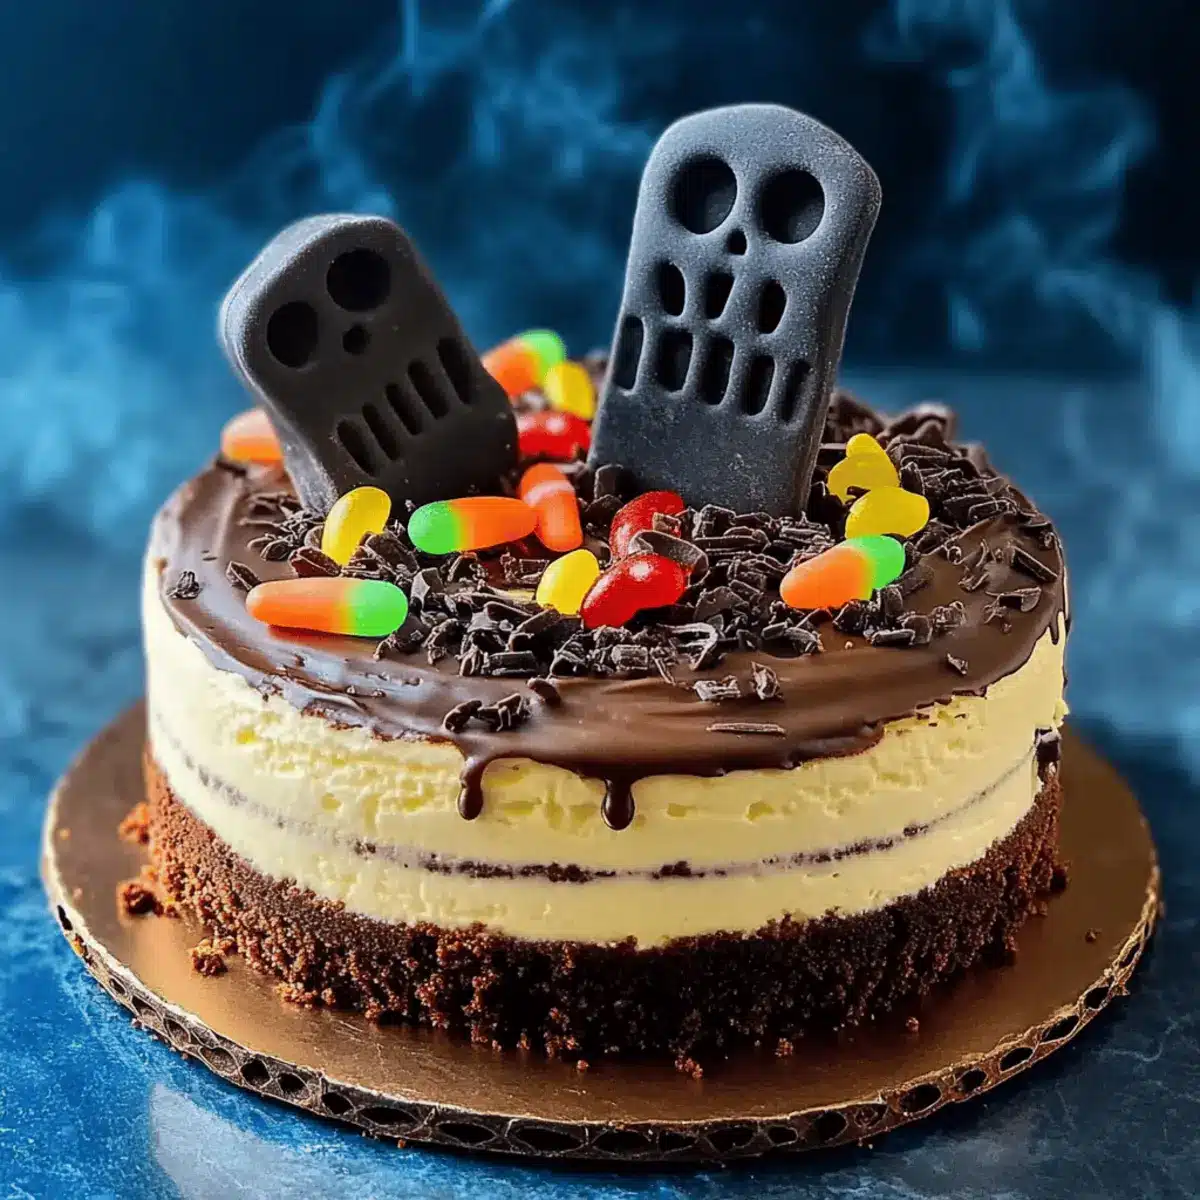
• Crushed Oreos – Mimics dirt on the cake’s surface, enhancing its spooky look; use chocolate graham crackers for a twist.
• Gummy Worms – Fun decoration to bring your graveyard scene to life; substitute with chocolate-covered raisins if preferred.
• Candy Eyes – Perfect for adding a creepy touch; can use edible markers for DIY decorations.
For Decoration
• Candy Melts – For making gravestones and spooky designs on top; substitute with melted chocolate for a homemade touch.
• Marzipan – Wrap small pieces to shape into tombstones for an authentic touch; substitute with fondant for a different texture.
• Fresh Mint Leaves – Adds a pop of color and freshness; optional, but it brightens the overall presentation.
With these Spooky Graveyard Cake ingredients, you’re well on your way to crafting a bewitching dessert that will delight your guests! Happy Halloween baking!
Step‑by‑Step Instructions for Spooky Graveyard Cake
Step 1: Prepare the Cake Batter
Preheat your oven to 350°F (175°C) and grease two round cake pans. In a large mixing bowl, combine your chocolate cake mix, eggs, water, and vegetable oil. Use an electric mixer to beat the batter on medium speed for about 2 minutes until smooth and well-blended. Pour the batter evenly into the prepared pans and bake for 25–30 minutes or until a toothpick inserted in the center comes out clean. Allow the cakes to cool completely in the pans.
Step 2: Make the Filling
While the cakes cool, prepare the filling for your Spooky Graveyard Cake. In a medium bowl, whisk together the chocolate pudding mix and milk according to the package instructions until thickened, usually taking about 2 minutes. In another bowl, beat the softened cream cheese with powdered sugar until smooth. Gently fold the pudding mixture into the cream cheese to create a creamy filling that will add richness between the cake layers.
Step 3: Assemble the Layers
Once the cakes are completely cooled, carefully remove them from the pans. Place one cake layer on a serving platter and spread half of the creamy filling evenly over the top. Add the second cake layer on top, gently pressing down. Use the remaining filling to cover the top and sides of your assembled cake, ensuring a smooth and even layer for the delicious spooky toppings.
Step 4: Decorate with Crushed Oreos
Sprinkle the crushed Oreos liberally over the top and sides of the cake to mimic the look of dirt in a graveyard. Use a spatula or your hands to press the cookie crumbs gently into the filling for better adherence. This will create a delightful, spooky texture that will make your Spooky Graveyard Cake look extra festive and creepy.
Step 5: Create Spooky Decorations
Melt your candy melts in a microwave-safe bowl for about 30 seconds, stirring until smooth. Pour the melted candy into a piping bag or a resealable plastic bag with a corner snipped off. Use this to create gravestones or other fun designs on parchment paper; allow them to set for about 10 minutes. Once hard, carefully place these decorative pieces on top of your cake for that authentic graveyard feel.
Step 6: Add Final Touches
To bring your Spooky Graveyard Cake to life, sprinkle gummy worms over the “dirt” and position candy eyes to peek out from the Oreo crumbs. For an added splash of color, tuck in a few fresh mint leaves around the decorations, giving your cake a vivid and ghoulish look. Ensure all decorations are well-distributed for maximum visual impact, transforming your creation into a true Halloween centerpiece.
Step 7: Serve and Impress
Once decorated, slice your Spooky Graveyard Cake for serving and showcase it on a festive table surrounded by Halloween decorations. Ensure it remains chilled until serving, and strategize your display to make it the highlight of your Halloween festivities. Your guests are in for a treat, both visually and in taste, with this enchanting dessert!
Tips for the Best Spooky Graveyard Cake
-
Bake Evenly: Ensure your oven temperature is accurate for perfectly baked layers; an oven thermometer can help avoid undercooked centers.
-
Chill the Filling: Allow the filling to set in the fridge for 30 minutes after mixing; this helps it hold its shape when layering the cake.
-
Press Crumbs Firmly: When adding crushed Oreos, gently press them into the filling to ensure they stick, creating a more convincing “dirt” look for your graveyard cake.
-
Creative Decorations: Use edible markers or sprinkles to customize your candy decorations, making the spooky theme even more personal and fun.
-
Plan Ahead: Make the layers in advance and assemble them the night before your event; this allows the flavors to meld while saving you time on the day of the party.
-
Taste Test: Wrap any leftover cake and enjoy it later; this way, your Spooky Graveyard Cake can be a delightful post-Halloween treat too!
How to Store and Freeze Spooky Graveyard Cake
Room Temperature: Allow the cake to cool completely before wrapping it tightly in plastic wrap to prevent dryness; it can stay fresh at room temperature for up to 2 days.
Fridge: For longer freshness, store the Spooky Graveyard Cake in an airtight container in the fridge for up to 5 days. This will keep the filling and decorations in great condition.
Freezer: If you need to save it for later, cut the cake into slices and wrap each piece tightly in plastic wrap, then foil; freeze for up to 3 months. Thaw it in the fridge overnight before serving.
Reheating: If you prefer your cake warm, briefly microwave slices for about 10-15 seconds. Avoid heating the decorated parts to maintain the spooky presentation.
Spooky Graveyard Cake Variations
Feel free to let your creativity flourish in the kitchen with these fun twists on the tantalizing Spooky Graveyard Cake.
- Gluten-Free: Use a gluten-free chocolate cake mix for a cake that everyone can enjoy without compromising on taste.
- Dairy-Free: Substitute cream cheese with a dairy-free alternative and use coconut milk for the pudding mix, making it suitable for dairy-sensitive guests.
- Healthier Option: Opt for a reduced-sugar cake mix and sweeten the filling with a natural sweetener like honey or maple syrup for a guilt-free indulgence.
- Flavor Twist: Mix in a dash of pumpkin spice or cinnamon into the pudding layer to give your cake a warm fall twist, complementing the rich chocolate.
- Add Nuts: Incorporate finely chopped nuts, like walnuts or pecans, in the filling or as a layer in the cake for an added crunch and a delightful contrast in texture.
- Fruity Fun: Add diced bananas or berries in the filling for a fruity surprise that adds moisture and a pop of color amidst the earthy tones of the cake.
- Candy Explosion: Top your cake with varied spooky candies like mini chocolate bars or licorice, creating a flavorful landscape that’s as fun to eat as it is to look at.
- Layer It Up: Create an even more extravagant treat by adding another layer of cake to enhance the height and allow for more filling and decorations, making it a true showstopper.
The beauty of this Spooky Graveyard Cake is its versatility. Pair it with other festive treats, like my Spooky Spiderweb Brownies or Ube Mochi Cake, for an unforgettable Halloween dessert table that will enchant your guests!
Make Ahead Options
These Spooky Graveyard Cake components are perfect for busy home cooks looking to save time on Halloween! You can bake the cake layers up to 3 days in advance; simply let them cool completely, wrap each layer in plastic wrap, and refrigerate to maintain moisture. Additionally, you can prepare the chocolate pudding filling up to 24 hours beforehand—store it in an airtight container in the fridge to keep it fresh and creamy. When ready to serve, assemble the cake with your prepped layers and filling, decorate with crushed Oreos and spooky candies, and you’ll impress your guests with minimal last-minute effort, ensuring your Spooky Graveyard Cake is just as delicious!
What to Serve with Spooky Graveyard Cake?
Elevate your Halloween celebration with delightful treats that complement the whimsical charm of this captivating dessert.
-
Creepy Cupcakes: These dark chocolate cupcakes topped with eerie green frosting add a sweet bite-sized option that thrills guests of all ages.
-
Witches’ Brew Punch: A fizzy, lime-green punch garnished with gummy worms creates a refreshing drink that pairs perfectly with the rich cake while enhancing the festive atmosphere.
-
Ghoulish Fruit Skewers: Colorful skewers of pineapple, grapes, and strawberries offer a refreshing contrast to the cake’s sweetness, adding a fun and healthy touch.
-
Chocolate-Dipped Marshmallow Pops: Decorated like ghosts, these treats add playful whimsy to your dessert table while maintaining a delightful chocolate flavor that tantalizes the tastebuds.
-
Savory Mummy Dogs: Mini hot dogs wrapped in crescent dough offer a savory option that balances the sweetness of the Spooky Graveyard Cake well.
-
Monster Rice Krispie Treats: Shaped like monsters and decorated with candy eyes, these treats are a fun addition that appeals to the kids (and the kid in all of us).
-
Ghostly White Chocolate Bark: This crunchy treat with nuts and dried fruits drizzled in white chocolate ties into the Halloween theme, providing a sweet and slightly salty surprise.
-
Candy Corn Trail Mix: A mix of candy corn, pretzels, and nuts brings crunchy textures and sweet flavors, ensuring there’s something for everyone to enjoy alongside the cake.
-
Pumpkin Spice Latte: For a cozy drink option, this seasonal favorite pairs fabulously with the cake, enhancing the overall experience with warm autumnal spices.
Spooky Graveyard Cake Recipe FAQs
What kind of chocolate cake mix should I use?
You can use any brand of chocolate cake mix that you prefer or even a homemade recipe if you’re feeling adventurous! The key is to choose one that you love, as it will form the base of your Spooky Graveyard Cake.
How should I store the Spooky Graveyard Cake?
After assembling, store the cake in an airtight container in the fridge for up to 5 days. If you want to keep it longer, cut the cake into slices, wrap each tightly in plastic wrap followed by foil, and freeze for up to 3 months. When you’re ready to enjoy it, just thaw the slices in the fridge overnight.
Can I modify the filling if I have dietary restrictions?
Absolutely! You can make the filling dairy-free by using coconut cream or dairy-free pudding and opting for a plant-based cream cheese alternative. This way, everyone can enjoy a slice of your Spooky Graveyard Cake without compromising their dietary needs!
What if I run out of crushed Oreos for the topping?
No worries! If you find yourself short on crushed Oreos, chocolate graham crackers are a great substitute. You can also use finely chopped nuts or even cookie crumbs from gluten-free cookies to maintain that “dirt” effect.
How can I prevent the cake from collapsing after decorating?
To ensure your cake holds its shape, always let the filling chill for about 30 minutes after mixing. This solidifies it a bit and helps when you layer between the cake layers. Additionally, pressing the crumbs gently into the filling will help them adhere better.
Can I make the Spooky Graveyard Cake a day in advance?
Yes! In fact, I highly recommend preparing it a day ahead of your party. This allows the flavors to meld beautifully, enhancing the taste. Just store it properly in the fridge. Don’t forget to add the decorations just before serving to keep them looking fresh and delightful!
Spooky Graveyard Cake That Will Haunt Your Guests' Dreams
Ingredients
Equipment
Method
- Preheat your oven to 350°F (175°C) and grease two round cake pans. In a large mixing bowl, combine your chocolate cake mix, eggs, water, and vegetable oil. Beat the batter on medium speed for about 2 minutes until smooth. Pour evenly into the prepared pans and bake for 25–30 minutes or until a toothpick comes out clean. Allow to cool.
- Prepare the filling by whisking together the chocolate pudding mix and milk as per package instructions until thickened, about 2 minutes. In another bowl, beat softened cream cheese with powdered sugar until smooth, then gently fold in the pudding mixture.
- Once cooled, remove cakes from pans. Place one layer on a serving platter and spread half of the filling. Add the second layer on top, pressing gently. Use the remaining filling to cover the top and sides.
- Sprinkle crushed Oreos liberally over the cake to mimic dirt. Press the cookie crumbs gently into the filling for better adherence.
- Melt candy melts and pour into a piping bag. Create gravestones or designs on parchment paper; allow to set for about 10 minutes and then place on the cake.
- Add gummy worms over the dirt and position candy eyes to peek out. Tuck fresh mint leaves around for color, ensuring decoration is well-distributed.
- Slice your cake for serving, chill until served, and present on a festive table. Your guests will be thrilled with both the look and taste of this delightful dessert!
Leave a Reply