
As I pulled out my baking supplies for this year’s Halloween bash, the sight of the vibrant colors and whimsical molds sparked a wave of nostalgia. Transforming ordinary ingredients into “spooky” delights is my favorite part of the holiday. These Easy and Spooky Halloween Party Treats are not just visually stunning; they’re also incredibly easy to whip up, making them a perfect solution for busy schedules. From tantalizing Spellbook Brownies to adorable Mummy Pigs in a Blanket, each recipe promises smiles and satisfaction for both kids and adults alike. Plus, these festive delights are highly customizable, ensuring that you can impress every guest while doubling as a fun craft session with your little ghosts and goblins. So, what spine-tingling treat will you create to chill and thrill your guests this Halloween?
Why Make These Spooky Treats?
Ease of Preparation: You don’t need to be a master chef to whip up these fun Halloween delights! With simple ingredients and straightforward steps, anyone can create these crowd-pleasers in no time.
Customizable Creations: The beauty of these treats lies in their versatility. Whether you’re using veggie dogs for a healthier option or swapping toppings on caramel apples, you can tailor the recipes to suit everyone’s taste!
Visual Appeal: From the eerie Spellbook Brownies to Mummy Pigs in a Blanket, each treat is a feast for the eyes. They’re sure to elevate the festive atmosphere and spark conversations at your gathering!
Kid-Friendly Fun: This is the perfect opportunity to get little hands involved in the kitchen. Decorating cookies or assembling spider snacks creates cherished memories while keeping your young goblins entertained!
Quick and Seasonal: These treats are designed for those busy Halloween prep days. Spend less time in the kitchen and more time enjoying your party with friends and family. Looking for more sweet options? Try Chocolate Cheesecake Decadent or Caramel Brownie Cheesecake for delightful variations!
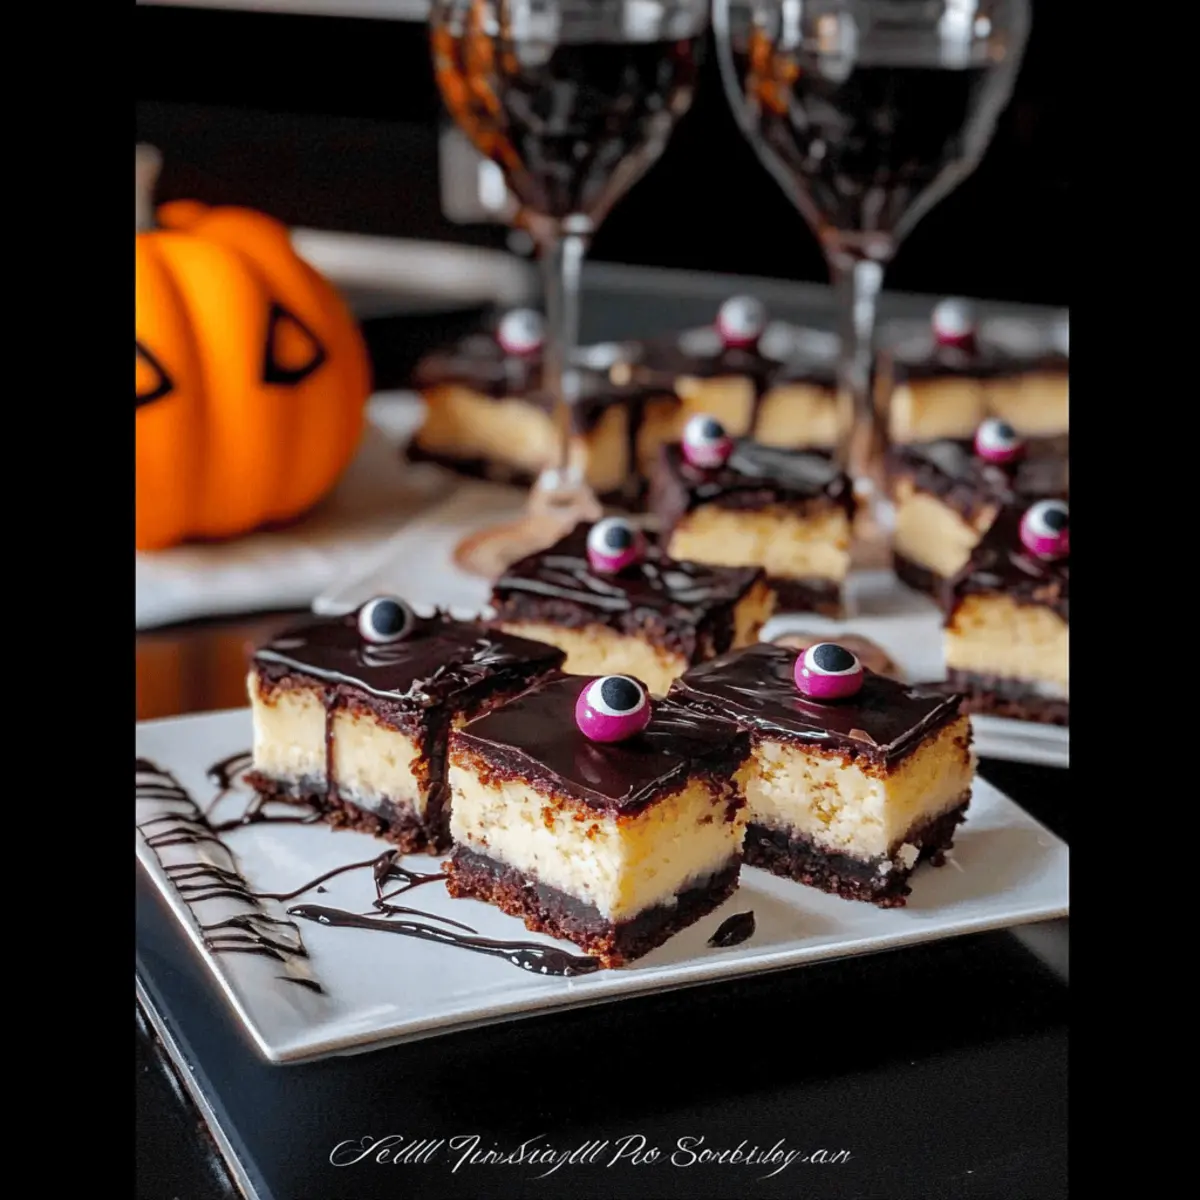
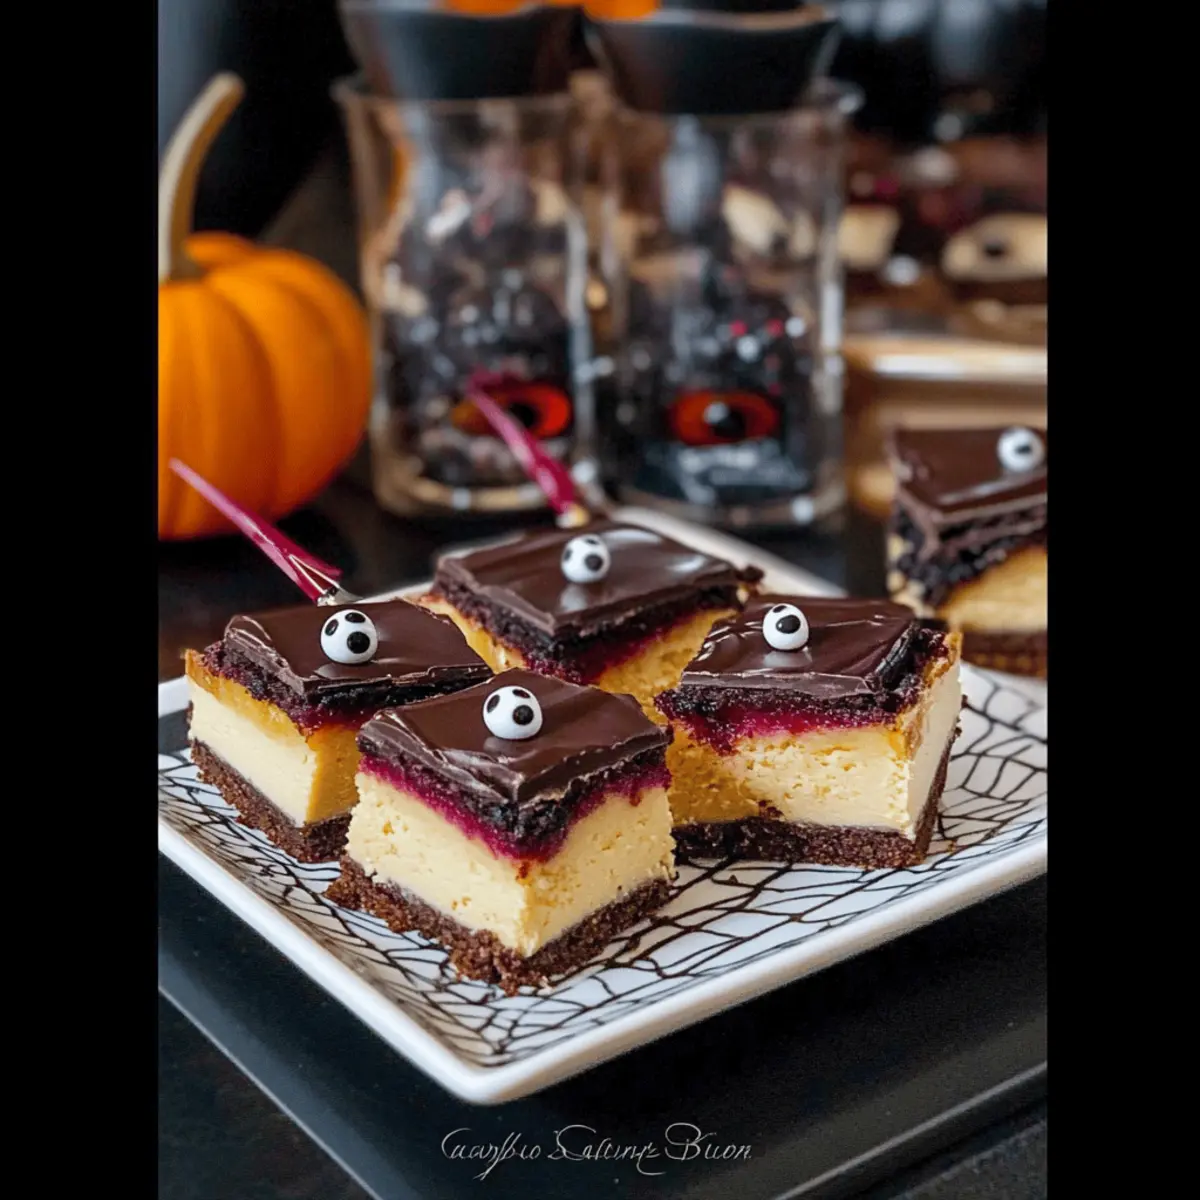
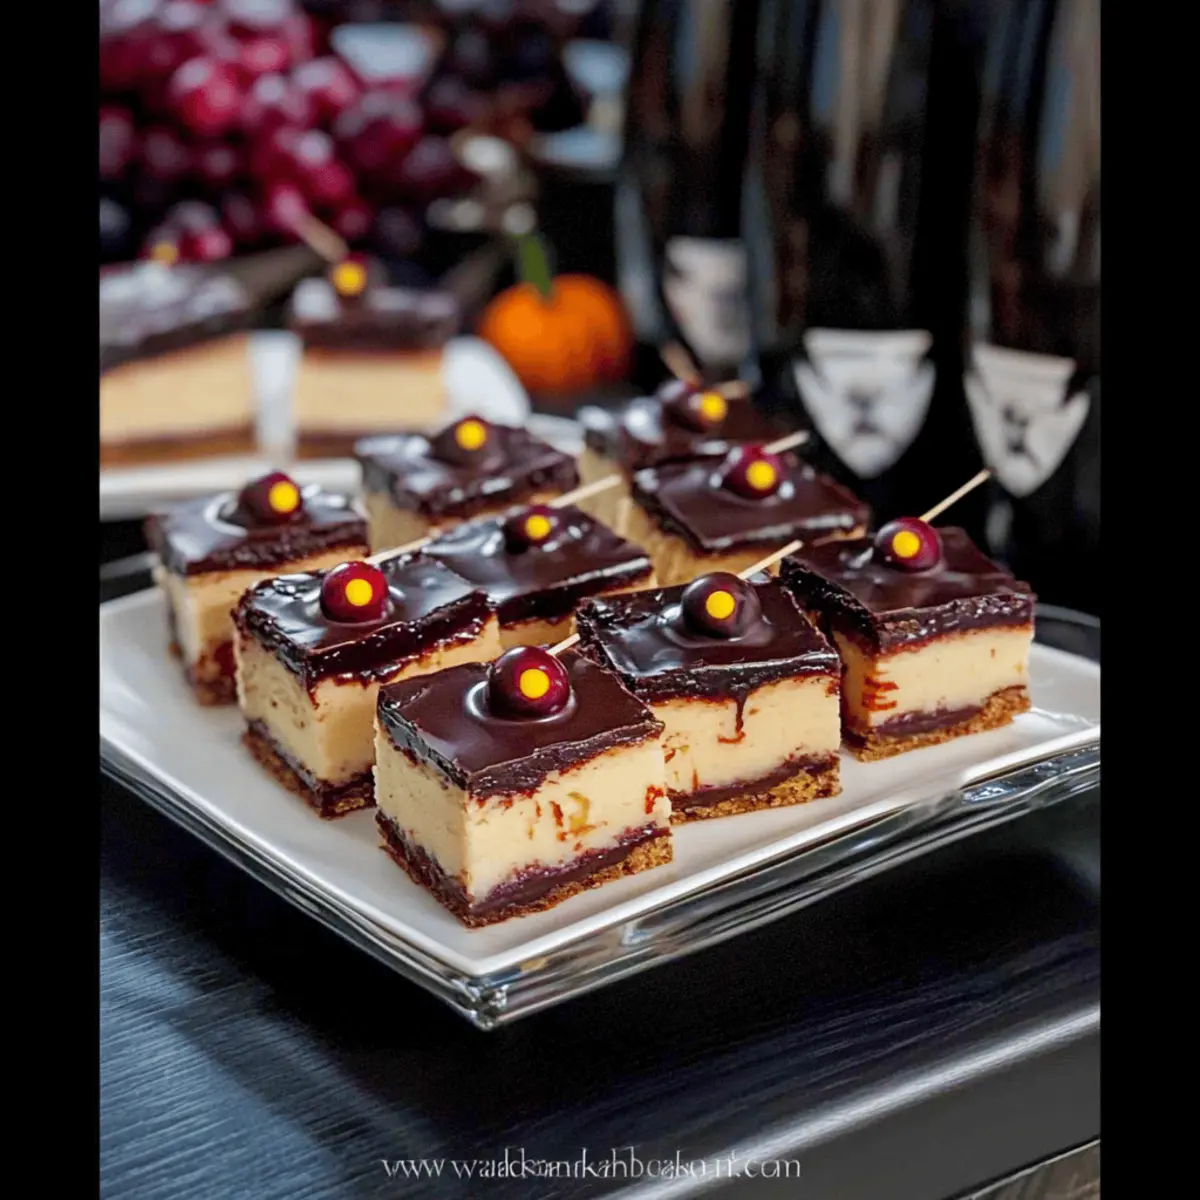
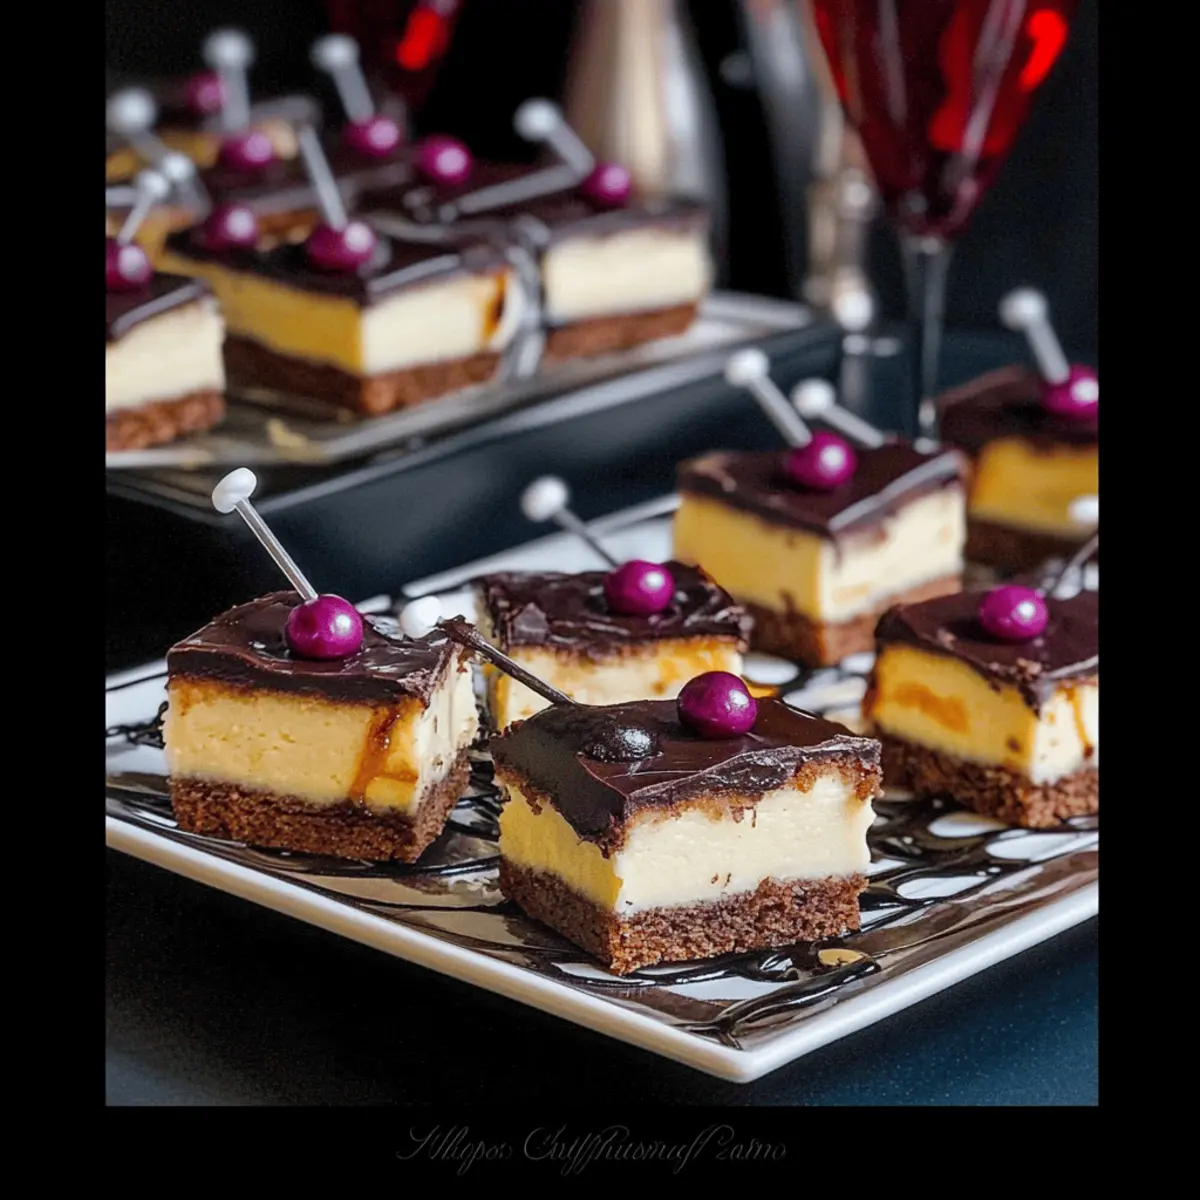
Cheesecake Bars with Wine Gelée Ingredients
• Discover all the delicious elements for your spooky dessert!
For the Cheesecake Bars
- Cream Cheese – A must-have for that rich and creamy base; ensure it’s softened for easy mixing.
- Granulated Sugar – Provides sweetness to balance the richness of the cream cheese; adjust to taste if preferred.
- Eggs – Bind the ingredients together; room temperature eggs work best for a smooth batter.
- Vanilla Extract – This adds a lovely depth of flavor; use pure vanilla for the best results.
- Graham Cracker Crumbs – Creates a deliciously crunchy base; feel free to substitute with crushed cookies for a twist.
- Butter – Helps hold the crust together; melted unsalted butter gives the best flavor.
For the Wine Gelée Topping
- Red Wine – Adds a sophisticated touch and complex flavor to the dessert; choose a fruity variety for a sweeter profile.
- Gelatin Powder – Essential for setting the gelée; make sure to bloom it according to package instructions for best results.
- Water – Used to dissolve the gelatin; hot water helps it integrate perfectly.
- Sugar – Sweetens the wine and balances flavors; adjust based on your wine’s sweetness.
- Fresh Berries – Enhance the visual appeal and add a fresh burst of flavor; try raspberries or blueberries for a festive look.
These Cheesecake Bars with Wine Gelée are not just easy to make, but their eye-catching presentation will thrill your Halloween guests!
Step‑by‑Step Instructions for Cheesecake Bars with Wine Gelée
Step 1: Prepare the Cheesecake Base
Start by preheating your oven to 325°F (163°C). In a mixing bowl, combine softened cream cheese, granulated sugar, eggs, and vanilla extract. Use an electric mixer on medium speed for about 3-4 minutes until the mixture becomes smooth and creamy. Meanwhile, grease a parchment-lined 8×8-inch baking pan, ensuring an easy release later. Pour the creamy cheesecake batter into the prepared pan, smoothing the top with a spatula.
Step 2: Create the Crust
In a separate bowl, mix the graham cracker crumbs with melted butter until well combined. The mixture should resemble wet sand. Press this crumb mixture firmly into the bottom of the cheesecake batter in the pan, creating an even layer. Bake in the preheated oven for about 25-30 minutes, or until the edges are set, and the center slightly jiggles when shaken. Allow the base to cool while you prepare the wine gelée.
Step 3: Bloom the Gelatin
In a small bowl, sprinkle the gelatin powder over 1/4 cup of water. Let it sit for about 5-10 minutes to bloom, which helps it dissolve better later. During this time, combine red wine and sugar in a saucepan over medium heat, stirring gently until the sugar completely dissolves. Bring to a simmer for around 2-3 minutes while stirring occasionally, then remove it from heat.
Step 4: Combine Gelatin and Wine Mixture
Once the wine mixture has cooled slightly, add the bloomed gelatin to the saucepan. Whisk until fully dissolved and the mixture is smooth. For an elegant touch, add a splash of fresh berries to the mix for flavor and visual impact. Allow the wine gelée to cool for an additional 5-10 minutes before pouring it evenly over the cooled cheesecake layer in the pan.
Step 5: Chill the Bars
Refrigerate the assembled cheesecake bars for at least 4 hours or until the gelée is fully set. This step is crucial to achieving that delightful texture and presentation. For best results, cover the dish gently with plastic wrap to avoid condensation on the surface. If time allows, chilling overnight enhances the flavors, making your Cheesecake Bars with Wine Gelée even more delicious.
Step 6: Slice and Serve
After the gelée has set, remove the cheesecake from the refrigerator. Carefully lift it out of the pan using the parchment overhang. Use a sharp knife to cut it into squares or bars, wiping the knife between cuts for clean edges. Arrange the cheesecake bars on a festive platter, and garnish with additional fresh berries or mint leaves for an appealing presentation at your Halloween gathering.
What to Serve with Easy and Spooky Halloween Party Treats
Halloween is all about creating a festive atmosphere, and pairing your spooky treats will elevate the excitement even more!
-
Crispy Apple Slices: Fresh and crunchy, these slices provide a refreshing contrast to sweet treats. You can even dip them in caramel for added sweetness!
-
Pumpkin Soup: A warm bowl of creamy pumpkin soup offers cozy comfort that balances out the fun, festive flavors of the party. Perfect for chilling the spine!
-
Spooky Punch: A vibrant mix of fruit juices and fizzy soda, this drink can be garnished with floating creepy plastic spiders for a fun touch that keeps guests refreshed.
-
Ghoulish Guacamole: Creamy, fresh guacamole topped with corn chips brings a savory element that can compete with the desserts. Use food coloring for an extra eerie effect!
-
Monster Cupcakes: Colorful cupcakes topped with gooey icing and candy eyes will delight your guests and add to the whimsical ambiance of your Halloween party.
-
Chocolate-Covered Pretzels: These treats have a delightful sweet and salty crunch that complements your spooky selection of treats perfectly. Add sprinkles for a festive flair!
-
Eerie Charcuterie Board: An artfully arranged display of meats, cheeses, and fruits can serve as an eye-catching centerpiece while providing delicious snacking options alongside your dessert!
-
Ghostly Ice Cream: Simple vanilla scoops dressed up like ghosts using chocolate chips and whipped cream will keep the chill in the air and the fun continuing late into the night!
Complete your Halloween gathering and bring joy to your guests with these delightful pairings alongside your Easy and Spooky Halloween Party Treats!
Expert Tips for Cheesecake Bars
-
Room Temperature Ingredients: Make sure your cream cheese and eggs are at room temperature before mixing; this helps achieve a smooth, lump-free batter for your cheesecake bars.
-
Don’t Overmix: When combining your cheesecake ingredients, mix just until smooth. Overmixing can lead to a dense texture instead of the light, fluffy consistency we want in cheesecake bars.
-
Gelatin Blooming: Always allow gelatin to bloom in water before adding it to the warm wine mixture; this prevents clumps and ensures your wine gelée sets perfectly on top.
-
Chill Time Importance: Be patient and let your cheesecake bars chill for at least 4 hours, or preferably overnight. This helps the flavors meld and the gelée firm up beautifully.
-
Slice Carefully: Use a sharp knife, cleaning it between each cut for beautiful edges. This ensures your Cheesecake Bars with Wine Gelée look as elegant as they taste!
How to Store and Freeze Cheesecake Bars with Wine Gelée
Fridge: Keep your cheesecake bars in an airtight container in the refrigerator for up to 5 days. This will maintain their creamy texture and fresh taste while keeping the wine gelée intact.
Freezer: Wrap individual cheesecake bars tightly in plastic wrap and then place them in a freezer-safe container. They can be frozen for up to 2 months; simply thaw in the fridge overnight before serving.
Serving Temperature: For optimal flavor, serve the cheesecake bars chilled. If stored at room temperature for a short period before your gathering, the creamy texture will remain delightful.
Reheating: There’s no need to reheat cheesecake bars, but if desired, let them come to room temperature for about 15–20 minutes before serving for the best flavor experience. Enjoy your Cheesecake Bars with Wine Gelée during the spook-tacular festivities!
Make Ahead Options
These Cheesecake Bars with Wine Gelée are perfect for busy cooks looking to save time without sacrificing flavor! You can prepare the cheesecake base up to 3 days in advance; simply bake and refrigerate it, covering the top with plastic wrap to maintain that silky texture. As for the wine gelée topping, it can also be made 24 hours ahead—just pour it over the cheesecake once it has cooled completely. For the best results, allow the bars to set in the refrigerator overnight, which will enhance their flavors. When it’s time to serve, slice and arrange the bars on a festive platter for a stunning presentation that’s just as delicious as the day you made them!
Variations & Substitutions for Cheesecake Bars with Wine Gelée
Get creative with your cheesecake bars and explore delightful twists that will leave your guests craving more!
-
Gluten-Free Crust: Substitute graham cracker crumbs with almond flour or gluten-free cookie crumbs for a crunchy, gluten-free base. This allows everyone to partake in deliciousness without missing out!
-
Fruity Variations: Swap red wine for a sweet dessert wine or fruity white wine to create a different flavor profile. This way, you can brighten the bars with a fresh burst of flavor!
-
Flavored Gelatin: Use flavored gelatin instead of plain gelatin for a fruitier gelée on top. For instance, raspberry or cherry gelatin will complement the cheesecake beautifully while adding a splash of color.
-
Chocolate Cheesecake: Use half chocolate cream cheese for an extra rich and chocolatey twist. This fun variation will certainly enchant chocolate lovers at your party!
-
Alternative Toppings: Try topping with seasonal fruits, like sliced strawberries or pomegranate seeds, instead of just berries for a festive look and taste. These tiny jewels add vibrancy while keeping your dessert visually stunning.
-
Dairy-Free Option: Substitute cream cheese with a dairy-free alternative and use a non-dairy butter. You’ll still achieve that creamy texture and delightful taste!
-
Boozy Infusion: For an adult-only event, try infusing the gelée with flavored liqueurs like raspberry liqueur. This adds a grown-up kick that is perfect for a Halloween party!
-
Layered Dessert: Transform your cheesecake bars into layered cups by alternating cheesecake and gelée in individual dessert cups. This creates an elegant presentation and is also a fun way for guests to personalize their servings!
Explore these tempting variations to take your cheesecake bars to the next level. Looking for a chocolatey delight? Don’t miss trying some delicious Chocolate Cheesecake Decadent recipes!
Cheesecake Bars with Wine Gelée Recipe FAQs
How do I choose the right red wine for the gelée?
Absolutely! Opt for a fruity variety, such as Merlot or Pinot Noir, to keep the flavor balanced and sweet. It’s best to avoid overly tannic wines, as they can overpower the cheesecake. If you prefer stronger flavors, feel free to experiment—just remember that sweeter wines typically pair better with desserts.
How should I store leftover cheesecake bars?
To retain their creamy consistency, store your cheesecake bars in an airtight container in the fridge for up to 5 days. If you have extras, wrap them tightly in plastic wrap and then place them in a freezer-safe container to keep them fresh for up to 2 months. Make sure to thaw them overnight in the fridge before serving for a delightful treat!
Can I make cheesecake bars ahead of time?
Very! You can prepare both the cheesecake and wine gelée, then refrigerate them for at least 4 hours to set properly. In fact, preparing them a day in advance is often recommended, as the flavors meld beautifully when allowed to chill overnight. This makes for a stress-free serving the next day!
What should I do if my cheesecake bars crack during baking?
If you notice cracks developing in your cheesecake, it may have been overbaked or mixed too vigorously. To prevent this, ensure you’re mixing only until smooth and baking just until the edges are set—remember that they will firm up as they cool. If cracks do occur, don’t worry! You can cover them with fruit or whipped cream for a creative presentation touch.
Are there any dietary considerations for these cheesecake bars?
Yes! If you’re making these for guests with dietary restrictions, you can substitute gluten-free graham cracker crumbs for a gluten-free crust. Additionally, you could use a non-alcoholic wine or a fruity juice for the gelée to keep the treat kid-friendly. Remember to check for dairy-free cream cheese options if you have lactose-intolerant guests!
Can I use something other than red wine for the gelée?
Absolutely! If red wine isn’t to your taste or you want an alcohol-free option, you can create a gelée using grape juice or berry-infused soda. For a touch of elegance, you might even consider a sparkling grape juice to maintain that festive feel while being appealing to everyone!
Cheesecake Bars with Wine Gelée for a Fancy Treat Delight
Ingredients
Equipment
Method
- Preheat your oven to 325°F (163°C). In a mixing bowl, combine softened cream cheese, granulated sugar, eggs, and vanilla extract. Mix for 3-4 minutes until smooth.
- Grease a parchment-lined 8x8-inch baking pan and pour the cheesecake batter into it, smoothing the top.
- Mix graham cracker crumbs with melted butter until resembling wet sand and press this mixture into the base of the batter.
- Bake for 25-30 minutes until edges are set and center jiggles slightly. Allow to cool.
- Sprinkle gelatin over 1/4 cup water and let it bloom for 5-10 minutes.
- In a saucepan, combine red wine and sugar, stirring until dissolved. Simmer for 2-3 minutes.
- Add bloomed gelatin to the warm wine mixture and whisk until smooth. Add fresh berries and let cool for 5-10 minutes before pouring over cheesecake base.
- Refrigerate for at least 4 hours until gelée is set. Cover with plastic wrap to avoid condensation.
- Slice the cheesecake into bars and serve, garnished with additional berries or mint leaves.
Leave a Reply