
The air is thick with the scent of rich chocolate, and laughter fills the kitchen as my kids gather around, eagerly anticipating our Halloween tradition. What better way to celebrate the spooky season than with these eye-catching Spooky Spiderweb Brownies? This easy-to-make recipe transforms a classic brownie into a festively fun treat, perfect for parties or school events. Plus, with the ability to customize flavors and designs, every home chef can add their own twist to this delight, making it a truly interactive baking experience. Here’s your chance to gather the family, unleash your creativity, and create a batch of brownies that will enchant both kids and adults alike. Who’s ready to whip up some Halloween magic?
Why are These Brownies a Halloween Hit?
Easy to Make: This recipe requires minimal steps, making it perfect even for novice bakers wanting to join in on the Halloween fun.
Customizable Flavors: Switch up the brownie mix to create unique flavor combinations. Imagine salted caramel or peanut butter brownie options for an extra twist!
Visually Stunning: The striking spiderweb design not only looks fantastic but also adds an element of artistry that will impress your guests.
Kid-Friendly Fun: Involve the little ones in decorating; everyone will love piping the white chocolate and creating their own spooky designs.
Perfect for Any Occasion: While they’re ideal for Halloween, these brownies can easily be adapted for any festive gathering—turn them into spooky treats or delicious delights for any celebration
Spooky Spiderweb Brownie Ingredients
• Get ready to tempt your taste buds and celebrate Halloween with these Spooky Spiderweb Brownies!
For the Brownie Base
- Brownie Mix – Select any mix you love, whether it’s fudge, chocolate chunk, or even gluten-free!
- Eggs – Provide the necessary moisture and act as a binding agent for the delightful brownie texture.
- Oil – Adds richness to your brownies; opt for melted butter if you prefer an even more decadent flavor.
For the Spiderweb Decoration
- White Chocolate – Perfect for creating that stunning spiderweb design; feel free to substitute with vanilla frosting that can be piped easily.
Dive into this fun and creative recipe, and prepare to delight your family and friends with your spooky baking skills!
Step‑by‑Step Instructions for Spooky Spiderweb Brownies
Step 1: Prepare the Brownie Batter
Start by preheating your oven to 350°F (175°C). In a mixing bowl, combine your chosen brownie mix with eggs and oil, stirring until smooth and well incorporated. The batter should be thick and glossy. Pour the mixture into a greased 9×13 inch baking pan, spreading it evenly. Bake for 25-30 minutes or until a toothpick inserted in the center comes out with a few moist crumbs.
Step 2: Cool the Brownies
Once baked, remove the brownies from the oven and let them cool in the pan for about 10-15 minutes. This allows them to set and makes them easier to remove. After this initial cooling, gently lift the brownies out of the pan using parchment paper if you lined it, and transfer them to a wire rack to cool completely, which should take another 30 minutes.
Step 3: Melt the White Chocolate
While your brownies are cooling, prepare the spiderweb decoration. Place your white chocolate in a microwave-safe bowl and heat it in 20-second intervals on medium power. Stir after each interval until smooth and melted, usually taking about 1-2 minutes total. Be cautious—don’t overheat it, or it may seize.
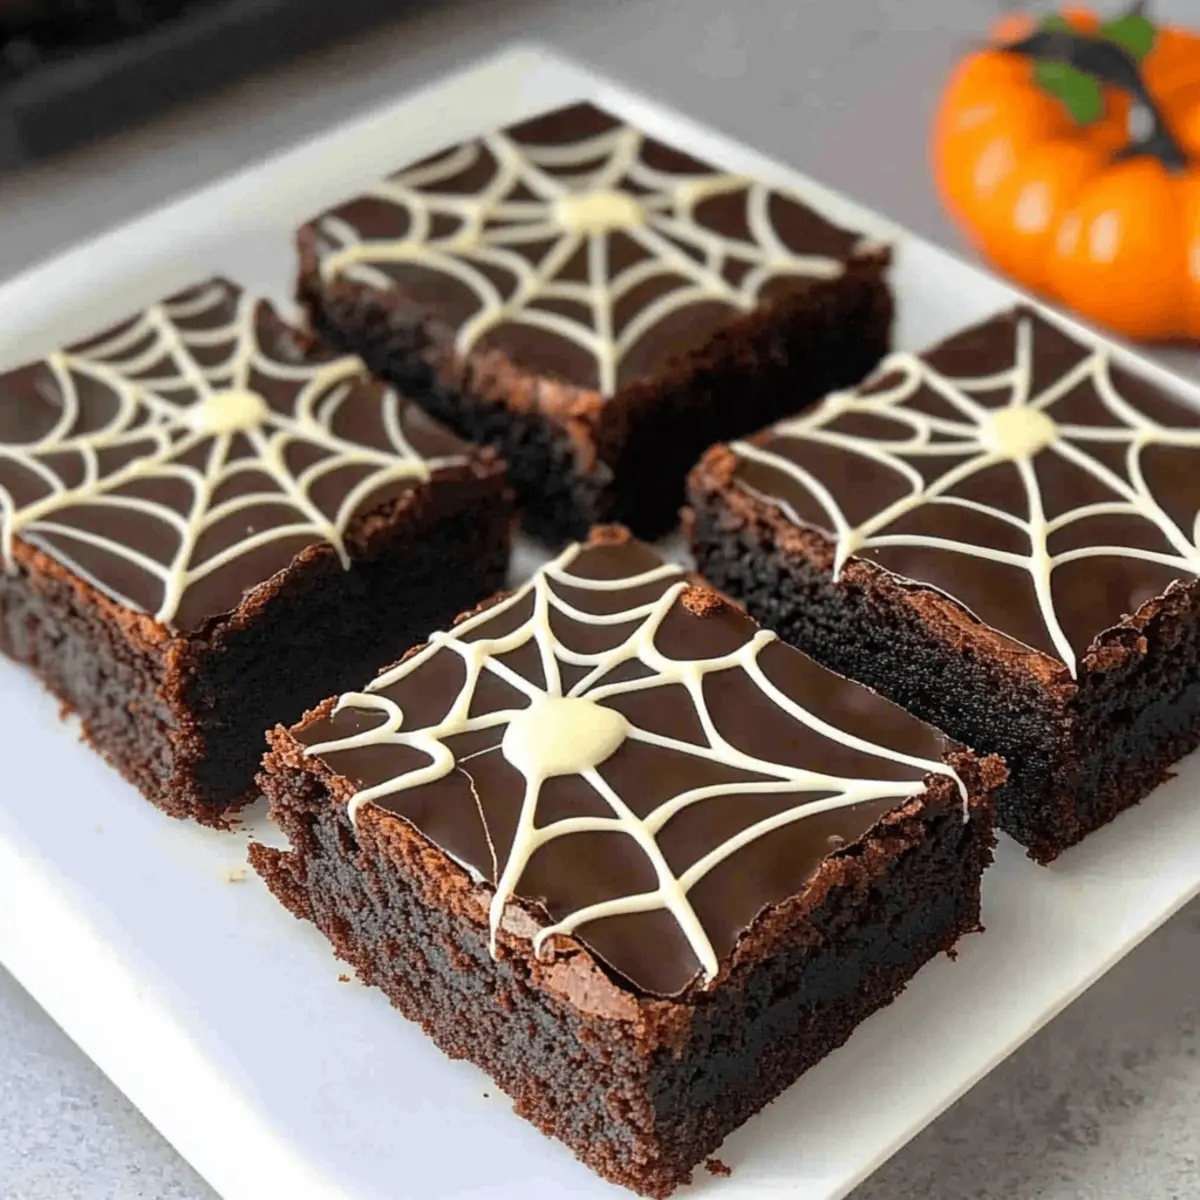
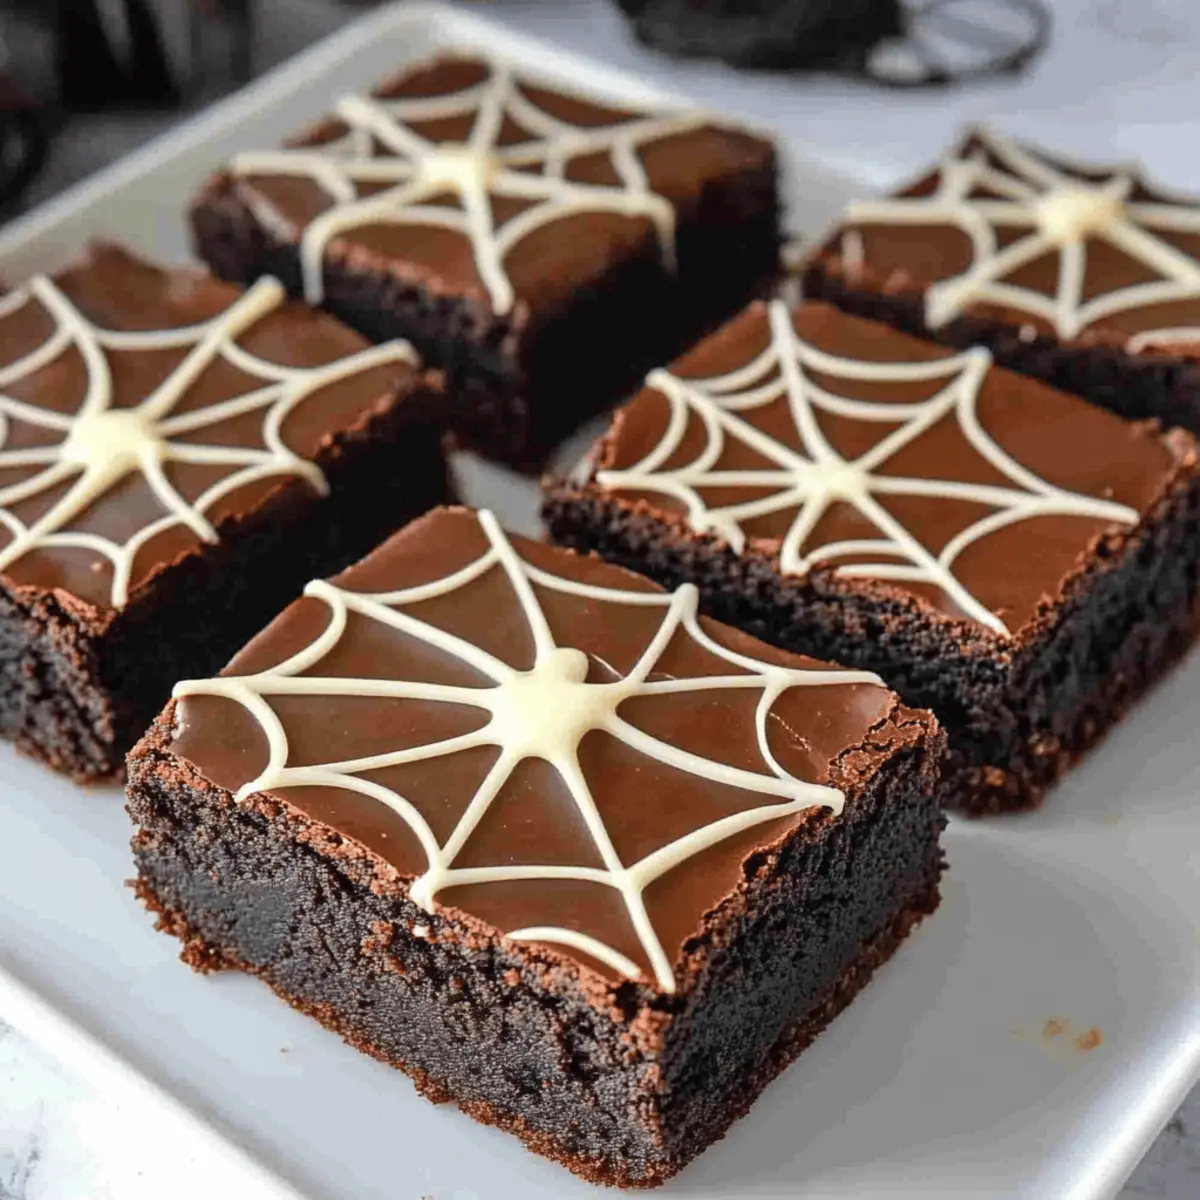
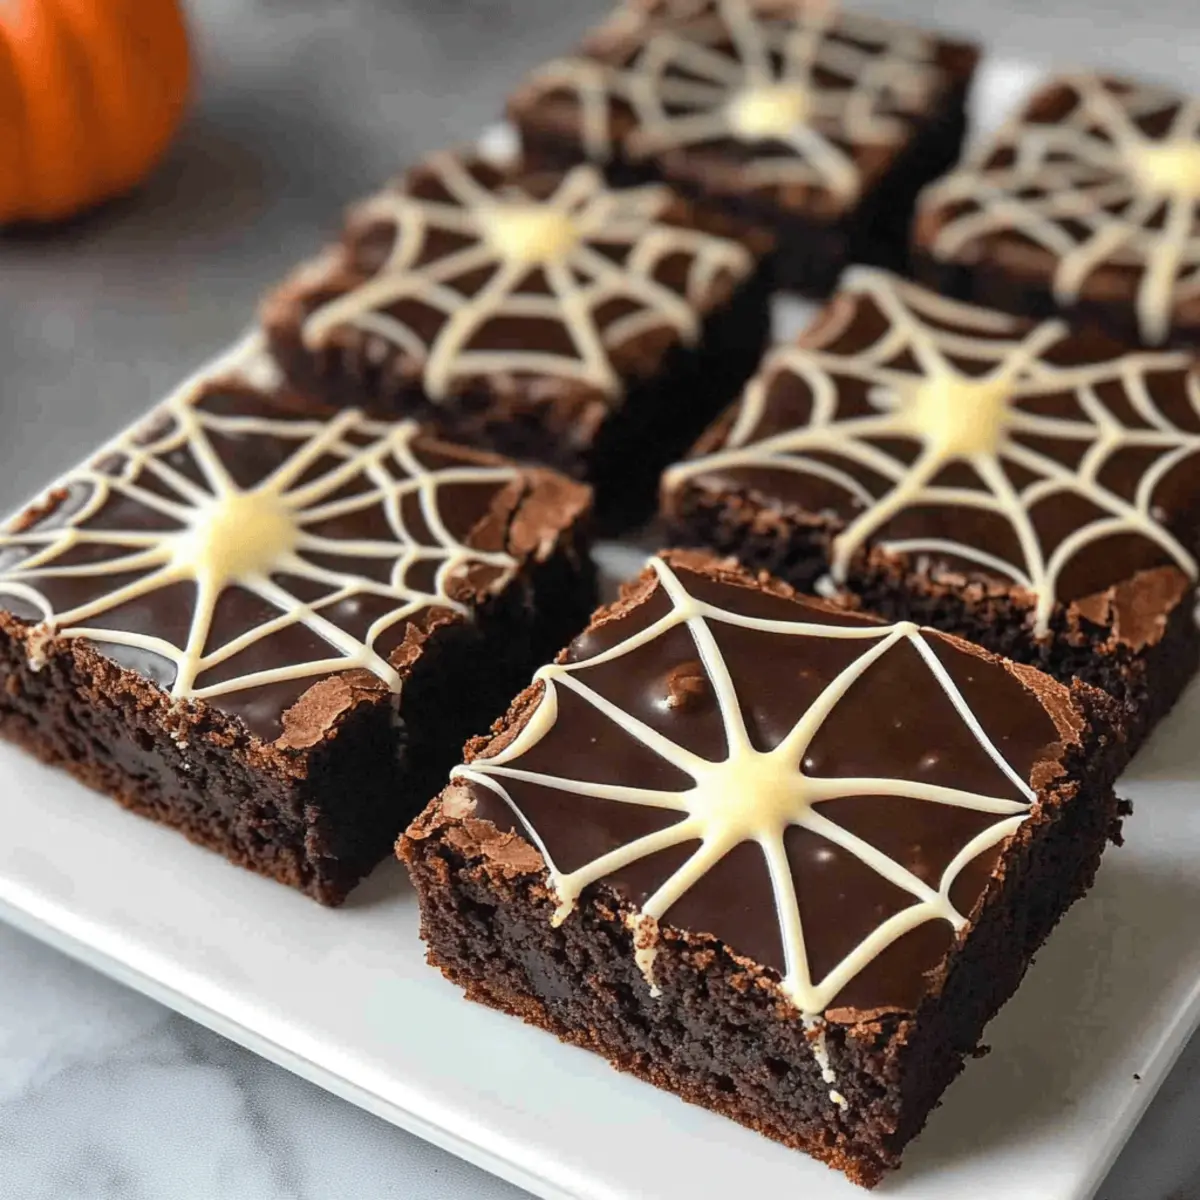
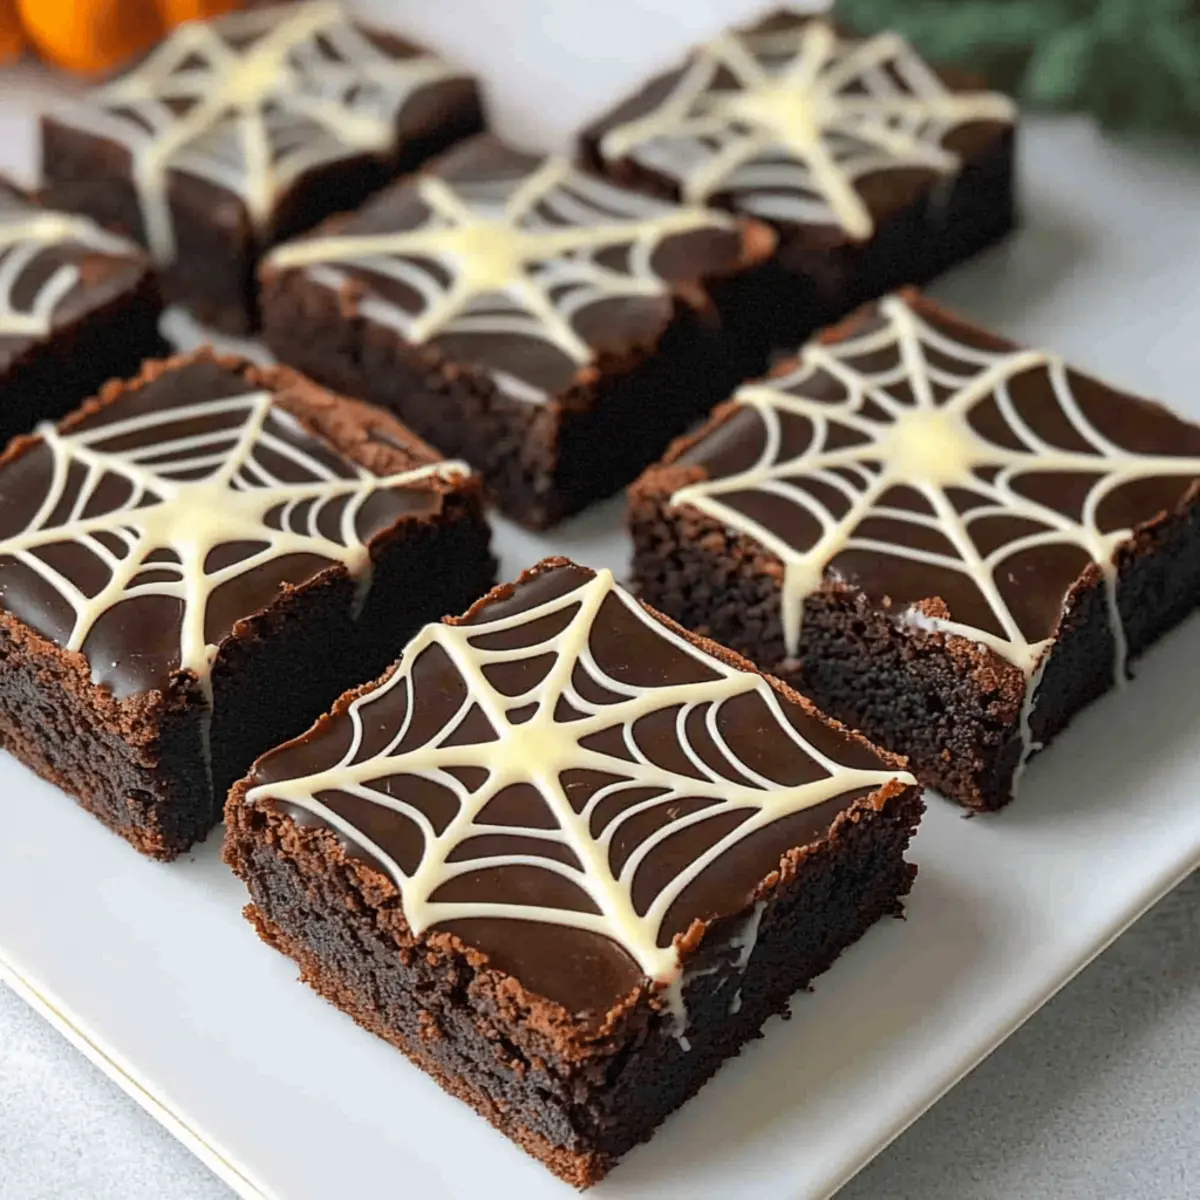
Step 4: Decorate the Brownies
Once the brownies are completely cool, fit a piping bag with a small round tip and fill it with the melted white chocolate. Pipe concentric circles of melted chocolate onto the surface of the brownies, starting from the center. Using a toothpick, drag lines from the center outwards to create the spooky spiderweb design. This step adds a fun and festive touch to your Spooky Spiderweb Brownies.
Step 5: Allow to Set
After decorating, it’s essential to allow the white chocolate to set properly. Let the brownies sit at room temperature for about 20-30 minutes until the chocolate hardens completely. This ensures that your spiderweb design stays neat and beautiful when you slice the brownies, making them an enchanting treat for Halloween gatherings.
Make Ahead Options
These Spooky Spiderweb Brownies are perfect for meal prep, allowing you to enjoy the Halloween spirit without last-minute stress! You can prepare the brownie base up to 3 days in advance; simply bake them, let them cool, and store them in an airtight container at room temperature. To maintain their fudgy texture, avoid refrigeration. When you’re ready to create your spooky designs, melt the white chocolate and decorate to your heart’s content. Allow the spiderweb to set for about 20-30 minutes before slicing. With these make-ahead tips, you’ll have a show-stopping treat that’s just as delicious and ready to impress your guests!
Expert Tips for Spooky Spiderweb Brownies
-
Avoid Overheating: Melt chocolate in short intervals to prevent it from seizing. Stir often and stop once smooth to maintain its texture.
-
Piping Precision: Use a piping bag for clean lines when creating your spiderweb design. A zip-top bag with a corner cut off works as a great substitute!
-
Cool Completely: Allow brownies to cool completely before decorating; any warmth can cause your spiderweb to melt into the brownie, losing its design.
-
Mix It Up: Don’t hesitate to switch up your brownie mix; try flavors like salted caramel or raspberry for a unique twist on your spooky spiderweb brownies!
-
Decorate Creatively: Add fun Halloween touches like candy eyes or festive sprinkles on top of your spiderweb for an extra layer of excitement and whimsy.
Storage Tips for Spooky Spiderweb Brownies
Room Temperature: Store brownies in an airtight container at room temperature for up to 3 days. This keeps them moist and prevents them from drying out.
Fridge: If storing for longer, place the brownies in the fridge for up to 1 week. Ensure they are well-wrapped to maintain freshness and texture.
Freezer: For longer storage, freeze brownies for up to 3 months. Wrap them tightly in plastic wrap and then place them in a freezer-safe container. Thaw in the fridge overnight before enjoying.
Reheating: To revive the fudgy texture, microwave the brownies for 10-15 seconds. Be careful not to overheat, as this can affect the spiderweb design on your Spooky Spiderweb Brownies.
What to Serve with Spooky Spiderweb Brownies
Indulging in Halloween-themed treats is even more delightful when paired with the perfect accompaniments to round out your festive feast.
-
Vanilla Ice Cream: A scoop of creamy vanilla melts beautifully over warm brownies, creating a delightful contrast of flavors and textures.
-
Chocolate Sauce Drizzle: Rich and decadent, a drizzle of chocolate sauce enhances the fudginess of your brownies, making every bite even more irresistible.
-
Pumpkin Spice Whipped Cream: This seasonal favorite brings a warm, spiced touch that complements the chocolate perfectly while adding a festive flair.
-
Ghostly Marshmallow Treats: These fluffy, sweet bites can be shaped like ghosts for added fun! Their light texture balances the dense brownie.
-
Hot Apple Cider: A steaming cup of spiced cider warms the spirit of the season, rounding out your dessert table with autumnal flavors.
-
Candy Corn Mix: A colorful blend of candy corn and nuts provides a crunchy contrast and a fun festive touch for the kids.
-
Chocolate Milkshake: Creamy and rich, a chocolate milkshake is the ultimate indulgence alongside your spooky brownies, perfect for a Halloween treat.
-
Coffee or Pumpkin Spice Latte: The rich flavors of coffee or a seasonal pumpkin spice latte lend a comforting warmth, balancing the sweetness of the brownies.
Spooky Spiderweb Brownies Variations
Feel free to let your creativity shine with these fun twists for your Spooky Spiderweb Brownies!
-
Flavor Boost: Change up the brownie mix! Consider flavors like caramel, peanut butter, or cookies and cream for unique taste combinations. Each mix brings a new layer of indulgence to your treat.
-
Fun Toppings: Add sprinkles, gummy worms, or candy eyeballs on top of your spiderweb design. These additions not only enhance the visual appeal but also invite playful bites that kids will love!
-
Dairy-Free: Use coconut oil instead of regular oil and opt for a dairy-free brownie mix. This way, everyone can enjoy the spookiness without dairy.
-
Gluten-Free: Choose a gluten-free brownie mix to cater to those with dietary restrictions. Your brownies will be just as fudgy and delicious, ensuring no one misses out on the Halloween fun!
-
Nutty Brownies: Stir in chopped walnuts or pecans into the brownie batter before baking. The crunch adds a lovely texture to the rich, fudgy background.
-
Decorative Frosting: If you’d rather skip the chocolate, use purple or orange frosting to create your spiderweb. These colors are perfect for Halloween and can match your party theme delightfully!
-
Pumpkin Spice: Mix in a teaspoon of pumpkin spice or espresso powder in your brownie batter for a seasonal twist. The warm spices will warm hearts alongside those sweet chocolate notes.
-
Heat It Up: For a bit of a kick, add a pinch of cayenne pepper or chili powder to the brownie mix. This unexpected heat will surprise and delight your guests, balancing chocolate’s sweetness!
Whether you’re experimenting with flavors or decorations, each variation is sure to enchant your family and friends. Looking for more inspiration? Check out my Cooking Tips for spicing up Halloween treats or explore festive Halloween-themed desserts for additional ideas!
Spooky Spiderweb Brownies Recipe FAQs
What kind of brownie mix should I use?
Absolutely! You can use any brownie mix that you enjoy. Whether you prefer fudge, chocolate chunk, or even a gluten-free variety, the choice is yours! This flexibility allows you to tailor the flavor to suit your family and friends’ tastes.
How should I store leftover brownies?
Store your Spooky Spiderweb Brownies in an airtight container at room temperature for up to 3 days. If you’d like to keep them fresher for longer, refrigerate them for up to 1 week. Just ensure they’re well-wrapped to maintain their delicious texture!
Can I freeze the brownies?
Yes! For longer storage, you can freeze your brownies for up to 3 months. Simply wrap each brownie tightly in plastic wrap, then place them in a freezer-safe container. When you’re ready to enjoy, just thaw them in the fridge overnight. For a quick delight, give them a slight microwave reheat for 10-15 seconds to make them warm and fudgy again!
Why did my spiderweb decoration melt into the brownies?
To avoid this, it’s crucial to let your brownies cool completely before decorating them. Warm brownies can cause the melted white chocolate to lose its shape and blend into the brownie itself. After baking, cool for about 30 minutes on a wire rack to ensure perfect spiderweb creation!
Are there any allergy considerations with this recipe?
For those with dietary restrictions, the great thing about these Spooky Spiderweb Brownies is their adaptability! Use gluten-free brownie mix for those with gluten allergies. Additionally, for nut allergies, ensure that your chocolate and other ingredients are nut-free. Always check ingredient labels as needed!
Can I involve kids in the decorating process?
Very! This is a fun recipe for all ages. Kids will love helping with the piping of the melted white chocolate and drawing the spiderweb with a toothpick. Just be sure to supervise during the melting and decorating stages to ensure a safe and enjoyable experience!
Spooky Spiderweb Brownies That Wow All Your Halloween Guests
Ingredients
Equipment
Method
- Preheat your oven to 350°F (175°C). Combine the brownie mix, eggs, and oil in a bowl, stirring until smooth. Pour into a greased baking pan and bake for 25-30 minutes.
- Once baked, cool the brownies in the pan for about 10-15 minutes, then transfer to a wire rack to cool completely (about 30 minutes).
- Melt the white chocolate in a microwave-safe bowl in 20-second intervals, stirring until smooth; this usually takes about 1-2 minutes.
- Once cooled, fill a piping bag with melted white chocolate and pipe concentric circles on the brownies. Use a toothpick to drag lines from the center outwards to create a spiderweb design.
- Allow the brownies to sit at room temperature for 20-30 minutes to let the chocolate set before slicing.
Leave a Reply