
There’s a cozy warmth that comes from baking, particularly when crafting adorable treats like Sugar Cookie Cups. These sweet little delights, with a buttery cookie base, are a canvas for creativity, inviting you to experiment with various frostings and toppings. Perfect for any occasion, whether you’re celebrating Valentine’s Day or hosting a festive gathering, this versatile dessert not only pleases the eye but also warms the heart. Plus, they’re super easy to whip up, making them a go-to recipe when friends drop by unexpectedly. Imagine the smile on your loved ones’ faces as they indulge in these homemade treats! Ready to dive into a baking adventure?

Why Are These Sugar Cookie Cups Special?
Irresistible Versatility: With endless frosting options, you can customize these treats for any celebration—think chocolate for a birthday or pastel colors for Easter!
Crowd Pleaser: Everyone loves a cookie, and these cute cups are bound to be the star of any party.
Effortless Baking: Minimal time and skill needed; perfect for seasoned chefs or beginners.
Make Ahead Magic: Prepare the dough in advance and freeze it, ready to pop in the oven when cravings strike.
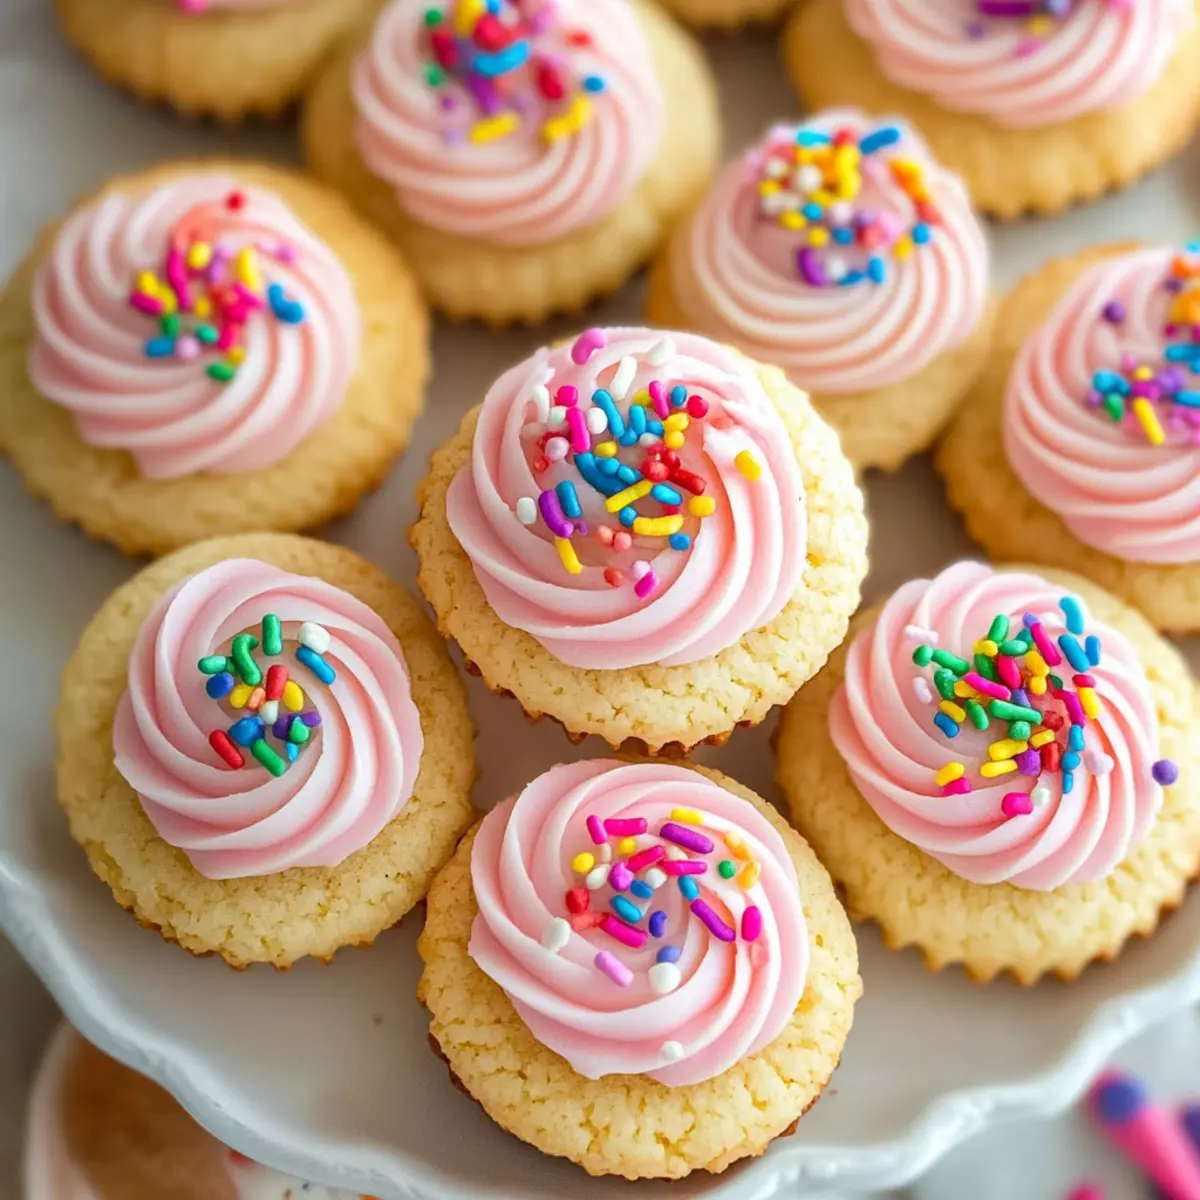
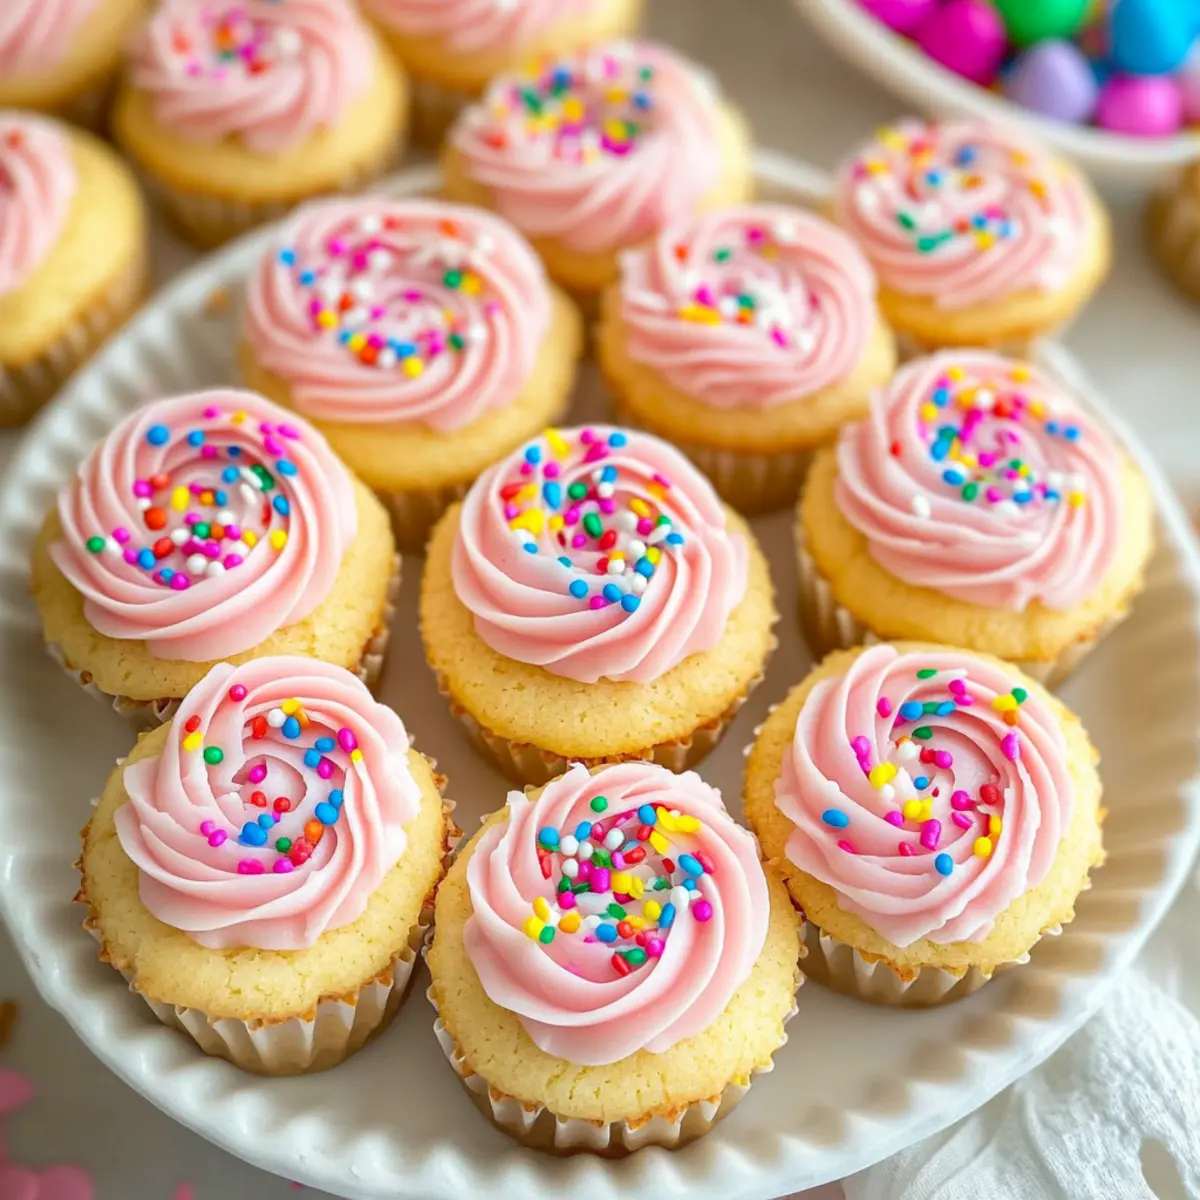
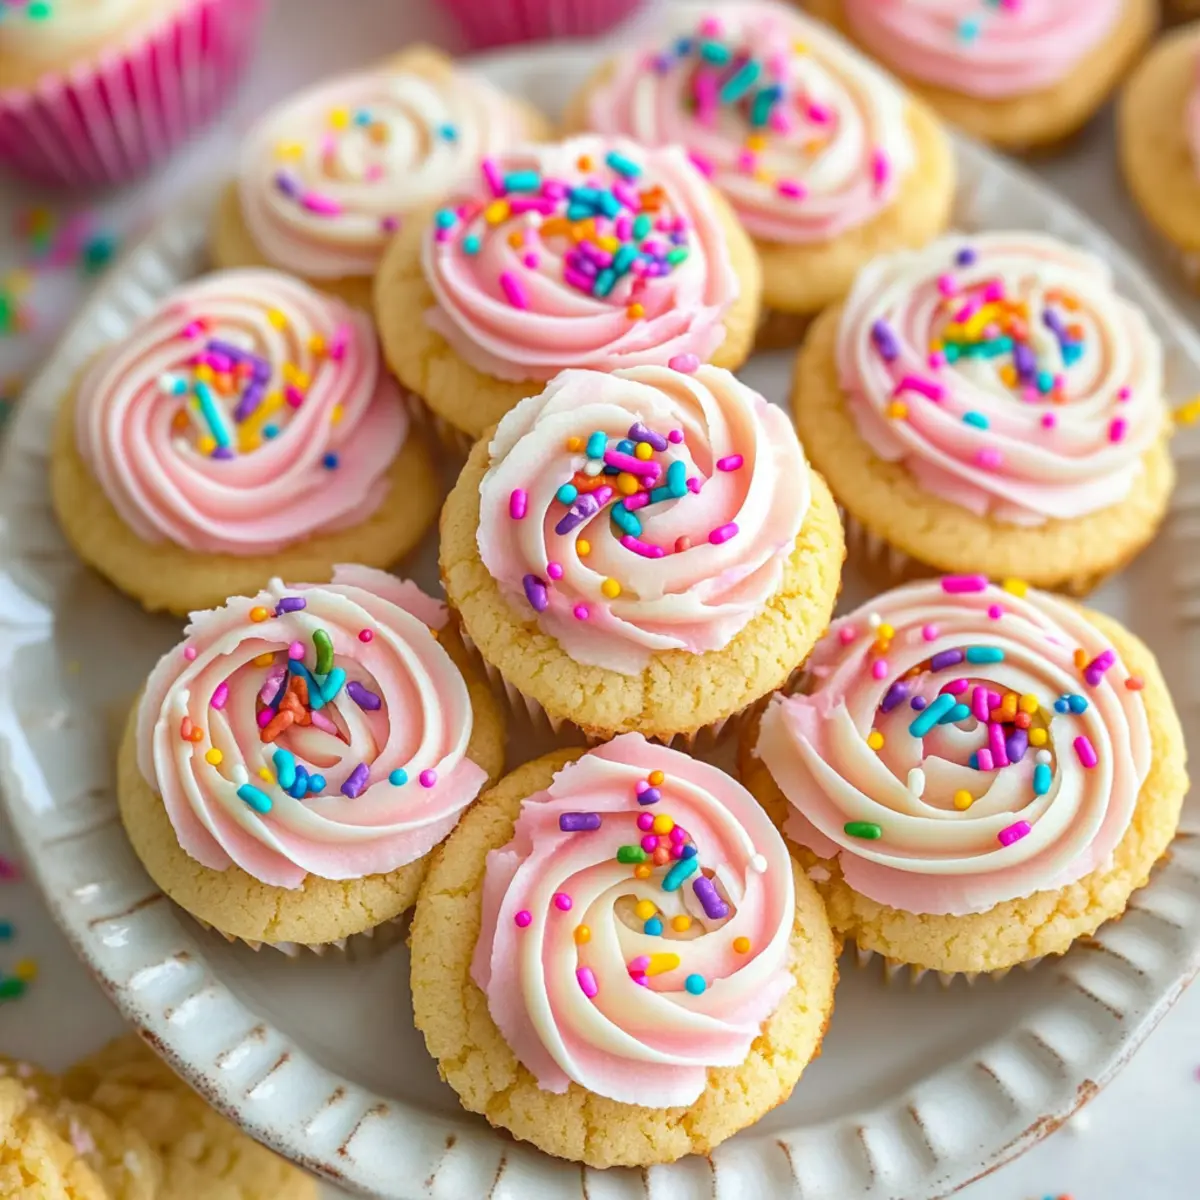
Perfect Presentation: Beautifully baked in muffin pans, these cups look professional and will impress your guests.
So why not pair your sugary creations with a delightful Brown Sugar Dalgona for a fun treat combo? These Sugar Cookie Cups will make any gathering sweeter!
Sugar Cookie Cups Ingredients
For the Cookie Base
- All-Purpose Flour – Provides structure and texture; remember to spoon and level for accuracy.
- Baking Soda & Baking Powder – Essential leavening agents that help the cookies rise to the perfect fluffiness.
- Salted Butter – Adds richness and flavor, with room temperature being ideal for optimal creaming. You can use unsalted and add ¼ tsp salt.
- Granulated Sugar – Sweetens the cookie while contributing to its chewy texture; a must-have for a classic sugar cookie.
- Vanilla Extract – Enhances flavor; feel free to swap for vanilla bean extract for a gourmet twist.
- Almond Extract – Optional but adds a lovely, nostalgic taste typical of traditional sugar cookies.
- Egg – Acts as the binding agent; should be at room temperature for best results.
For the Frosting
- Cream Cheese – The star of the frosting; make sure it’s softened for easy mixing.
- Powdered Sugar – Sweetens the frosting and gives it that smooth, creamy consistency.
- Milk – Adjusts the frosting’s texture; add more if you prefer it thinner.
For Decoration
- Sprinkles – An exciting finishing touch; customize with colors and shapes for different celebrations!
These Sugar Cookie Cups are a fun and festive way to indulge all year round!
Step‑by‑Step Instructions for Sugar Cookie Cups
Step 1: Prepare the Pan
Preheat your oven to 350°F (175°C) and grease two regular muffin pans with butter or non-stick spray. This ensures that your adorable Sugar Cookie Cups will come out easily after baking. Make sure you evenly coat each muffin cup to prevent sticking, which helps maintain their perfect shape.
Step 2: Mix Wet Ingredients
In a large mixing bowl, cream together 1 cup of salted butter and 1 cup of granulated sugar until the mixture is light and fluffy, about 3-5 minutes. Then, add in 1 large room-temperature egg, 2 teaspoons of vanilla extract, and ½ teaspoon of almond extract if using. Mix well until everything is smooth and incorporated, forming a shiny batter.
Step 3: Combine Dry & Wet
In a separate bowl, whisk together 2 ¾ cups of all-purpose flour, 1 teaspoon of baking soda, and ½ teaspoon of baking powder. Gradually add this dry mixture to the wet ingredients, mixing until a soft dough forms. You’ll know it’s ready when it holds together without being sticky and has a cohesive texture perfect for shaping into cups.
Step 4: Shape Cookie Cups
Using about 2 tablespoons of dough for each cup, scoop and press the dough firmly into each muffin cup. Ensure the dough rises halfway up the sides, creating a well in the center for frosting later. The key is to make them thick enough to hold their shape while still being cute and cupcake-like.
Step 5: Bake
Bake the cookie cups in your preheated oven for 12-14 minutes, or until the edges are lightly golden and the centers feel just set. Keep an eye on them to prevent overbaking, as you want that soft, chewy texture typical of fantastic Sugar Cookie Cups. Once baked, remove them from the oven and let them cool in the pans for about 15 minutes.
Step 6: Prepare Frosting
While the cookie cups are cooling, make the cream cheese frosting. Beat together 4 ounces of softened cream cheese and ½ cup of softened butter until smooth and creamy. Gradually add in 4 cups of powdered sugar and a splash of milk, mixing until you achieve your desired frosting consistency—thicker for piping and lighter for spreading!
Step 7: Decorate
Once the cookie cups are completely cooled, use a piping bag or a spoon to fill each cup generously with the cream cheese frosting. Get creative with your sprinkles for a fun touch—choose colors that fit any celebration! These Sugar Cookie Cups are now beautifully decorated and ready to wow your guests!
How to Store and Freeze Sugar Cookie Cups
Room Temperature: Store leftover Sugar Cookie Cups in an airtight container at room temperature for up to 3 days for optimal freshness.
Fridge: If you live in a warm climate or want to prolong their life, you can refrigerate them for up to 1 week in an airtight container. Just allow them to reach room temperature before serving.
Freezer: For longer storage, freeze cookie cups individually wrapped in plastic wrap and then in a freezer-safe bag for up to 2 months. Thaw overnight in the fridge before enjoying.
Reheating: To enjoy your Sugar Cookie Cups warm, place them in the microwave for about 10-15 seconds. Be cautious not to overheat, as they can become too soft.
Make Ahead Options
These Sugar Cookie Cups are perfect for meal prep, allowing you to enjoy homemade treats with less stress. You can prepare the cookie dough up to 24 hours in advance, wrapping it tightly in plastic wrap and refrigerating it until you’re ready to bake. If you want to extend your prep, you can freeze the dough for up to 3 months—just be sure to thaw it overnight in the fridge before baking. For the frosting, you can also make it ahead and store it in an airtight container in the fridge for up to 3 days; just give it a quick mix before using to restore its creamy consistency. When ready to serve, simply bake the cookie cups and frost them once they’ve cooled completely, ensuring your delightful Sugar Cookie Cups maintain their quality!
Expert Tips for Sugar Cookie Cups
Room Temperature Ingredients: Ensure all your ingredients, especially butter and eggs, are at room temperature for a smooth, well-blended batter that results in soft Sugar Cookie Cups.
Don’t Overbake: Watch your cookie cups closely as they bake to retain that lovely chewy texture. Remove them once they’re lightly golden around the edges.
Cool Before Frosting: Allow your Sugar Cookie Cups to cool completely before frosting them. This prevents the frosting from melting and helps keep their adorable shape intact.
Customize Your Frosting: Experiment with different frosting flavors and colors. You can easily swap cream cheese for chocolate or vanilla to match your theme!
Use Muffin Liners: For an extra festive touch, consider using cupcake liners in your muffin pan. They add color and make for easy serving without sticking.
Make Ahead: Prepare the dough in advance and freeze it. When you’re ready to bake, simply thaw and bake fresh, warm Sugar Cookie Cups when unexpected guests drop by!
What to Serve with Adorable Sugar Cookie Cups?
These delightful treats are perfect for creating a well-rounded dessert experience that pleases both the palate and the heart.
-
Warm Vanilla Milk: Perfectly creamy and comforting, this drink pairs seamlessly with the sweet, buttery cookie cups.
-
Fresh Berries: The tartness of raspberries or strawberries provides a refreshing contrast to the sweet frosting. Toss them lightly with a bit of sugar to enhance their natural sweetness.
-
Chocolate Dipped Pretzels: These add a delightful crunch and a touch of saltiness, balancing the sweetness of the cookie cups beautifully.
-
Ice Cream: A scoop of soft-serve vanilla or any fun flavor complements these sugar cookies perfectly and enhances the joyful experience of each bite.
-
Milkshakes: Indulge in a delicious milkshake that mirrors the essence of the cookie cups—think vanilla or chocolate shakes topped with whipped cream!
-
Fruit Salad: A medley of sweet, juicy fruits adds brightness to your dessert table and is a lighter option alongside the cookies.
Let these serving suggestions transform your adorable Sugar Cookie Cups into a full-fledged celebration that bursts with joy and flavor!
Sugar Cookie Cups Variations
Feel free to let your creativity shine by customizing these delightful treats with fun variations and substitutions!
- Flavorful Frosting: Replace cream cheese frosting with chocolate or vanilla for a delicious twist. Who can resist a rich chocolatey topping?
- Gluten-Free Option: Use gluten-free flour in place of all-purpose flour for a no-gluten version. Enjoy the same soft, chewy goodness without any gluten concerns!
- Tasty Toppings: Top with chopped nuts, crushed cookies, or creative sprinkles to enhance both flavor and texture. These little details can elevate your cookie cups for each occasion!
- Zesty Fillings: For a refreshing change, swap frosting for lemon curd, fruit preserves, or ice cream. Imagine the burst of fruity flavor with every bite—it’s a delightful surprise!
- Mini Cookie Cups: Use mini muffin pans to create bite-sized versions, perfect for parties! Just remember to adjust the baking time slightly for these petite treats.
- Vegan Alternate: Substitute almond milk and a flax egg for a vegan-friendly treat, while using coconut cream for frosting. Everyone can join in on the fun!
- Festive Colors: Add food coloring to your frosting or dough to match different holidays, making your Sugar Cookie Cups visually stunning. Just picture those vibrant colors on a holiday table!
- Pretty Presentation: Serve with Kitchen Sink Cookies on a platter for a colorful dessert spread. They complement each other beautifully!
The possibilities are endless, and with each variation, you can create a special memory that will warm hearts!
Sugar Cookie Cups Recipe FAQs
How do I choose ripe ingredients for this recipe?
Absolutely! For the best results, ensure your butter is at room temperature, which means it should be soft but not melted. When picking eggs, use large, fresh eggs for binding—check the expiration date. For any frosted embellishments, pastel sprinkles or chocolate chips are fantastic for a lovely visual and flavor boost!
What’s the best way to store leftover Sugar Cookie Cups?
Very! Keep your leftover Sugar Cookie Cups in an airtight container at room temperature for up to 3 days for optimal freshness. If you prefer, you can refrigerate them for up to 1 week, but remember to let them come to room temperature for best taste before diving in!
Can I freeze Sugar Cookie Cups?
Absolutely! If you want to enjoy these delightful treats later, wrap each Sugar Cookie Cup individually in plastic wrap, then place them in a freezer-safe bag. They can be frozen for up to 2 months. To thaw, simply leave them overnight in the fridge, and they’re ready to enjoy again, or warm them for a few seconds in the microwave!
What should I do if my cookie cups are too hard or dry?
If you find your cookie cups turned out too hard, check a couple of things for next time. Firstly, make sure not to overbake your cookie cups—12-14 minutes should be sufficient, just until the edges are golden. Also, ensure you haven’t used too much flour; spooning and leveling your flour is key to accurate measurements. If all else fails, a dollop of frosting can help add some moisture back!
Are Sugar Cookie Cups suitable for special dietary needs?
Very! For a gluten-free option, simply substitute the all-purpose flour with a 1:1 gluten-free flour blend. If someone has a dairy allergy, consider using dairy-free butter and a dairy-free cream cheese alternative for the frosting. Always be mindful of specific allergies, especially regarding common ingredients like eggs and nuts in decorations.
Deliciously Fun Sugar Cookie Cups for Every Celebration
Ingredients
Equipment
Method
- Preheat your oven to 350°F (175°C) and grease two regular muffin pans with butter or non-stick spray.
- In a large mixing bowl, cream together 1 cup of salted butter and 1 cup of granulated sugar until light and fluffy.
- Add in 1 large egg, 2 teaspoons of vanilla extract, and ½ teaspoon of almond extract. Mix well.
- In a separate bowl, whisk together 2 ¾ cups of all-purpose flour, 1 teaspoon of baking soda, and ½ teaspoon of baking powder. Gradually add to the wet mixture.
- Scoop about 2 tablespoons of dough for each cup and press it firmly into each muffin cup.
- Bake for 12-14 minutes until edges are golden and centers are just set. Let cool for 15 minutes.
- While cooling, prepare cream cheese frosting by beating together cream cheese and softened butter, then gradually add powdered sugar and milk.
- Once the cookie cups are cooled, fill each cup with frosting and decorate with sprinkles.
Leave a Reply