
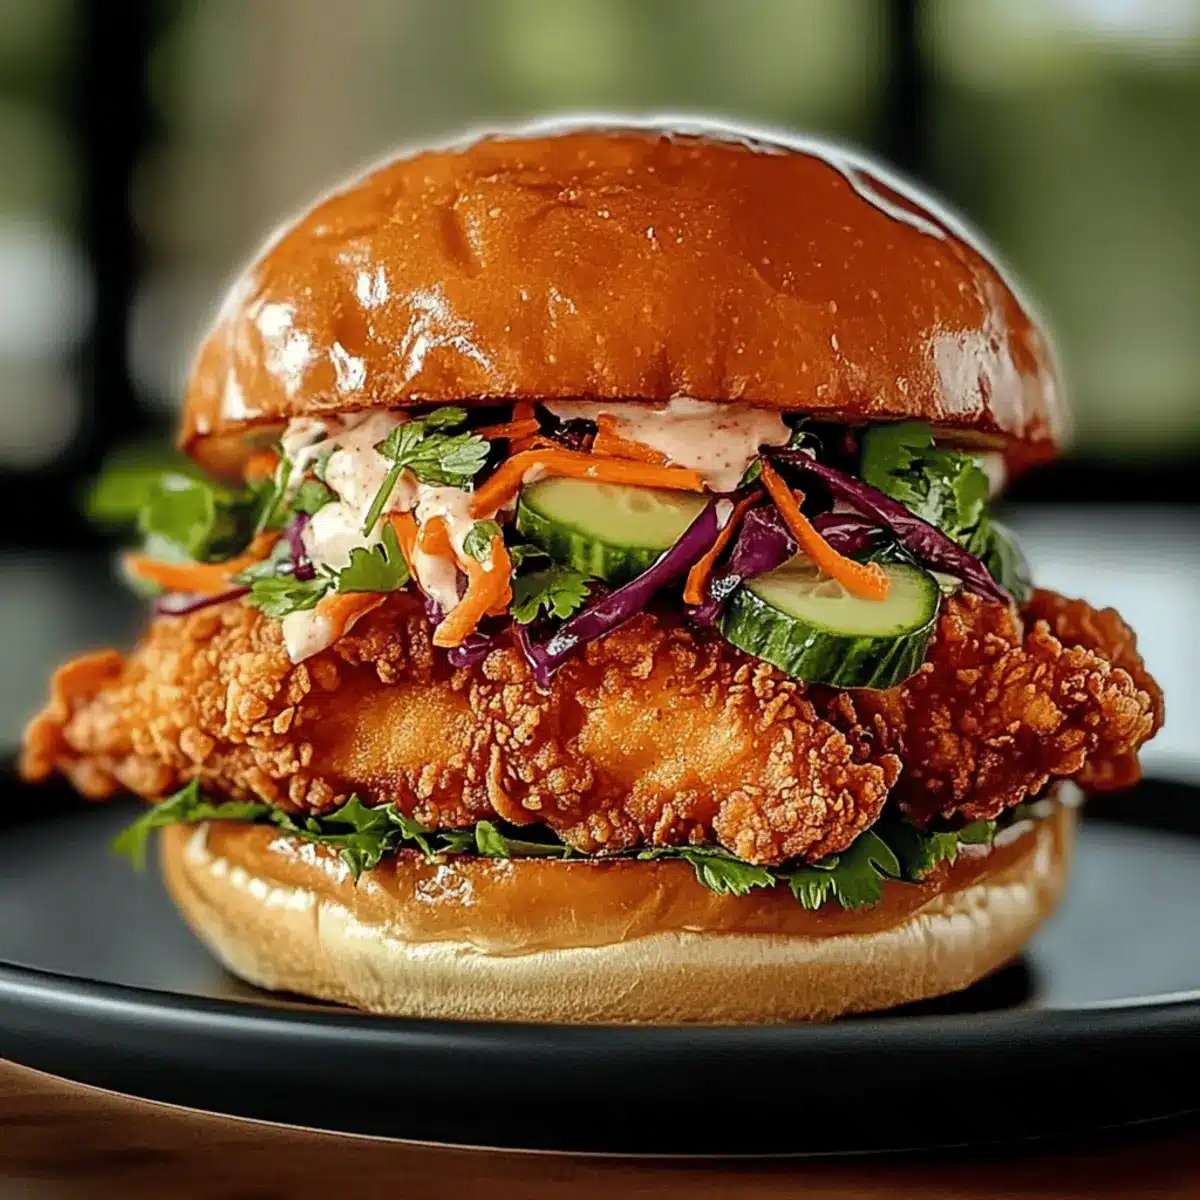
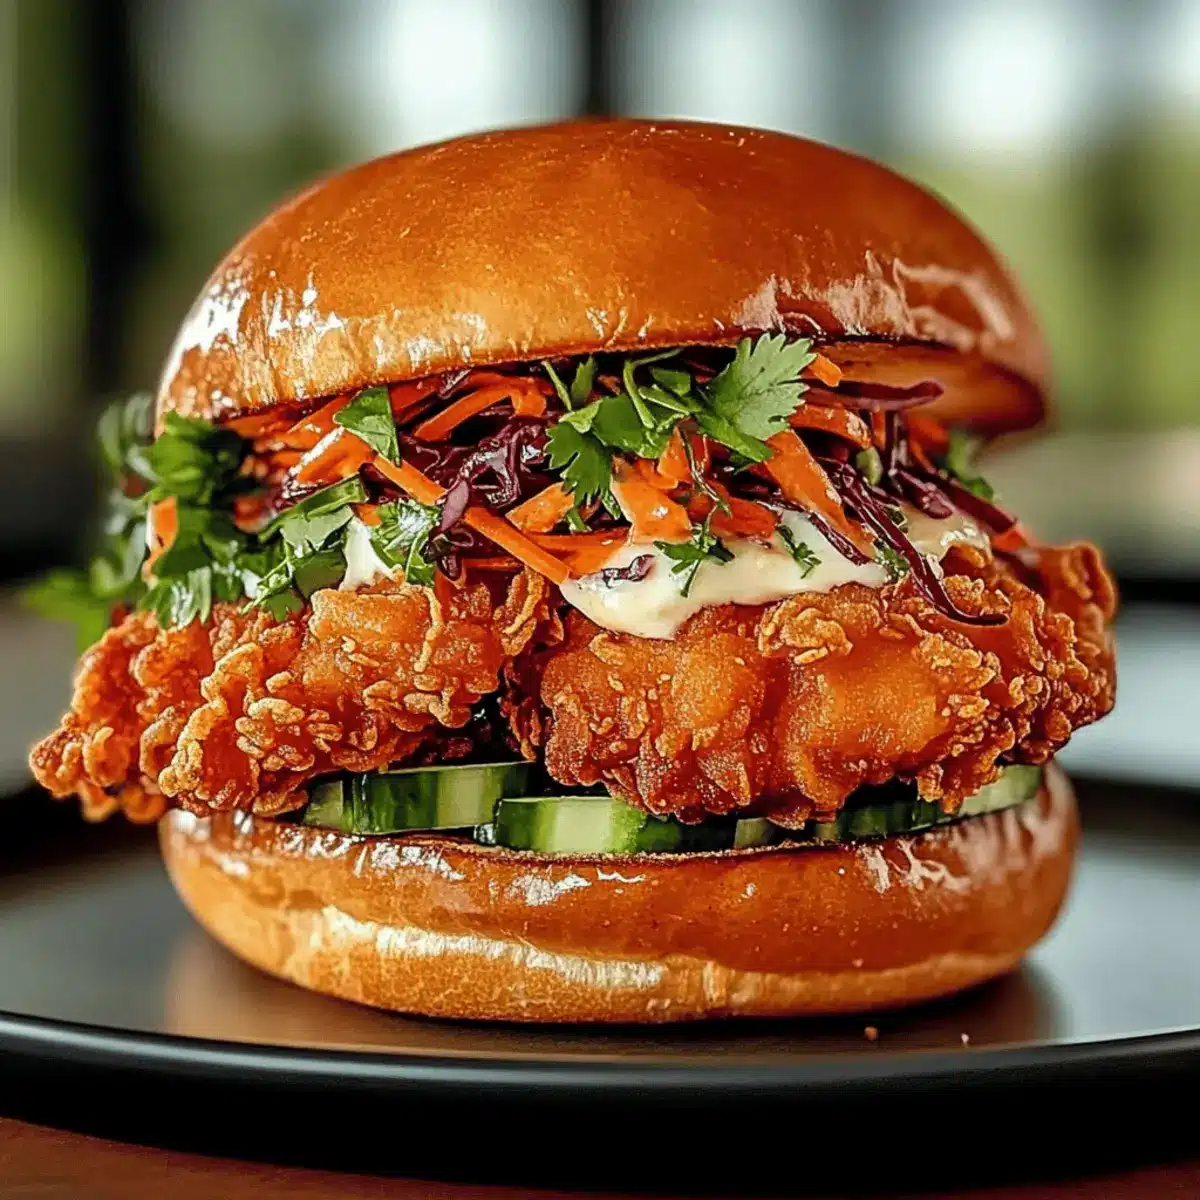
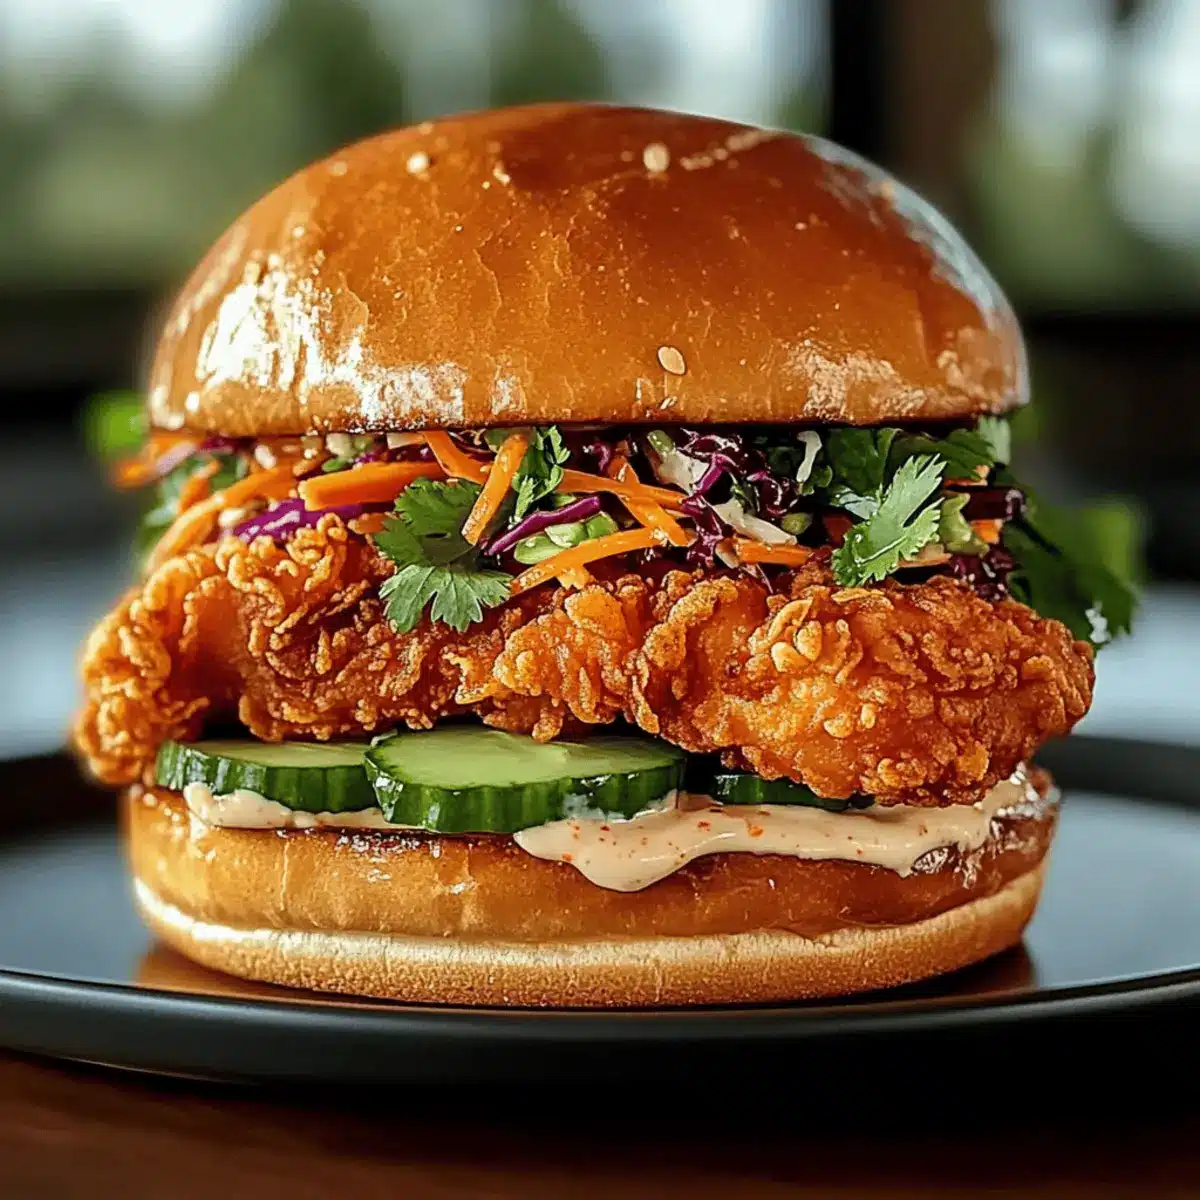
The first time I bit into a Thai Fried Chicken Sandwich, I felt like I was on an adventurous culinary expedition without leaving my kitchen. Picture a crispy, golden chicken fillet that dances with vibrant Thai spices, all nestled within soft, toasted brioche buns. This sandwich isn’t just a meal; it’s a celebration of flavors that is both savory and tantalizingly spicy, making it perfect for a cozy lunch or a satisfying dinner. What’s more, it’s customizable for everyone at the table, whether you’re a fan of extra heat or prefer a milder touch. Plus, it serves as a delightful crowd-pleaser that even the kids will adore. Ready to elevate your sandwich game and transform lunch or dinner into a thrilling flavor experience? Let’s dive into this recipe together!
Why choose the Thai Fried Chicken Sandwich?
Crispy Perfection: This sandwich features a perfectly golden-brown exterior that wraps around juicy chicken thighs, ensuring every bite is a crunch-filled delight.
Customization Galore: Whether you crave spicy heat or a milder taste, the options are limitless—add more cayenne or swap the slaw for a refreshing salad!
Kid-Friendly Appeal: Even the pickiest eaters will fall in love with its fun flavors and textures, making it an ideal choice for family meals.
Quick and Simple: With easy-to-follow steps, you’ll whip up this delicious sandwich in no time, ideal for busy weekdays or spontaneous gatherings.
Looking for more tasty options? Pair your meal with sides like Pan Fried Cabbage or complement it with a refreshing Honey Garlic Chicken for a complete feast!
Thai Fried Chicken Sandwich Ingredients
For the Chicken
- Chicken Thighs – The star of the show; they deliver juiciness and flavor, while boneless, skinless chicken breasts can serve as a substitute.
- Soy Sauce – This ingredient adds a savory depth; opt for low-sodium soy sauce for a healthier twist.
- Fish Sauce – Brings essential umami flavor; for a vegetarian option, feel free to omit it or substitute with more soy sauce.
- Lime Juice – Brightens up all the flavors; fresh lime juice is definitely recommended for the best taste.
- Ginger – Offers a warm spice that complements the dish perfectly; freshly grated ginger is always a winner.
- Garlic – Adds that irresistible aroma; fresh garlic is preferred over garlic powder for maximum flavor.
- Ground Coriander, White Pepper, Turmeric – These spices enhance both flavor and color; adjust to suit your personal taste.
For the Batter
- All-Purpose Flour – Forms the base of your coating; you can experiment with alternative flours for gluten-free options.
- Cornstarch – Contributes to that coveted crunch; essential for achieving a crispy texture.
- Rice Flour – Elevates crispiness in the batter; you won’t want to skip this!
- Baking Powder – Helps create a light, puffy texture when frying; a must-have for the batter.
- Ice Water – Key for lightness in batter; make sure it’s cold for the best results.
For the Spicy Mayo
- Mayonnaise – Provides creaminess; use it as the foundation of your spicy mayo.
- Sriracha – Adds that kick! Adjust based on your heat preference for the perfect balance.
- Lime Juice – Brightens the mayo, linking the flavors together beautifully.
- Honey – Offers a hint of sweetness; essential for rounding out the flavors.
- Sesame Oil – Introduces a nutty depth; a little goes a long way in flavoring your mayo.
For the Pickled Slaw
- Cabbage (Green & Red) – The backbone of your slaw; feel free to swap in your favorite crunchy veggies.
- Carrots – Adds color and sweetness; you can also use shredded vegetables for variety.
- Rice Vinegar – Provides tanginess to the slaw; other vinegars can work in a pinch, but rice vinegar is best.
- Sugar – Balances the tanginess; adjust to your taste for a perfect pickled bite.
- Salt – Essential for flavor; it helps bring all the elements together in your slaw.
For Assembly
- Brioche Buns – Soft and fluffy, they hold all your ingredients together; try ciabatta or lettuce wraps for different textures.
- Vegetable Oil – Crucial for frying; maintain the correct temperature for extra-crispiness.
- Fresh Cilantro – A touch of freshness for garnish; it ties in beautifully with the flavors.
- Optional Cucumbers – For added crunch and freshness; a delightful addition to your sandwich!
Dive into this blissfully crispy journey with all the elements you’ll need for your fabulous Thai Fried Chicken Sandwich!
Step‑by‑Step Instructions for Thai Fried Chicken Sandwich
Step 1: Marinate the Chicken
In a mixing bowl, whisk together soy sauce, fish sauce, lime juice, grated ginger, minced garlic, ground coriander, white pepper, and turmeric until well combined. Submerge the chicken thighs in the marinade, ensuring they are thoroughly coated. Cover the bowl with plastic wrap and refrigerate for a minimum of 2 hours, or ideally overnight, to allow the flavors of the Thai Fried Chicken Sandwich to truly infuse.
Step 2: Prepare the Pickled Slaw
While the chicken marinates, prepare the tangy slaw. In a large bowl, combine shredded green and red cabbage with grated carrots. In a separate bowl, whisk together rice vinegar, sugar, and salt until dissolved. Pour this mixture over the cabbage and carrots, tossing to coat evenly. Cover with a lid or plastic wrap and refrigerate for at least 30 minutes, allowing the flavors to meld beautifully.
Step 3: Make the Spicy Mayo
For the creamy spicy mayo, combine mayonnaise, sriracha, lime juice, honey, and sesame oil in a small bowl. Mix everything together until smooth and well-blended. Taste and adjust the seasoning as needed—add more sriracha for extra heat if desired. Once mixed, cover and refrigerate the spicy mayo until needed, giving it time for the flavors to intensify in your Thai Fried Chicken Sandwich.
Step 4: Coat and Fry the Chicken
In a mixing bowl, combine all-purpose flour, cornstarch, rice flour, baking powder, garlic powder, onion powder, paprika, and cayenne pepper for the batter. Gradually blend in ice water until you achieve a lumpy batter texture. Preheat vegetable oil in a deep skillet or pot to 350°F (175°C). Dip each marinated chicken thigh into the batter, letting excess drip off, then carefully place them in the hot oil. Fry in batches for 6-8 minutes or until golden brown and cooked through, reaching an internal temperature of 165°F (74°C).
Step 5: Drain and Assemble
Once the chicken is perfectly fried, use a slotted spoon to transfer it to a wire rack, letting excess oil drain off. While the chicken rests, toast the brioche buns until golden. Spread a generous layer of spicy mayo on the bottom half of each bun, then layer crispy chicken on top. Add a hefty spoonful of the tangy pickled slaw and sprinkle with fresh cilantro and optional cucumber slices. Place the top bun on and serve your delightful Thai Fried Chicken Sandwich immediately!
Thai Fried Chicken Sandwich Variations
Feel free to get creative and customize this recipe to suit your taste buds, resulting in a delightfully unique experience!
-
Extra Spicy: Add more cayenne pepper or hot sauce to the batter or spicy mayo for a fiery kick. Your taste buds will thank you for the added heat!
-
Bunless Delight: Serve the crispy chicken over a bed of mixed greens instead of in a bun for a lighter, healthier option. It’s just as satisfying sans the carbs!
-
Refreshing Twist: Swap the pickled slaw with a crisp cucumber and carrot salad for a refreshing crunch that complements the savory chicken beautifully. This is a great way to introduce more veggies for a colorful dish.
-
Bread Variety: Experiment with different types of bread, like ciabatta or even lettuce wraps, to change up the texture and presentation. Each option brings its own unique spin!
-
Creative Sides: Pair your sandwich with sweet potato fries or a vibrant mango salad for a complete meal that brings together contrasting flavors and textures.
-
Gluten-Free Option: Substitute all-purpose flour with almond flour or a gluten-free flour blend to cater to those with gluten sensitivities. Enjoy the same crispy goodness without the gluten!
-
Vegan Version: Use tofu or tempeh marinated in the same delicious flavors as the chicken, then coat and fry similarly for a plant-based version that retains the essence of the original.
Enhance your culinary adventure! If you’re in the mood for more fantastic flavors, check out our recipe for Fiery Chicken Ramen or the vibrant Thai Coconut Chicken for additional inspiration.
Make Ahead Options
These Thai Fried Chicken Sandwiches are perfect for meal prep, making them an excellent choice for busy weeknights! You can marinate the chicken thighs up to 24 hours in advance; simply combine the marinade and fully coat the chicken, then refrigerate until you’re ready to fry. The pickled slaw can be prepared up to 3 days ahead—just store it in an airtight container in the fridge to maintain its crispness. When you’re ready to enjoy, make the spicy mayo and proceed to coat and fry the chicken as instructed. This way, you’ll have restaurant-quality results with minimal effort, ensuring every bite remains just as delicious!
Expert Tips for the Best Thai Fried Chicken Sandwich
• Oil Temperature: Ensure the oil is at 350°F (175°C) for perfectly crispy chicken. Too hot can burn the batter, while too cool makes it soggy.
• Marination Time: Letting the chicken marinate for at least 2 hours (or even overnight) intensifies the flavor of your Thai Fried Chicken Sandwich.
• Batter Consistency: Aim for a lumpy batter; this texture helps achieve a crunchy exterior when frying. Don’t overmix!
• Fry in Batches: Avoid overcrowding the pot while frying. This helps maintain oil temperature and ensures each piece gets that golden, crispy finish.
• Storing Leftovers: Keep fried chicken and slaw separate for best quality. Reheat chicken in the oven to stay crispy, and enjoy this delicious Thai Fried Chicken Sandwich within three days!
How to Store and Freeze Thai Fried Chicken Sandwich
Fridge: Store leftover fried chicken for up to 3 days in an airtight container. Make sure to keep the crispy elements separate from the slaw for optimal texture.
Freezer: Freeze fried chicken pieces in an airtight container for up to 2 months. To reheat, bake in the oven at 375°F (190°C) for about 15–20 minutes until heated through and crispy.
Reheating: For best results, reheat fried chicken in the oven rather than the microwave. This helps maintain that signature crunch of your Thai Fried Chicken Sandwich.
Pickled Slaw: The slaw can be kept in the refrigerator for up to 5 days, making it great for meal prep. Enjoy it as a side with other dishes even after the sandwich is gone!
What to Serve with Thai Fried Chicken Sandwich?
Elevate your meal experience with delightful pairings that perfectly balance the flavors of your Thai Fried Chicken Sandwich.
-
Sweet Potato Fries: The natural sweetness of crispy sweet potato fries creates a wonderful contrast to the savory chicken sandwich.
-
Mango Salad: Fresh mango salad adds a bright and fruity element, harmonizing beautifully with the spiciness of your sandwich.
-
Coconut Rice: The creamy, rich tastes of coconut rice create a comforting backdrop, complementing the bold flavors of the chicken.
-
Thai Iced Tea: This indulgent drink provides a refreshing sweet chill that dries out the heat, making it an ideal pairing for your spicy bites.
-
Pickle Chips: Tangy pickle chips bring a crunchy zest to your meal, adding a delightful bite that contrasts with the creamy spicy mayo.
-
Coleslaw: A simple coleslaw with a vinegar tang not only enhances the sandwich but also provides a refreshing crunch.
-
Vegetable Stir-Fry: A vibrant mix of colorful veggies stir-fried quickly in soy sauce adds crunch and texture, creating a colorful and nutritious addition to your meal.
-
Lime Sorbet: For dessert, a light and zesty lime sorbet cleanses your palate and refreshes after indulging in rich flavors.

Thai Fried Chicken Sandwich Recipe FAQs
How do I choose the best chicken thighs for my sandwich?
Absolutely! When selecting chicken thighs, look for pieces that are plump and have a good amount of fat for moisture. Avoid those with dark spots or unpleasant odors. Fresh, high-quality chicken will ensure a juicy, flavorful result in your Thai Fried Chicken Sandwich.
What’s the best way to store leftover Thai Fried Chicken Sandwich components?
Very! Store leftover fried chicken in an airtight container in the refrigerator for up to 3 days. Keep the crispy chicken separate from the slaw, as moisture can make it soggy over time. The slaw can be stored in the refrigerator for up to 5 days. This way, you can enjoy delicious, fresh bites whenever you want.
Can I freeze the fried chicken for later use?
Certainly! To freeze your fried chicken, allow it to cool completely, then place pieces in an airtight container or freezer bag. It will keep well for up to 2 months. When ready to enjoy, reheat in the oven at 375°F (190°C) for 15-20 minutes until heated through and crispy again.
What if my batter is too thick or too thin?
No worries! If your batter is too thick, gradually add a little more ice water until it reaches a lumpy texture. If it’s too thin, add a small amount of all-purpose flour to thicken it up. It should coat the chicken well but still drip off slightly when lifted—aim for that perfect balance.
Are there any dietary concerns for pets or allergies I should consider?
Absolutely! For those with allergy concerns, always check for gluten in soy sauce and consider low-sodium options if salt is a worry. As for pets, the spicy elements like sriracha and garlic should be avoided for them. This Thai Fried Chicken Sandwich is definitely meant for human consumption!(Recipe FAQs)
Ultimate Thai Fried Chicken Sandwich: Crispy & Full of Flavor
Ingredients
Equipment
Method
- Marinate the chicken by mixing soy sauce, fish sauce, lime juice, ginger, garlic, coriander, white pepper, and turmeric. Submerge chicken thighs in mixture, refrigerate for at least 2 hours, ideally overnight.
- Prepare the pickled slaw by combining shredded cabbage and carrots, mixing rice vinegar, sugar, and salt, and pouring over veggies. Let sit for at least 30 minutes.
- For spicy mayo, combine mayonnaise, sriracha, lime juice, honey, and sesame oil in a bowl. Mix until smooth, then refrigerate.
- Prepare the batter by mixing all-purpose flour, cornstarch, rice flour, baking powder, and ice water. Heat oil to 350°F (175°C) and fry chicken until golden brown.
- Drain fried chicken on a wire rack and toast brioche buns. Assemble with spicy mayo, chicken, pickled slaw, cilantro, and optional cucumbers.
Leave a Reply