
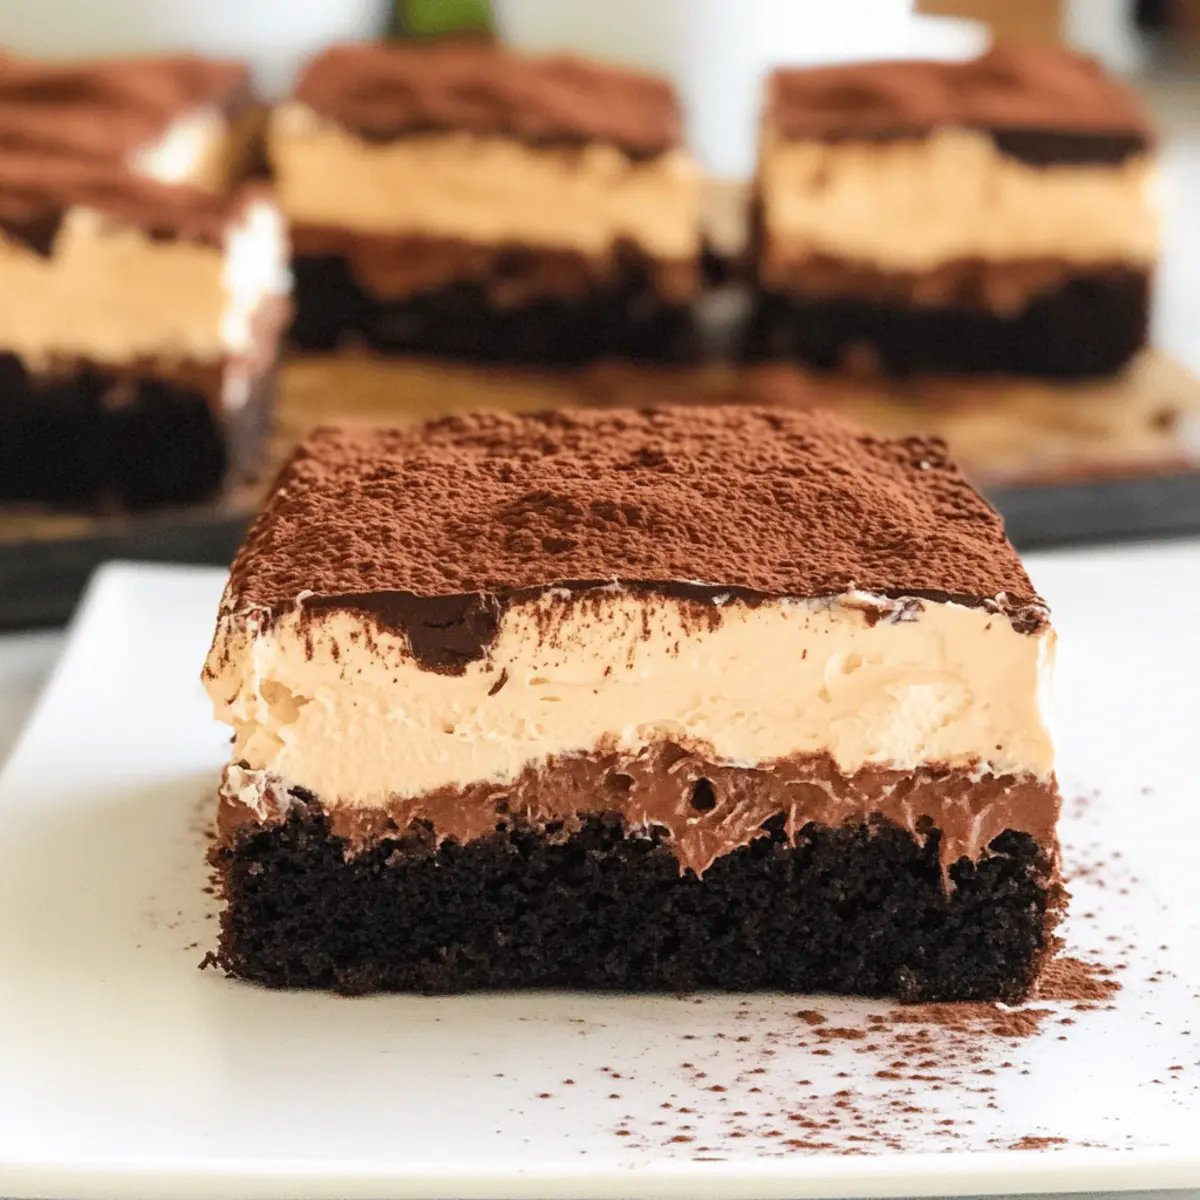
The moment I took my first bite of Tiramisu Brownies, I felt like I was wandering through an Italian café, with the rich scent of coffee and chocolate swirling around me. The luscious blend of fudgy brownie goodness and a dreamy mascarpone layer takes this dessert to new heights, making it an instant hit at any gathering. These Tiramisu Brownies not only bring a show-stopping twist to a classic but are also surprisingly easy to whip up, ensuring that you can treat yourself (and your loved ones) without spending all day in the kitchen. Whether you’re celebrating a special occasion or simply looking to satisfy your sweet tooth, this dessert is packed with enough indulgence to make every bite feel special. Are you ready to dive into the world of Italian-inspired dessert bliss?
Why Are Tiramisu Brownies Irresistible?
Rich, Indulgent Flavor: The combination of chocolate and coffee creates a decadent treat that satisfies even the strongest cravings.
Easy to Prepare: With straightforward instructions, you’ll be amazed how quickly you can bring the café experience home.
Perfect for Sharing: These brownies are sure to impress at gatherings, from birthdays to casual get-togethers.
Unique Twist: By fusing tiramisu with brownies, you create a dessert that stands out, offering a delightful surprise in every bite.
Versatile Variations: Feel free to customize; add chocolate chips or experiment with flavored extracts to make them uniquely yours.
If you enjoyed this recipe, you might also love our delightful Spooky Spiderweb Brownies for another fun twist on classic desserts!
Tiramisu Brownie Ingredients
• Discover the essentials for mouthwatering Tiramisu Brownies!
For the Brownies
- Unsalted Butter (113 g) – Provides richness and moisture; can substitute with salted butter—reduce added salt.
- Dark Chocolate (200 g) – Gives a rich chocolate flavor; use good quality chocolate for the best results.
- Brown Sugar (100 g) – Adds moisture and caramel flavor; light brown sugar works well as a substitute.
- Granulated Sugar (50 g) – Sweetens the brownies; coconut sugar can offer a unique flavor alternative.
- Eggs (3) – Binds the ingredients and adds richness; no direct substitutes are recommended for structure.
- All-Purpose Flour (90 g, sifted) – Provides structure; whole wheat flour may be used, but texture will differ.
- Salt (pinch) – Enhances overall flavor.
- Vanilla Extract (½ teaspoon) – Adds depth; can be swapped for vanilla bean for a richer flavor.
- Espresso or Instant Coffee (2 shots) – Delivers a robust coffee flavor; instant coffee can be substituted with brewed coffee.
For the Mascarpone Topping
- Mascarpone Cheese (250 g, room temperature) – Creates a creamy topping; cream cheese can substitute, but taste will vary.
- Heavy Cream (240 ml) – Adds richness and stability to the mascarpone.
- Sugar (50 g for mascarpone topping) – Sweetens the mascarpone; powdered sugar mixes more easily.
- Salt (¼ teaspoon) – Balances the sweetness in the mascarpone.
- Vanilla Extract (½ teaspoon, for mascarpone) – Enhances the flavor profile.
- Espresso Powder (2 tablespoons) – Intensifies the coffee flavor; instant coffee can replace it.
- Cocoa Powder (for dusting) – Finishes the brownies with that classic tiramisu touch.
Step‑by‑Step Instructions for Tiramisu Brownies
Step 1: Preheat and Prepare
Start by preheating your oven to 350°F (175°C). Line an 8 or 9-inch square baking tin with parchment paper, letting it hang over the edges for easy removal later. This step is essential for achieving the perfect Tiramisu Brownies, ensuring they bake evenly and have a lovely texture.
Step 2: Melt Chocolate and Butter
In a microwave-safe bowl, combine the dark chocolate and unsalted butter. Microwave in 30-second increments, stirring after each session until the mixture is smooth and melted, taking about 1-2 minutes total. Be cautious not to overheat; the mixture should be shiny and fully blended without any lumps.
Step 3: Mix Sugars into Chocolate
Once melted, remove the bowl from the microwave and mix in the brown sugar and granulated sugar until well combined. The heat will help dissolve the sugars, creating a rich, gooey mixture that adds depth to your Tiramisu Brownies. Allow the mixture to cool slightly before moving on to the next step.
Step 4: Incorporate Eggs and Vanilla
Stir in the vanilla extract, then add the eggs one at a time, whisking vigorously after each addition until fully incorporated. This aeration gives the brownies a light, tender crumb. Ensure the mixture appears smooth and glossy, indicating the eggs are well combined with the chocolate base.
Step 5: Fold in Dry Ingredients
Sift the all-purpose flour and a pinch of salt over the wet mixture. Gently fold the dry ingredients into the chocolate mixture using a spatula, taking care not to overmix. The batter should be just combined with no visible flour spots, maintaining that rich, fudgy appearance essential for Tiramisu Brownies.
Step 6: Bake the Brownies
Pour the brownie batter into the prepared tin, smoothing the top with a spatula. Place it in the preheated oven and bake for 25-30 minutes, or until a toothpick inserted into the center comes out with a few moist crumbs. This step is critical to achieving that perfect fudgy texture that characterizes Tiramisu Brownies.
Step 7: Espresso Infusion
Once baked, remove the brownies from the oven and immediately poke holes all over the surface using a skewer or toothpick. Pour the two shots of espresso evenly over the warm brownies, allowing them to soak up the coffee flavor. This step imparts that irresistible coffee essence that complements the chocolate beautifully.
Step 8: Whisk the Mascarpone Topping
In a separate bowl, whisk the mascarpone cheese, heavy cream, and half a teaspoon of vanilla extract together for about 30 seconds until the mixture is smooth and combined. The room temperature mascarpone makes it easier to blend, ensuring a creamy topping that pairs perfectly with your Tiramisu Brownies.
Step 9: Sweeten the Cream
Add the espresso powder and powdered sugar to the mascarpone mixture. Continue whisking until stiff peaks form, indicating the cream is light and airy. This luscious topping steals the show, offering a rich flavor that complements the fudgy brownie base without overpowering it.
Step 10: Spread the Mascarpone Layer
Once your brownies are completely cool, spread the mascarpone topping evenly over the surface of the brownies. Use a spatula to smooth the cream layer, making it look inviting and ready for the finishing touch. The creamy layer should be generous, enhancing the richness of the Tiramisu Brownies.
Step 11: Dust with Cocoa Powder
Using a sieve, dust the top of the mascarpone layer with cocoa powder for that classic tiramisu finish. This not only provides visual appeal but also adds a lightly bitter touch that beautifully balances the sweetness of the brownies. Allow it to settle for a minute before serving.
Step 12: Cut and Serve
Carefully lift the brownies out of the tin using the parchment paper overhang. Cut them into squares with a sharp knife, preferably warmed in water for cleaner slices. Serve your indulgent Tiramisu Brownies and watch them disappear as loved ones savor every rich, coffee-flavored bite!
Tiramisu Brownies Variations
Feel free to get creative with these Tiramisu Brownies and make them your own—with a few simple swaps or additions, you can create delightful new flavors and textures!
-
Dairy-Free: Substitute the mascarpone and heavy cream with coconut cream for a rich, dairy-free topping full of tropical flavor.
Coconut cream offers a unique twist while keeping the whole dish indulgent and tasty, just without the dairy! -
Nutty Twists: Incorporate ground almonds or hazelnuts into the brownie batter for extra depth and a delightful crunch.
The nutty flavor complements chocolate beautifully, adding a lovely texture that makes each bite more exciting. -
Flavor Boost: Swap espresso or instant coffee for flavored coffee—vanilla or hazelnut coffee can add an unexpected yet delicious element.
This simple adjustment not only enhances your brownie experience but transports you to a cozy café with every bite! -
Spicy Kick: Add a pinch of cayenne pepper or chili powder to the brownie mix for a surprising kick that pairs well with chocolate.
The gentle heat creates a delightful contrast with the sweetness, elevating your dessert into a unique taste adventure. -
Cacao Nibs: Replace some chocolate with cacao nibs for added crunch and a bittersweet touch.
This will give your Tiramisu Brownies a gourmet feel, creating an unexpected layer of flavor and texture that chocolate lovers will adore. -
Boozy Indulgence: Add a splash of coffee liqueur or Irish cream into the brownie mix or mascarpone for an adult-friendly dessert.
This twist takes the classic tiramisu flavor to another level of decadence, perfect for when you’re looking to elevate your dessert game! -
Vegan Option: For a vegan version, use flax eggs and plant-based substitutes like almond milk and silken tofu for the mascarpone.
You’ll maintain all the deliciousness while accommodating a plant-based lifestyle, satisfying every kind of sweet tooth! -
Chocolate Chip Delight: Mix in chocolate chips or chunks to the brownie batter for an extra chocolatey treat that melts in your mouth.
The gooey pockets of chocolate bring an irresistible richness that will have your friends asking for a second piece!
These variations allow you to customize your Tiramisu Brownies to suit your taste or dietary needs. If you’re in the mood for more festive and fun treats, consider trying our delicious Spooky Spiderweb Brownies for an added touch of creativity!
How to Store and Freeze Tiramisu Brownies
Fridge: Store Tiramisu Brownies tightly wrapped in plastic wrap or in an airtight container for up to 4 days. This keeps them fresh and ready to enjoy!
Freezer: To freeze, cut the brownies into squares and place them in a single layer on a baking sheet. Once frozen, transfer them to a freezer-safe container for up to 3 months.
Reheating: When ready to indulge, let the brownies thaw in the fridge overnight. For a warm treat, microwave individual servings for 10-15 seconds until just warmed through.
Make-Ahead: You can prepare the brownies a day in advance before serving. Just wait to add the mascarpone topping until you’re ready to serve for the best texture.
Make Ahead Options
These Tiramisu Brownies are perfect for meal prep enthusiasts looking to save time on busy weeknights! You can prepare the brownie base up to 3 days in advance and store it tightly wrapped in the refrigerator. Just be sure to let them cool completely before wrapping to maintain their moist texture. The mascarpone topping can be made up to 24 hours ahead of time; store it in an airtight container in the refrigerator to keep it fresh. When you’re ready to serve, simply spread the mascarpone mixture over the cooled brownies, dust with cocoa powder, and enjoy that rich, indulgent dessert with minimal effort!
What to Serve with Tiramisu Brownies?
Elevate your dessert experience by complementing the rich flavors of these brownies with delightful pairings that awaken the senses.
- Vanilla Ice Cream: The creamy, cold scoop balances the warm fudge and coffee layers, creating a delightful contrast.
- Espresso: A side of this bold brew enhances the coffee notes in the brownies, making each bite a truly Italian experience.
- Whipped Cream: Adding a dollop of lightly sweetened whipped cream introduces a velvety texture that perfectly balances the richness.
- Fresh Berries: Juicy raspberries or strawberries add a splash of freshness and tang, cutting through the decadence beautifully.
- Chocolate Sauce: A drizzle of warm chocolate sauce intensifies the flavor, turning these brownies into an even richer treat.
- Hazelnut Liqueur: For an after-dinner drink, this liqueur complements the nuttiness of coffee while echoing the flavors of the dessert.
- Cinnamon Dusting: A light sprinkle of cinnamon on top introduces a warm spice, enhancing the warm flavors of the dessert.
- Milk: A tall glass of cold milk provides a classic accompaniment to brownies, softening the sweet indulgence for a wholesome finish.
- Chocolate-Covered Espresso Beans: For those craving an extra caffeine kick, these provide both crunch and an energizing burst of flavor, completing the experience!
Tips for the Best Tiramisu Brownies
-
Eggs Matter: Beat the eggs until pale: For an airy and light brownie texture, ensure your eggs are well-whisked to introduce air.
-
Room Temperature Ingredients: Use room temperature mascarpone: This ensures smoother mixing and a creamier topping; cold mascarpone can be lumpy.
-
Clean Cuts: Use a warm knife for slicing: Dipping your knife in warm water makes cutting through the brownies effortless, helping maintain their beautiful layers.
-
Flavor Enhancer: Consider adding liqueur: A splash of Marsala wine or coffee liqueur can elevate the tiramisu flavor profile, giving your Tiramisu Brownies a delightful twist.
-
Don’t Rush It: Allow brownies to cool before topping: Letting your brownies cool completely ensures that the mascarpone layer doesn’t melt and maintains its creamy texture.
Tiramisu Brownies Recipe FAQs
What kind of chocolate should I use for Tiramisu Brownies?
Absolutely! For the richest flavor, I recommend using good quality dark chocolate (at least 70% cocoa). This creates a deep chocolate base that pairs perfectly with the coffee and mascarpone. If you prefer a sweeter taste, you can swap it with semi-sweet or even milk chocolate, but be aware that it will alter the overall richness of the brownies.
How do I store leftover Tiramisu Brownies?
The more the merrier! Wrap your Tiramisu Brownies tightly in plastic wrap or store them in an airtight container in the fridge for up to 4 days. Allow them to sit at room temperature for about 15-20 minutes before serving to bring back their fudgy texture. Enjoy them fresh or aged; both ways taste delightful!
Can I freeze Tiramisu Brownies?
Certainly! To freeze, cut the Tiramisu Brownies into squares and lay them in a single layer on a baking sheet. Freeze for about 2 hours, then transfer to a freezer-safe container or zip-top bag. They’ll stay fresh for up to 3 months. When you’re ready for a treat, let them thaw in the fridge overnight and then warm them briefly in the microwave for that fresh-baked taste!
What if my mascarpone topping is too runny?
No worries! If you find that your mascarpone topping isn’t holding its shape, it could be due to not whisking it long enough. To fix this, continue whisking until stiff peaks form. If it stays runny, you may add a little more powdered sugar (1 tablespoon at a time) while gently whisking to help stabilize it. The beauty of this topping is its adaptability—just a little patience goes a long way!
Are Tiramisu Brownies safe for those with gluten allergies?
Good question! Traditional Tiramisu Brownies contain all-purpose flour, so they’re not gluten-free. However, you can easily make them gluten-free by substituting all-purpose flour with a 1:1 gluten-free flour blend. Just check the ingredients to avoid any hidden gluten sources, ensuring a delightful dessert for those with gluten sensitivities!
Can my pet eat Tiramisu Brownies?
Not at all! While we absolutely adore Tiramisu Brownies, it’s vital to keep them away from pets, especially dogs. Ingredients like chocolate and coffee are toxic to them. So, enjoy these delicious treats yourself and avoid sharing – they’ll be happier with their own specially formulated snacks.
Irresistible Tiramisu Brownies - A Coffee Lover's Dream
Ingredients
Equipment
Method
- Preheat your oven to 350°F (175°C). Line an 8 or 9-inch square baking tin with parchment paper, letting it hang over the edges.
- In a microwave-safe bowl, combine the dark chocolate and unsalted butter. Microwave in 30-second increments, stirring after each session until smooth, about 1-2 minutes total.
- Mix in the brown sugar and granulated sugar until well combined. Allow the mixture to cool slightly.
- Stir in the vanilla extract and add eggs one at a time, whisking vigorously after each addition until fully incorporated.
- Sift the all-purpose flour and a pinch of salt over the wet mixture. Gently fold the dry ingredients into the chocolate mixture using a spatula.
- Pour the brownie batter into the prepared tin, smoothing the top with a spatula. Bake for 25-30 minutes, or until a toothpick comes out with a few moist crumbs.
- Remove the brownies from the oven and poke holes all over the surface. Pour the two shots of espresso evenly over the warm brownies.
- In a separate bowl, whisk the mascarpone cheese, heavy cream, and half a teaspoon of vanilla extract until smooth and combined.
- Add the espresso powder and powdered sugar to the mascarpone mixture and whisk until stiff peaks form.
- Spread the mascarpone topping evenly over the surface of the brownies once completely cool.
- Dust the top of the mascarpone layer with cocoa powder using a sieve.
- Lift brownies out of the tin using the parchment paper overhang. Cut into squares and serve.
Leave a Reply