
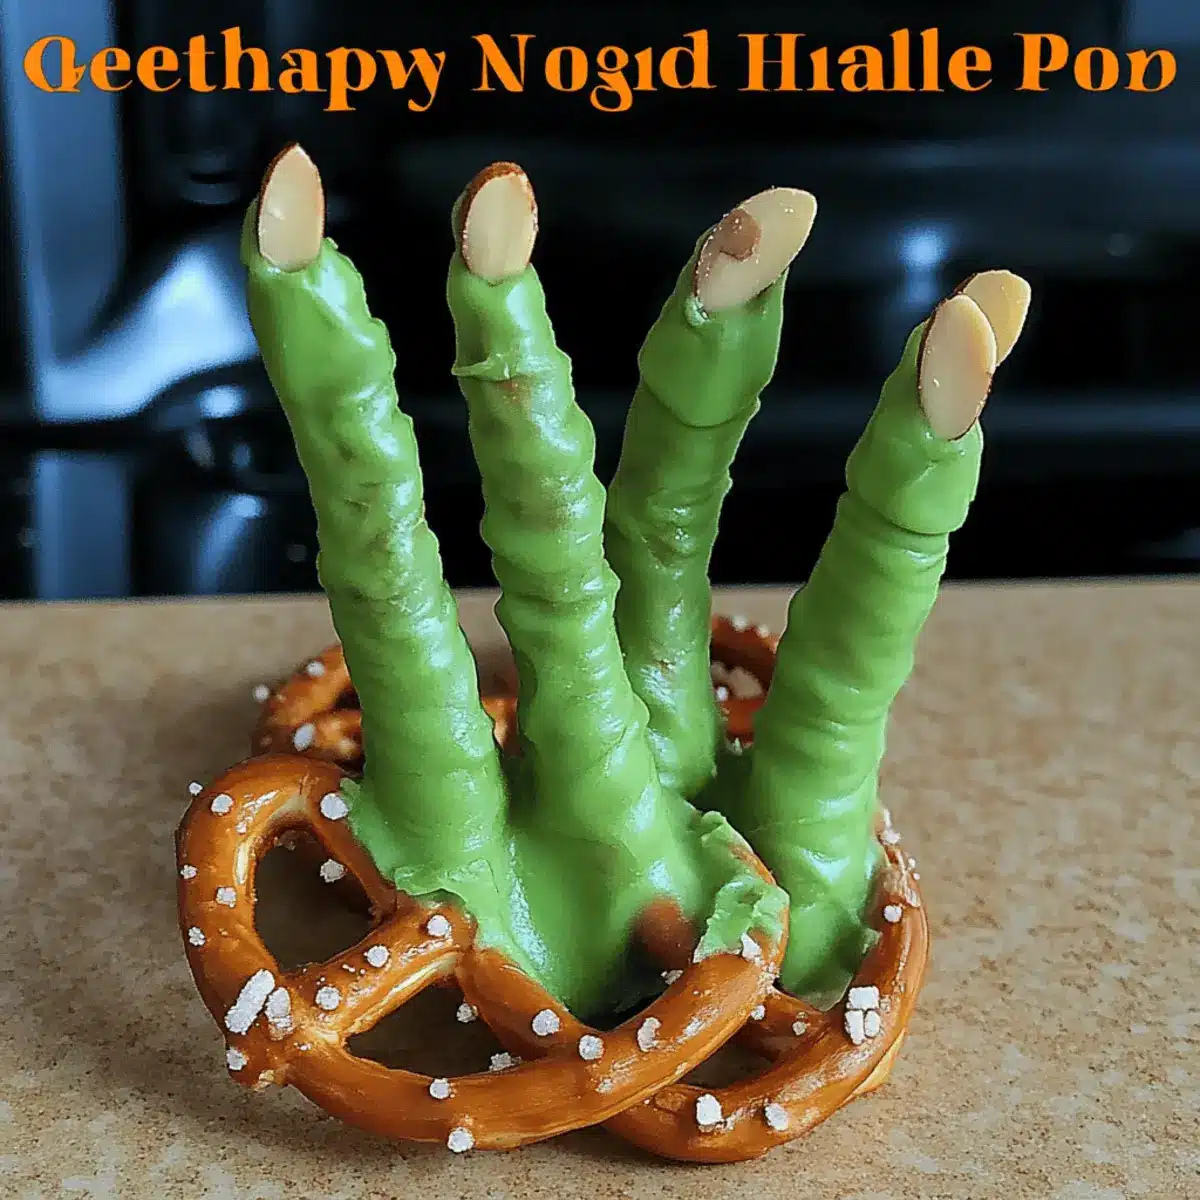
As I stood in the kitchen, the scent of melting chocolate wafting through the air, it hit me—Halloween is not just for pumpkins and spooky decorations; it’s also a playground for creativity in the kitchen! Introducing my Witch Finger Pretzels—these delightfully eerie treats blend crunch and sweetness, making them an instant favorite for both kids and adults. With just a few simple ingredients and minimal prep time, they’re the perfect way to elevate any Halloween gathering. Not only do they look fabulously ghastly, but they also offer a fun and interactive cooking experience you can enjoy with little ones at home. So, are you ready to dip into some delicious mischief?
Why are Witch Finger Pretzels a must-try?
Creepy and Fun: These Witch Finger Pretzels are a perfect blend of spooky visuals and delicious taste, ensuring they are a hit at any Halloween party.
Easy to Make: With simple ingredients and quick instructions, even novice bakers can whip these up in no time.
Kid-Friendly Activity: They provide a fun way to engage kids in the kitchen, transforming snack time into a creative and interactive experience.
Versatile Treats: Switch up the coatings and decorations, allowing for personalized touches! Try using milk or dark chocolate for different flavor profiles.
Crowd-Pleasing Appeal: Their unique look combined with delightful crunch and sweetness makes them an irresistible treat for both kids and adults.
Make your Halloween festivities even more exciting with this delightful recipe!
Witch Finger Pretzel Ingredients
• Get ready to create these spooky treats with just a few simple components!
For the Pretzel Base
- Pretzel Rods – The perfect crunchy foundation for your witch fingers that’s both sturdy and tasty.
For the Coating
- Green Wilton Candy Melts or White Chocolate Chips – Provides a sweet, smooth coating; add food coloring to achieve that eerie green hue with white chocolate.
For the Creepy Fingernails
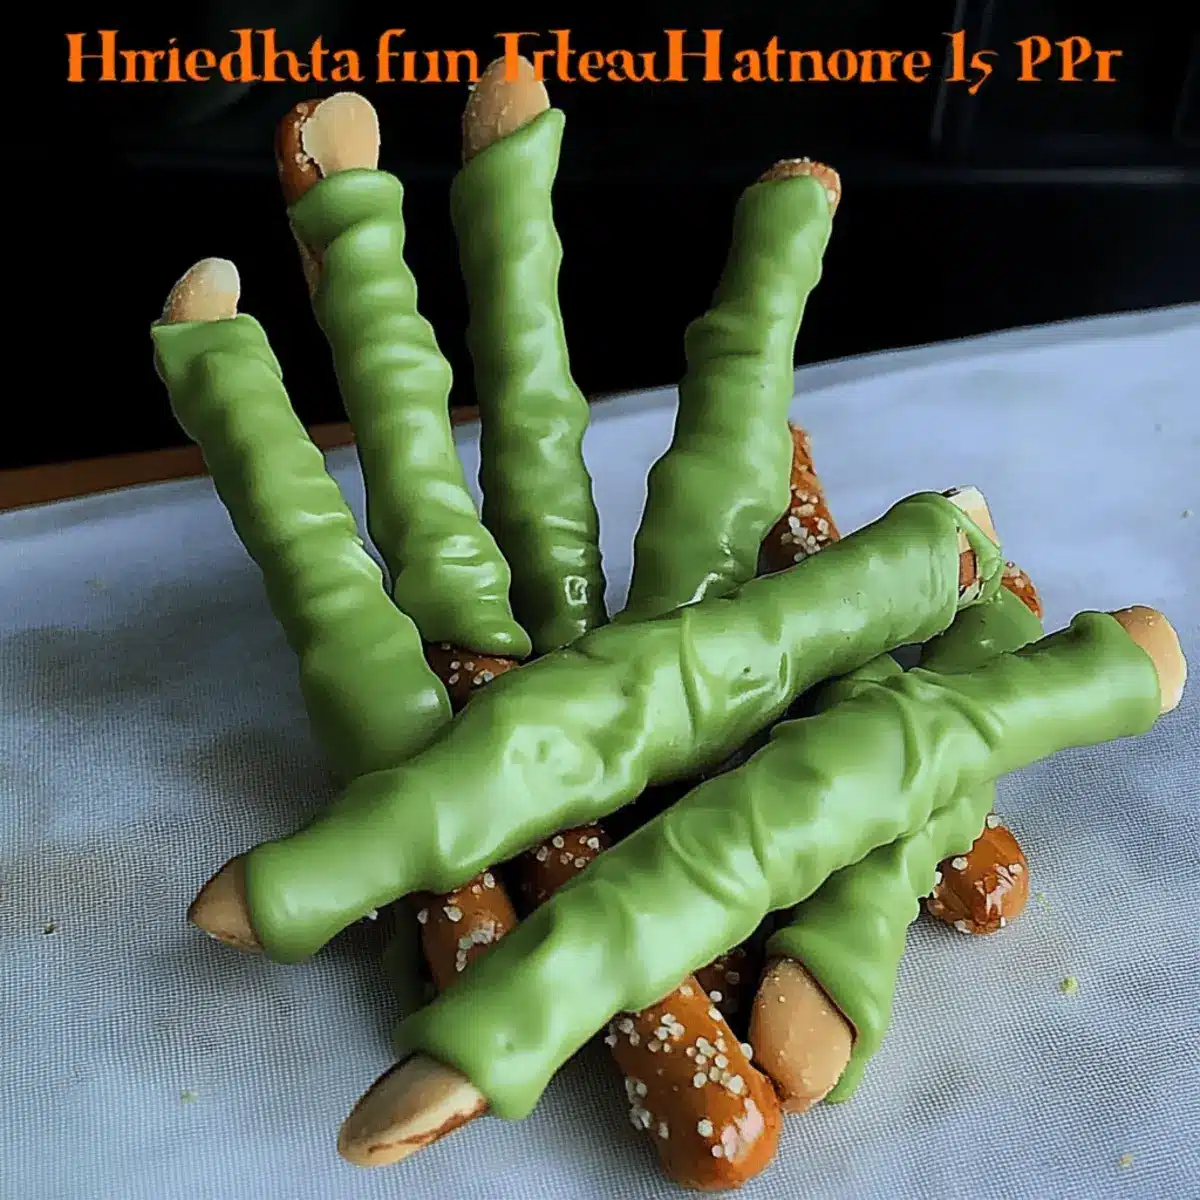
- Toasted Slivered Almonds – Mimics witchy nails at the tip of each pretzel; opt for plain slivered almonds if you can’t find toasted ones.
Transform your Halloween treat game with these enchanting Witch Finger Pretzels!
Step‑by‑Step Instructions for Witch Finger Pretzels
Step 1: Melt the Coating
Begin by melting the green Wilton candy melts or white chocolate chips in a microwave-safe bowl. Heat in 30-second intervals while stirring until completely smooth. If using white chocolate, add your chosen food coloring until you achieve a vivid green hue. This should take about 1-2 minutes total.
Step 2: Dip the Pretzels
Once melted, dip each pretzel rod into the warm candy coating, ensuring it’s fully covered. Gently shake off any excess coating and place the pretzels on a piece of waxed paper or a cooling rack. This step should be completed swiftly, as you want the coating to remain warm for the next step.
Step 3: Add the Fingernails
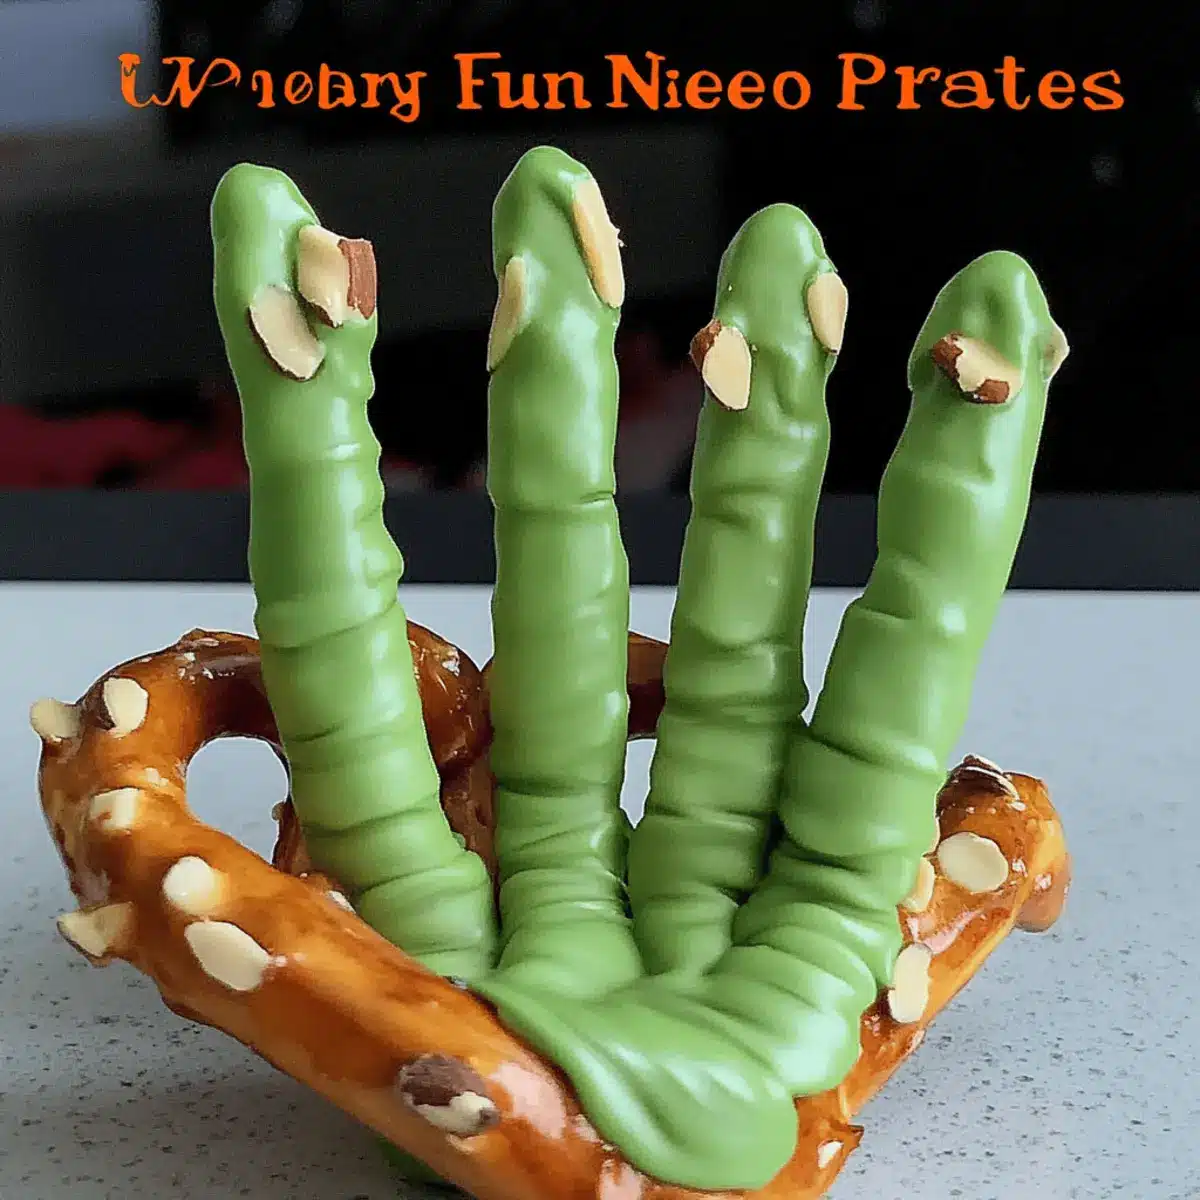
After about 15 seconds, when the coating slightly firms up but is still tacky, press a slivered almond into the tip of each pretzel to create a whimsical fingernail. Make sure the almonds fit snugly against the candy coating, mimicking the shape of witchy fingers.
Step 4: Draw the Knuckles
To add a little extra detail to your Witch Finger Pretzels, take a toothpick and gently draw knuckles onto each pretzel. Do this while the coating is still setting but not fully dried for a clean design. This gives them even more of that spooky charm and enhances their appearance.
Step 5: Allow to Harden
Let the Witch Finger Pretzels cool and set completely at room temperature. For faster results, you can place them in the refrigerator for about 10-15 minutes. You’ll know they’re ready when the coating has hardened and the pretzels look impeccably spooky.
Step 6: Store and Serve
Once fully set, store your Witch Finger Pretzels in an airtight container to keep them fresh. These treats can be made ahead of time and will be perfect to serve at your Halloween gathering. Scare up some fun as you present these delightfully eerie snacks!
Make Ahead Options
These Witch Finger Pretzels are perfect for meal prep, allowing you to enjoy more time with loved ones during Halloween festivities. You can prepare the pretzel rods and dip them in the coating up to 24 hours in advance. Simply follow the initial steps of melting the candy and coating the pretzels, then let them harden completely before storing. To maintain their delightful crunch, keep them in an airtight container at room temperature. When you’re ready to serve, just add the slivered almonds for the spooky fingernail effect and draw the knuckles with a toothpick. This way, you’ll have spooky, delicious treats ready to wow your guests with minimal effort!
Expert Tips for Witch Finger Pretzels
-
Melt Carefully: Ensure the candy melts or white chocolate isn’t too hot to prevent slippage during dipping. A gentle heat preserves texture!
-
Timing is Key: After dipping, wait about 15 seconds before adding the almond “fingernail.” This ensures the coating is sticky enough for a secure fit.
-
Create Clean Lines: Draw knuckles with a toothpick before the coating hardens completely, but after it starts to set for best results.
-
Storage Secrets: Keep your Witch Finger Pretzels in an airtight container at room temperature. They stay fresh for up to 4 days without losing their crunch!
-
Experiment with Flavors: Try using milk or dark chocolate instead of green candy melts for variations that appeal to different tastes.
-
Decorative Alternatives: Get creative! Swap almonds for candy corn or use colored sprinkles for a festive look while still maintaining the witchy theme.
Witch Finger Pretzels Variations & Substitutions
Feel free to unleash your creativity and take these Witch Finger Pretzels to a whole new level of spookiness and flavor!
-
Chocolate Switch: Substitute white chocolate with milk or dark chocolate for a richer taste that pairs perfectly with the pretzels.
-
Nut-Free Option: Instead of slivered almonds, top with candy corn to create a colorful, nut-free treat that still looks great!
-
Vegan Twist: Use dairy-free chocolate chips to make this treat suitable for your vegan friends, adding a delightful charm everyone can enjoy.
-
Fun with Frosting: Let the kids pipe different colored icing onto the pretzels instead of drawing knuckles for a delicious twist that’s a festive delight.
-
Sprinkle Surprise: Swap the knuckle detailing for colored sprinkles to create a fun, festive finish. These add a pop of color and extra sweetness!
-
Fiery Variation: Drizzle some spicy hot sauce or sriracha over the chocolate before it sets for an adventurous twist that adds a surprising kick!
-
Flavor Layers: Introduce a layer of peanut butter or Nutella under the chocolate coating for an indulgent surprise that elevates every bite.
Experiment and enjoy these enticing variations to make your Halloween treats uniquely yours! If you’re looking to add even more creativity to your spooky snacks, consider checking out how milk or dark chocolate can change the flavor profile of your Witch Finger Pretzels.
Storage Tips for Witch Finger Pretzels
Room Temperature: Store your Witch Finger Pretzels in an airtight container at room temperature for up to 4 days. This keeps them crunchy and delicious!
Fridge: If you prefer them chilled, refrigerate the container for extra firmness. They can be stored in the fridge for up to a week, but be mindful of condensation when you take them out.
Freezer: For longer storage, freeze the Witch Finger Pretzels in a single layer on a baking sheet. Once frozen, transfer them to an airtight freezer bag for up to a month. Thaw at room temperature before serving.
Reheating: Although they’re best enjoyed fresh, if you prefer a warm snack, you can briefly microwave them for 10-15 seconds to soften the chocolate coating. Enjoy your spooky treats!
What to Serve with Witch Finger Pretzels
Spooky celebrations are all about fun, and what better way to elevate your Halloween gathering than with some delightful side dishes?
-
Creepy Crafts: Pair with DIY pumpkin spice cupcakes for a delightful contrast; these sweet treats will enchant your little ghouls.
-
Ghoulish Fruit Platter: A vibrant mix of sliced apples, grapes, and bananas, drizzled with caramel sauce—perfect for balancing sweetness and crunch!
-
Monster Munch Popcorn: Salty, sweet, and festively colored, this popcorn blend is a crowd-pleaser and adds a playful touch to your snack table.
-
Spooky Punch: A zesty mix of orange juice, ginger ale, and floating fruit slices for a refreshing drink. Add gummy worms for an extra creepy touch!
-
Themed Cheese Platter: Serve assorted cheeses with ghost-shaped crackers for a savory option that contrasts beautifully with the sweet pretzels.
-
Witch’s Brew Chili: A hearty, spicy chili pairs wonderfully with the sweet witch fingers, adding a warm and comforting component to the spread.
Don’t hesitate to mix and match these pairings for a Halloween feast that’ll have your guests raving!
Witch Finger Pretzels Recipe FAQs
What type of pretzel rods should I use?
You can use standard pretzel rods for this recipe, which provide the crunch and base structure for your Witch Finger Pretzels. I recommend looking for ones that are sturdy, as they will hold up well against the candy coating and almond “fingernails.” If desired, you can also use gluten-free pretzel rods as an alternative!
How should I store Witch Finger Pretzels?
Store your Witch Finger Pretzels in an airtight container at room temperature to maintain their crunch, ideally for up to 4 days. If you want to keep them longer, moving them to the fridge can extend freshness to about a week. Just be cautious of condensation when you take them out!
Can I freeze Witch Finger Pretzels?
Absolutely! To freeze your Witch Finger Pretzels, place them in a single layer on a baking sheet until they’re frozen solid. Then, transfer them to an airtight freezer bag. They can be stored like this for up to a month. When you’re ready to enjoy them, simply thaw at room temperature for about 15-30 minutes.
What should I do if the coating isn’t sticking well?
If you find the candy coating isn’t sticking properly during assembly, it may be too hot or too cool. Make sure to allow the melted candy melts or white chocolate to cool slightly before dipping, but not so much that it starts to harden. If they do harden too quickly, you can microwave the coating in 10-second bursts to reheat.
Are there any allergy considerations for this recipe?
Yes! When making Witch Finger Pretzels, consider any nut allergies if you are using slivered almonds. Alternatives like candy corn or edible eyes can safely replace them. Be sure to check the ingredients of your candy melts or chocolate for potential allergens as well. Always tailor these treats to ensure they’re safe for everyone at your gathering!
How can I make these suitable for a larger crowd?
The more the merrier! To make a larger batch, simply multiply the ingredients according to your desired yield. Just ensure you have enough space for dipping and drying them, as you may need multiple baking sheets lined with wax paper. Enjoy creating spooky treats in bulk for your Halloween party!

Witch Finger Pretzels: Spooky Treats for Halloween Fun
Ingredients
Equipment
Method
- Melt the green Wilton candy melts or white chocolate chips in a microwave-safe bowl. Heat in 30-second intervals until smooth.
- Dip each pretzel rod into the warm candy coating, ensuring it's fully covered. Shake off excess coating and place on waxed paper.
- After 15 seconds, press a slivered almond into the tip of each pretzel to create a fingernail.
- Draw knuckles with a toothpick while the coating is still tacky for detailed design.
- Let Witch Finger Pretzels cool completely. Optionally refrigerate for 10-15 minutes to harden the coating.
- Store in an airtight container to keep fresh for your Halloween gathering.
Leave a Reply