
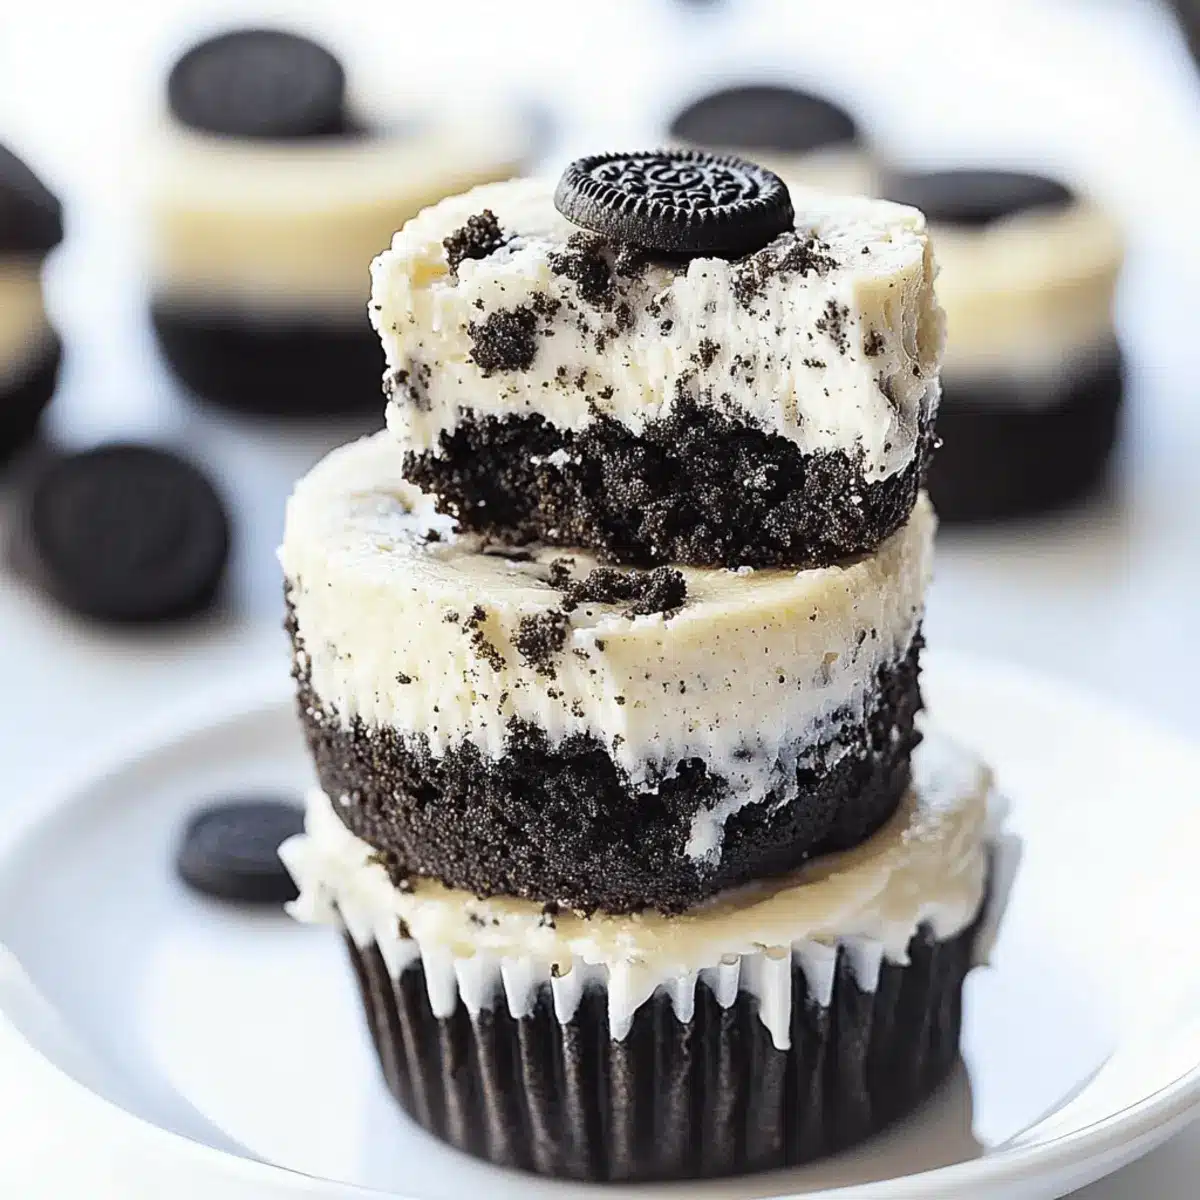
You know that moment when a simple craving turns into a delicious victory? That’s exactly how I felt the first time I tried making these Mini Oreo Cheesecakes. Each adorable bite combines the irresistible creamy goodness of cheesecake with the classic crunch of Oreos, making them a showstopper at any gathering. With just five ingredients and a quick prep time of under 30 minutes, they fit perfectly into the hectic lives we all lead, offering a satisfying dessert without the painstaking effort. Whether you’re hosting a party or simply indulging after a long day, these no-bake mini treats will win hearts and taste buds alike. Ready to whip up some bliss in your kitchen? Let’s dive deeper into this delightful recipe!
Why Are Mini Oreo Cheesecakes So Irresistible?
Simplicity: With just five ingredients, this recipe is a breeze, making it perfect for both novice and experienced bakers.
Quick Prep: Taking less than 30 minutes, these no-bake delights fit seamlessly into your busy schedule.
Decadent Flavor: The rich combination of cream cheese and Oreos creates a luxurious taste that satisfies any sweet tooth.
Crowd-Pleasing: Serve them at parties or family gatherings—these bite-sized treats are sure to impress everyone!
Versatility: Feeling adventurous? You can easily swap Oreos for Golden Oreos or mix in chocolate chips for a tasty twist.
If you’re craving a creamy dessert, you might also enjoy making an Oreo Milkshake Indulgence or some delightful Oreo Overnight Oats for breakfast!
Mini Oreo Cheesecake Ingredients
For the Cheesecake Filling
• Cream Cheese – Ensure it’s full-fat and softened for a creamy texture.
• Sugar – Adds the necessary sweetness to balance the tanginess of the cream cheese.
• Whole Eggs – Contributes richness and helps achieve that perfect creamy consistency.
• Vanilla Extract – Enhances flavor with a hint of warmth and sweetness.
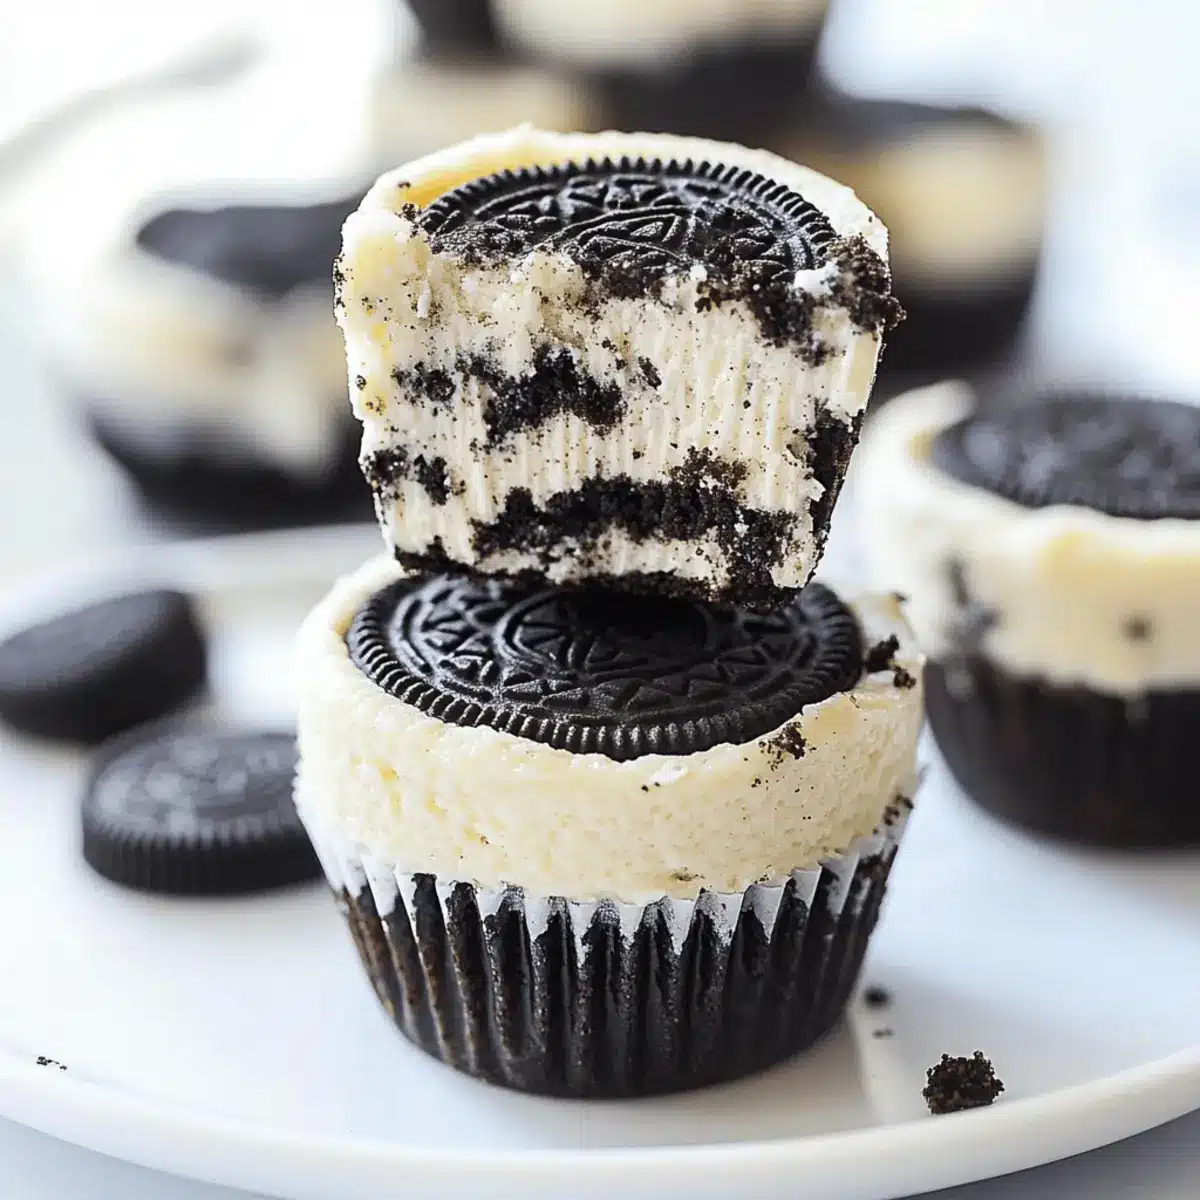
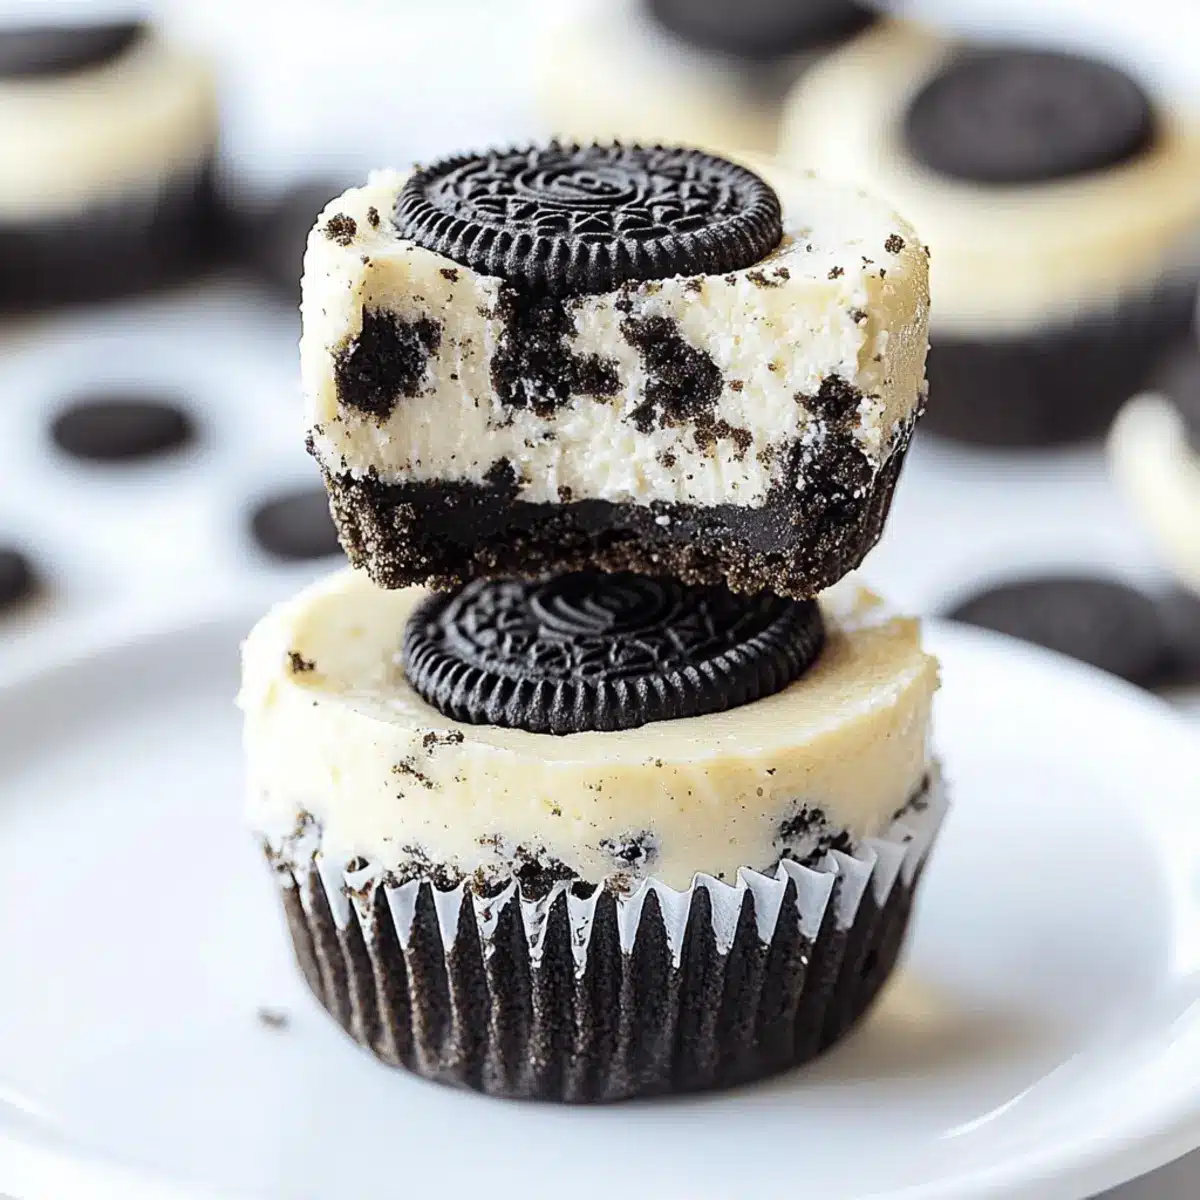
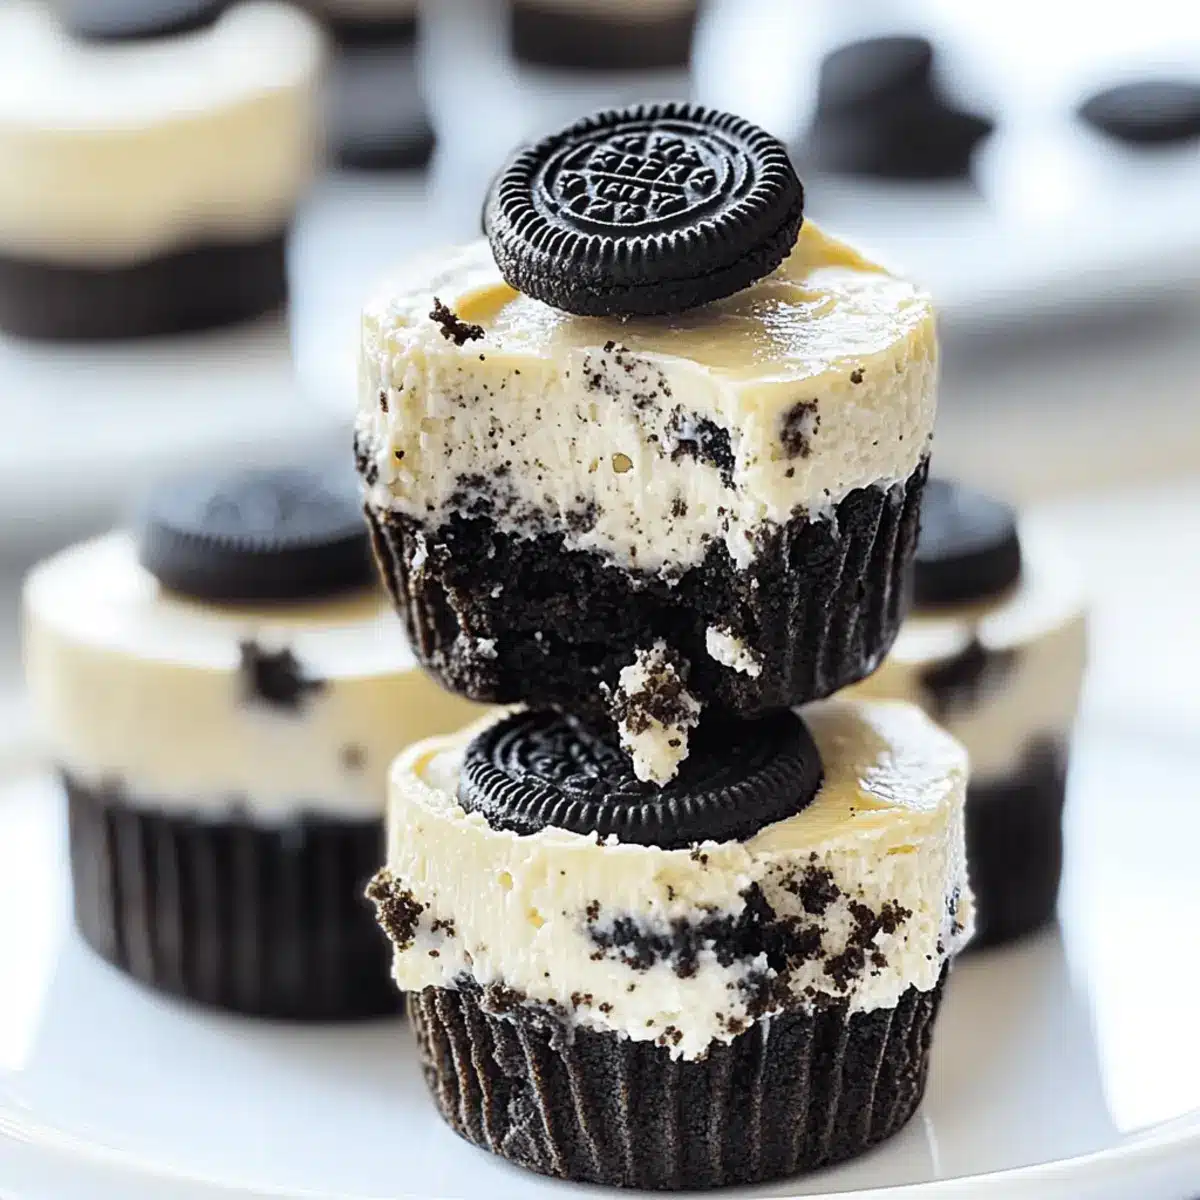
• Oreos – Used for the base and in the filling; mix big and small pieces for delightful texture.
For the Base
• Whole Oreos – One whole Oreo per cupcake liner creates a delightful crust.
With just these few simple ingredients, you’re on your way to creating deliciously decadent Mini Oreo Cheesecakes that everyone will love!
Step‑by‑Step Instructions for MINI OREO CHEESECAKES
Step 1: Prepare Baking Tray
Preheat your oven to 350°F (175°C). Line a standard cupcake pan with 16 paper liners, ensuring they’re securely in place. For each liner, place a whole Oreo cookie right at the bottom. This will form the delicious cookie crust, providing a delightful crunch for your Mini Oreo Cheesecakes.
Step 2: Make the Cheesecake Filling
In a large mixing bowl, combine softened cream cheese, sugar, whole eggs, and vanilla extract. Use an electric mixer to blend everything until the mixture is smooth and creamy, taking about 2–3 minutes. Once well combined, gently fold in chopped Oreo cookie crumbs using a spatula, ensuring an even distribution throughout your cheesecake filling.
Step 3: Fill Cupcake Liners
Spoon approximately two tablespoons of the cheesecake batter over the whole Oreos in each cupcake liner. Make sure to fill each liner evenly, allowing space for the batter to rise slightly. If you desire an extra touch, sprinkle some additional Oreo crumbs on top of the batter for added texture and flavor.
Step 4: Bake
Place the cupcake pan in the preheated oven and bake for 14–16 minutes. Keep a close eye on them—the tops should be set but still have a slight jiggle in the center. Be careful not to overbake, as this could dry out your Mini Oreo Cheesecakes. Once done, remove from the oven and let cool for at least 30 minutes.
Step 5: Chill and Serve
After the initial cooling period, transfer the cheesecakes to the refrigerator to chill for a minimum of 2 hours. This will help the flavors meld together beautifully and improve the texture. When ready to serve, consider adding a dollop of whipped cream on top, and perhaps finish with crumbled Oreos for a beautiful presentation.
Make Ahead Options
These Mini Oreo Cheesecakes are truly perfect for meal prep, allowing you to savor their deliciousness with ease during hectic days! You can prepare the cheesecakes up to 24 hours in advance by baking them and refrigerating them without the toppings. Once cooled, place them in an airtight container to maintain their creamy texture and taste. If you wish to prep even further, you can combine the filling ingredients and refrigerate for up to 3 days—just give it a quick stir before filling the cupcake liners. When you’re ready to serve, simply top with whipped cream and crushed Oreos, and enjoy this delightfully decadent dessert with minimal effort!
What to Serve with Mini Oreo Cheesecakes?
Indulging in Mini Oreo Cheesecakes opens up a delightful world of flavor pairings, transforming your dessert experience into something even more delightful.
- Fresh Berries: Juicy strawberries or raspberries bring a vibrant burst of freshness that beautifully contrasts the richness of the cheesecake.
- Whipped Cream: A dollop of light, airy whipped cream adds a luscious touch and enhances the softness of each bite.
- Chocolate Sauce: Drizzling warm chocolate sauce introduces a rich depth that complements the cookies-and-cream flavors, delighting any chocolate lover.
- Coffee: A strong cup of coffee pairs harmoniously, cutting through the sweetness and providing an invigorating balance to the rich dessert.
- Ice Cream: Scoop vanilla or cookies-and-cream ice cream alongside for an extra creamy experience, merging different textures for an indulgent treat.
- Mint Leaves: Garnishing with fresh mint sprigs adds a refreshing brightness, making each bite feel a little lighter and more sophisticated.
- Chocolate-covered Strawberries: For a sweet contrast, serve with chocolate-covered strawberries that echo the Oreos’ chocolatey essence while adding a fruity twist.
- Caramel Drizzle: A swirl of salted caramel enhances the dessert’s decadence, offering a sweet-salty dynamism that elevates the flavor.
- Sparkling Water: For a refreshing drink option, serve these cheesecakes with a bubbly sparkling water to cleanse the palate between bites.
MINI OREO CHEESECAKES Customization Options
Feel free to put your own twist on these delightful Mini Oreo Cheesecakes, transforming each bite into a unique experience!
-
Golden Oreos: Swap regular Oreos for Golden Oreos for a sweeter, lighter flavor that adds a fun twist.
-
Greek Yogurt Substitute: Substitute half the cream cheese with Greek yogurt for a tangy flavor and a lighter texture that feels refreshing.
-
Chocolate Chips: Fold in some mini chocolate chips into the filling for an extra layer of chocolatey goodness.
-
Flavor Extracts: Experiment with flavored extracts like almond or hazelnut in place of vanilla for a distinct taste adventure.
-
Nutty Crunch: Add crushed nuts like pecans or walnuts to the crust for a satisfying crunch that complements the creaminess.
-
Reduced Sugar: For a healthier version, reduce the sugar by half; this allows the natural sweetness of the Oreos to shine.
-
Spicy Kick: Stir in a pinch of cinnamon or even a dash of chili powder for an unexpected warm spice that enhances the dessert.
-
Fruit Topping: Top these cheesecakes with fresh berries or a fruit compote for a burst of color, flavor, and nutrition!
These variations not only elevate your Mini Oreo Cheesecakes but also make them perfect for any occasion! And if you adore Oreo flavors, consider indulging in an Oreo Milkshake Indulgence or breakfasting on some dreamy Oreo Overnight Oats for an extra sweet treat.
Expert Tips for Mini Oreo Cheesecakes
-
Soften Cream Cheese: Ensure your cream cheese is thoroughly softened to avoid lumps in the cheesecake filling; this results in a smooth texture.
-
Mind the Baking Time: Keep an eye on the baking time; remove them from the oven when they’re set but still slightly jiggly in the center. Overbaking can lead to dryness in your Mini Oreo Cheesecakes.
-
Crumb Care: For more intense Oreo flavor, incorporate additional cookie crumbs into the filling; just don’t forget to mix it gently to maintain the fluffy texture.
-
Cupcake Liner Tip: Use standard-sized muffin tins instead of mini ones for consistent baking; if you do use smaller tins, adjust the baking time accordingly.
-
Cooling is Key: Allow the baked cheesecakes to cool for at least 30 minutes before refrigerating, enhancing the flavors and improving the overall texture.
-
Deco Delight: Enhance presentation by topping with whipped cream and additional crushed Oreos right before serving; this adds an appealing visual dimension.
How to Store and Freeze Mini Oreo Cheesecakes
Fridge: Store your Mini Oreo Cheesecakes in an airtight container in the refrigerator for up to 1 week. This keeps them fresh while enhancing their creamy texture.
Freezer: For longer storage, individually wrap each cheesecake in plastic wrap and place them in a freezer-safe bag or container; they can be frozen for up to 3 months.
Thawing: When you’re ready to enjoy your frozen Mini Oreo Cheesecakes, simply transfer them to the fridge for a few hours to thaw. This gentle method maintains their delicious taste and creamy texture.
Reheating: No need to reheat these no-bake delights; enjoy them chilled for the best experience!
Mini Oreo Cheesecakes Recipe FAQs
How do I choose ripe ingredients, especially the cream cheese?
Absolutely! Always opt for full-fat cream cheese that’s been softened to room temperature. This ensures a smooth texture without lumps. Look for cream cheese that’s not past its expiration date. Freshness makes a real difference!
How should I store my Mini Oreo Cheesecakes?
To keep your Mini Oreo Cheesecakes fresh, store them in an airtight container in the refrigerator for up to 1 week. Make sure to cover them well, so they don’t absorb any odors from other foods. This method helps to maintain their delightful flavor and texture.
Can I freeze the Mini Oreo Cheesecakes, and how?
Yes, you can! Individually wrap each Mini Oreo Cheesecake in plastic wrap and place them in a freezer-safe bag or container. They’ll stay fresh for up to 3 months. To thaw, simply transfer them to the refrigerator for several hours. This allows them to defrost slowly, helping to preserve their creamy goodness.
What should I do if my cheesecakes are too dry?
If you find that your Mini Oreo Cheesecakes are dry, it’s often due to overbaking. I recommend keeping a close watch on them; they should be set with a slight jiggle in the center when you take them out. If you have a hard time with time management, setting a timer can be really helpful!
Are there any allergy considerations I should keep in mind?
Definitely! These cheesecakes contain dairy and eggs, so they aren’t suitable for those with lactose intolerance or egg allergies. Consider using a dairy-free cream cheese and egg substitute if you need to accommodate dietary restrictions. Always read ingredient labels to ensure they meet your guests’ needs!
Can I adapt the recipe for pets?
While it’s tempting to share these delicious treats, it’s best to avoid giving them to pets, especially due to the sugar and chocolate present in Oreos. For a pet-friendly alternative, consider making plain yogurt treats using safe fruits for dogs or cats!
Decadent Mini Oreo Cheesecakes in Under 30 Minutes
Ingredients
Equipment
Method
- Preheat your oven to 350°F (175°C). Line a standard cupcake pan with 16 paper liners and place a whole Oreo cookie in each liner.
- In a large bowl, combine softened cream cheese, sugar, whole eggs, and vanilla extract. Mix until smooth and creamy, about 2–3 minutes. Gently fold in chopped Oreo cookie crumbs.
- Spoon about two tablespoons of the cheesecake batter over the whole Oreos in each liner. Optionally, sprinkle more Oreo crumbs on top.
- Bake for 14–16 minutes, until set but slightly jiggly in the center. Let cool for at least 30 minutes.
- Transfer cheesecakes to the refrigerator to chill for at least 2 hours before serving. Optionally top with whipped cream and crumbled Oreos.
Leave a Reply