
As I watched my kids race around the backyard on a sweltering summer day, it hit me—what’s a hot afternoon without a scoop of homemade vanilla ice cream? This recipe for the Best Ever Homemade Vanilla Ice Cream is a delightful adventure into nostalgia, offering the rich, creamy indulgence we all crave, with absolutely no cooking required. In under 10 minutes, you’ll create a base that’s not only incredibly easy but also fully customizable, allowing for fun add-ins like fresh fruit or crunchy nuts. Whether you’re serving it at a family barbecue or enjoying a quiet evening on the porch, this ice cream is a perfect way to elevate your warm weather gatherings. Are you ready to indulge in this creamy bliss, or will you take it a step further and try something unexpected?
Why Is This Vanilla Ice Cream So Special?
Quick and Easy: You’ll whip up this homemade vanilla ice cream in under 10 minutes—perfect for those spontaneous summer cravings!
Customizable Delight: Add your favorite ingredients like fresh strawberries or chocolate chips, making each batch uniquely yours.
No Cooking Required: Say goodbye to complicated recipes; this one requires no cooking, just simple mixing and freezing for a hassle-free treat.
Creamy and Rich: The blend of heavy cream and whole milk creates an indulgent, smooth texture that will remind you of classic ice cream shop delights.
Family Favorite: This recipe not only satisfies sweet cravings but also brings loved ones together, creating warm memories worth savoring, just like in those cherished family traditions.
Serve with Style: Drizzle chocolate sauce or pile on fresh fruits for an eye-catching presentation that will impress your guests!
Vanilla Ice Cream Ingredients
For the Cream Base
• Heavy Cream – Provides a rich, creamy base; substitute with half-and-half for a lighter option.
• Whole Milk – Adds creaminess and balances the heaviness of cream; for a lower-fat alternative, use skim milk.
For Sweetening
• Sugar – Sweetens the ice cream; honey or maple syrup can be used as substitutes but may alter the flavor.
• Salt – Enhances overall flavor; optional but recommended for a more balanced taste.
For Flavoring
• Vanilla Extract – Gives a classic vanilla taste; use pure vanilla for the best flavor; artificial vanilla can be used for a different twist.
Remember, this Vanilla Ice Cream base is entirely customizable! Feel free to add your favorite fruits or nutty delights as you mix.
Step‑by‑Step Instructions for Best Ever Homemade Vanilla Ice Cream
Step 1: Mix the Cream Base
In a large mixing bowl, combine 2 cups of heavy cream, 1 cup of whole milk, ¾ cup of sugar, a pinch of salt, and 2 teaspoons of pure vanilla extract. Whisk the mixture for about 2-3 minutes until the sugar is completely dissolved and the mixture is smooth and creamy. You’ll know it’s ready when the sugar particles are no longer visible in the liquid.
Step 2: Pour into Ice Cream Maker
Carefully pour the creamy mixture into your ice cream maker’s container. Make sure the container is properly assembled and your ice cream maker has been pre-frozen (if required, according to manufacturer instructions). Set the machine to churn and operate it for approximately 25-30 minutes. The mixture will start to thicken into a soft-serve consistency.
Step 3: Freeze for a Firmer Texture
Once the ice cream reaches a soft-serve texture, transfer it to a large airtight container. Smooth the surface with a spatula, and seal the container tightly. Place it in the freezer for an additional 2-4 hours, allowing the vanilla ice cream to firm up beautifully. Keep an eye on it; you want a smooth, scoopable texture when it’s ready.
Step 4: Serve and Enjoy
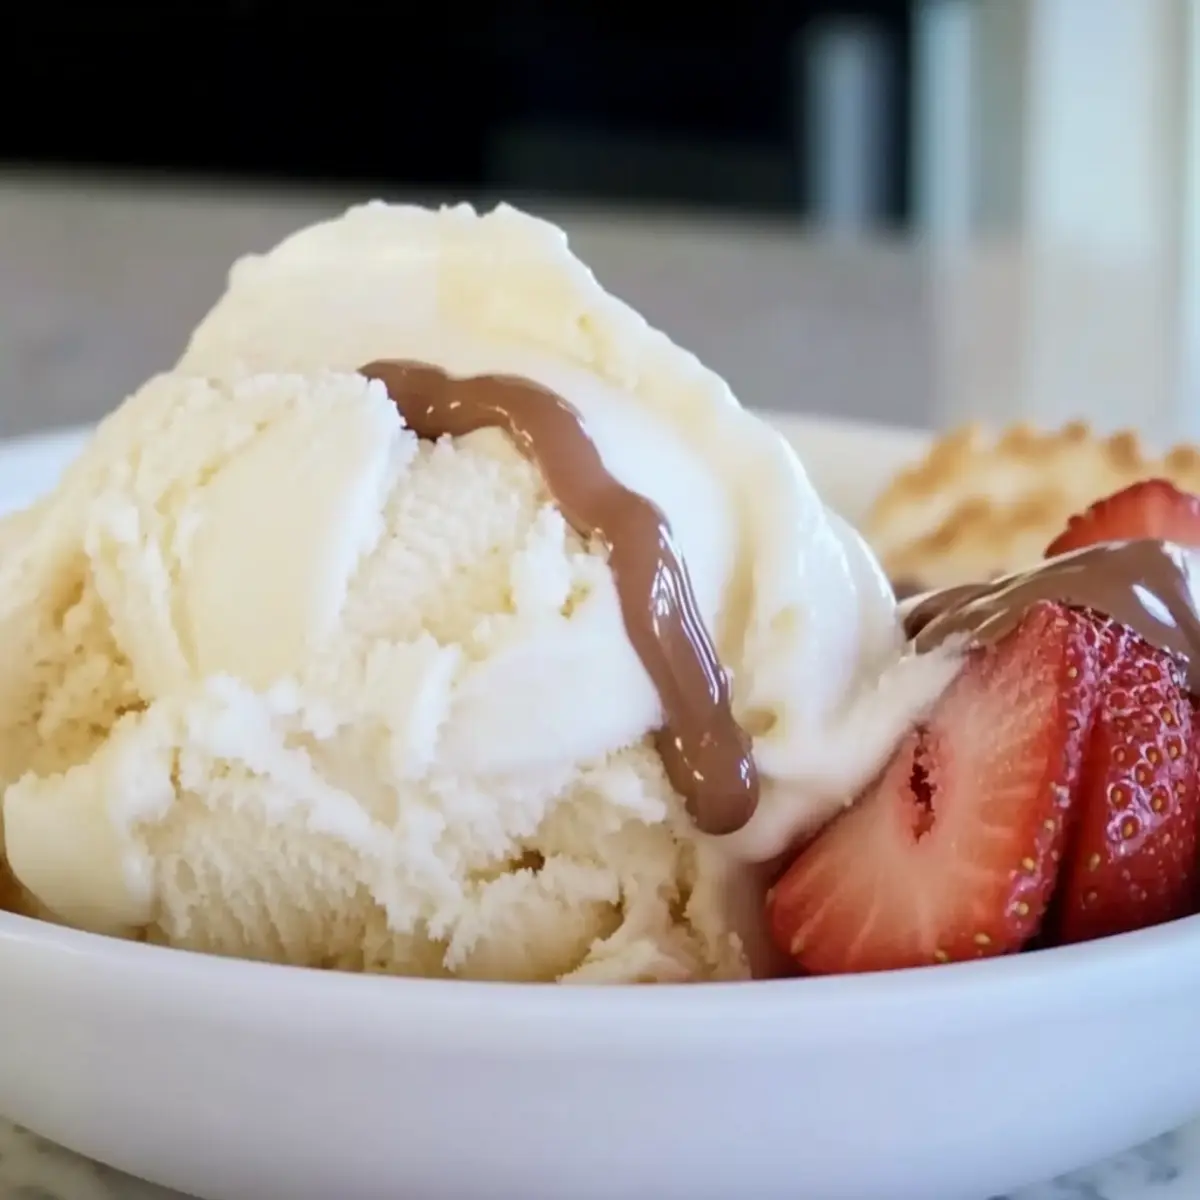
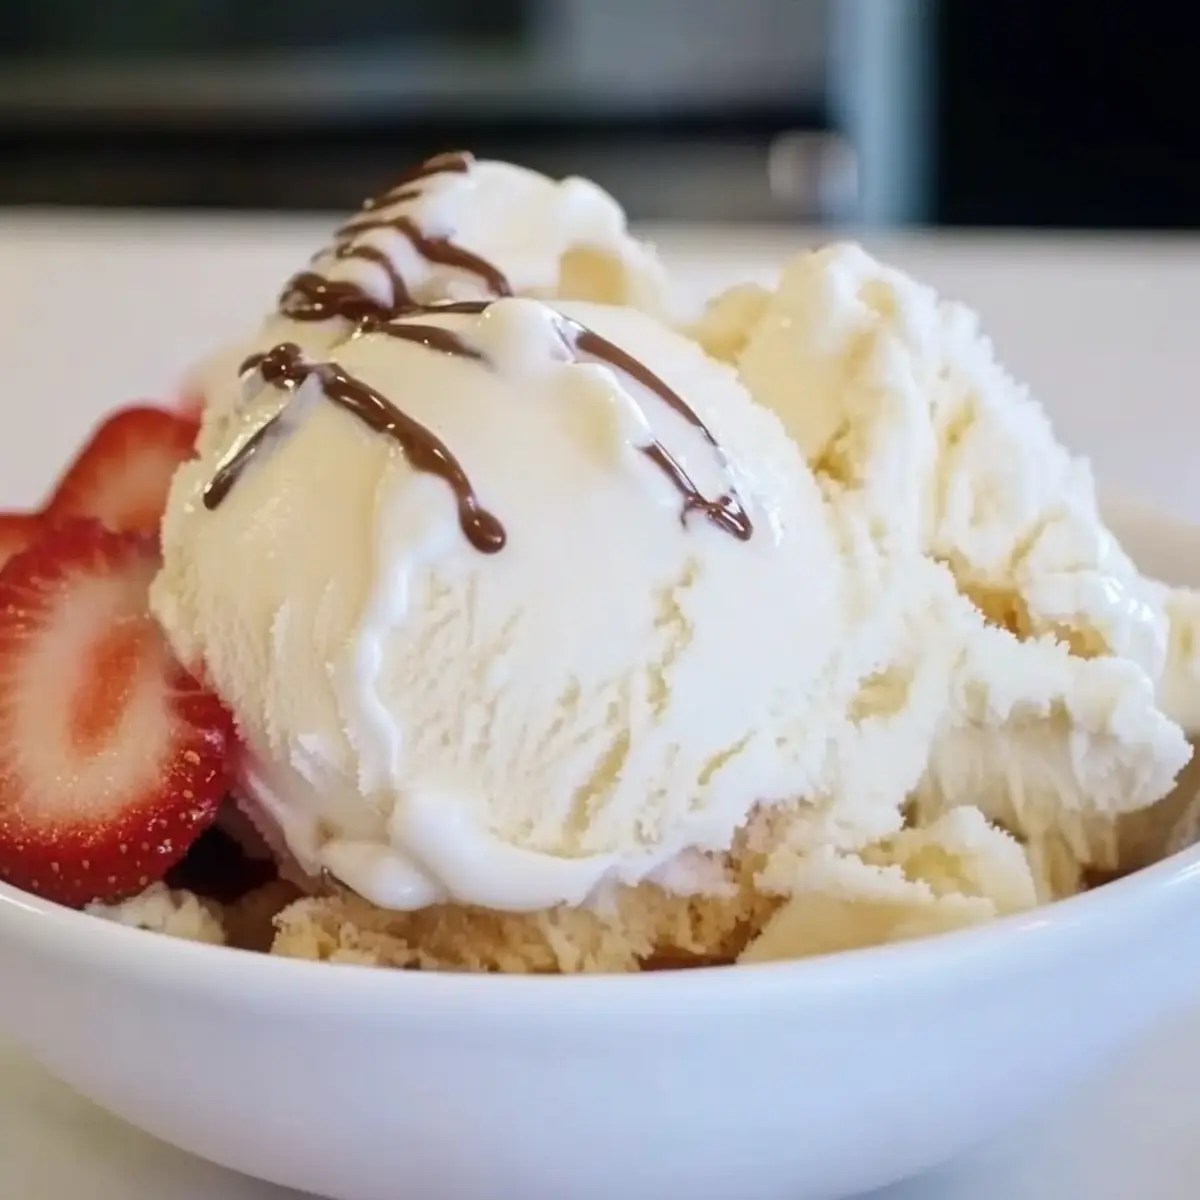
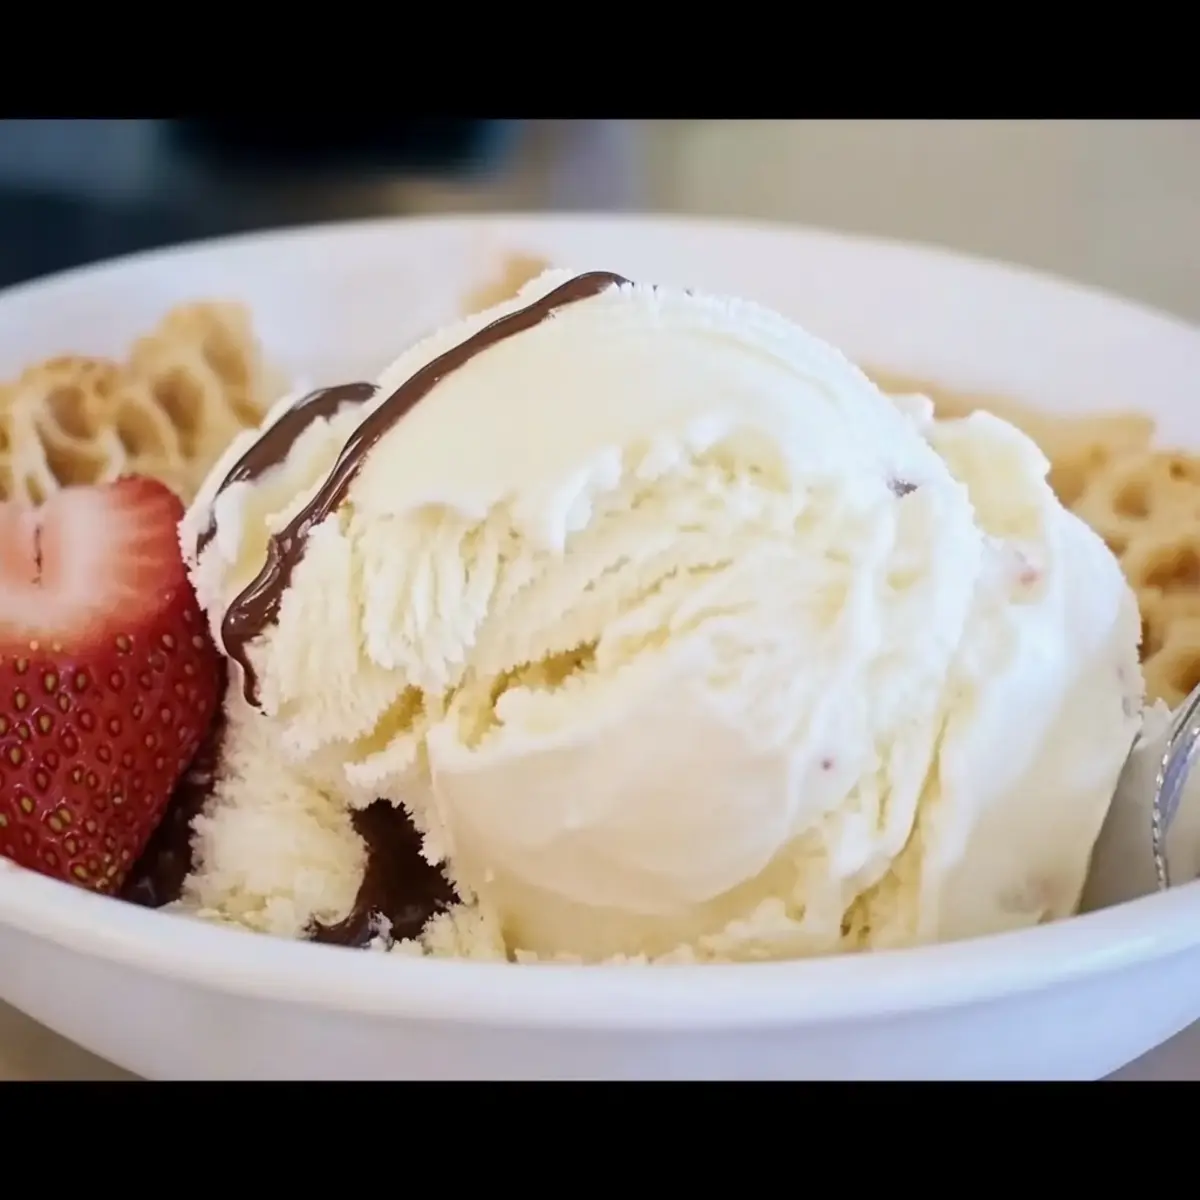
When ready to serve, scoop out generous portions of your homemade vanilla ice cream into bowls or cones. You’ll notice its creamy richness and enticing vanilla aroma. For an extra splash of fun, drizzle chocolate sauce or add fresh fruit on top. Invite your family to indulge and savor every lovely bite of this Best Ever Homemade Vanilla Ice Cream.
Expert Tips for Vanilla Ice Cream
-
Chill the Ingredients: Make sure your heavy cream and whole milk are chilled for a smoother mixture; room temperature can result in a grainy texture.
-
Don’t Rush the Churn: Allow your ice cream maker enough time to churn properly; rushing the process can lead to a less creamy consistency in your vanilla ice cream.
-
Infuse Flavor: For a deeper flavor, infuse the milk with vanilla beans before mixing, enhancing your base even more!
-
Monitor Freezing Time: Keep an eye on the hardening process in the freezer to avoid ice crystals; you want the vanilla ice cream to remain smooth and scoopable.
-
Add-Ins Timing: Blend in your favorite add-ins like fruits or nuts only after achieving soft-serve consistency for the best texture—this prevents them from sinking!
Make Ahead Options
These scrumptious homemade vanilla ice cream treats are perfect for meal prep enthusiasts! You can prepare the cream base up to 24 hours in advance by mixing the heavy cream, whole milk, sugar, salt, and vanilla extract together. Simply store the mixture in an airtight container in the refrigerator to keep it fresh. When you’re ready to enjoy your vanilla ice cream, just pour the chilled mix into your ice cream maker and churn according to the manufacturer’s instructions. For even better results, ensure your ice cream maker’s container is thoroughly frozen before use. This way, you’ll savor a creamy, delicious dessert with minimal last-minute effort!
How to Store and Freeze Vanilla Ice Cream
Airtight Container: Store your homemade vanilla ice cream in an airtight container to prevent freezer burn and maintain its creamy texture for up to 2 weeks.
Freezing Time: If made in advance, the ice cream can freeze for up to 1 week before serving, ensuring it’s ready for your warm summer gatherings.
Reheating (if needed): If the ice cream hardens too much, let it sit at room temperature for 5-10 minutes before scooping. This will make serving easier and more enjoyable!
Customizable Storage: Remember, this vanilla ice cream base is customizable, so if you’ve added mix-ins like fruit or chocolate, ensure it’s well mixed before freezing for the best results.
Vanilla Ice Cream Variations & Substitutions
Feel free to unleash your creativity with this vanilla ice cream recipe and make it uniquely yours!
-
Fruit-Filled Delight: Toss in crushed strawberries or blueberries for a fruity twist that bursts with flavor. Each scoop will be a refreshing journey of flavors!
-
Nutty Addition: Substitute almonds, walnuts, or pecans for a delightful crunch. The added texture complements the creamy base beautifully.
-
Chocolate Twist: For those chocolate lovers out there, replace some of the milk with chocolate milk or mix in cocoa powder. Every bite becomes a rich chocolate dream!
-
Sweetener Swap: Use honey or maple syrup instead of sugar for a different sweet profile. This not only adds complexity but a natural touch as well!
-
Dairy-Free: Swap the heavy cream and milk with coconut milk or almond milk for a creamy, plant-based alternative that still delivers amazing flavor.
-
Spicy Kick: Add a pinch of cinnamon or a dash of cayenne pepper to elevate your vanilla ice cream with a warm heat that surprises the palate.
-
Infused Flavor: Try infusing the cream with lavender or mint before mixing for a refreshing aromatic experience. This adds a lovely complexity too!
-
Layered Indulgence: Create a layered ice cream treat by alternating layers of vanilla and your favorite fruit puree or sauce. It’s not only delicious but also visually stunning!
I also recommend experimenting with delicious add-ins from my recipes, like the creamy Avocado Cream Sauce or the vibrant Iced Raspberry Vanilla. Each of these will take your homemade vanilla ice cream to delightful new heights!
What to Serve with Best Ever Homemade Vanilla Ice Cream
As the warm sun shines down, the creaminess of this vanilla ice cream beckons for delightful companions that elevate your dessert experience.
- Fresh Berries: The tartness of strawberries or blueberries perfectly balances the sweetness of the vanilla ice cream while adding a vibrant color to your dish.
- Chocolate Sauce: A luscious drizzle of warm chocolate sauce adds a rich, indulgent touch, making every scoop feel like a special treat.
- Waffle Cones: Crispy waffle cones provide a delicious crunch that contrasts beautifully with the creamy texture of the ice cream. It’s a classic combo that never goes out of style.
- Nuts: Toasted almonds or pecans introduce a satisfying crunch and a nutty, roasted flavor that enhances the overall experience. Mix them in or sprinkle on top!
- Whipped Cream: Light and airy, whipped cream adds a touch of elegance, creating a dreamy dessert that feels luxuriously indulgent.
- Banana Split Style: Layer your ice cream with sliced bananas, nuts, and a drizzle of syrup for a nostalgic banana split that brings the ice cream parlor home.
- Mint Leaves: A few fresh mint leaves add a burst of freshness, enhancing the creamy sweetness and offering a subtle aromatic note.
- Iced Coffee: Pair your vanilla ice cream with an iced coffee for a deliciously refreshing pick-me-up, turning your dessert into a delightful beverage experience.
Homemade Vanilla Ice Cream Recipe FAQs
What is the best cream selection for homemade vanilla ice cream?
Absolutely! I highly recommend using heavy cream for its rich texture. This creates that luxurious mouthfeel we love in vanilla ice cream. If you’re looking for a lighter version, half-and-half can also be used, but the creaminess will be less pronounced.
How should I store homemade vanilla ice cream?
To maintain the best texture, store your vanilla ice cream in an airtight container. This helps prevent freezer burn and keeps it delicious for up to 2 weeks. Be sure to smooth the top with a spatula and seal it tightly.
Can I freeze vanilla ice cream for later use?
Yes! Your homemade vanilla ice cream can be made ahead of time and stored in the freezer for up to a week. Just transfer it to an airtight container after it reaches soft-serve consistency and freeze for an additional 2-4 hours before serving. When it’s time to scoop, let it sit at room temperature for 5-10 minutes to soften slightly.
What if my ice cream is too hard to scoop?
If your vanilla ice cream turns out too hard, don’t worry! Simply let it sit on the counter for about 5-10 minutes before scooping. This will make it easier to serve. Additionally, ensuring your ice cream maker is fully frozen before use will help prevent overly icy results.
Are there any dietary considerations for this vanilla ice cream?
Yes! This recipe contains dairy, so it may not be suitable for those with lactose intolerance or dairy allergies. However, you can make a dairy-free version by substituting coconut cream and dairy-free milk. If you’re serving to pets, be cautious—avoid giving them ice cream, as sugary treats aren’t great for their health.
Can I add ingredients like fruits or nuts to my vanilla ice cream?
Very! In fact, I recommend it! You can fold in your favorite mix-ins, like crushed strawberries or chocolate chips, after the ice cream reaches a soft-serve stage. This way, they won’t sink to the bottom, ensuring every scoop is as delightful as the last.

Creamy Vanilla Ice Cream That's So Easy, No Cooking Needed
Ingredients
Equipment
Method
- In a large mixing bowl, combine the heavy cream, whole milk, sugar, salt, and vanilla extract. Whisk until the sugar dissolves and the mixture is smooth.
- Pour the creamy mixture into your ice cream maker's pre-frozen container and churn for about 25-30 minutes until thickened.
- Transfer the soft-serve ice cream to an airtight container, smooth the surface, seal it tightly, and freeze for an additional 2-4 hours.
- Scoop out generous portions into bowls or cones and add chocolate sauce or fresh fruit as toppings before serving.
Leave a Reply