
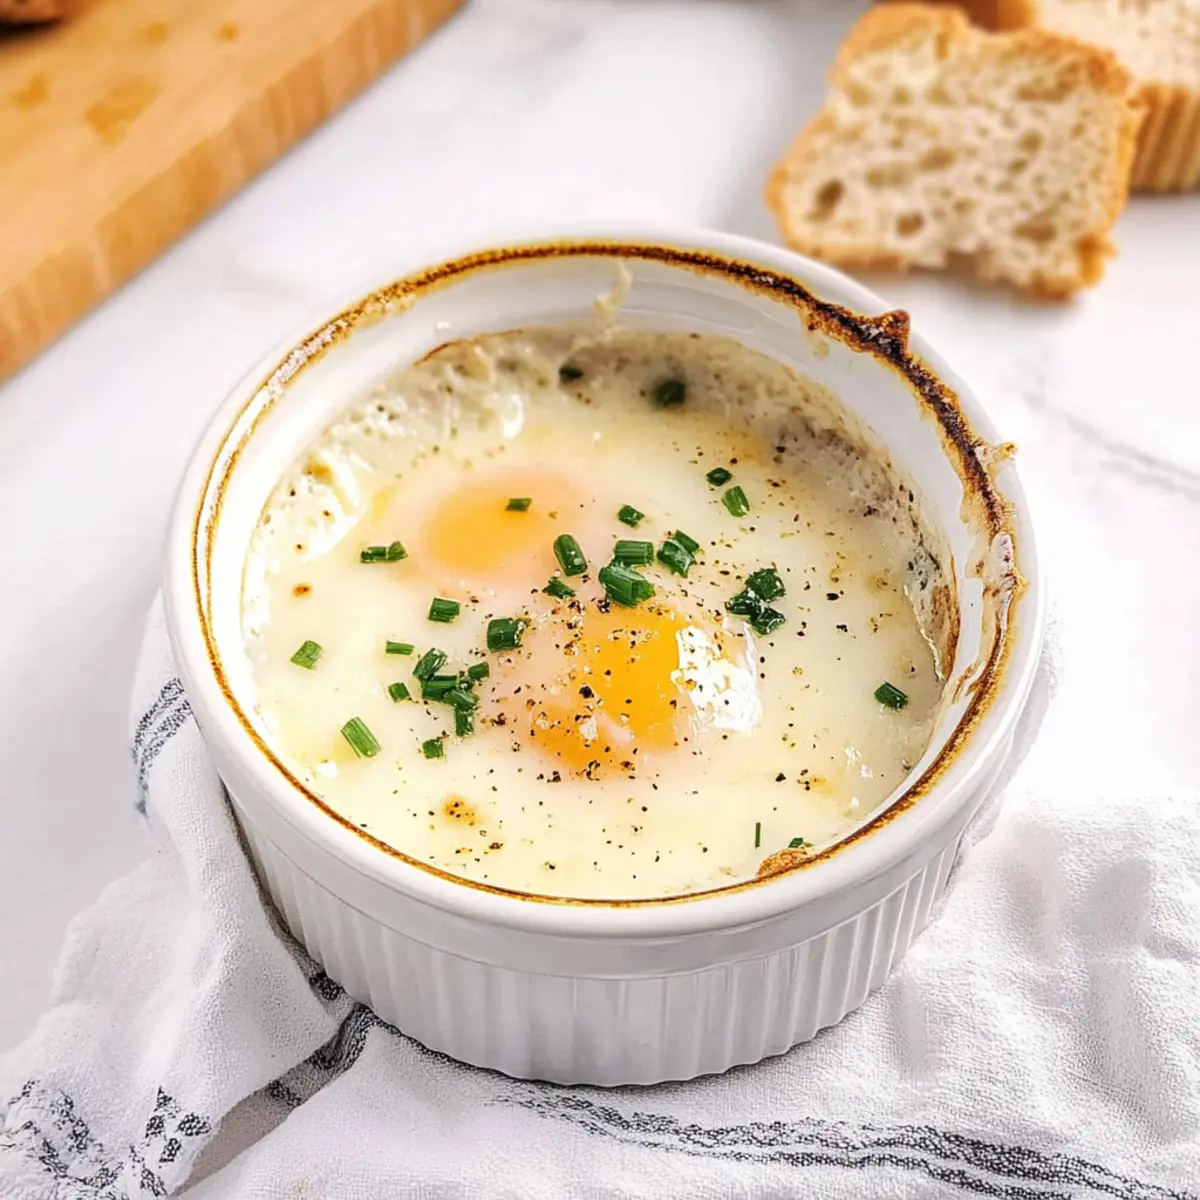
Amid the gentle clinking of brunch plates and the soft hum of conversation, there’s a transformative moment that elevates any gathering: the arrival of Shirred Eggs. These delightful egg dishes present a glossy surface hiding perfectly runny yolks, each bite inviting you to indulge in their creamy richness. What I love most about Shirred Eggs is their simplicity, making them an easy option for both relaxed weekends and special brunch celebrations. Packed with protein and customizable to fit any dietary preferences—like dairy-free alternatives—this recipe caters to everyone at your table. So, are you ready to whisk up something truly elegant that will have your guests asking for seconds?

Why Are Shirred Eggs So Delicious?
Simplicity: This recipe is incredibly straightforward, requiring little more than basic kitchen skills to achieve brunch perfection.
Versatile: Feel free to swap ingredients based on your dietary needs, from dairy-free alternatives to adding vibrant veggies.
Crowd-Pleaser: With its rich, savory flavor profile—thanks to creamy heavy cream and Parmesan—it’s sure to impress both family and friends.
Quick to Prepare: In just 15 minutes, you can serve a dish that feels gourmet without spending hours in the kitchen.
Elegant Presentation: Each ramekin not only looks beautiful but also offers a perfect vessel for dipping your favorite toast. So, why not get creative and pair these eggs with a side of Air-Fryer Breakfast Potatoes for a complete meal? Enjoy indulging in this delightful dish!
Shirred Eggs Ingredients
• Create your perfect brunch dish with these essential ingredients!
For the Base
- Unsalted Butter – Prevents sticking and enhances richness; substitute with vegan butter for a dairy-free version.
- Heavy Cream – Adds creaminess and flavor depth; can be replaced with high-fat oat milk or Coconut Vegan Cashew Cream Sauce for a dairy-free option.
- Large Eggs – The star of the dish providing protein; opt for premium quality for the best flavor.
For the Seasoning
- Salt – Enhances flavor; adjust to your taste preference.
- Black Pepper – Brings warmth and spice to the dish; freshly ground is always best.
For the Garnish
- Fresh Chives – Adds a mild onion flavor and fresh touch; scallions can be used as an alternative if needed.
- Grated Parmesan Cheese – Contributes savory richness; for a dairy-free twist, try nutritional yeast or a vegan cheese substitute.
Indulge in this delectable Shirred Eggs recipe and enjoy a delightful brunch experience!
Step‑by‑Step Instructions for Shirred Eggs
Step 1: Preheat the Oven
Begin by preheating your oven to 375°F (190°C). This temperature is perfect for gently baking the Shirred Eggs, ensuring that the whites set while the yolks remain delightfully runny. Allow a few minutes for the oven to reach this temperature, which will help achieve the desired texture and blend of flavors.
Step 2: Prepare the Ramekin
While the oven heats, take a 6-ounce ramekin and generously grease it with unsalted butter. Spread the butter evenly across the bottom and sides to prevent sticking and to add richness to your Shirred Eggs. A well-greased ramekin will ensure a smooth release of the eggs once baked and add a lovely flavor.
Step 3: Add the Heavy Cream
Pour a thin layer of heavy cream into the greased ramekin, just enough to coat the bottom. This creaminess is key to achieving the delightful texture that makes Shirred Eggs so appealing. Its richness will harmonize beautifully with the eggs, creating that delightful contrast when you take your first bite.
Step 4: Crack the Eggs
Carefully crack your large eggs on top of the cream, ensuring not to break the yolks. Aim for one egg per ramekin, as this recipe focuses on creating that luscious, runny yolk that enhances the overall enjoyment of the Shirred Eggs. The visual of the gleaming yolks sitting atop the cream is already a delight!
Step 5: Season Generously
Sprinkle a pinch of salt and freshly ground black pepper over the eggs to enhance the flavors of your Shirred Eggs. Adjust the seasonings according to your preference, as a little extra seasoning can elevate this dish significantly. The simplicity of the flavors allows the egg and cream combination to shine through.
Step 6: Add Garnishes
Next, sprinkle the freshly chopped chives and grated Parmesan cheese generously over the top of the eggs. This step not only adds a burst of flavor but also provides a beautiful pop of color. The chives will lend an oniony freshness while the Parmesan brings a savory richness that complements the dish perfectly.
Step 7: Bake to Perfection
Carefully place the ramekin on a baking sheet to catch any drips, then transfer it to your preheated oven. Bake for 12-15 minutes, keeping an eye on the eggs as you want the whites to be set but the yolks to remain delectably runny. You’ll know they are ready when the edges are firm but the center still jiggles slightly.
Step 8: Rest Before Serving
Once your Shirred Eggs are out of the oven, let them rest for a couple of minutes. This will allow the steam to settle and the dish to cool slightly, ensuring a safer and more enjoyable eating experience. The resting time heightens the anticipation for that first incredible bite!
Step 9: Serve and Indulge
Serve your elegant Shirred Eggs warm, taking care to enjoy them straight from the ramekin. Pair them with your favorite toasted bread for dipping into that rich, runny yolk. This dish is beautifully presented and ready to impress your guests, perfect for any brunch occasion!
How to Store and Freeze Shirred Eggs
Serve Immediately: Shirred eggs are best enjoyed fresh from the oven. The texture is unparalleled when served right away, ensuring that heavenly runny yolk experience.
Refrigeration: If you have leftovers, you can store them in the fridge for up to 2 days in an airtight container. However, the texture may change, so it’s best to consume them promptly.
Freezing Not Recommended: Freezing Shirred Eggs is not advised. The delicate nature of the eggs will result in a change of texture and creaminess once thawed, making it less enjoyable.
Reheat Gently: If storing, reheat the eggs in a preheated oven at 350°F (175°C) for about 10 minutes, covered with foil to prevent drying out, keeping in mind that the yolks may not remain runny.
Make Ahead Options
These Shirred Eggs are perfect for meal prep enthusiasts looking to save time on busy mornings! You can prepare the ramekins by greasing them and adding the heavy cream and seasonings up to 24 hours in advance, storing them in the refrigerator. For optimal results, keep the eggs separate and crack them in just before baking to maintain their freshness and texture. When you’re ready to enjoy, simply crack the eggs on top, sprinkle the chives and Parmesan, and bake as directed. This way, you’ll have delicious, gourmet Shirred Eggs with minimal effort, making your brunch experience just as delightful!
What to Serve with Elegant Shirred Eggs with Parmesan and Chives
Imagine a vibrant brunch table full of delightful flavors that perfectly complement your elegant dish, inviting everyone to gather and indulge.
- Air-Fryer Toast: The crunch of warm, toasted bread is perfect for dipping into the luscious yolk. Each bite will leave you wanting more!
- Air-Fryer Breakfast Potatoes: These crispy, golden potatoes provide a hearty texture that balances the creaminess of the Shirred Eggs and keeps your brunch filling and satisfying.
- Fresh Green Salad: A simple salad with mixed greens and a light vinaigrette adds refreshing brightness and a pop of color, enhancing the overall meal experience.
- Sautéed Spinach: Tender spinach, lightly seasoned with garlic, offers an earthy element that pairs beautifully with the rich eggs, making each bite even more magical.
- Savory Muffins: Try serving warm savory muffins with herbs and cheese, as their warm, fluffy texture is a delightful contrast to the silky eggs.
- Mimosas: A classic brunch drink, this bubbly cocktail of champagne and orange juice brightens the meal while its effervescence keeps the atmosphere festive and light.
- Fruit Compote: Sweet and tangy fruit compote provides a refreshing contrast to the savory flavors of the Shirred Eggs and completes your brunch with a sweet note.
- Greek Yogurt Parfait: Layered with fresh berries and granola, this light dessert rounds off your meal with a creamy, crunchy finish that invites you to relish each flavor.
- Herbed Cream Cheese Spread: A delightful addition to your toast, it brings an herby, tangy element that harmonizes perfectly with the richness of the Shirred Eggs.
Expert Tips for Shirred Eggs
-
Fresh Ingredients: Always use high-quality, farm-fresh eggs for the best flavor and nutrition in your Shirred Eggs.
-
Avoid Overbaking: Keep an eye on your eggs in the oven. The perfect Shirred Eggs should have set whites and runny yolks, so set your timer and check early!
-
Ramekin Matters: Choose a 6-ounce ramekin for even cooking; if using different sizes, adjust the baking time to ensure all eggs are cooked perfectly.
-
Season Thoughtfully: Don’t hesitate to adjust your salt and pepper to personal taste, allowing the rich flavors to shine through without overpowering the dish.
-
Experiment with Add-ins: Feel free to mix in vegetables like spinach or herbs to customize your Shirred Eggs and add a nutritious twist!
-
Serve Immediately: For the best experience, serve the Shirred Eggs right out of the oven. The textures and flavors are at their peak when fresh!
Shirred Eggs: A Twist of Delight
Get ready to unleash your creativity in the kitchen with these delicious Shirred Eggs that invite your personal touch!
-
Dairy-Free: Swap the unsalted butter with vegan butter and replace heavy cream with high-fat oat milk or Coconut Vegan Cashew Cream Sauce for a plant-based delight. Be amazed at how creamy they can still be!
-
Veggie Boost: Stir in fresh spinach, diced tomatoes, or bell peppers before adding the eggs to enhance nutrition and flavor. A touch of color and nutrition brings these eggs to life!
-
Cheese Experiment: Try substituting Parmesan with feta or goat cheese for a tangy twist that will take your Shirred Eggs to a whole new level. Each cheese brings a unique flair to the dish.
-
Herb Infusion: Infuse the dish with Herbs de Provence or thyme in place of chives for an aromatic experience that enhances the overall flavor profile. The fragrant herbs will provide a warm welcome to your brunch table.
-
Heat it Up: For those who love a bit of spice, sprinkle in some red pepper flakes or a dash of hot sauce before baking to ignite the flavor fireworks! Just a pinch will add that perfect zing.
-
Add Crunch: Top your Shirred Eggs with crispy bacon pieces or sautéed mushrooms for a delightful texture contrast. The savory crunch adds a wonderful dimension to each bite.
-
Savory Fun with Sausage: Incorporate cooked sausage or smoked salmon beneath the eggs for a hearty brunch that feels extra special. These meaty additions serve as a perfect complement to the rich eggs.
-
Egg White Omelet Twist: For a lighter take, maximize your egg whites and minimize the yolks for a protein-packed, low-calorie dish. Just remember to watch your baking time closely as the cooking will differ slightly!
Feel inspired? Whether you’re excited about a sumptuous brunch with friends or a cozy morning bite with family, the world of Shirred Eggs adapts beautifully to your taste! And for an excellent accompanying dish, consider pairing these eggs with some Air-Fryer Breakfast Potatoes for a complete brunch experience!
Shirred Eggs Recipe FAQs
What type of eggs should I use for Shirred Eggs?
Absolutely! For the best results, choose fresh, high-quality large eggs from a local farm or organic source. Farm-fresh eggs tend to have a richer flavor and better texture, which enhances the final dish.
How do I store leftover Shirred Eggs?
If you happen to have any leftovers, store them in an airtight container in the fridge for up to 2 days. However, keep in mind that the texture may not be as delightful as when fresh, so it’s best to consume them promptly.
Can I freeze Shirred Eggs?
Very! It’s actually not recommended to freeze Shirred Eggs. The delicate structure and creaminess of the eggs will change when thawed, leading to an unappetizing texture. It’s best to enjoy them fresh for the best experience!
What’s the best way to reheat Shirred Eggs?
To reheat Shirred Eggs, preheat your oven to 350°F (175°C) and place the eggs in the oven for about 10 minutes, covered with foil to prevent them from drying out. Just keep in mind that the yolks might not remain runny after reheating, so enjoy them fresh when possible!
Can I make Shirred Eggs dairy-free?
Absolutely! To create a dairy-free version of Shirred Eggs, substitute the unsalted butter with a vegan alternative and replace heavy cream with high-fat oat milk or a Coconut Vegan Cashew Cream Sauce. You can keep the flavor rich and delightful without dairy!
What if my Shirred Eggs are overcooked?
If your Shirred Eggs turn out overcooked, don’t despair! This can happen if they’re left in the oven too long. To prevent this, keep an eye on the cooking time and set a timer for 12 minutes, checking for perfectly set whites and runny yolks. Remember, the key is gentle baking!
Delicious Shirred Eggs: A Simple Twist for Brunch Bliss
Ingredients
Equipment
Method
- Preheat your oven to 375°F (190°C).
- Grease a 6-ounce ramekin with unsalted butter.
- Pour a thin layer of heavy cream into the greased ramekin.
- Carefully crack your large eggs on top of the cream.
- Sprinkle a pinch of salt and black pepper over the eggs.
- Sprinkle chopped chives and grated Parmesan cheese over the eggs.
- Place the ramekin on a baking sheet and bake for 12-15 minutes.
- Let the Shirred Eggs rest for a couple of minutes before serving.
- Serve warm with your favorite toasted bread.
Leave a Reply