
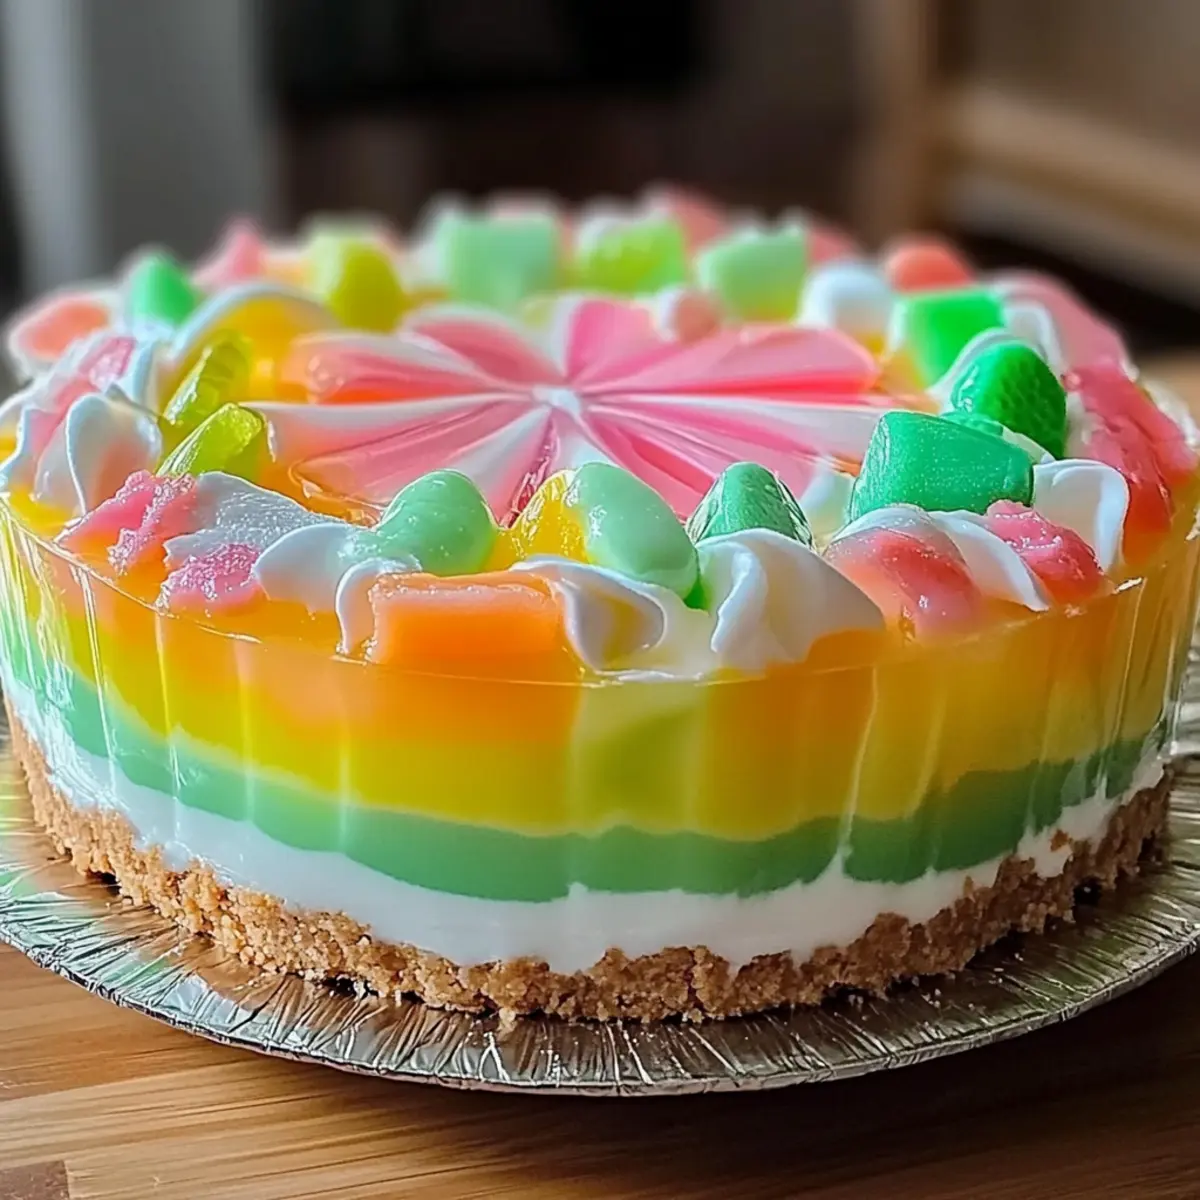
As I strolled through the aisles filled with pastel-colored treats, I was reminded of the simple joys that Easter brings. This Easy Easter No-Bake Jello Pie is my go-to recipe for capturing that festive spirit, blending creamy layers with fruity Jello that makes it a hit at any gathering. Not only is it incredibly easy to whip up, but it’s also a make-ahead dessert that lets you kick back and enjoy the holiday without any last-minute baking stress. Plus, with colorful variations and family-friendly flavors, it’s sure to make everyone smile. Curious about how to create this delightful centerpiece for your Easter table? Let’s dive into the details!
Why is No-Bake Jello Pie a Must-Try?
Simplicity at Its Best: This Easy Easter No-Bake Jello Pie requires minimal effort, making it perfect for busy hosts.
Endless Flavor Options: With various Jello flavors, you can customize it for every palate—consider adapting it for special diets like sugar-free, just like our Bake Chocolate Peanut option.
Family-Friendly Fun: Its playful texture and vibrant colors are sure to delight both kids and adults, making it an instant favorite at gatherings.
Make-Ahead Magic: Prepare it in advance without any fuss, allowing you to fully enjoy the holiday festivities without last-minute stress.
Festive Presentation: The final colorful layers create a stunning visual that is sure to impress your guests, much like our beloved Salmon Sushi Bake.
Easter No Bake Jello Pie Ingredients
For the Crust
• Graham Cracker Crust – Provides a crunchy base for the pie; try substituting with Oreo or nut-based crust for a different flavor twist.
For the Cream Cheese Layer
• Cream Cheese – Adds rich creaminess to the filling; use dairy-free cream cheese for a vegan-friendly version.
• Granulated Sugar – Sweetens the cream cheese layer; adjust or use a sugar substitute for a lighter touch.
• Vanilla Extract – Enhances flavor; can be omitted for a simpler taste.
For the Jello Layers
• Boiling Water – Activates the Jello for proper setting; ensure it’s fully dissolved for the best results.
• Cold Water – Helps cool down the Jello mixture before setting.
• Jello (Various Flavors and Colors) – Brings vibrant color and fruity flavor to the pie; use sugar-free Jello for a lighter option.
For Topping
• Whipped Topping – Adds a light, fluffy texture; consider using dairy-free whipped topping for a vegan twist.
• Optional Easter Candies or Sprinkles – Adds festive decoration and extra fun to your pie presentation.
Step‑by‑Step Instructions for Easter No Bake Jello Pie
Step 1: Prepare the Cream Cheese Layer
In a mixing bowl, combine softened cream cheese, granulated sugar, and a splash of vanilla extract. Use an electric mixer on medium speed for about 2-3 minutes until the mixture is smooth and creamy, with no lumps. Set this luscious cream cheese layer aside while you prepare the Jello, ensuring your pie will have a rich and delightful filling.
Step 2: Prepare the First Jello Layer
Boil 1 cup of water in a saucepan and remove it from heat. Dissolve one packet of Jello in the boiling water, stirring for about 2 minutes until completely mixed. Then, add 1 cup of cold water to the mixture. Allow this colorful Jello to cool for about 15 minutes, just until it begins to set slightly but is still pourable—this ensures a beautiful texture when layered.
Step 3: Pour the First Jello Layer
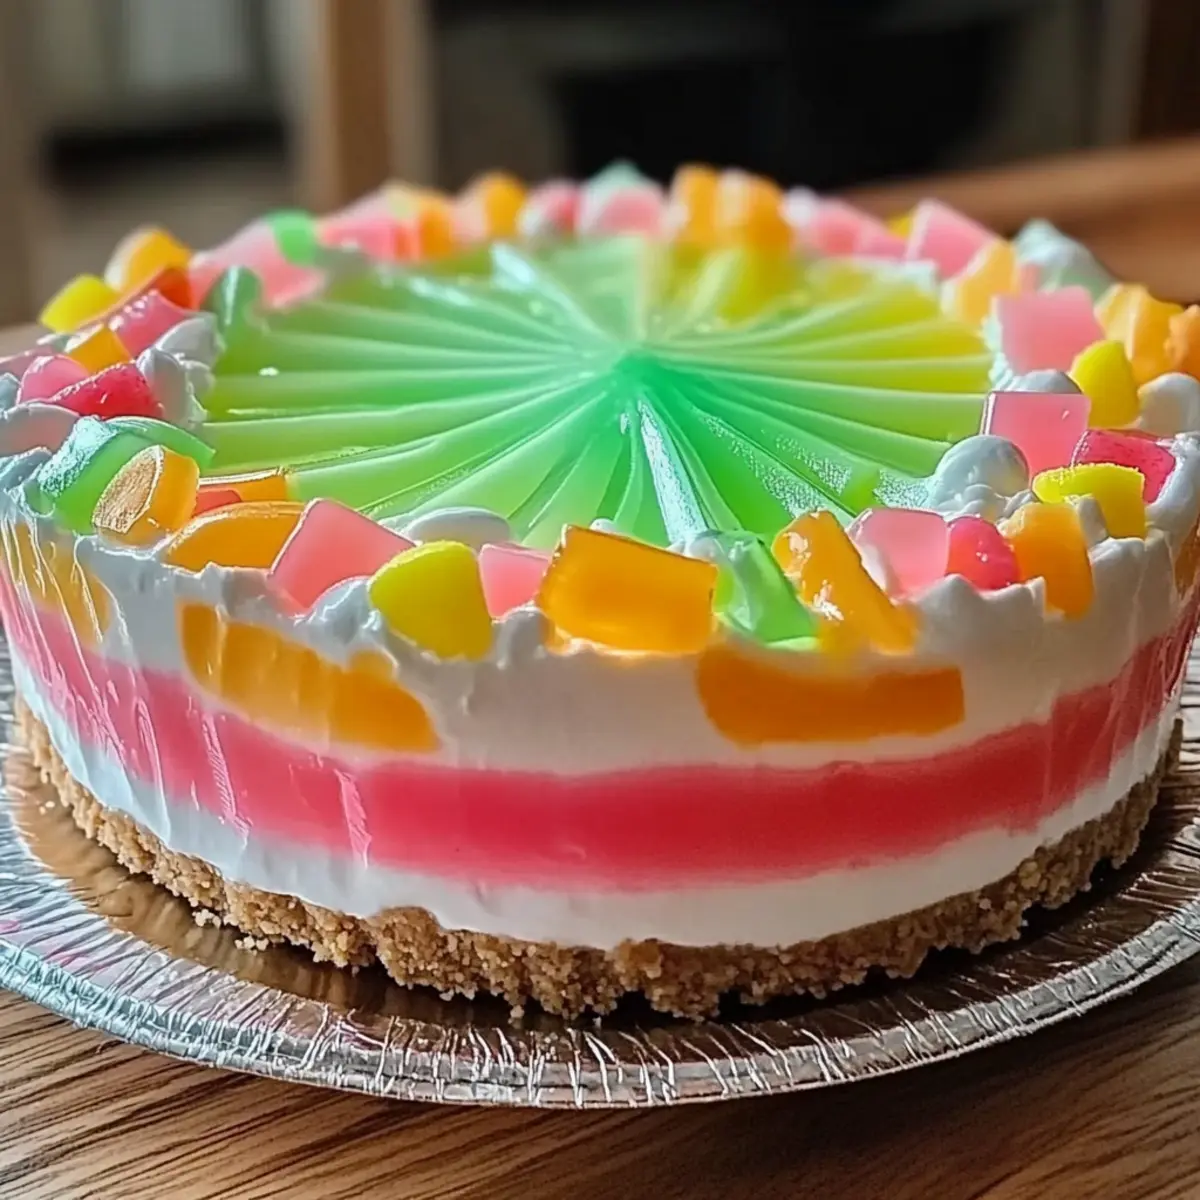
Carefully pour the partially set Jello over the prepared graham cracker crust in a pie dish, ensuring an even layer. This first Jello layer adds a vibrant color and fruity flavor to your Easter No Bake Jello Pie. Place the pie in the refrigerator for approximately 1 hour, or until this layer is fully firm—look for a solid jiggle when it’s ready.
Step 4: Spread the Cream Cheese Layer
Once the first Jello layer is set, gently spread the cream cheese mixture evenly over it. Use a spatula to ensure the cream cheese layer is smooth and reaches the edges of the pie dish. This creamy layer will contrast beautifully with the Jello. Return the pie to the fridge and let it chill for about 30 minutes to firm up before adding the second layer of Jello.
Step 5: Prepare the Second Jello Layer
While the cream cheese layer sets, repeat the same process as before: boil 1 cup of water and dissolve another packet of Jello in it. After stirring for 2 minutes, add 1 cup of cold water, mixing well. Cool this mixture for about 15 minutes until it begins to thicken, ensuring it won’t disturb the cream cheese layer when poured.
Step 6: Pour the Second Jello Layer
Once the cream cheese layer is firm, pour the new Jello mixture over it gently, covering the cream cheese completely. This creates a stunning visual effect with layers of color. Place the pie back in the refrigerator for a final setting; allow it to chill for at least 2 hours, or until the second layer is solid. This waiting period is essential for the Easter No Bake Jello Pie to achieve the perfect texture.
Step 7: Decorate and Serve
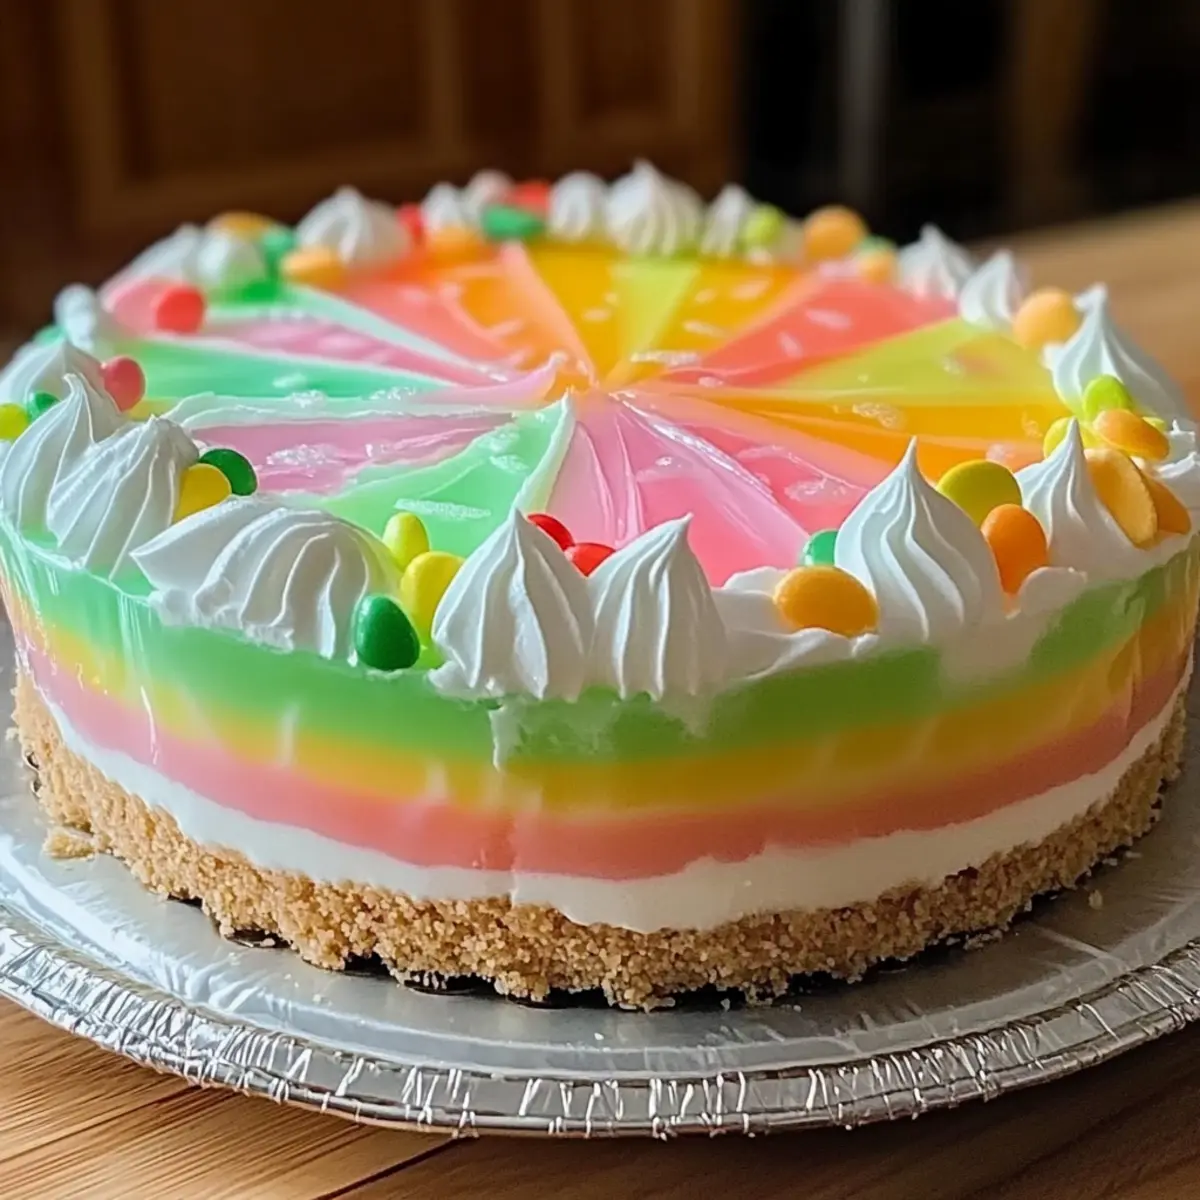
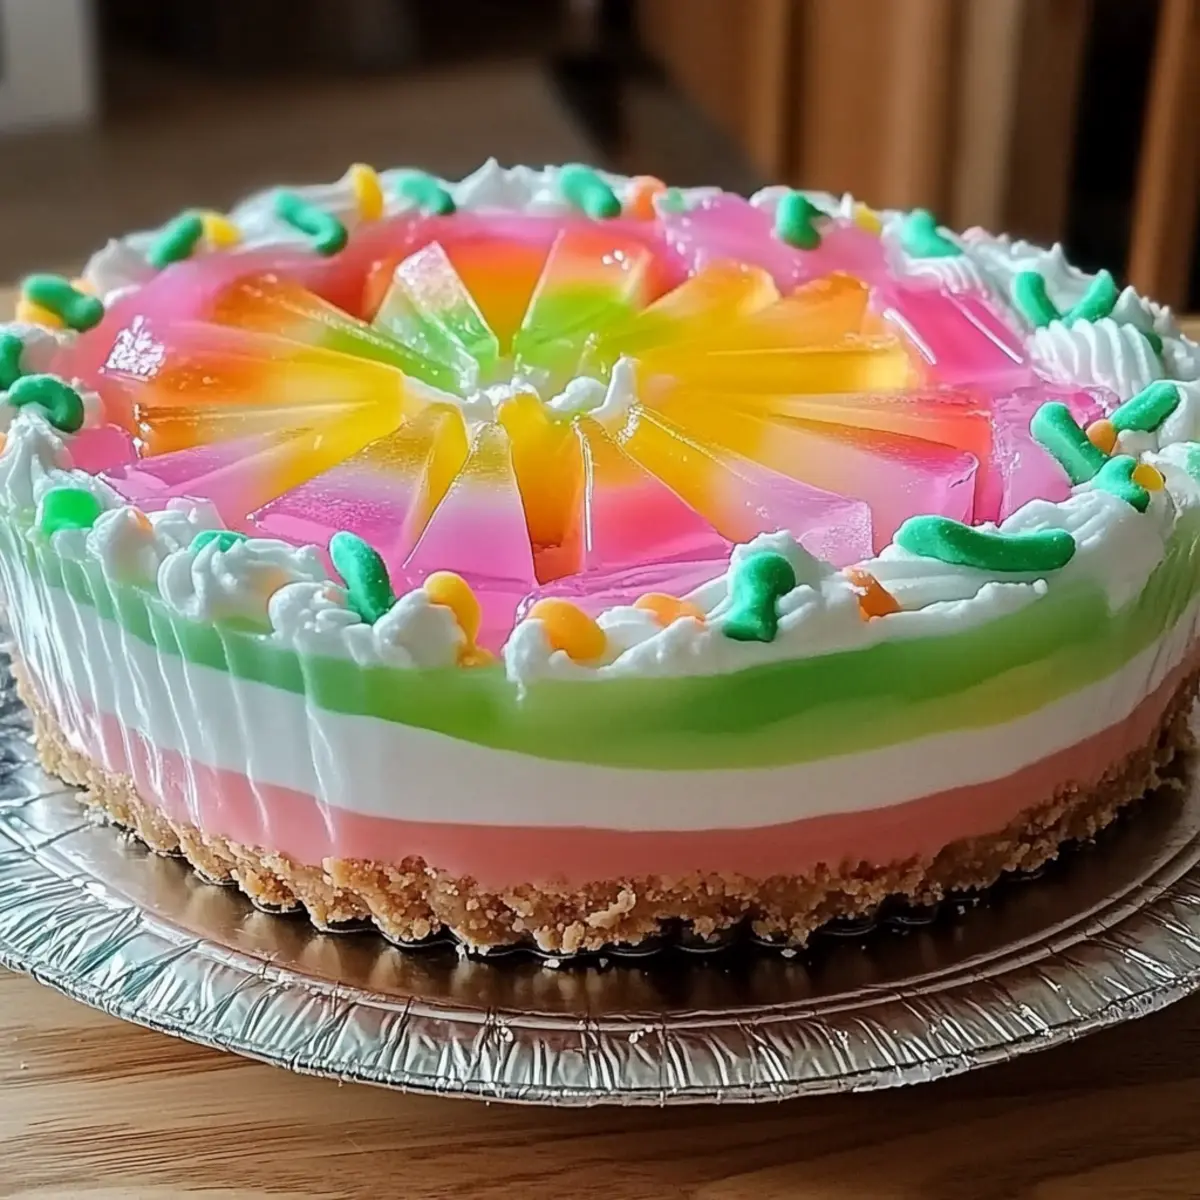
When the pie layers are fully set, take it out of the fridge and top with whipped topping, spreading it generously over the surface. For a festive touch, sprinkle colorful Easter candies or sprinkles on top. Slice your delightful Easter No Bake Jello Pie and serve chilled to enjoy, bringing a vibrant and delicious centerpiece to your holiday table!
Make Ahead Options
These Easy Easter No-Bake Jello Pies are perfect for meal prep, allowing you to enjoy the festivities without the last-minute rush! You can prepare the cream cheese layer up to 24 hours in advance; just store it in an airtight container in the refrigerator to maintain its creamy texture. The Jello layers can also be made ahead; prepare and let them chill in the fridge up to 3 days before assembling the pie. To finish, simply layer the prepped components in your graham cracker crust, let it set again for about 1 hour before serving, and you’ll end up with a delightful pie that’s just as delicious!
Easter No Bake Jello Pie Variations
Feel free to get creative with this Easter No Bake Jello Pie and make it your own with delightful twists!
-
Dairy-Free: Swap regular cream cheese for dairy-free cream cheese and use dairy-free whipped topping for a vegan-friendly version.
Your guests won’t even notice the difference, and you’ll cater to all dietary preferences! -
Sugar-Free: Use sugar-free Jello and a sugar substitute in the cream cheese layer for a lighter option.
This way, you can enjoy the same festive flavors without the added sugar while still delighting your loved ones. -
Different Crusts: Try an Oreo crust or a nut-based crust for a delicious twist on the traditional graham cracker base.
Each option offers unique flavors that can elevate your pie to new heights. -
Fruit Additions: Fold in fresh fruits into the cream cheese layer, like strawberries or blueberries, for added texture and fruity goodness.
The bright colors and bursts of flavor will make your pie even more inviting and festive. -
Layered Colors: Use a variety of Jello flavors and colors in each layer for a vibrant, rainbow-like effect.
This will definitely impress your guests and create a fun visual display on your holiday table, much like our Wholesome Baked Oatmeal for breakfast gatherings! -
Chocolate Drizzle: Drizzle melted chocolate over the top before serving for an indulgent touch that pairs beautifully with the fruity layers.
This richer flavor contrast can take your pie experience to the next level! -
Nut Crunch: Add crushed nuts or granola on top for an extra crunch factor that complements the silky layers.
This will introduce a satisfying texture contrast, making each bite a delightful surprise. -
Spicy Kick: Incorporate a pinch of cinnamon or a dash of cayenne pepper in the cream cheese mixture for a surprising twist.
The warmth from the spices can create a unique and memorable flavor profile that’s truly unexpected for a dessert.
How to Store and Freeze Easter No Bake Jello Pie
Fridge: Keep your Easter No Bake Jello Pie in an airtight container in the refrigerator for up to 3-4 days. Enjoy it within the first 2-3 days for the best texture and flavor.
Freezer: It’s not recommended to freeze this pie as it can alter the creamy texture of the layers, causing them to become grainy.
Covering: If you don’t have an airtight container, cover the pie tightly with plastic wrap to prevent it from absorbing other flavors in the fridge.
Reheating: There’s no need to reheat this pie; simply slice and serve it chilled for a refreshing treat.
Expert Tips for Easter No Bake Jello Pie
-
Dissolve Gently: Ensure Jello is fully dissolved in boiling water before cooling; undissolved granules can cause texture issues.
-
Layering Patience: Allow each layer to set properly before adding the next; this keeps layers distinct and visually appealing in your Easter No Bake Jello Pie.
-
Avoiding Ice Crystals: Never freeze the pie as it alters the creamy texture; chill it in the refrigerator instead.
-
Creative Variations: Don’t hesitate to use different Jello flavors for a colorful look; mix and match to suit your family’s tastes.
-
Base Flexibility: Experiment with crust options; a nut crust or Oreo crust adds unique flavor and texture, accommodating various dietary preferences.
What to Serve with Easter No-Bake Jello Pie?
Elevate your festive feast with delightful accompaniments that perfectly complement this bright and fruity dessert.
-
Creamy Vanilla Ice Cream:
A scoop of creamy vanilla ice cream adds a rich, smooth contrast to the light, fruity texture of the pie. This classic pairing brings indulgence to every bite. -
Fresh Fruit Salad:
A mix of seasonal fruits like strawberries, blueberries, and kiwi enhances the freshness of the Jello pie, providing a burst of natural sweetness that marries beautifully with its flavors. -
Chocolate Drizzle:
A drizzle of warm chocolate sauce creates a decadent touch that pairs perfectly with the creamy layers of the pie, offering a delightful twist that chocolate lovers will crave. -
Coconut Whipped Topping:
Swap traditional whipped topping for coconut whipped cream to give a tropical flair to the pie. Its light and airy texture complements the creaminess wonderfully. -
Sparkling Lemonade:
Serve with a glass of sparkling lemonade for a refreshing drink that cuts through the sweetness, balancing the dessert’s rich flavors while keeping a festive vibe. -
Mini Easter Egg Chocolates:
These colorful treats not only make a playful garnish but also provide that extra bit of sweetness that holiday gatherings crave, delighting kids and adults alike. -
Cheesecake Bites:
Light and fluffy cheesecake bites are an indulgent companion to the Jello pie that adds an additional layer of flavor and makes for a rich dessert experience. -
Pistachio Muffins:
A warm pistachio muffin on the side adds a unique nutty flavor that beautifully contrasts with the fruity Jello pie. Their subtle sweetness enhances the overall dessert spread. -
Mint Tea:
Serve with a warm cup of mint tea for a refreshing taste that refreshes the palate, perfect for enjoying after a heavy meal. The invigorating flavor also complements the lightness of the pie.
Easter No Bake Jello Pie Recipe FAQs
What type of Jello is best for this recipe?
You can use any flavor of Jello that you like! For a classic look, I often opt for strawberry or lemon. If you’re looking for a lower sugar option, definitely try sugar-free Jello versions; just check the package for the same instructions, and they work perfectly!
How can I store the Easter No Bake Jello Pie?
After preparing your pie, store it in an airtight container in the refrigerator. It will keep well for up to 3-4 days. For the best texture and fresh flavor, I recommend enjoying it within the first 2-3 days. If using another container, ensure it’s covered with plastic wrap to avoid absorbing any fridge odors.
Can I freeze the Easter No Bake Jello Pie?
I wouldn’t recommend freezing this pie as it can affect the creamy texture of the layers, making them grainy when thawed. Enjoy it fresh! If you really need to keep it longer, consider freezing the filling components separately and assembling them fresh when ready to serve.
What should I do if my Jello doesn’t set properly?
If your Jello layers are not setting, it may be due to the water-to-Jello ratio. Make sure you’re using the correct amounts: usually 1 cup of boiling water and 1 cup of cold water per packet. To fix a layer that hasn’t set, you can put it back in the fridge for additional time. Sometimes, just letting it chill longer (up to an extra hour) can do the trick.
Are there any dietary considerations for this recipe?
Absolutely! This Easy Easter No Bake Jello Pie can easily be adapted for various dietary needs: use dairy-free cream cheese and whipped topping to make it vegan, or substitute granulated sugar with your favorite sugar alternative for a lower-carb version. It’s a versatile treat that can cater to many preferences!
Can I make this pie the day before serving?
Yes, it’s perfect for make-ahead preparation! You can assemble your Easter No Bake Jello Pie up to a day in advance. Just keep it covered in the fridge, and it will be ready to delight your guests when they arrive. This way, you can focus on enjoying the festivities!
Easter No Bake Jello Pie That Stuns and Delights Everyone
Ingredients
Equipment
Method
- Prepare the Cream Cheese Layer: In a mixing bowl, combine softened cream cheese, granulated sugar, and vanilla extract. Mix until smooth, about 2-3 minutes. Set aside.
- Prepare the First Jello Layer: Boil 1 cup of water, remove from heat, and dissolve one packet of Jello. Stir for 2 minutes, then add 1 cup of cold water. Cool for 15 minutes.
- Pour the First Jello Layer: Carefully pour the cooled Jello over the prepared crust. Refrigerate for about 1 hour or until firm.
- Spread the Cream Cheese Layer: Once the first Jello layer is set, spread the cream cheese mixture evenly over it.
- Prepare the Second Jello Layer: Repeat the process for the second layer: boil water, dissolve Jello, add cold water, and cool for 15 minutes.
- Pour the Second Jello Layer: Pour the new Jello mixture over the cream cheese layer and refrigerate for at least 2 hours until solid.
- Decorate and Serve: Once fully set, top with whipped topping and sprinkle with Easter candies. Slice and serve chilled.
Leave a Reply