
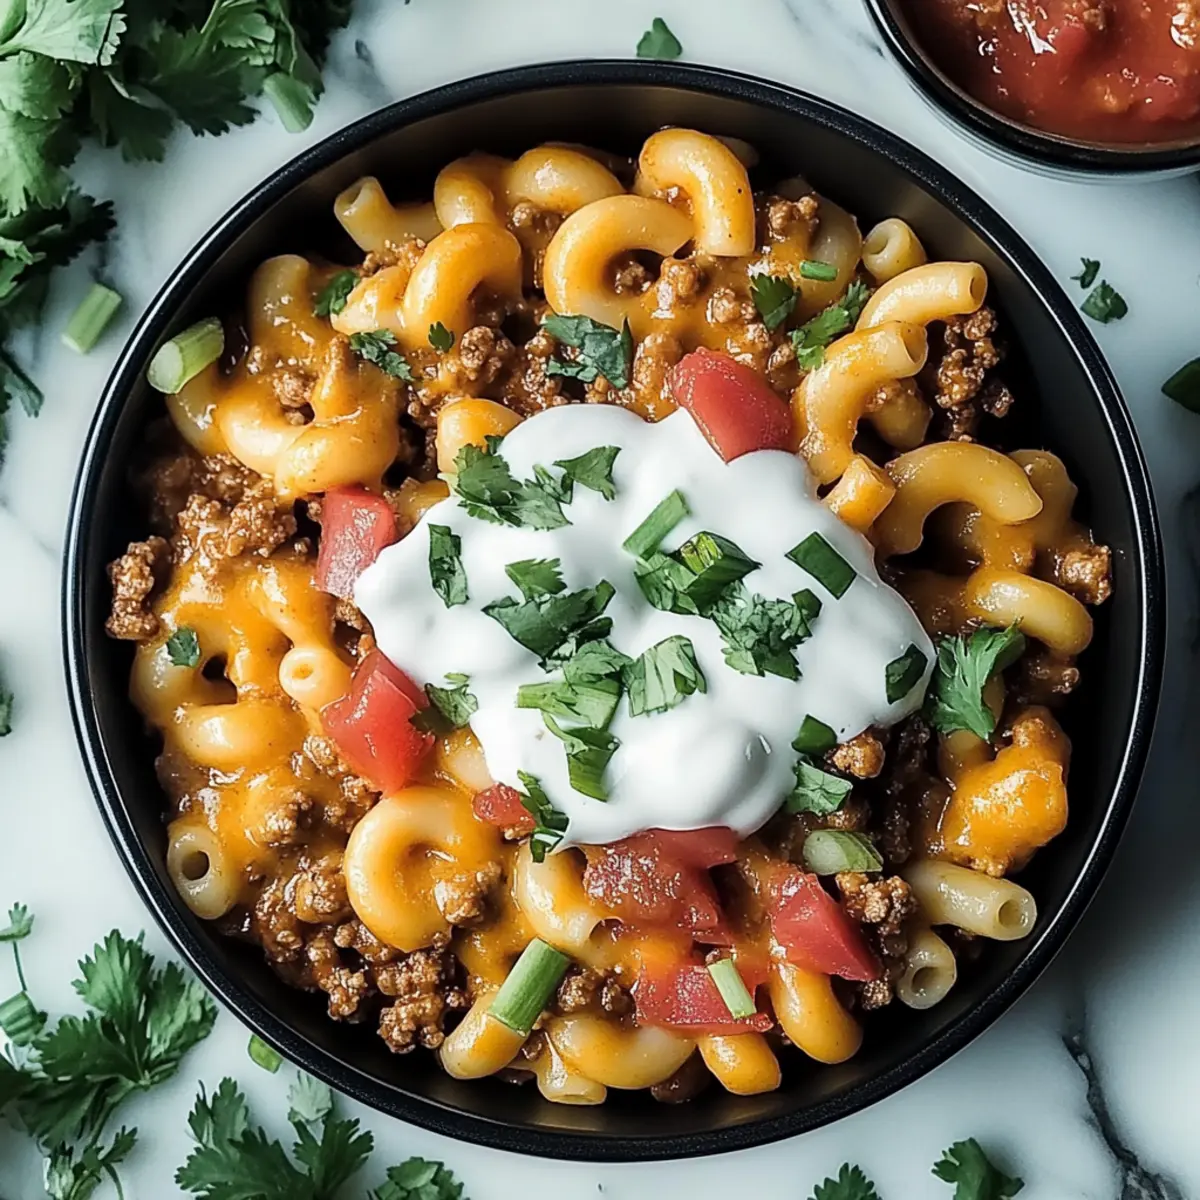
As I stirred the bubbling pot, the aroma of savory taco spices mixed with melted cheese filled my kitchen, instantly transporting me to my favorite taco joint. This Taco Mac recipe brings together two beloved comfort foods—macaroni and cheese with zesty taco flavors—to create a dish that’s not just quick to prepare but bursting with personality. Whether you’re looking for an effortless weeknight dinner or a fun twist on a classic, this beginner-friendly recipe is sure to warm your heart and satisfy your cravings. Ready to dive into a bowl of creamy, cheesy goodness that will make you forget takeout forever? Let’s get cooking!

Why is Taco Mac a Must-Try?
Comforting Fusion: Taco Mac combines your favorite macaroni and cheese with bold taco flavors, offering a delightful twist on two classic dishes.
Beginner-Friendly: This recipe is perfect for novice cooks; minimal skills are needed to whip up this delicious meal in no time.
Flavor Explosion: With a rich mix of spices and creamy cheese, every bite bursts with vibrant flavors.
Versatile Delight: Customize with your choice of proteins or veggies, making it suitable for everyone at the table.
Effortless Meal Prep: It comes together quickly, ideal for busy weeknights when you crave something satisfying without a lot of fuss.
Crowd-Pleasing: Serve it at your next gathering, and watch it vanish—everyone loves a hearty, comforting dish like Taco Mac! Consider pairing it with Air Fryer Tacos for a complete taco night!
Taco Mac Ingredients
For the Beef Mixture
• Ground Beef – Provides protein and savory flavor. Substitute with ground turkey or a plant-based protein for a healthier version.
• Taco Seasoning – Enhances the dish with spicy, bold taco flavors. Use homemade taco seasoning to control the spice level.
For the Pasta
• Elbow Macaroni – Forms the base of the dish. Any small pasta, such as penne or rotini, can be substituted.
For the Cheesy Sauce
• Shredded Cheddar Cheese – Adds creaminess and a sharp flavor. Swap with Monterey Jack or Pepper Jack for a spicier kick.
• Shredded Mozzarella Cheese – Contributes a gooey texture. Can also use a Mexican cheese blend for a different taste.
• Milk – Helps create a creamy consistency. Almond milk or another dairy-free milk can be used for a non-dairy version.
• Sour Cream – Provides creaminess and tang. Greek yogurt or cream cheese can be good substitutes for a similar texture.
For Additional Flavor
• Diced Tomatoes (canned) – Adds moisture and sweetness. Fresh tomatoes may be used if in season, or substitute with tomato sauce for a smoother texture.
• Chopped Green Onions – Adds freshness and crunch. Can replace with chives for a milder flavor.
• Olive Oil – Used for sautéing. Any neutral oil can be substituted.
With these ingredients, you’re just a few steps away from a cheesy, taco-inspired delight that’ll have you saying goodbye to fast food for good!
Step‑by‑Step Instructions for Taco Mac
Step 1: Cook the Ground Beef
Heat a large skillet over medium-high heat. Add the ground beef, breaking it apart with a spatula as it cooks. Sauté until browned and no longer pink, about 6–8 minutes. Ensure the beef is crumbled well and starts to caramelize slightly for added flavor, then carefully drain any excess fat before proceeding to the next step.
Step 2: Season the Beef
Return the skillet to medium heat and add taco seasoning along with ½ cup of water to the browned beef. Stir the mixture until well combined. Allow it to simmer for about 5 minutes, letting the flavors meld together and the sauce thicken slightly. You’ll know it’s ready when the beef is coated in a rich, aromatic sauce.
Step 3: Cook the Elbow Macaroni
While the beef simmers, bring a large pot of salted water to a boil. Add elbow macaroni and cook according to the package instructions until al dente, usually around 7-8 minutes. Stir occasionally to prevent sticking. Once done, drain the pasta in a colander, and reserve the pot for later use.
Step 4: Sauté the Tomatoes
In the same pot used for the pasta, heat 1 tablespoon of olive oil over medium heat. Add the diced tomatoes and cook for 2–3 minutes, stirring occasionally, until they soften and release their juices. You want them to become slightly pulpy; this will help enhance the overall texture of the Taco Mac.
Step 5: Combine Ingredients
Add the drained elbow macaroni and the beef mixture to the pot with sautéed tomatoes. Gently stir everything together to ensure the pasta is coated with the taco beef and tomato mixture. This blend will start creating the foundation for the creamy sauce you’re about to add, so mix thoroughly.
Step 6: Make it Creamy
Lower the heat to medium and pour in 1 cup of milk, followed by the shredded cheddar and mozzarella cheeses, along with the sour cream. Stir continuously until the cheeses melt and the mixture becomes creamy and well-combined, which will take about 3–5 minutes. You’ll know it’s ready when it’s bubbling and beautifully gooey.
Step 7: Garnish and Serve
Finally, remove the pot from heat and sprinkle chopped green onions on top for a fresh crunch. This adds a lovely pop of flavor and color to your Taco Mac. Serve hot in bowls, and watch it disappear as everyone digs into this cheesy, comforting dish filled with taco-inspired goodness.
Taco Mac Variations & Substitutions
Customize your Taco Mac experience with these delicious ideas that will elevate your dish even further!
-
Dairy-Free: Swap heavy cream and cheese with a plant-based cheese and coconut milk for a creamy, non-dairy version.
-
Spicy Kick: Add diced jalapeños or a splash of hot sauce while mixing in the taco seasoning for an extra fiery flavor boost.
-
Veggie Boost: Mix in black beans or corn to make for a heartier dish. They’ll add wonderful texture and a pop of sweetness!
-
Unique Pasta Shapes: Use shells or fusilli instead of elbow macaroni. The twisty shapes hold onto every cheesy bite perfectly.
-
Herb Infusion: Stir in fresh cilantro or parsley for an inviting herbaceous flavor that brightens up the dish beautifully.
-
Swap Meats: Trade out the ground beef for shredded chicken or crumbled turkey for a lighter take that still packs a punch.
-
Creamier Upgrade: Use cream cheese alongside your shredded cheeses for an even richer, velvety texture that’ll leave you wanting more!
-
Tomato Variations: If diced tomatoes aren’t your thing, try a spicy salsa or a homemade tomato sauce for a different twist on flavor.
Explore these variations and make your Taco Mac uniquely yours. For more taco-inspired fun, consider serving it alongside Birria Tacos Savory or some crispy Air Fryer Tacos to create the ultimate taco night experience! Enjoy your culinary adventure!
How to Store and Freeze Taco Mac
Fridge: Store leftover Taco Mac in an airtight container for up to 3 days to maintain its creamy texture and flavors.
Freezer: For longer storage, freeze Taco Mac in a freezer-safe container for up to 3 months. Thaw in the fridge overnight before reheating.
Reheating: Gently reheat Taco Mac on the stove or in the microwave, adding a splash of milk to restore creaminess and prevent it from drying out.
What to Serve with Taco Mac?
Create the perfect dining experience by pairing your comforting bowl of Taco Mac with these delicious additions that elevate flavors and textures.
-
Crispy Tortilla Chips: Serve alongside tortilla chips for a satisfying crunch that complements the creamy dish perfectly. Dip them into your favorite salsa for a fun twist!
-
Fresh Garden Salad: A light, crisp salad with mixed greens, cherry tomatoes, and a tangy vinaigrette offers a refreshing contrast to the rich, cheesy Taco Mac. It balances out the meal beautifully.
-
Guacamole: The creamy, buttery texture of guacamole pairs wonderfully with the zesty flavors of Taco Mac. It’s a satisfying topping that adds a fresh element to each bite.
-
Mexican Street Corn: This sweet and savory dish brings a burst of flavor and texture to your table. The charred corn, lime, mayo, and cheese blend make for a delightful side that complements the main dish flawlessly.
-
Refreshing Casa Margarita: Unwind with a classic Casa Margarita, perfect for cutting through the richness of Taco Mac. The tangy lime and smooth tequila blend will elevate your dining experience.
-
Sour Cream and Salsa: Offering dollops of tangy sour cream and vibrant salsa allows guests to customize their bowls. The extra layers of flavor enhance the overall enjoyment of this comforting dish.
-
Pineapple Salsa: A fruity salsa with diced pineapple, cilantro, and jalapeños adds a refreshing sweetness and a little kick, nicely balancing the meal while brightening flavors as well.
-
Brownies for Dessert: End your meal with a rich, fudgy brownie. The sweet contrast serves as a delightful finish after the savory Taco Mac, ensuring everyone leaves the table satisfied.
Each pairing brings its own unique twist, transforming your Taco Mac into an unforgettable dining experience that resonates with warmth and flavor!
Expert Tips for Taco Mac
-
Quality Beef: Choose lean ground beef for less grease. This ensures your Taco Mac remains creamy without a greasy residue.
-
Avoid Clumping: Stir the cheese in slowly and consistently to prevent clumping. This creates a smooth and creamy sauce that makes every bite delectable!
-
Customize Spice Levels: Alter the taco seasoning based on your heat preference. For a spicier kick, mix in some diced jalapeños along with your beef.
-
Perfect Pasta: Cook the elbow macaroni until just al dente, as it will continue to cook when mixed with the beef and cheese. This prevents overcooked mushiness.
-
Storing Leftovers: If you’re saving some Taco Mac, add a splash of milk before reheating to revive its creamy texture and prevent it from drying out.
-
Fresh Garnishes: Always top with fresh chopped green onions or herbs right before serving. This adds a burst of flavor and a lovely visual appeal to your dish!
Make Ahead Options
These Taco Mac components are perfect for meal prep enthusiasts! You can cook the ground beef with taco seasoning and refrigerate it for up to 3 days. For optimal flavor, allow it to cool before sealing it in an airtight container to prevent moisture buildup. You can also cook the elbow macaroni up to 24 hours in advance; just toss it with a little olive oil to prevent sticking before refrigerating. When you’re ready to serve, simply reheat the beef and pasta mix in a skillet with a splash of milk to regain creaminess. Then stir in the cheeses and sour cream until melted and enjoy this comforting dish just as delicious as when freshly made!
Taco Mac Recipe FAQs
What type of ground meat should I use for Taco Mac?
Absolutely! Ground beef is the go-to for Taco Mac, offering rich flavor and texture. However, if you’re looking for a lighter option, ground turkey or even a plant-based protein works wonderfully too. The key is to choose something that holds up well in the creamy mixture!
How should I store leftover Taco Mac?
Very! To store Taco Mac, place it in an airtight container and refrigerate for up to 3 days. Ensure it’s cooled to room temperature before sealing to avoid moisture buildup. When ready to enjoy again, simply reheat on the stove or microwave gently—don’t forget to add a splash of milk for that creamy consistency!
Can I freeze Taco Mac?
Absolutely! Taco Mac freezes beautifully. Transfer it to a freezer-safe container, ensuring it’s well-sealed to prevent freezer burn, and it will last for up to 3 months. When you can’t resist that cheesy goodness anymore, thaw it overnight in the fridge and reheat it on the stove with a bit of milk to keep it luscious.
What if my cheese clumps together while making Taco Mac?
Oh no! If this happens, don’t worry! Stir the cheese in slowly and at a lower temperature to avoid clumping. Ensure that your pot isn’t too hot when adding cheese and continue stirring until the mixture is smooth and creamy. If clumping is present, you can add a little more milk to help break it down.
Can I make Taco Mac vegetarian-friendly?
Absolutely! For a delicious vegetarian version, swap out the ground beef for black beans or lentils and use vegetable broth instead of water when simmering the taco seasoning. This way, you can still enjoy that bold taco flavor without the meat, making it a delightful option for everyone!
What kind of pasta can I use instead of elbow macaroni?
Very good question! While elbow macaroni is traditional, you can absolutely use any small pasta like penne or fusilli. Even shells make an inviting change! Just be sure to follow the cooking instructions on the package for the best texture, aiming for al dente before combining with the other ingredients.
Taco Mac: Your Ultimate Comfort Food for Cozy Nights
Ingredients
Equipment
Method
- Heat a large skillet over medium-high heat. Add the ground beef, breaking it apart with a spatula as it cooks. Sauté until browned and no longer pink, about 6–8 minutes.
- Return the skillet to medium heat and add taco seasoning along with ½ cup of water to the browned beef. Stir until well combined and let simmer for about 5 minutes.
- While the beef simmers, bring a large pot of salted water to a boil. Add elbow macaroni and cook according to package instructions until al dente, usually around 7-8 minutes.
- In the same pot, heat 1 tablespoon of olive oil over medium heat. Add the diced tomatoes and cook for 2–3 minutes, stirring occasionally.
- Add the drained elbow macaroni and beef mixture to the pot with sautéed tomatoes. Gently stir to coat the pasta.
- Lower the heat to medium and pour in 1 cup of milk, followed by the cheeses and sour cream. Stir until melted and creamy.
- Remove from heat and sprinkle chopped green onions on top. Serve hot in bowls.
Leave a Reply