
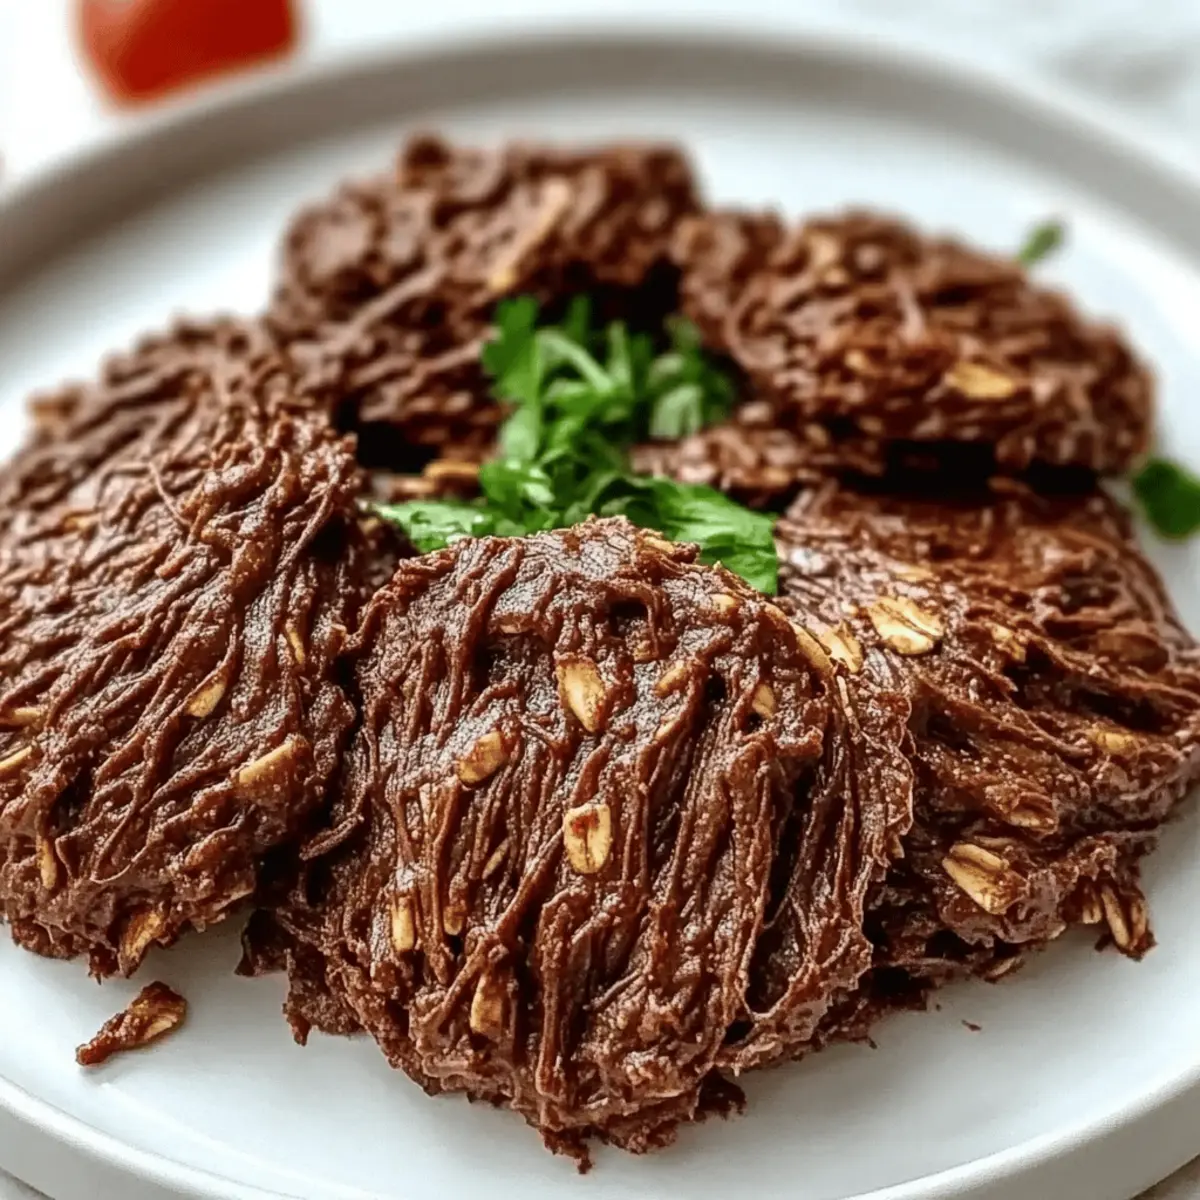
The first bite of these 4-ingredient crispy chocolate oat cookies took me back to simple afternoons spent baking with friends, sharing laughter between spoonfuls of dough. A blend of rich cocoa and hearty oats creates a satisfying crunch that feels indulgent yet guilt-free—perfect for anyone looking to satisfy a sweet tooth without the fuss of complicated recipes. Whether you’re a busy home-chef or simply in need of a quick snack, these cookies offer a swift solution to dessert cravings while being gluten-free and dairy-free. Imagine welcoming guests with a warm batch fresh from the oven—who wouldn’t love that? Ready to create your next cookie masterpiece? Let’s dive into this deliciously simple recipe!
Why are these cookies a must-try?
Simplicity at its best: With just four ingredients, these cookies come together in a breeze, making them perfect for busy cooks who crave something sweet without the hassle.
Deliciously versatile: Try gluten-free or nut-free variations to cater to your dietary needs, ensuring everyone at the table can indulge.
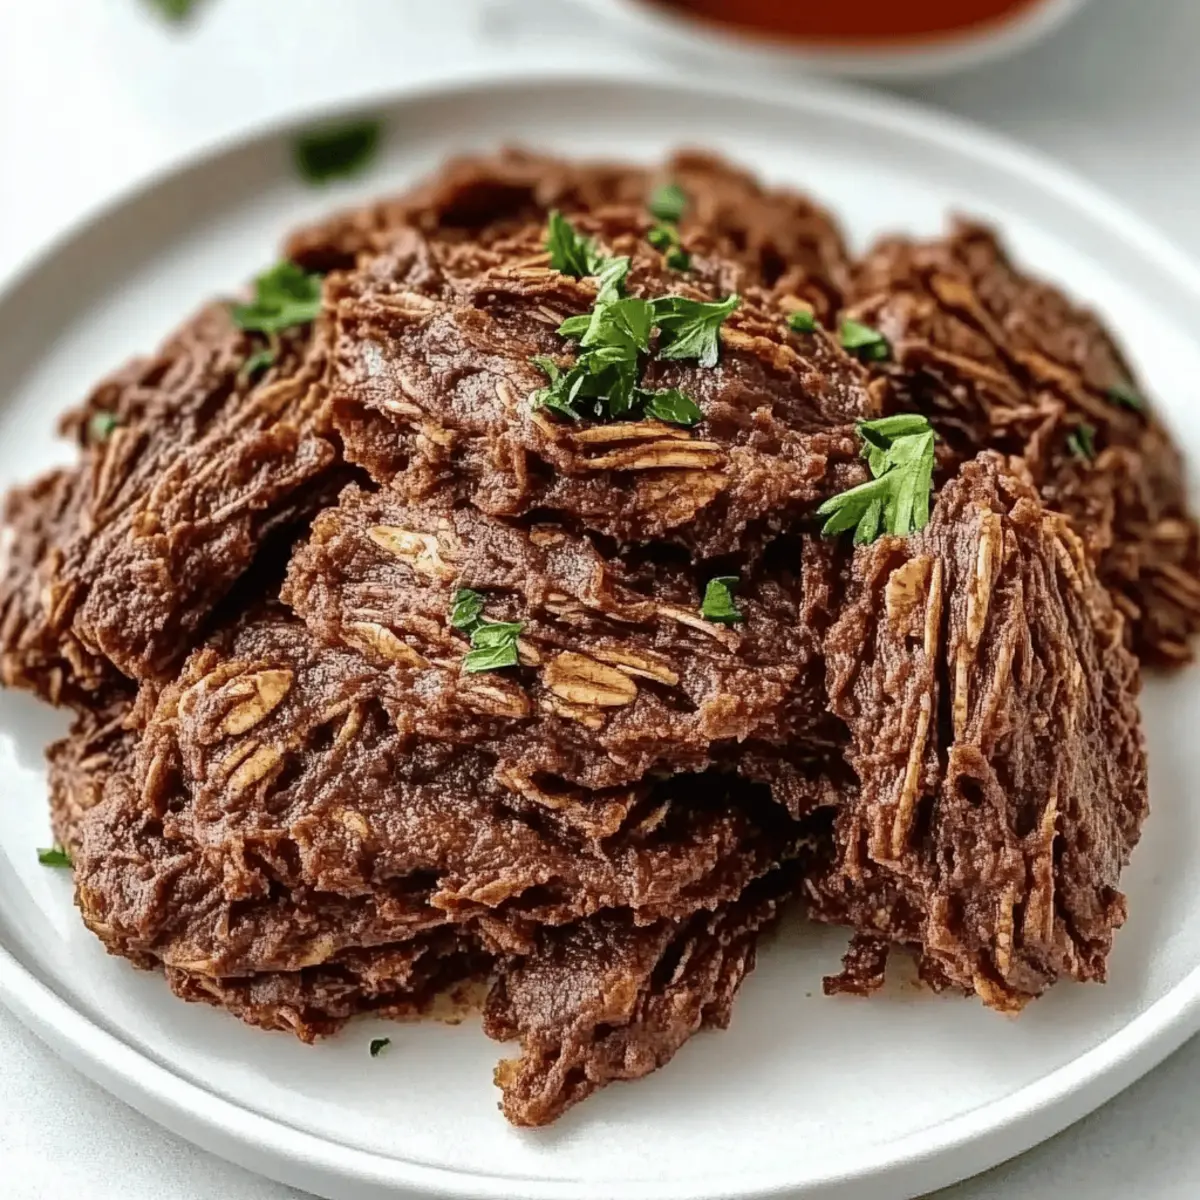
Irresistible crunch: The combination of crispy edges and chewy centers offers a delightful contrast that makes each bite truly satisfying.
Quick satisfaction: Ready in under 15 minutes, you’ll have a delicious treat in no time, perfect for spontaneous cravings or surprise guests.
Guilt-free indulgence: Naturally dairy-free and packed with the goodness of oats, these cookies let you enjoy dessert without the extra calories. Pair them with some almond milk or coffee for the ultimate snack experience!
4-Ingredient Chocolate Oat Cookies Ingredients
For the Batter
- Oats – Use gluten-free oats to keep these cookies compliant with dietary preferences.
- Cocoa Powder – Opt for unsweetened cocoa powder to maintain a rich chocolate flavor without added sugars.
- Maple Syrup – This natural sweetener keeps the cookies moist; you can easily swap it with agave syrup for a different taste.
- Nut Butter (e.g., peanut or almond) – Acts as a binding agent; sunflower seed butter is a fantastic substitute for those with nut allergies.
Step‑by‑Step Instructions for 4-Ingredient Crispy Chocolate Oat Cookies
Step 1: Preheat the Oven
Preheat your oven to 350°F (175°C) while you prepare the cookie dough. This temperature is perfect for achieving that delightful crispiness on the edges of your cookies. Make sure your oven is fully preheated for about 10 minutes before baking for the best results.
Step 2: Combine Dry Ingredients
In a large mixing bowl, combine 2 cups of rolled oats and ½ cup of unsweetened cocoa powder. Stir them together until well incorporated, ensuring that the cocoa powder is evenly distributed throughout the oats. This mixture will serve as the foundation for your flavorful crispy chocolate oat cookies.
Step 3: Add Wet Ingredients
Pour in ⅓ cup of maple syrup and ⅓ cup of your favorite nut butter into the dry mixture. Mix thoroughly until a thick and sticky dough forms, making sure all the dry ingredients are combined. The dough should hold together well but not be too wet—the perfect balance for shaping your cookies.
Step 4: Shape the Cookies
Using a cookie scoop or tablespoon, scoop out portions of the dough and roll them into balls. Place them on a lined baking sheet, spacing them about 2 inches apart to allow for spreading. Press each dough ball slightly to flatten, ensuring an even shape when baked.
Step 5: Bake the Cookies
Place the baking sheet in your preheated oven and bake for 10-12 minutes. Keep an eye on the cookies; they are ready when the edges are crisp while the centers still feel soft to the touch. This contrast gives your cookies that delightful chewy center.
Step 6: Cool the Cookies
Once baked, remove the sheet from the oven and let your cookies cool on the baking sheet for about 5 minutes. This resting time helps them firm up. Afterward, carefully transfer them to a wire rack to cool completely, allowing the cookies to crisp up even more—perfect for enjoying later!
Beef Barbacoa Variations & Substitutions
Feel free to get creative and customize your beef barbacoa to suit your tastes and dietary needs!
-
Gluten-Free: Use corn tortillas instead of flour for serving to keep it safe for gluten-sensitive guests. Nothing beats that authentic texture of tender, flavorful beef wrapped in warm corn tortillas.
-
Spicy Kick: Add diced jalapeños to the cooking liquid for an extra layer of heat that’s sure to please spicy food lovers. The resulting dish will have a delightful warmth that complements the richness of the beef.
-
Herb Flavor Boost: Toss in fresh cilantro leaves or a handful of parsley while slow cooking to elevate the freshness and enhance the flavor. These vibrant herbs will bring a new level of brightness to your barbacoa.
-
Vegetarian Option: Substitute shredded jackfruit for beef for a plant-based twist that still delivers on flavor and texture. When seasoned well, jackfruit absorbs the spices beautifully, offering a satisfying vegetarian alternative.
-
Taco Night Festivities: Use barbacoa in tacos topped with your favorite toppings like avocado, diced onions, and crumbled queso fresco for an unforgettable meal. You can also make extra servings and enjoy a taco feast with friends!
-
Slow Cooker Alternative: If time is tight, consider using a slow cooker—just set it and forget it! The convenience of slow cooking means you can return to a tender, well-seasoned beef dinner after a long day.
-
Cultural Twist: Try serving beef barbacoa with rice and beans, or even in a burrito with your choice of fillings for a hearty feast. So many options emerge when you think beyond tacos; it’s a true crowd-pleaser!
These variations are sure to elevate your beef barbacoa experience. If you’re intrigued by even more savory beef options, check out Mongolian Beef Savory for a delightful twist, or savor the flavors of a Cajun Roast Beef that’s bursting with personality!
Make Ahead Options
These 4-ingredient crispy chocolate oat cookies are perfect for meal prep enthusiasts! You can mix the dry ingredients (oats and cocoa powder) and store them in an airtight container for up to 3 days. Additionally, prepare the cookie dough and refrigerate it for up to 24 hours before baking; this can actually enhance the flavors! When you’re ready to bake, simply scoop and shape the cookies as directed, then bake them straight from the fridge for the best texture. This way, you’ll have delicious, homemade cookies ready with minimal effort—just as satisfying as if you made them fresh!
How to Store and Freeze 4-Ingredient Chocolate Oat Cookies
Airtight Container: Store your cookies in an airtight container at room temperature for up to 1 week to maintain their delightful crunch.
Refrigeration: For longer freshness, you can keep them in the fridge for up to 2 weeks. Just make sure to seal them well to avoid moisture.
Freezing: To freeze, place cookies in a single layer in a freezer-safe bag or container, and they’ll be good for up to 3 months. Thaw at room temperature before enjoying.
Reheating: If you like them warm, pop the cookies in the oven at 350°F (175°C) for a few minutes. This will bring back their delightful texture, ensuring a fresh taste every time you indulge.
Expert Tips for 4-Ingredient Cookies
Use Rolled Oats: Ensure you use rolled oats rather than instant or quick oats for the best texture and crunch.
Don’t Overbake: Keep an eye on your cookies; they should feel soft in the center when removed from the oven. Overbaking will dry them out.
Mix Well: Make sure to combine your wet and dry ingredients thoroughly to avoid dry patches in your dough, ensuring each cookie has a consistent flavor profile.
Add Chocolate Chips: For an extra chocolatey treat, fold in some dairy-free chocolate chips into your dough before baking.
Store Correctly: Keep your cookies fresh by storing them in an airtight container at room temperature for up to a week or refrigerate for longer-lasting enjoyment.
Explore Variations: Feel free to try adding dried fruits or seeds to your dough for a personalized touch that enhances both flavor and nutrition.
What to Serve with 4-Ingredient Crispy Chocolate Oat Cookies
Indulging in these delightful cookies opens up a world of satisfying pairing possibilities for a perfect treat experience.
-
Almond Milk: The creamy texture of almond milk pairs beautifully with the crunchy cookies, amplifying the cocoa flavor while adding a nutty richness.
-
Fresh Berries: Bright, juicy berries like strawberries or raspberries offer a refreshing contrast to the rich chocolate, bringing natural sweetness and acidity to your snack.
-
Dark Chocolate Drizzle: A simple drizzle of melted dark chocolate over the cookies enhances their decadent taste, creating an even more luxurious treat.
-
Nut Butter Dip: Serve with a small bowl of your favorite nut butter for dipping; the heartiness of the nut butter complements the oats and satisfies your cravings.
-
Coffee: The bold flavor of a hot coffee brings out the deep cocoa notes in the cookies, creating a cozy café experience at home.
-
Coconut Yogurt: This dairy-free addition provides creaminess and a hint of tropical flavor that pairs perfectly with the chocolatey crunch.
-
Banana Slices: Sweet banana slices add a natural sweetness; they’re a delightful contrast to the cookie’s texture and offer a boost of nutrition.
-
Chia Seed Pudding: A light chia seed pudding can serve as a refreshing accompaniment full of fiber, making your cookie experience indulgently nutritious.
-
Ice Cream: Scoop some dairy-free ice cream on the side for an ultimate dessert moment, blending rich chocolate, oats, and creamy goodness in every bite.
4-Ingredient Crispy Chocolate Oat Cookies Recipe FAQs
What type of oats should I use for these cookies?
Absolutely! For the best texture and crunch, be sure to use rolled oats rather than instant or quick oats. Rolled oats provide that hearty structure that makes your cookies both chewy and crispy. If you’re looking for a gluten-free option, make sure your oats are labeled as gluten-free!
How long can I store these cookies?
You can store your cookies in an airtight container at room temperature for up to 1 week. If you want to keep them fresh longer, moving them to the refrigerator can extend their shelf life to about 2 weeks. Just ensure they’re well-sealed to prevent any moisture from making them soggy!
Can I freeze the cookies?
Very much so! To freeze your cookies, simply arrange them in a single layer in a freezer-safe bag or container. They’ll stay delicious for up to 3 months. When you’re ready to enjoy, just thaw them at room temperature or pop them in the oven set to 350°F (175°C) for a few minutes to warm them up and restore that delightful texture.
What if my cookies come out too dry?
If your cookies turn out dry, it could be that they were overbaked or the dough was too crumbly. Next time, check for the right baking time—cookies may still feel soft in the center when they come out. Make sure to mix your wet and dry ingredients thoroughly; if the dough looks too dry, feel free to add a splash more maple syrup to achieve that perfect consistency.
Are there any dietary considerations with these cookies?
Certainly! These cookies are naturally dairy-free due to the use of nut butter and cocoa powder. If you’re accommodating nut allergies, you can easily swap the nut butter with sunflower seed butter for a nut-free version. Always check packaging for allergens, especially if sharing with those who have dietary restrictions.
Can I add other ingredients to customize my cookies?
The more the merrier! Feel free to experiment by adding in dairy-free chocolate chips, dried fruits like cranberries, or seeds for extra crunch and flavor. Just make sure to maintain the balance of ingredients so your cookies remain deliciously satisfying!
Savory Beef Barbacoa: Your Easy, Flavorful Dinner Solution
Ingredients
Equipment
Method
- Preheat your oven to 350°F (175°C) for about 10 minutes.
- In a large mixing bowl, combine rolled oats and unsweetened cocoa powder.
- Pour in maple syrup and nut butter into the dry mixture, mix until dough forms.
- Scoop out portions of dough, roll into balls, and flatten slightly on a lined baking sheet.
- Bake for 10-12 minutes until edges are crisp; centers should feel soft.
- Let cool on baking sheet for 5 minutes before transferring to a wire rack.
Leave a Reply