
As I wandered through the vibrant Halloween decorations in the neighborhood, I couldn’t help but think about the deliciously spooky treats that would soon grace our tables. Among the hauntingly delightful options, my absolute favorite has to be these Mummy Halloween Brownies. Not only are they irresistibly easy to whip up, but their gooey, chocolatey goodness is sure to impress both kids and adults alike. Perfect for parties or cozy family gatherings, these brownies carry a festive charm that transforms any occasion into a celebration of flavor and fun. Ready to bring some spooky sweetness into your kitchen? Let’s dive into these bewitching brownies that will leave everyone asking for seconds!
Why Are Mummy Brownies a Must-Bake?
Irresistible Chocolatey Bliss: Sink your teeth into these gooey brownies that offer a rich, fudgy texture, making them a chocolate lover’s dream come true.
Spooktacular Presentation: With their charming mummy design, they add a festive flair to any Halloween gathering, impressing both kids and adults with their whimsical appeal.
Surprisingly Simple: You’ll be amazed at how easy they are to whip up, allowing you to spend less time in the kitchen and more time enjoying the festivities.
Versatile Treats: Perfect for parties, school events, or cozy family nights, these brownies pair wonderfully with other spooky delights like our Spooky Spiderweb Brownies or themed cupcakes.
Quick to Make: Need a last-minute dessert? These brownies bake in just 20-30 minutes, ensuring you have a delicious treat ready in no time!
Mummy Halloween Brownie Ingredients
• Whip up these delightful Mummy Halloween Brownies to enchant your guests!
For the Brownies
- All-purpose flour – Essential for structure; feel free to swap in gluten-free flour for a tasty alternative.
- Granulated sugar – Adds sweetness; brown sugar can deepen the flavor profile in your brownies.
- Unsweetened cocoa powder – Provides rich chocolate flavor; don’t skip this for those fudgy vibes!
- Eggs – Acts as a binding agent; flax eggs are a great vegan substitute if desired.
- Butter – Adds moisture and flavor; for a dairy-free version, coconut oil works wonders.
- Baking powder – Helps the brownies rise; you can substitute with baking soda, just adjust the amount.
For the Mummy Decoration
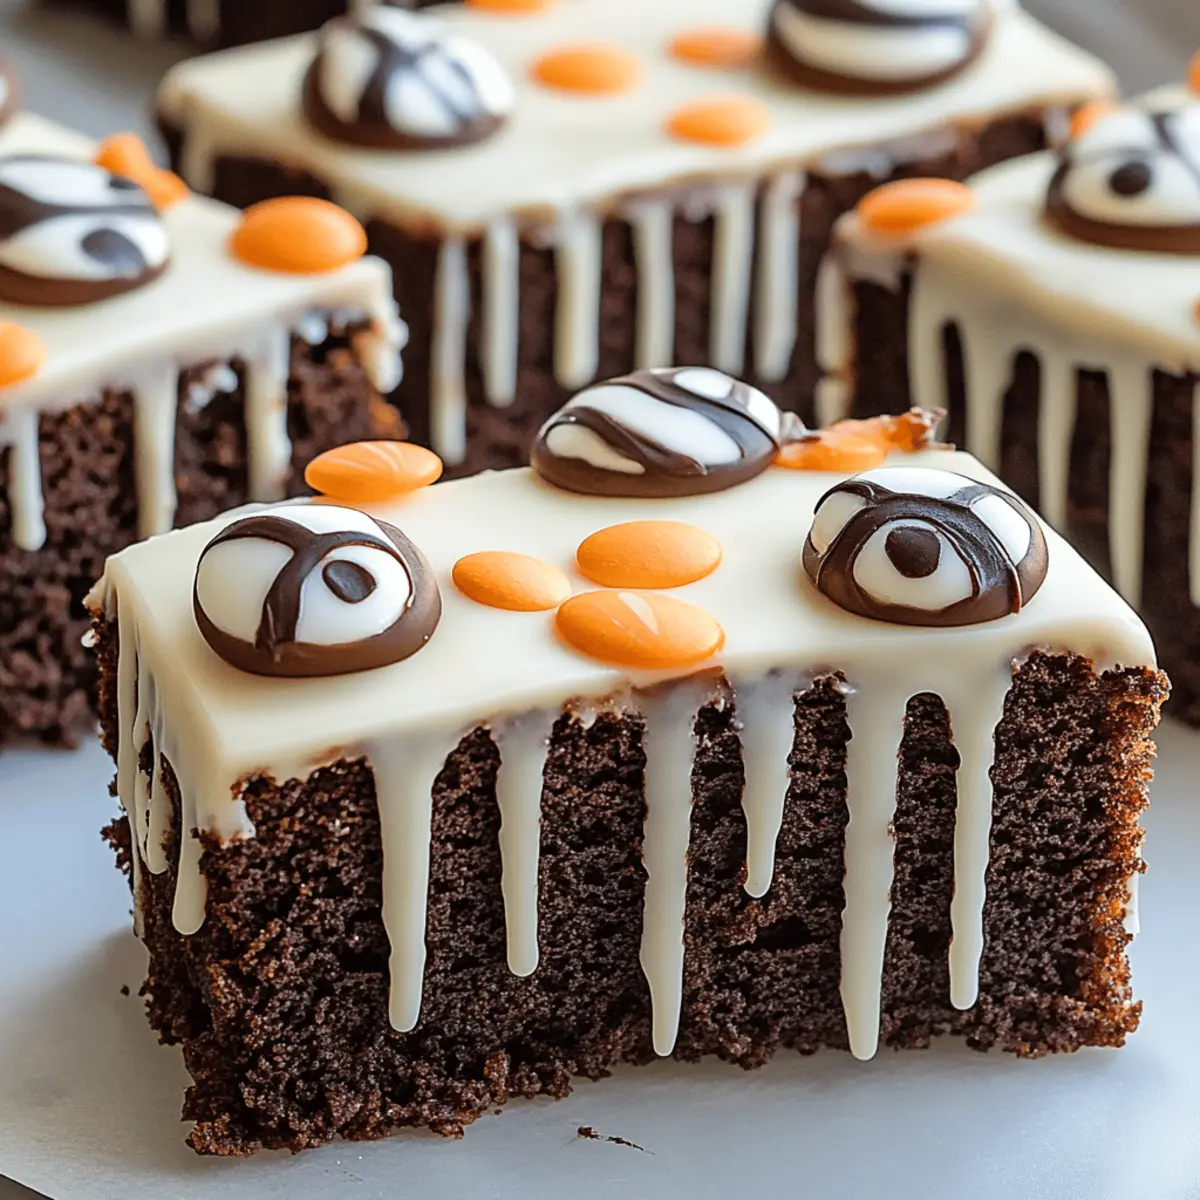
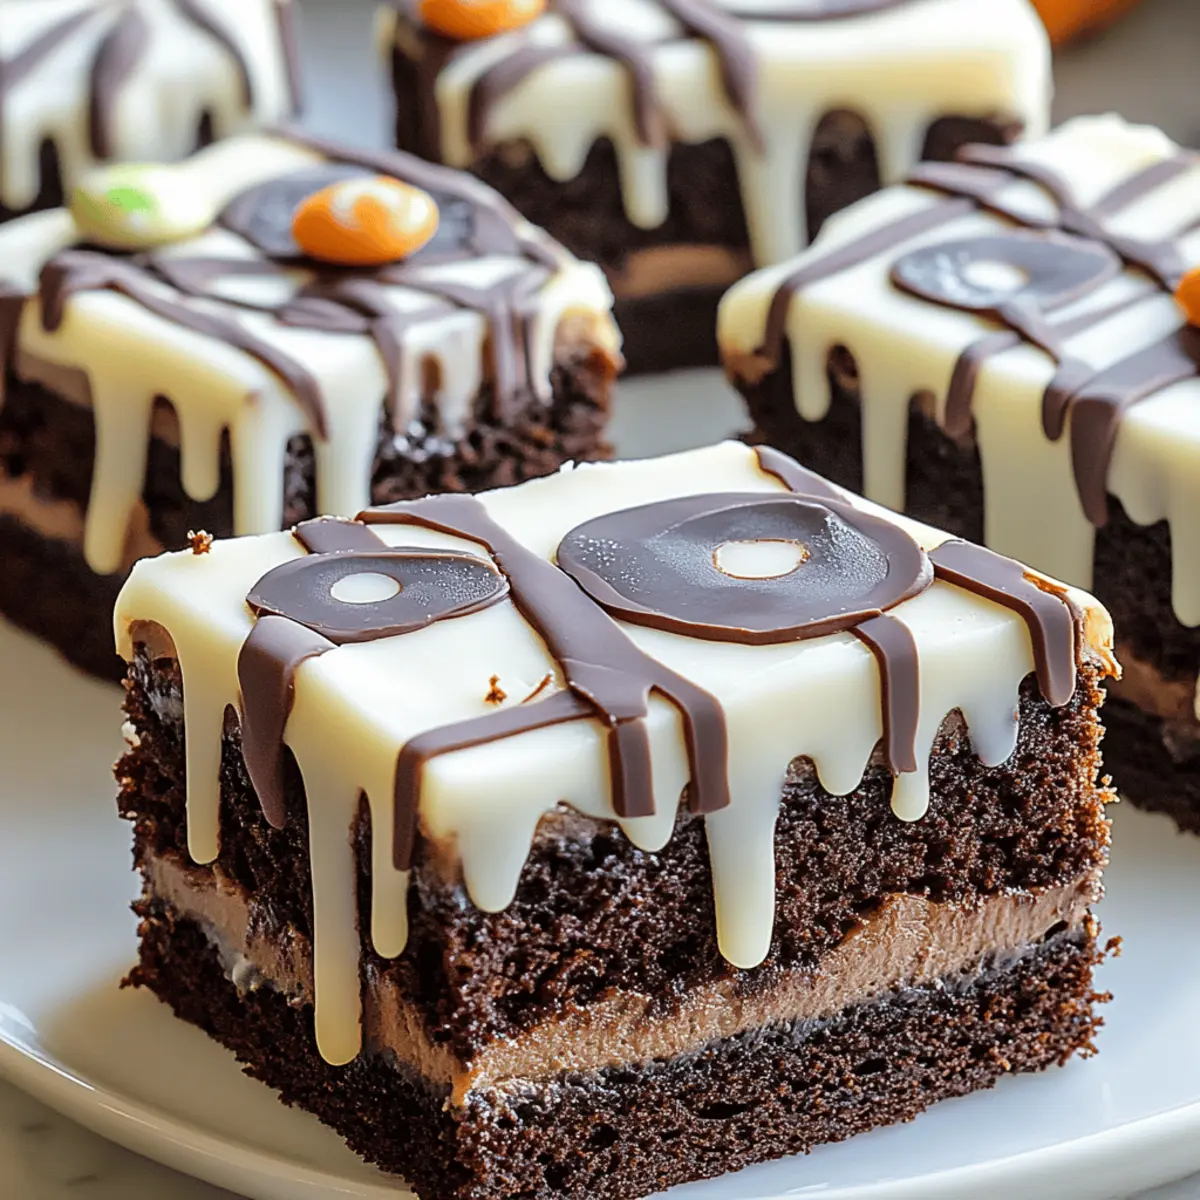
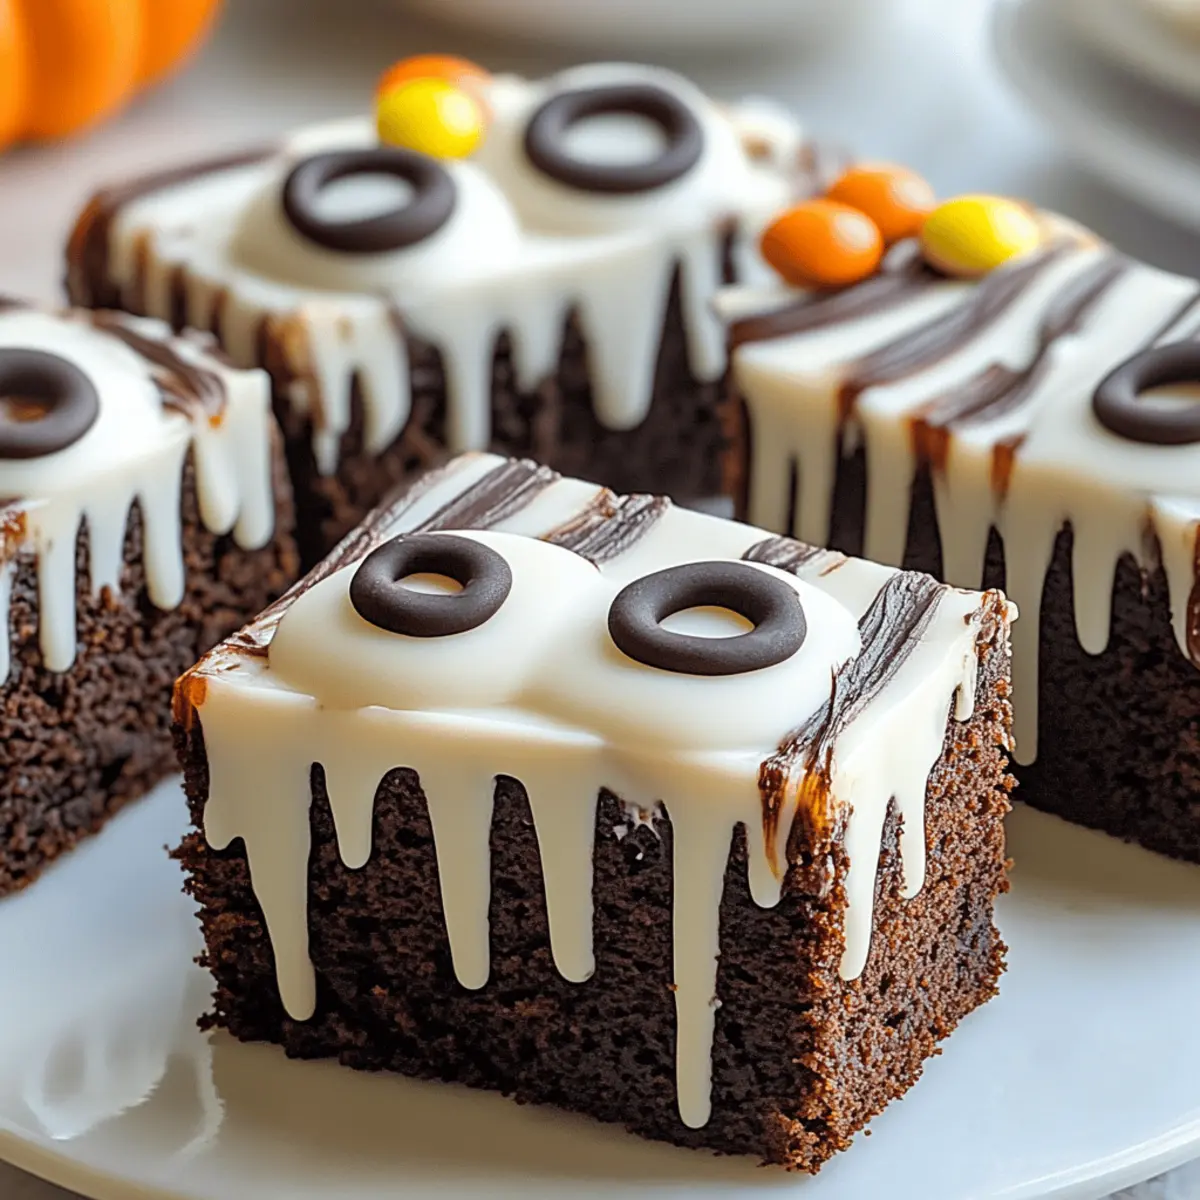
- White frosting – Use it to create that spooky mummy layer; opt for a thick frosting for better application.
- Candy eyes – The perfect finishing touch for your mummies; they add a fun and festive flair!
Get ready to transform your kitchen into a spooky baking haven with these delightful ingredients!
Step‑by‑Step Instructions for Mummy Halloween Brownies
Step 1: Prepare Your Oven and Pans
Begin by preheating your oven to 350°F (175°C). While the oven warms up, grab a 9×13-inch baking pan and grease it with butter or line it with parchment paper for easy removal. This will ensure your brownies come out perfectly fudgy and not stuck to the bottom—ideal for your Mummy Halloween Brownies!
Step 2: Mix Dry Ingredients
In a large mixing bowl, sift together 1 cup of all-purpose flour, 1 cup of unsweetened cocoa powder, and 1 teaspoon of baking powder, along with a pinch of salt. This step is crucial, as sifting helps to aerate the dry ingredients and avoids clumps, ensuring your brownies rise evenly and have a rich chocolate flavor.
Step 3: Cream Butter and Sugar
Using an electric mixer, beat together ½ cup of softened butter and 1 cup of granulated sugar in a separate bowl until the mixture is light and fluffy, which usually takes about 3-5 minutes. This process incorporates air, making your brownies delightfully cakey while still being rich and fudgy, perfect for the Mummy Halloween Brownies you’re about to create.
Step 4: Incorporate Eggs
Add in 2 large eggs one at a time, mixing well after each addition to create a smooth batter. Ensure that the ingredients are fully combined—this creates the binding that keeps your brownies moist. This chocolatey mixture should look glossy and inviting, ready to embrace the dry ingredients soon.
Step 5: Combine Wet and Dry Mixtures
Gradually mix the dry ingredients into the wet mixture, stirring until just combined; do not overmix. You’ll know it’s ready when there are no visible streaks of flour left, and the batter is thick and rich. This will provide the perfect base for your Mummy Halloween Brownies, ensuring they are fudgy and delicious.
Step 6: Bake the Brownies
Pour the brownie batter into the prepared baking pan and spread it evenly. Bake in the preheated oven for 20-25 minutes, or until a toothpick inserted into the center comes out with a few moist crumbs. Keep an eye out for the edges that pull away slightly from the pan—this is a great indicator that your brownies are done!
Step 7: Cool and Prepare for Decoration
Once baked, remove the brownies from the oven and allow them to cool in the pan for about 10 minutes before transferring to a wire rack to cool completely. This step is vital, as decorating too soon can cause the frosting to melt into a gooey mess instead of creating adorable mummy faces on your Mummy Halloween Brownies.
Step 8: Decorate with Frosting
Once cooled, spread a generous layer of white frosting over the brownies to create the mummy’s base. Use a piping bag or a spatula to create uneven lines of frosting, mimicking a mummy’s bandages. Top off with candy eyes for that spooky yet playful touch. Your Mummy Halloween Brownies are now ready to be admired and devoured!

Mummy Halloween Brownies Variations & Substitutions
Feel free to get creative and add your personal touch to these fun Mummy Halloween Brownies!
- Gluten-Free: Substitute all-purpose flour with a 1:1 gluten-free baking mix for fabulous results.
- Vegan: Use flax eggs and coconut oil instead of regular eggs and butter for a delightful dairy-free treat.
- Sugar Swap: Replace granulated sugar with coconut sugar for a lower-glycemic option that adds a hint of caramel flavor.
- Nutty Delight: Add chopped walnuts or pecans to the brownie batter for a crunchy surprise in each bite.
- Spiced Up: Incorporate a teaspoon of cinnamon or a pinch of nutmeg for a warm, cozy flavor that invokes the spirit of fall.
- Choco-Mint: Mix in some peppermint extract to the brownie batter for a festive mint chocolate twist.
- Fun Toppings: Instead of candy eyes, use Halloween-themed sprinkles or edible glitter to create a spookier look.
- Frosting Flavor: Experiment with different frosting flavors, such as vanilla or chocolate, to customize the taste even more; after all, there’s no limit to creativity in the kitchen!
For more inspiration, check out our delicious Spooky Spiderweb Brownies or try making themed cupcakes that complement these delightful mummies! Enjoy crafting unique treats this Halloween!
Expert Tips for Mummy Halloween Brownies
-
Cool Before Frosting: Allow the brownies to cool completely before adding frosting; this prevents melting and helps retain shape.
-
Use Quality Cocoa: Choose high-quality unsweetened cocoa powder for the richest flavor in your Mummy Halloween Brownies—don’t settle for anything less!
-
Piping Bag Magic: For a professional look, use a piping bag to apply the frosting, creating nice, even mummy bandages and fun designs.
-
Chill the Dough: If the brownie batter seems too soft, let it chill for about 30 minutes before baking; this helps maintain the fudgy texture during baking.
-
Experiment with Decor: Don’t be afraid to get creative with the mummy decorations; try using colored frosting or additional candy to give each brownie a unique character!
Make Ahead Options
These Mummy Halloween Brownies are perfect for busy cooks looking to save time without sacrificing flavor! You can prepare the brownie batter up to 24 hours in advance by mixing all the ingredients and storing it in an airtight container in the refrigerator. If you’d like, you can also bake the brownies in advance and keep them stored (once cooled) in an airtight container for up to 3 days. To maintain their delicious fudgy consistency, ensure they are completely cooled before wrapping them tightly. When you’re ready to serve, simply frost and decorate with candy eyes, and you’ll have spooky treats that are just as delightful as if made fresh!
What to Serve with Mummy Halloween Brownies
Elevate your spooky celebration with delightful pairings that will enchant both kids and adults alike!
- Pumpkin Spice Latte: This comforting, seasonal beverage brings warm autumn spices that balance the sweetness of the brownies beautifully.
- Caramel Apple Slices: Crisp apple slices drizzled with caramel offer a refreshing crunch, making them the perfect contrast to rich, fudgy brownies.
- Ghostly Marshmallow Treats: These fun, no-bake treats look adorable on a dessert table, and their lightness complements the brownie’s density.
- Spooky Halloween Punch: A vibrant, fruit-infused punch can provide a refreshing sip that brightens the palate between rich bites of brownies.
- Chocolate-Dipped Strawberries: Juicy strawberries dipped in decadent chocolate provide a delightful burst of flavor that pairs wonderfully with the brownies.
- Candy Corn Cupcakes: These festive treats mirror the Halloween theme, adding both color and a sweet twist to your spooky spread.
For a breathtaking display, create a themed dessert table showcasing these delightful pairings alongside your Mummy Halloween Brownies!
How to Store and Freeze Mummy Halloween Brownies
Room Temperature: Store your Mummy Halloween Brownies in an airtight container at room temperature for up to 3 days for optimal freshness.
Fridge: For longer storage, place the brownies in an airtight container and refrigerate for up to a week. Just remember to let them come to room temperature before serving for the best texture!
Freezer: If you want to save some for later, freeze individual brownies wrapped in plastic wrap and then placed in a freezer-safe bag for up to 3 months. Thaw them overnight in the fridge before enjoying.
Reheating: To enjoy them warm, you can microwave a brownie for 10-15 seconds. This will enhance the gooey chocolate goodness, perfect for a cozy treat!
Mummy Halloween Brownies Recipe FAQs
What type of cocoa powder should I use for Mummy Halloween Brownies?
I recommend using unsweetened cocoa powder for the richest chocolate flavor. Dutch-processed cocoa can also be used, but it may give a different taste profile. Always check for freshness, and avoid cocoa that has been sitting on your shelf for too long!
How should I store Mummy Halloween Brownies?
Store your Mummy Halloween Brownies in an airtight container at room temperature for up to 3 days, ensuring they remain moist. If you want them to last longer, refrigerate them for up to a week, but allow them to come to room temperature before serving for the best texture!
Can I freeze Mummy Halloween Brownies?
Absolutely! To freeze, wrap individual brownies in plastic wrap, then place them in a freezer-safe zip-top bag. They’ll stay fresh for up to 3 months. When you’re ready, thaw them overnight in the fridge and enjoy. You can also warm them briefly in the microwave to enhance their gooey texture!
What should I do if my brownie batter is too soft?
If you find that your brownie batter is too soft, don’t worry! Chilling the batter for about 30 minutes can help firm it up before baking. This will help maintain that delicious fudgy texture you desire, ensuring your Mummy Halloween Brownies turn out just right!
Can I make Mummy Halloween Brownies gluten-free?
Absolutely! You can easily substitute all-purpose flour with a gluten-free flour blend. Make sure to check the blend’s ingredient list for optimal results, and keep in mind that baking times might slightly vary. Happy baking!
Are Mummy Halloween Brownies appropriate for kids with allergies?
It’s essential to consider allergies when baking! For nut allergies, ensure that your butter or alternatives are nut-free. If using eggs is a concern, flax eggs work great as a binding substitute. Always check the labels on your frosting and candy decorations, as they can sometimes contain allergens.
Mummy Halloween Brownies That Will Bewitch Your Guests
Ingredients
Equipment
Method
- Preheat your oven to 350°F (175°C) and grease a 9x13-inch baking pan.
- Sift together flour, cocoa powder, baking powder, and a pinch of salt in a large mixing bowl.
- In another bowl, cream together softened butter and granulated sugar until light and fluffy.
- Mix in eggs one at a time, ensuring a smooth batter.
- Gradually mix the dry ingredients with the wet mixture until just combined.
- Pour the brownie batter into the pan and bake for 20-25 minutes, checking with a toothpick.
- Allow brownies to cool in the pan for 10 minutes before transferring to a wire rack.
- Spread white frosting over cooled brownies and decorate with candy eyes.
Leave a Reply