
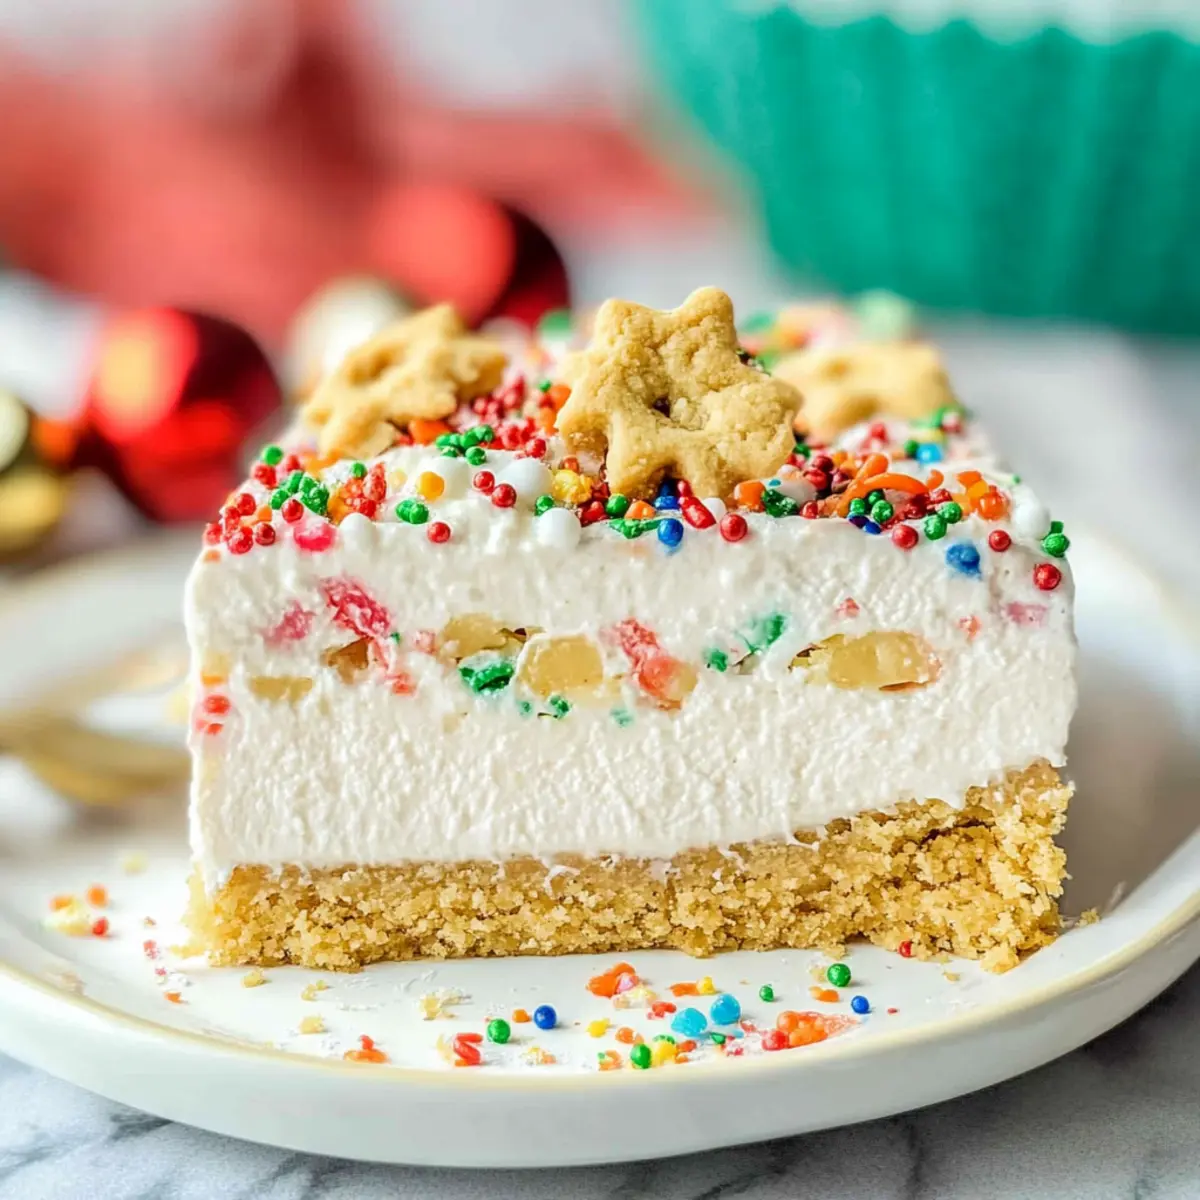
As I stood in my kitchen, surrounded by the festive cheer of the season, I realized there’s nothing quite like creating a special dessert to share with loved ones. This No-Bake Christmas Cookie Lush is my go-to for easy holiday entertaining, combining layers of creamy cheesecake and velvety pudding atop a luscious vanilla cookie crust. The best part? It’s incredibly quick to prepare and requires no time in the oven, making it perfect for when your schedule gets busy. Plus, with the chance to mix and match toppings and crusts, you can tailor this treat to suit your festive spirit! Are you ready to impress your guests and indulge in a delightful holiday dessert without the fuss? Let’s dive in!
Why Will You Love This No-Bake Dessert?
Simplicity at Its Finest: This No-Bake Christmas Cookie Lush is incredibly easy to make, with no oven required, leaving you more time to enjoy the festivities.
Customizable Layers: Mix and match your favorite toppings or switch up the cookies for a unique twist! You could try variations like the festive Christmas Kitchen Sink for added creativity.
Crowd-Pleasing Appeal: With its stunning layers and vibrant sprinkles, this dessert will be the star of your holiday gatherings, pleasing guests of all ages.
Perfect pairing: Serve alongside a warm drink or a slice of fresh fruit for a balanced dessert experience.
Make Ahead Convenience: Prepping this dessert a day in advance enhances its flavors, making it a stress-free option for busy holiday schedules.
No Bake Christmas Cookie Lush Ingredients
For the Crust
• Vanilla Oreo Cookies – The base for your layers; swap with vanilla sandwich cookies or graham crackers for a different flavor.
• Butter – Helps bind the cookie crumbs; unsalted butter offers a balanced taste profile.
For the Cream Cheese Layer
• Cream Cheese – A rich, creamy layer; use full-fat for the best flavor and be sure it’s softened for easy mixing.
• Powdered Sugar – Sweetens the mixture smoothly without any graininess; no direct substitutes recommended for proper sweetness.
• Whipped Topping – Adds lightness to the cream cheese; feel free to use homemade whipped cream if you fancy!
For the Pudding Layer
• Cheesecake Instant Pudding Mix – Essential for that signature cheesecake flavor; vanilla or white chocolate pudding can work as substitutes.
• Cold Milk – Key for thickening the pudding; whole milk will create a creamier texture in the pudding mix.
For the Final Touch
• Holiday Sprinkles – Brighten up your dessert and add festive cheer; swap them with any colorful sprinkles you have on hand.
• Crushed Cookies – Use the remaining cookies for topping; they add a delightful crunch to your finished dessert.
Step‑by‑Step Instructions for No Bake Christmas Cookie Lush
Step 1: Prepare the Pan
Begin by optionally lining a 9×13-inch baking dish with parchment paper to ensure easy removal of your No Bake Christmas Cookie Lush later. This step helps keep the edges clean and tidy, providing a beautiful presentation. If you’re using a non-stick pan, you can skip this step, but it can add convenience.
Step 2: Crust Prep
In a food processor or a zip-top bag, crush 36 vanilla Oreo cookies into fine crumbs. Combine these crumbs with melted unsalted butter and ½ tablespoon of festive holiday sprinkles in a mixing bowl. Press the mixture firmly into the bottom of your prepared baking dish, forming a solid crust that’s slightly compact and holds together when cut.
Step 3: Cream Cheese Layer
In a large mixing bowl, beat the softened cream cheese with powdered sugar and a splash of peppermint extract until the mixture is smooth and free of lumps. Gently fold in one tub of whipped topping and another ½ tablespoon of sprinkles to create a light, airy mixture. Evenly spread the cream cheese layer over the cookie crust using a spatula for an even finish.
Step 4: Pudding Layer
In a separate bowl, whisk together the cheesecake instant pudding mix and cold milk until the mixture begins to thicken, about 2-3 minutes. Once thickened, fold in another ½ tablespoon of holiday sprinkles to enhance visual appeal. Carefully spread this pudding layer over the cream cheese layer, smoothing it out gently with your spatula for a polished look.
Step 5: Final Toppings
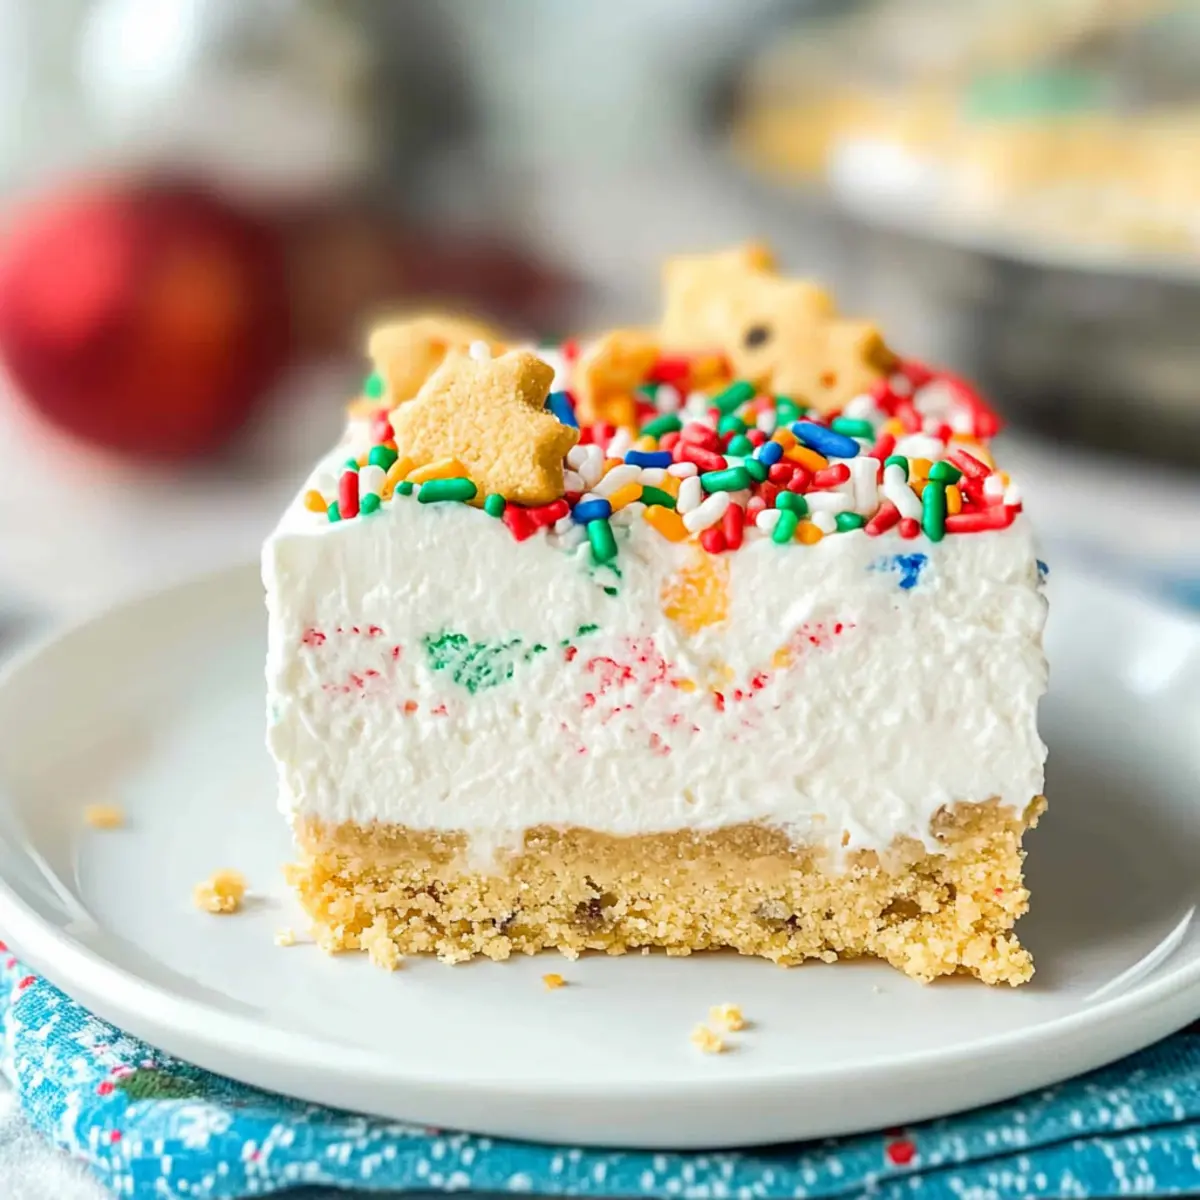
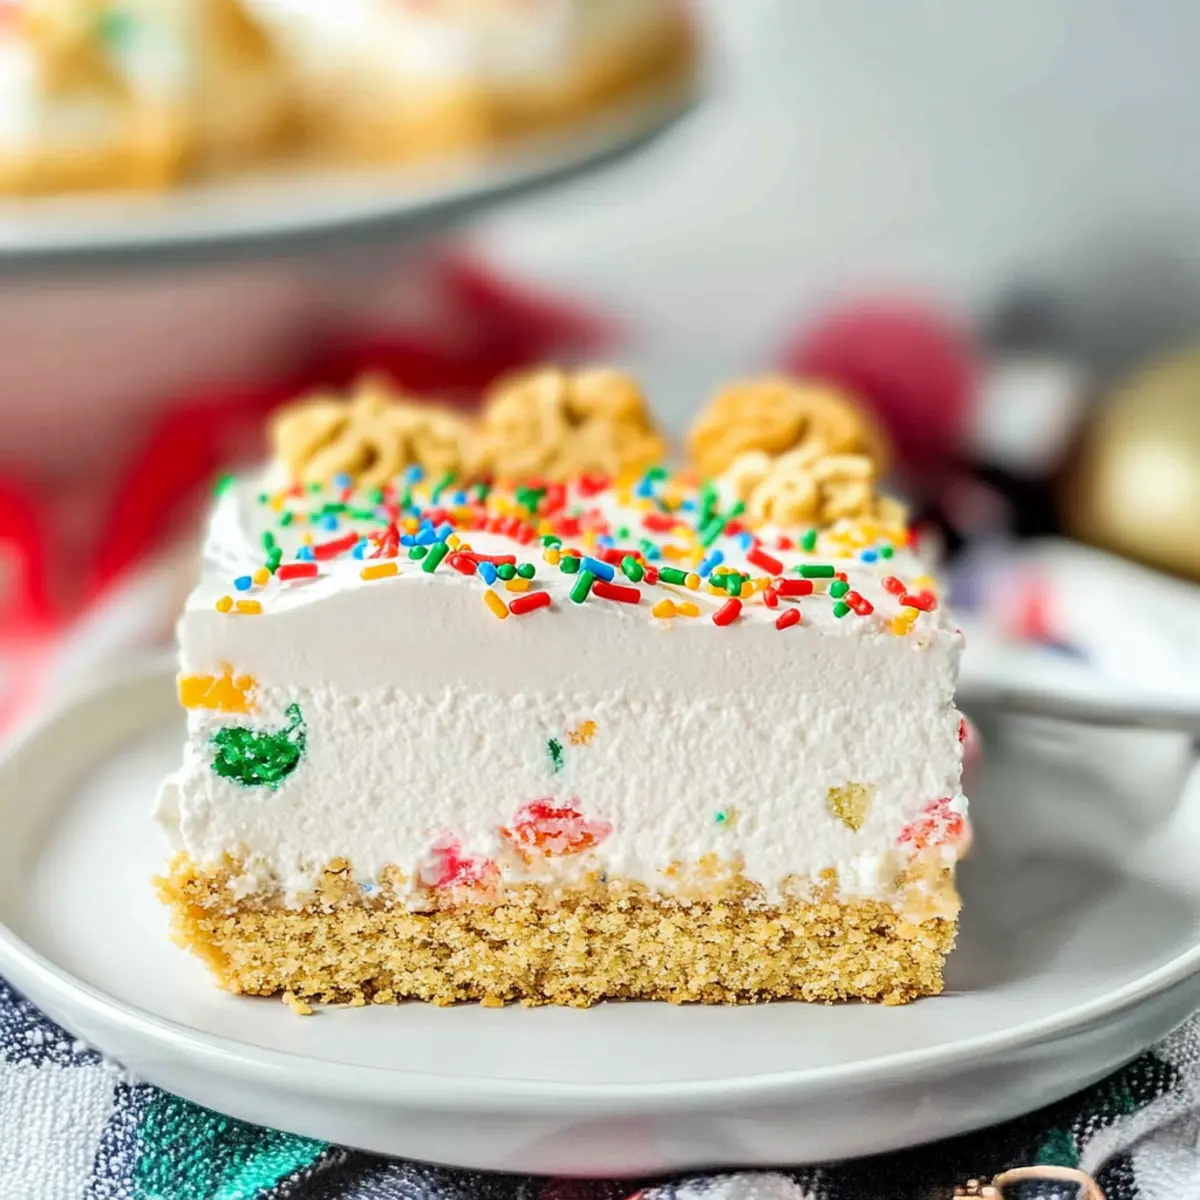
Top your layered dessert with the remaining whipped topping, ensuring it fully covers the pudding layer for a neat appearance. Finely crush the last 12 cookies and sprinkle them generously over the whipped topping, adding a delightful crunch. Finish with the remaining holiday sprinkles, allowing your No Bake Christmas Cookie Lush to sparkle with festive cheer.
Step 6: Chill
Transfer the complete dessert to the refrigerator and chill for at least 4 hours to set the layers properly. If you desire a firmer slice, consider freezing it for about an hour before serving. This chilling process melds the flavors and ensures the layers hold together beautifully when sliced into squares.
How to Store and Freeze No Bake Christmas Cookie Lush
Fridge: Store leftovers in an airtight container in the fridge for up to 4 days to maintain freshness and flavor.
Freezer: If you want to keep it longer, freeze the No Bake Christmas Cookie Lush for up to 1 month. Wrap it tightly in plastic wrap to prevent freezer burn.
Thawing: Before serving, transfer the frozen dessert to the fridge to thaw overnight for the best texture. If you’re short on time, leave it at room temperature for about 1 hour.
Reheating: No reheating necessary! Serve chilled for the best experience, showcasing the layers of creaminess and crunch in every delightful bite.
Expert Tips for No Bake Christmas Cookie Lush
-
Room Temperature Cheese: Ensure your cream cheese is at room temperature to avoid lumps, allowing for a smoother blend in the layer.
-
Crunchy Crust: Don’t skip on crushing the cookies finely; this ensures a firm base for your No Bake Christmas Cookie Lush that holds together perfectly when sliced.
-
Sprinkle Smart: Reserve a few sprinkles for the top. This adds a festive touch and keeps the vibrant colors bright, enhancing visual appeal.
-
Layer Evenly: Spread each layer evenly to achieve a polished look, which is essential for that beautiful presentation at your holiday gatherings.
-
Chill Time: Patience is key—allowing the dessert to chill for at least 4 hours helps meld flavors and ensures structural integrity for serving.
Make Ahead Options
These No Bake Christmas Cookie Lushes are a fantastic option for busy home cooks looking to save time during the hectic holiday season! You can prepare the cookie crust and cream cheese layer up to 24 hours in advance, making it easy to assemble the dessert when you’re ready. Simply store them separately in the refrigerator to maintain their quality. The pudding layer can also be mixed ahead of time, but it’s best to layer everything together the day you plan to serve it to keep that delightful crunch from the cookie crust. When you’re ready to impress your guests, just complete the final toppings and allow it to chill for a minimum of 4 hours, or overnight for even better flavor. Enjoy the ease of having this festive treat ready to go and leave the baking behind!
What to Serve with No Bake Christmas Cookie Lush?
Nothing completes a festive meal quite like a delightful assortment of sides and treats to make your holiday gathering unforgettable.
-
Creamy Mashed Potatoes: Their buttery richness contrasts perfectly with your light dessert, balancing flavors beautifully.
-
Roasted Brussels Sprouts: Their earthy flavor adds a warm, savory note that enhances the sweetness of the Cookie Lush.
-
Holiday Salad: A fresh medley of greens, cranberries, and nuts provides a refreshing crunch, creating a well-rounded meal experience.
-
Warm Apple Cider: This spiced drink brings warmth to the table and pairs harmoniously with dessert, inviting everyone to sip and savor.
-
Chocolate Fondue: Set it up for dipping fruits and pretzels, offering a fun interactive element while complementing your Cookie Lush.
-
Gingerbread Cookies: Serve these classic treats alongside for a nostalgic crunch that’s perfect for the season.
-
Pecan Pie: Its rich, sticky sweetness mirrors the texture of your dessert for a classic holiday pairing that delights with every bite.
With these options, you can create a festive table that pairs wonderfully with your No Bake Christmas Cookie Lush!
No Bake Christmas Cookie Lush Variations
Feel free to get creative and make this dessert your own with these fun twists!
-
Berry Bliss: Add fresh berries like strawberries or raspberries between layers for a fruity burst of flavor. The contrast of creamy layers with tangy fruit is delightful!
-
Chocolate Delight: Swap out vanilla pudding for rich chocolate pudding to satisfy all the chocolate lovers in your life. This variation adds a wonderfully decadent twist.
-
Nutty Crunch: Introduce chopped nuts like pecans or walnuts as a topping for an extra layer of texture and flavor. The nuttiness perfectly complements the creamy layers.
-
Minty Fresh: Mix in crushed mint candies or Andes mints into the cream cheese layer for a refreshing twist. Mint lovers will appreciate this festive addition during holiday gatherings.
-
Spiced Pumpkin: For a fall-inspired version, replace half of the cream cheese with pumpkin puree and add pumpkin spice to taste. This warming flavor is perfect for the season.
-
Cookie Variants: Use different flavored cookies like chocolate sandwich cookies or ginger snaps instead of vanilla Oreos for a unique crust. Experimenting with cookie flavors can yield delightful surprises.
-
Tropical Paradise: Layer in shredded coconut and crushed pineapple for a tropical flair that brightens up festive gatherings. It brings a refreshing taste that contrasts beautifully with the richness of cream cheese.
For more delightful treats, you might also enjoy these festive recipes like Christmas Kitchen Sink or try out the tasty Velvet Crinkle Cookie for your next holiday cookie exchange. Enjoy your cooking adventure!

No-Bake Christmas Cookie Lush Recipe FAQs
What type of cookies should I use for the crust?
Absolutely, you can use Vanilla Oreo Cookies for the crust, but feel free to mix it up! Any vanilla sandwich cookies or graham crackers work beautifully as substitutes. Just keep in mind that the flavor profile will slightly change, enhancing your No-Bake Christmas Cookie Lush’s uniqueness.
How should I store leftovers?
To keep your No-Bake Christmas Cookie Lush fresh, store any leftovers in an airtight container in the refrigerator for up to 4 days. It’s best enjoyed chilled, so make sure to slice it right before serving to maintain that delightful texture!
Can I freeze the No-Bake Christmas Cookie Lush?
Yes, you can! If you want to enjoy your dessert later, wrap it tightly in plastic wrap and freeze it for up to 1 month. When you’re ready to indulge, transfer the lush to the fridge to thaw overnight for the best texture, or leave it at room temperature for about an hour if you’re short on time.
Any tips for achieving the perfect layers?
For impeccable layers in your No-Bake Christmas Cookie Lush, make sure to evenly spread each layer with a spatula. Patience is key when chilling it for at least 4 hours to allow the flavors to meld beautifully! Also, ensuring your cream cheese is at room temperature helps it mix smoothly, avoiding any unwanted lumps.
Can I make this dessert a day in advance?
Very much so! In fact, making your No-Bake Christmas Cookie Lush a day ahead of time can enhance the flavor and ensure all layers are well-set. Just cover it tightly and keep it refrigerated—your guests will be thoroughly impressed with this creamy holiday treat!
Are there any dietary considerations for pets or allergies?
Definitely! If you have pets, be aware that ingredients such as chocolate and certain sweeteners can be harmful. For people with dietary restrictions, check for allergies related to dairy in cream cheese and whipped topping, and consider using alternative ingredients like non-dairy whipped topping and vegan cream cheese as necessary.
No Bake Christmas Cookie Lush: A Festive Treat to Delight!
Ingredients
Equipment
Method
- Optionally line a 9x13-inch baking dish with parchment paper for easy removal.
- Crush 36 vanilla Oreo cookies into fine crumbs and mix with melted butter and ½ tablespoon of sprinkles. Press the mixture into the bottom of your dish.
- In a mixing bowl, beat the softened cream cheese with powdered sugar and a dash of peppermint extract. Fold in whipped topping and another ½ tablespoon of sprinkles. Spread over the crust.
- In a bowl, whisk together pudding mix and cold milk until thickened. Fold in another ½ tablespoon of sprinkles and spread over the cream cheese layer.
- Top with remaining whipped topping, crushed cookies, and the remaining sprinkles.
- Chill in the refrigerator for at least 4 hours before serving.
Leave a Reply