
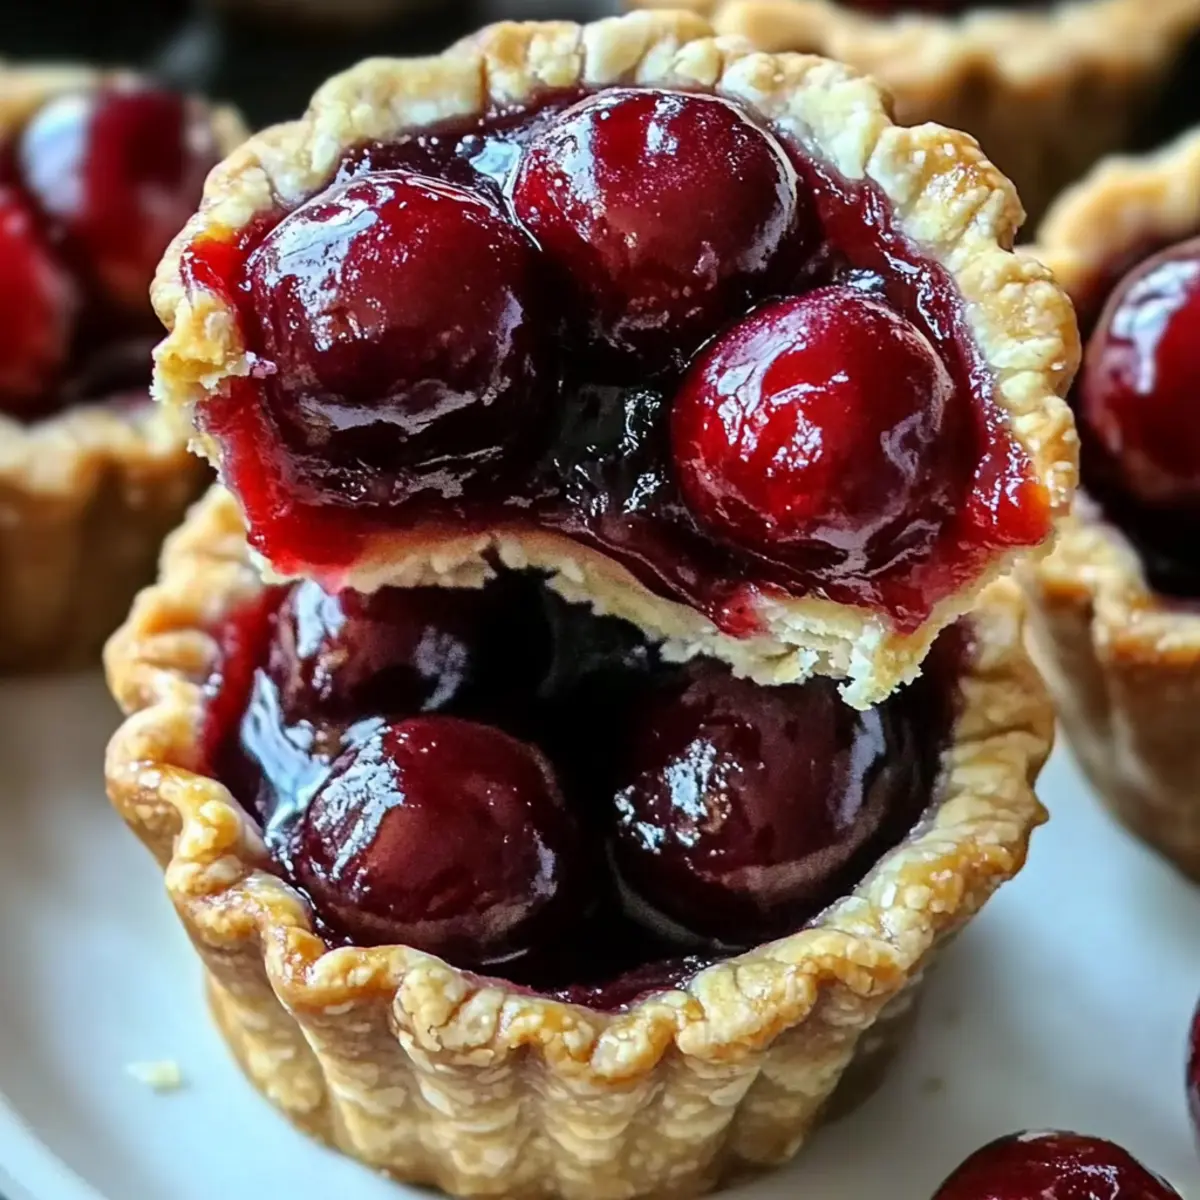
As I stood by my kitchen window, the sun pouring in like golden syrup, I couldn’t help but think how perfect a day it was for baking. That’s when the idea for these Easy Mini Cherry Pies struck me! With their crisp, buttery crusts hugging a vibrant cherry filling, these little wonders are the ultimate way to add joy to summer picnics or family gatherings. Honestly, the best part? They come together with just four simple ingredients and are incredibly easy to make! Whether you’re looking for a fun dessert to share or a portable treat to munch on, these Mini Cherry Pies are sure to impress. Want to know the secret behind their charm? Let’s dive into this delightful recipe together!
Why Are Mini Cherry Pies So Irresistible?
Joyful, Bite-Sized Treats: These delightful Mini Cherry Pies pack all the flavor of a full-sized pie into a portable, easy-to-enjoy format.
Quick & Simple: With only four ingredients, you’ll have these sweet delights ready in no time, making them perfect for busy days or spontaneous gatherings.
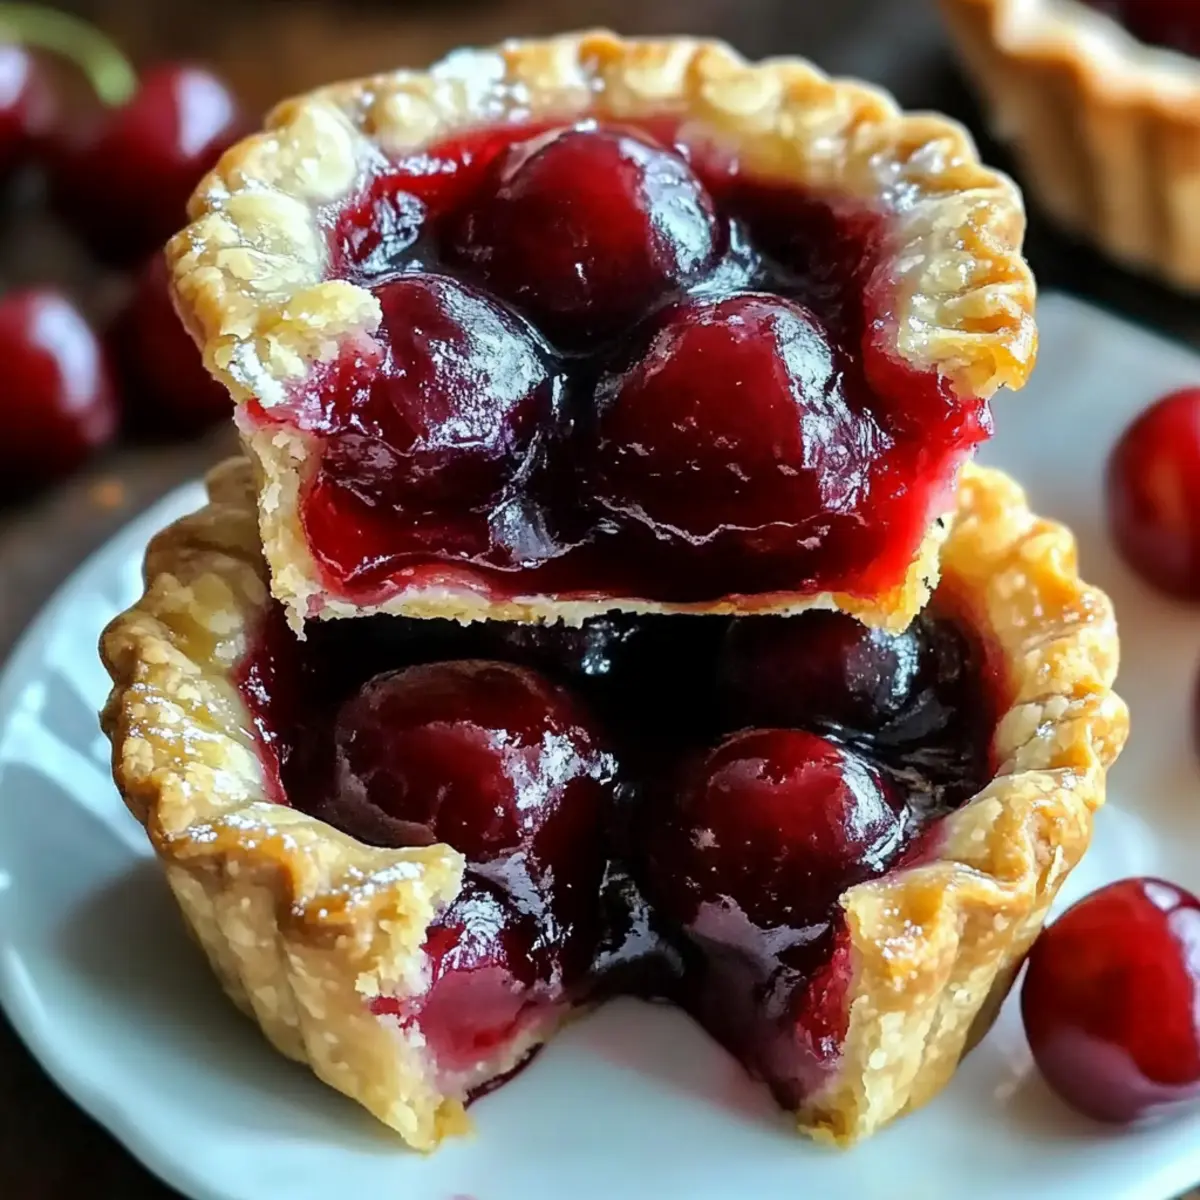
Crispy, Buttery Crust: The flaky texture melts in your mouth, complementing the luscious cherry filling flawlessly.
Customizable Flavors: Feel free to swap out cherry filling for other fruits like blueberry or peach; each variation brings a unique twist, just like my beloved Mini Oreo Cheesecakes.
Crowd-Pleasing Appeal: Whether for a picnic or a family dinner, these mini delights will make everyone smile, transforming an ordinary meal into a memorable feast.
Mini Cherry Pie Ingredients
Get ready to whip up a batch of these delightful Mini Cherry Pies with just a handful of ingredients!
For the Crust
• Store-bought pie crust – Saves time and effort; feel free to use homemade for an extra special touch!
For the Filling
• Cherry pie filling – The star of the show; using fresh or frozen cherries can elevate the flavor!
For the Glaze
• Egg white – Brush on top for a shiny, golden finish that makes the pies look irresistible!
For the Topping
• Sugar – A sprinkle right before baking adds that lovely sparkle and sweetness to the crust!
Step‑by‑Step Instructions for Mini Cherry Pies
Step 1: Preheat the Oven
Start by preheating your oven to 350°F (175°C). While it’s heating up, gather your muffin tin and generously grease each cup with cooking spray or butter to ensure easy removal later. This will help your Mini Cherry Pies slide out effortlessly once baked to golden perfection.
Step 2: Cut the Crust
Unroll your store-bought pie crust onto a clean, lightly floured surface. Using a cookie cutter or a glass, cut out 3 ½–4-inch circles. Aim for about 12 circles so you have enough to line the muffin tin. The circles should be evenly shaped to fit snugly into each muffin cup, creating the perfect base for your Mini Cherry Pies.
Step 3: Form the Crusts
Carefully place each dough circle into a greased muffin cup, pressing gently into the bottom and up the sides to form a mini crust. Make sure to mold the dough snugly but without tearing it. This will cradle your sweet cherry filling beautifully, ensuring that every bite of these Mini Cherry Pies is filled with delightful flavor.
Step 4: Add the Filling
Spoon the cherry pie filling into each crust, filling them about two-thirds full. Avoid overfilling to prevent spills while baking, which can cause a messy clean-up later. Watching that vibrant, thick filling glisten in its new crust is a sure sign you’re on the right path to a delicious treat.
Step 5: Create the Topping (Optional)
If you’d like to get creative, roll out any leftover pie crust and cut it into thin strips. Weave them together for a beautiful lattice topping that adds a charming touch to your Mini Cherry Pies. Arrange the strips artfully across the filling or simply lay them on top for a rustic look that makes your pies stand out.
Step 6: Brush and Sugar
Once your pies are assembled, lightly brush the tops with the beaten egg white for a lovely shiny glaze. This gives your Mini Cherry Pies a golden finish. Sprinkle a touch of sugar over each one for added sparkle and sweetness, enhancing the visual and flavor appeal of your baked treats.
Step 7: Bake
Carefully place the muffin tin in the preheated oven and bake your Mini Cherry Pies for 25–30 minutes. Keep an eye on them, and look for a golden-brown crust and bubbling filling as indicators that they are perfectly done. The wonderful aroma will fill your kitchen, making anticipation even sweeter!
Step 8: Cool and Remove
Once your pies are golden and bubbly, take them out of the oven and let them cool in the tin for about 15–20 minutes. This cooling period helps them set and makes it easier to lift them out. Gently coax each Mini Cherry Pie from the muffin tin, taking care to keep its lovely shape intact.
Expert Tips for Mini Cherry Pies
Keep Dough Cool: Chilling your pie dough briefly can prevent it from becoming sticky, allowing you to work with it more easily.
Prevent Soggy Bottoms: To avoid a soggy crust, sprinkle a thin layer of flour or sugar in the crust before adding the filling.
Perfect Lattice Topping: Use a ruler to cut uniform strips for the lattice, and ensure your dough is chilled for clean cuts and neat assembly.
Check for Doneness: For perfect Mini Cherry Pies, look for a golden crust and bubbling filling; this indicates they are baked through and ready to enjoy!
Storage Tips: Keep leftovers in an airtight container in the fridge for up to 3 days, or freeze for longer storage.
How to Store and Freeze Mini Cherry Pies
Fridge: Store leftover Mini Cherry Pies in an airtight container in the refrigerator for up to 3 days to maintain freshness and flavor.
Freezer: For longer storage, freeze your Mini Cherry Pies in a freezer-safe container or tightly wrapped in plastic wrap for up to 1 month.
Thawing: When ready to enjoy, thaw the pies in the fridge overnight; then warm them in a preheated oven at 350°F (175°C) for about 10 minutes for that freshly-baked taste.
Reheating: If you’ve frozen them, remember to follow the thawing instructions before reheating to ensure your Mini Cherry Pies are deliciously warm and inviting!
Make Ahead Options
These Mini Cherry Pies are perfect for meal prep enthusiasts looking to save time on busy weeknights! You can prepare the pie crusts and fill them with cherry pie filling up to 24 hours in advance. Simply cover the filled pies with plastic wrap and refrigerate to keep them fresh. When you’re ready to enjoy these delightful treats, remove them from the fridge, brush with egg white, sprinkle with sugar, and bake as directed. This way, you’ll have delicious, homemade Mini Cherry Pies that are just as tasty as if they were made fresh that day, making your dessert planning a breeze!
What to Serve with Mini Cherry Pies
Indulge in a delightful feast that pairs effortlessly with the sweet charm of these adorable Mini Cherry Pies.
- Whipped Cream: A dollop of fluffy whipped cream on top adds a rich creaminess that balances the tart cherry filling beautifully.
- Vanilla Ice Cream: Serving warm pies with a scoop of vanilla ice cream creates a delightful contrast between the hot and cold elements. The classic pairing brings a comforting vibe to any dessert table.
- Fresh Berries: A mix of fresh strawberries and blueberries complements the cherry flavor while adding a burst of freshness. Their vibrant colors also make for an eye-catching presentation!
- Chocolate Sauce: Drizzling chocolate sauce over the pies offers a decadent touch. The smooth richness from the chocolate enhances the experience of each bite.
- Lemon Sorbet: The refreshing tartness of lemon sorbet serves as a lovely palate cleanser and light complement to the sweet pies. It introduces a bright note to the dessert experience.
- Iced Tea: A chilled glass of sweetened iced tea provides a refreshing counterpoint, making it a perfect accompaniment for summer gatherings. The lightness of the tea pairs nicely with the sweetness of the pies.
- Coffee: A warm cup of coffee can elevate the dessert experience, bringing out the flavors of the cherry filling while providing a comforting finish to your meal.
Mini Cherry Pies Variations & Substitutions
Feel free to experiment with these Mini Cherry Pies to suit your tastes and pantry!
-
Blueberry Bliss: Swap the cherry filling for blueberry for a delightful twist that’s just as sweet.
Blueberries bring a juicy burst of flavor and are perfect for the summer months. -
Peachy Keen: Substitute peach filling and add a sprinkle of cinnamon for a warm, fruity profile.
The cinnamon adds a cozy touch, making these pies ideal for fall gatherings. -
Chocolate-Cherry Combo: Mix in chocolate chips with the cherry filling for a decadent dessert experience.
The rich chocolate complements the tart cherries beautifully, making for an indulgent treat. -
Raspberry Romance: Use raspberry filling instead of cherries for a tart and vibrant flavor that’s irresistibly delicious.
Topped with whipped cream, these pies become a refreshing delight that everyone will love! -
Nutty Crunch: Add crushed nuts, like pecans or walnuts, to the cherry filling for a delightful crunch in each bite.
This little addition adds texture and a rich, nutty flavor that elevates your mini pies. -
Spicy Cherry Surprise: Incorporate a pinch of cayenne or ginger into the cherry filling for a subtle heat.
A little spice can transform these pies into a unique treat that surprises your taste buds! -
Dairy-Free Delight: Opt for a dairy-free pie crust to accommodate dietary needs without losing flavor.
Combine it with fruit fillings like cherry or blueberry for a guilt-free indulgence. -
Mini Oreo Cheesecakes: Want another portable dessert option? Try my delightful Mini Oreo Cheesecakes for a creamy contrast to these fruit-filled pies!
Explore these variations and make them your own; your baking adventure awaits!
Mini Cherry Pies Recipe FAQs
How do I pick the best cherries for my filling?
Absolutely! If you’re using fresh cherries, look for ones that are plump and firm with a shiny skin. Avoid any that have dark spots or are soft, as they may be overripe. If you’re opting for frozen cherries for convenience, ensure they’re unsweetened and have been stored properly without freezer burn.
What’s the best way to store leftover Mini Cherry Pies?
Very! Place your leftover Mini Cherry Pies in an airtight container and store them in the refrigerator for up to 3 days. This helps keep the crust crispy and the filling fresh. If you want to enjoy them later, consider freezing them—just follow the tips below!
Can I freeze Mini Cherry Pies? How?
Absolutely! To freeze your Mini Cherry Pies, let them cool completely after baking. Then, place them in a single layer in a freezer-safe container or wrap them individually in plastic wrap. They can be frozen for up to 1 month. When you’re ready to enjoy them, simply thaw them overnight in the fridge and warm them in a preheated oven at 350°F (175°C) for about 10 minutes until heated through.
Why is my pie crust soggy?
Oh no! A soggy crust can happen if there’s too much moisture. To prevent this, sprinkle a thin layer of flour or sugar in the bottom of your crust before adding the filling. This acts as a barrier, absorbing excess moisture. Additionally, ensure your pies are baked until golden-brown and bubbly.
Are Mini Cherry Pies suitable for pets?
Not really. While cherries are not toxic to dogs in small quantities, the sugar and crust can be harmful and lead to digestive issues. It’s best to keep these decadent treats for yourself and choose pet-friendly snacks for your furry friends instead.
Can I use other fruits in this recipe?
The more the merrier! Feel free to substitute cherry filling with your favorite fruits like blueberries or peaches. Each fruit brings a unique flavor to your Mini Pies. For a really indulgent twist, try adding chocolate chips to the filling for a delicious chocolate-cherry combo!
Mini Cherry Pies That Spark Joy in Every Bite
Ingredients
Equipment
Method
- Preheat your oven to 350°F (175°C) and grease a muffin tin.
- Unroll the pie crust and cut out 3 ½–4-inch circles.
- Place each dough circle into a greased muffin cup to form the crust.
- Spoon the cherry pie filling into each crust, filling them about two-thirds full.
- Create a lattice topping with leftover pie crust, if desired.
- Brush the tops with egg white and sprinkle sugar over each one.
- Bake for 25–30 minutes until golden brown and filling is bubbling.
- Cool in the tin for 15–20 minutes before gently removing.
Leave a Reply