
As I rummaged through my pantry, I stumbled upon a delightful stash of cheese and pepperoni, my mind racing with possibilities. That’s when the idea of crafting some Pepperoni Cheese Crisps hit me—an absolute game changer for anyone craving a quick and easy snack. Whipping these up takes just 20 minutes, and they’re not only keto-friendly but also gluten-free, making them perfect for gatherings or quiet evenings at home. The satisfying crunch and savory flavor will have your friends and family reaching for more! So, are you ready to indulge in this crispy goodness? Let’s dive into making these irresistible crisps that will kick your snack game up a notch!
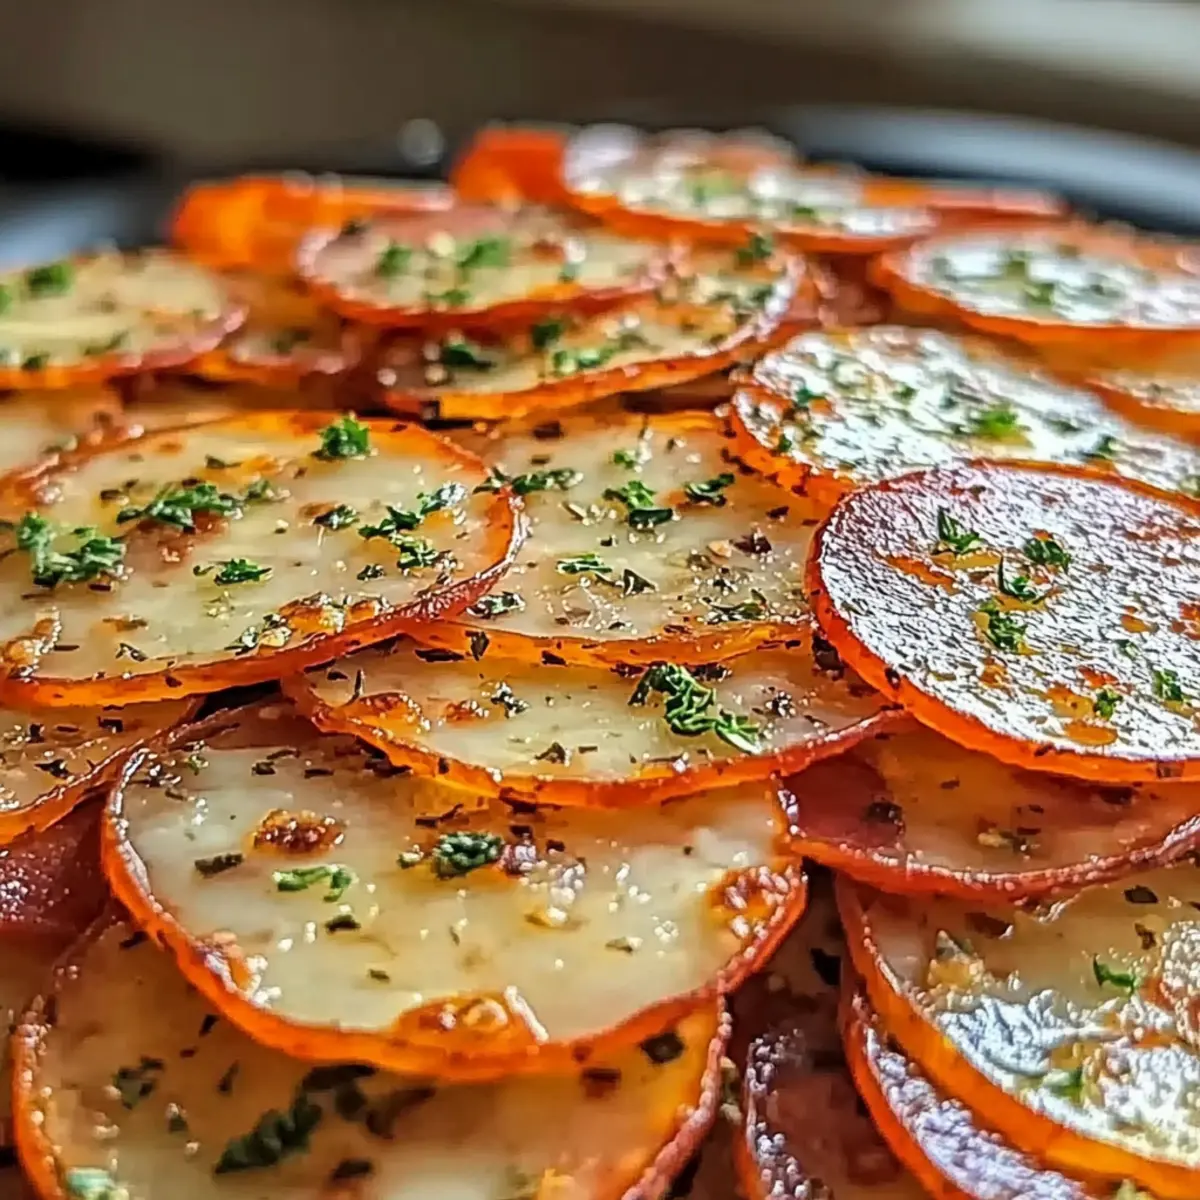
Why are Pepperoni Cheese Crisps a must-try?
Quick and Easy: These crisps come together in just 20 minutes, making them perfect for those busy days when you want something tasty without a lot of fuss.
Delicious Crunch: The combination of crispy cheese and savory pepperoni creates a satisfying snack that rivals your favorite chips.
Keto and Gluten-Free: Ideal for anyone on a low-carb diet, they fit right into your keto-friendly lifestyle while being gluten-free—snacking has never felt better!
Versatile Flavor: Feel free to mix up the cheeses or add a touch of heat with red pepper flakes, tailoring them to your taste.
Crowd-Pleasing Snack: Serve them at gatherings or enjoy a batch while binge-watching your favorite shows—everyone will go crazy for these crispy delights!
If you’re a fan of easy, delectable treats, you might also enjoy our Strawberry Cheesecake Cinnabon or the rich Chocolate Cheesecake Decadent for dessert!
Pepperoni Cheese Crisps Ingredients
For the Crisps
• Shredded Mozzarella Cheese – Provides meltiness and a stretchy texture; try substituting with provolone for an exciting twist.
• Shredded Cheddar Cheese – Adds rich flavor and color; swap for Monterey Jack or pepper jack for a delightful variation.
• Grated Parmesan Cheese – Introduces umami depth and a crispy finish; Pecorino Romano makes a sharper alternative.
• Pepperoni – The star ingredient; about 40-50 slices; consider turkey pepperoni for a lighter option or add cooked sausage for extra protein.
• Italian Seasoning – Enhances flavors with a medley of herbs; individual dried herbs like oregano or basil can be used.
• Garlic Powder – Adds aromatic flavor; fresh minced garlic can serve as a unique substitute.
• Red Pepper Flakes (Optional) – For that spicy kick; adjust according to your heat preference.
• Fresh Parsley (Optional) – For garnish, adding a burst of color and freshness to your snack.
Dive into these Pepperoni Cheese Crisps and elevate your snacking experience!
Step-By-Step Instructions for Pepperoni Cheese Crisps
Step 1: Preheat the Oven
Start by preheating your oven to 375°F (190°C). While it warms up, prepare a baking sheet by lining it with parchment paper. This will prevent your Pepperoni Cheese Crisps from sticking, ensuring they come out perfectly crispy and easy to clean up after.
Step 2: Combine Cheeses
In a mixing bowl, combine shredded mozzarella, cheddar, and grated Parmesan cheese. Use a fork or spatula to mix the cheeses together until they are evenly distributed. This blend will create the deliciously melty and crunchy base for your Pepperoni Cheese Crisps—a few moments of mixing will set you up for snack success!
Step 3: Season Cheese Mixture
Sprinkle in the Italian seasoning and garlic powder, mixing everything well to fully incorporate the flavors into the cheese blend. If you like some heat, don’t forget to add a pinch of red pepper flakes to spice things up! This seasoning will enhance the overall taste of your crispy delights.
Step 4: Prepare Pepperoni
Take the pepperoni slices and, if they are larger, cut them in half to create bite-sized pieces. This will ensure that each Pepperoni Cheese Crisp has a perfect ratio of cheese to pepperoni. Evenly distributed pepperoni also helps with uniform cooking, leading to a balanced flavor in every bite.
Step 5: Arrange on Baking Sheet
Carefully place the prepared pepperoni slices in a single layer on the lined baking sheet. Ensure there’s some space between the slices, as this allows the cheese to melt and create that irresistible crispiness. You’ll want to see the vibrant red of the pepperoni shining through nicely.
Step 6: Top with Cheese
Generously sprinkle your cheese mixture over the arranged pepperoni slices. Be sure to cover each slice thoroughly, as the melted cheese will bind the pepperoni and create a delicious crunchy topping. Picture the melted cheese bubbling and melding together with that savory pepperoni—pure snack perfection!
Step 7: Bake
Pop the baking sheet into the preheated oven and bake for 8-10 minutes. Keep a close eye on your Pepperoni Cheese Crisps; they are ready when the cheese is bubbly and golden brown around the edges. The aroma in your kitchen will hint that something delicious is on its way!
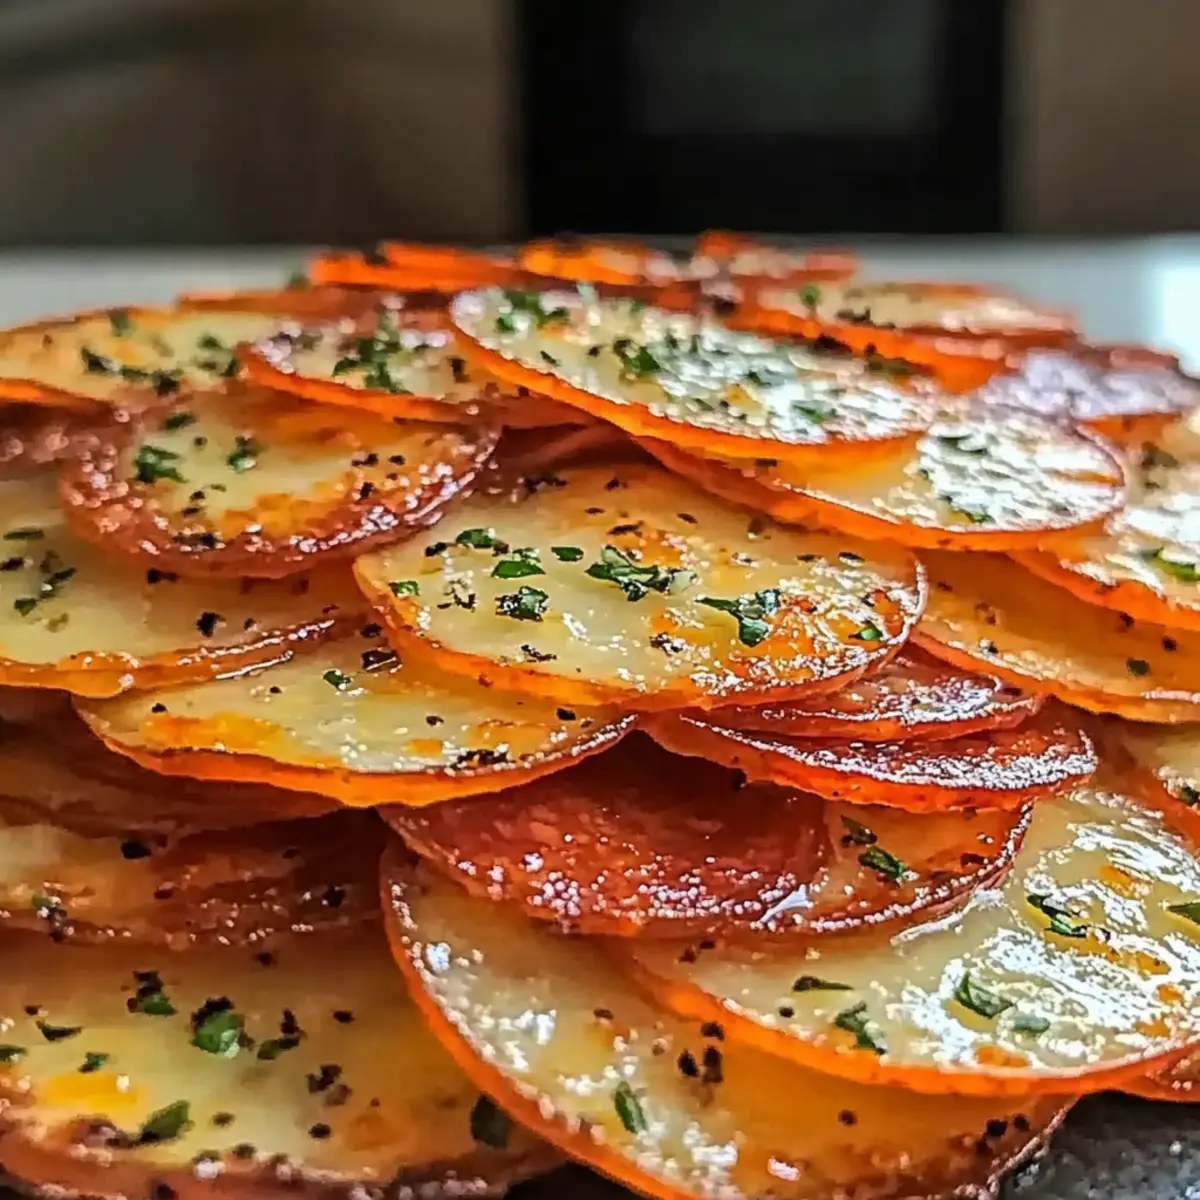
Step 8: Cool Crisps
Once baked, carefully remove the baking sheet from the oven and let the crisps cool for a few minutes. This cooldown period is important, as it allows the cheese to firm up a bit, making for that satisfying crunch. Transfer the crisps to a wire rack to cool completely for the best texture.
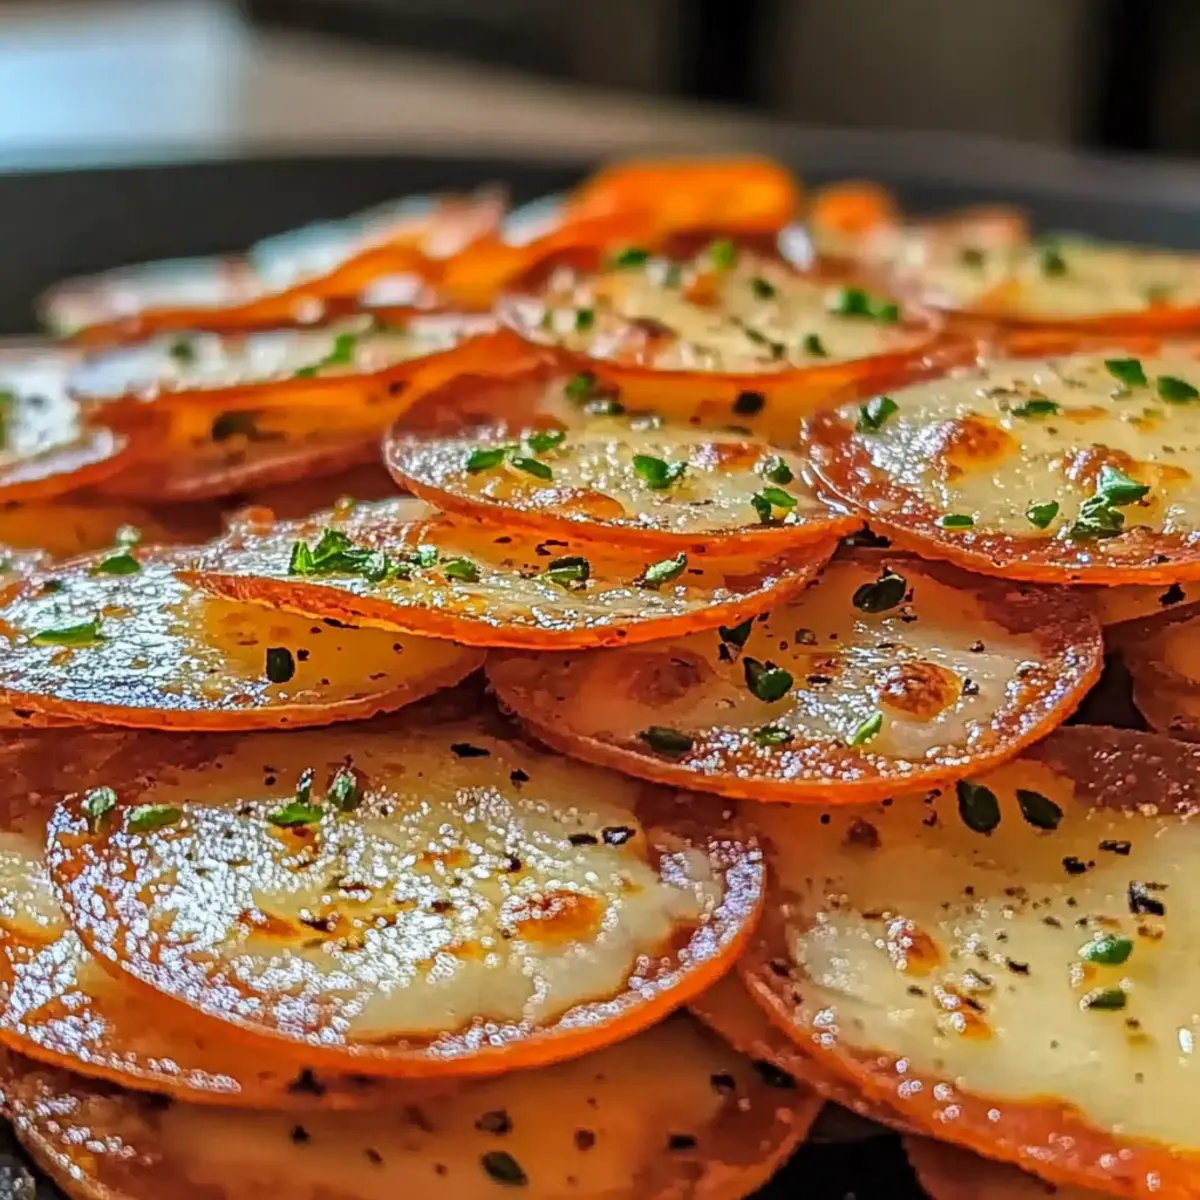
Step 9: Serve and Garnish
These Pepperoni Cheese Crisps are best enjoyed warm! Serve them immediately for the ultimate snacking experience, and if you like, sprinkle with fresh parsley for a pop of color and freshness. You can also pair them with marinara sauce for a delicious dipping option.
Step 10: Store Leftovers
If you happen to have any leftovers, place them in an airtight container. They can be stored for a few days, but for the best texture, reheat them in a toaster oven or air fryer before serving. This way, the crispiness will be revived, ready for your next snacking session!

Expert Tips for Perfect Pepperoni Cheese Crisps
-
Watch the Bake Time: Keep an eye on your Pepperoni Cheese Crisps as they bake. They can go from perfect to burnt within seconds, so check for golden brown edges.
-
Use Quality Cheese: Opt for full-fat cheeses for the best flavor and texture. Low-fat varieties may not melt and crisp as nicely.
-
Avoid Crowding: Make sure to leave space between the pepperoni slices on the baking sheet. Overcrowding prevents even crisping, leading to soggy results.
-
Customize Seasoning: Feel free to personalize the seasoning to suit your taste. Add more red pepper flakes for extra heat or switch up the Italian herbs for variety.
-
Storage Matters: To maintain crispiness, store any leftover Pepperoni Cheese Crisps in an airtight container and reheat before serving for the best texture.
With these tips in mind, your next batch of Pepperoni Cheese Crisps will be an irresistible hit!
Pepperoni Cheese Crisps: Exciting Variations Await!
Feel free to explore these delicious ideas and make this recipe uniquely yours!
-
Cheese Blend: Try a combination of mozzarella and gouda for a creamy twist. The rich, smoky flavor of gouda complements the pepperoni beautifully.
-
Veggie Boost: Mix in finely chopped bell peppers or jalapeños to the cheese mixture. Not only do they add color, but they also bring a delightful crunch and a hint of sweetness.
-
Nutty Flavor: Consider adding a sprinkle of nutritional yeast to the cheese blend for a cheesy flavor that adds depth and a nutty touch. It’s a popular dairy-free option loved by many!
-
Herb Infusion: Instead of Italian seasoning, experiment with fresh herbs like thyme or rosemary for an aromatic experience that elevates your crisps to gourmet status. You’ll be amazed at how a little fresh herb can transform the flavor!
-
Flavored Sausages: For an added protein kick, swap out pepperoni for cooked chorizo or Italian sausage. Each bite becomes a little festival of flavors that everyone will be talking about.
-
Saucy Surprise: Pre-bake your crisps for a few minutes, then drizzle with hot sauce or pesto before finishing baking. This brings an exciting flavor explosion that’s both savory and a little spicy!
-
Cheesy Explosion: Add a mix of cheeses like pepper jack or feta for a bold flavor and an added creamy texture. It takes your traditional crisps to new cheesy heights!
These Pepperoni Cheese Crisps are versatile delights, and if you find yourself craving something sweet afterward, treat yourself to our decadent Caramel Brownie Cheesecake—it’s an experience you won’t forget!
Make Ahead Options
These Pepperoni Cheese Crisps are perfect for meal prep, allowing you to enjoy a crunchy snack without much last-minute fuss! You can prepare the cheese mixture (mozzarella, cheddar, and Parmesan) and refrigerate it up to 3 days in advance. Additionally, you can slice the pepperoni and store it in an airtight container for up to 5 days. When you’re ready to serve, simply arrange the pepperoni on a baking sheet, sprinkle with your prepped cheese mixture, and bake as directed. This approach not only saves time but ensures your crisps are just as delicious, providing that delightful crunch you crave!
How to Store and Freeze Pepperoni Cheese Crisps
Airtight Container: Place any leftovers in an airtight container to keep them fresh. They can last for up to 3 days at room temperature.
Fridge: If you want to extend freshness, store them in the fridge for up to a week, but note that they may lose some crispiness.
Reheating Tips: To regain their crunchy texture, reheat your Pepperoni Cheese Crisps in a toaster oven or air fryer for a few minutes before serving.
Freezer: For longer storage, freeze the crisps in a single layer on a baking sheet, then transfer to a freezer-safe bag for up to 1 month. Reheat directly from the freezer for best results.
What to Serve with Pepperoni Cheese Crisps
Elevate your snack game by exploring delightful pairings that enhance the irresistible crunchiness of these cheesy bites.
- Marinara Sauce: The classic dip for all cheese lovers, this tangy sauce adds a savory contrast to the crispy snacks.
- Creamy Ranch Dressing: The cool, herbal flavors of ranch balance the spice of the pepperoni, making each bite a refreshing experience.
- Guacamole: This creamy dip offers a velvety texture that complements the crispiness while adding a touch of zest to your snacking.
- Roasted Veggies: Colorful, slightly charred vegetables add freshness and crunch that pairs beautifully with the rich flavors of the crisps.
- Stuffed Peppers: Mini stuffed bell peppers with cheese or meat provide a sweet contrast to the salty, crunchy cheese crisps, creating a harmonious bite.
- Charcuterie Board: Pair these crisps with an assortment of meats, olives, and cheeses for an impressive platter that’s sure to please any crowd.
- Sparkling Water with Lime: Refreshing and light, this drink cleanses the palate between bites, allowing the flavors of the crisps to shine.
- Chocolate-Covered Almonds: For a sweet finish, these add a delightful crunch and subtle sweetness that beautifully contrasts with the savory crisps.
Pepperoni Cheese Crisps Recipe FAQs
How do I choose the right pepperoni?
When selecting pepperoni for your Pepperoni Cheese Crisps, look for slices that are vibrant in color without any dark spots. You can choose between traditional pork pepperoni or turkey pepperoni for a lighter version. If you’re seeking variety, consider adding other types of meat like cooked sausage or even salami for an extra flavor punch!
How should I store leftovers?
After making your Pepperoni Cheese Crisps, let them cool completely before storing. Place them in an airtight container for maximum freshness. They can last for up to 3 days at room temperature, but for extended freshness, refrigerate them for up to a week. Remember, reheating in a toaster oven or air fryer will help restore their crunchy texture!
Can I freeze Pepperoni Cheese Crisps?
Absolutely! To freeze your Pepperoni Cheese Crisps, first, arrange them in a single layer on a baking sheet. Freeze until solid, then transfer the crisps to a freezer-safe bag or container. They can be stored for up to 1 month. To enjoy later, simply reheat directly from the freezer in the toaster oven until they are warm and crispy again!
What can I do if the cheese burns?
If your cheese starts to burn while baking, your temperature could be too high. Keep an eye on the crisps, checking them a minute or two earlier than the recommended bake time. You want them to be golden brown and bubbly, but not charred. If you do notice some areas are burnt, it’s perfectly fine to trim those off before serving!
Are these suitable for people with dietary restrictions?
Yes! These Pepperoni Cheese Crisps are naturally gluten-free and can easily be made keto-friendly. For those with dairy allergies, you might like to experiment with dairy-free cheese alternatives, though the texture and flavor may vary. Always check ingredient labels to ensure they meet any specific dietary needs!
What can I serve with these crisps?
These little delights pair perfectly with an array of dips! I recommend serving your Pepperoni Cheese Crisps with marinara sauce for a classic touch. However, feel free to get creative with other dips like creamy ranch, spicy salsa, or even a tangy guacamole. They make a fantastic addition to any charcuterie board as well!
Crispy Pepperoni Cheese Crisps for Irresistible Snacking
Ingredients
Equipment
Method
- Preheat your oven to 375°F (190°C) and line a baking sheet with parchment paper.
- In a mixing bowl, combine shredded mozzarella, cheddar, and grated Parmesan cheese until evenly distributed.
- Sprinkle in the Italian seasoning and garlic powder, mixing well. Add red pepper flakes if desired.
- Cut larger pepperoni slices in half to create small pieces for even distribution.
- Arrange the pepperoni slices on the lined baking sheet, ensuring some space between them.
- Sprinkle the cheese mixture generously over the pepperoni slices.
- Bake for 8-10 minutes until cheese is bubbly and golden brown.
- Allow the crisps to cool for a few minutes before transferring to a wire rack.
- Serve warm, optionally garnished with fresh parsley and enjoy!
- Store any leftovers in an airtight container for up to 3 days or refrigerate for up to a week.
Leave a Reply