
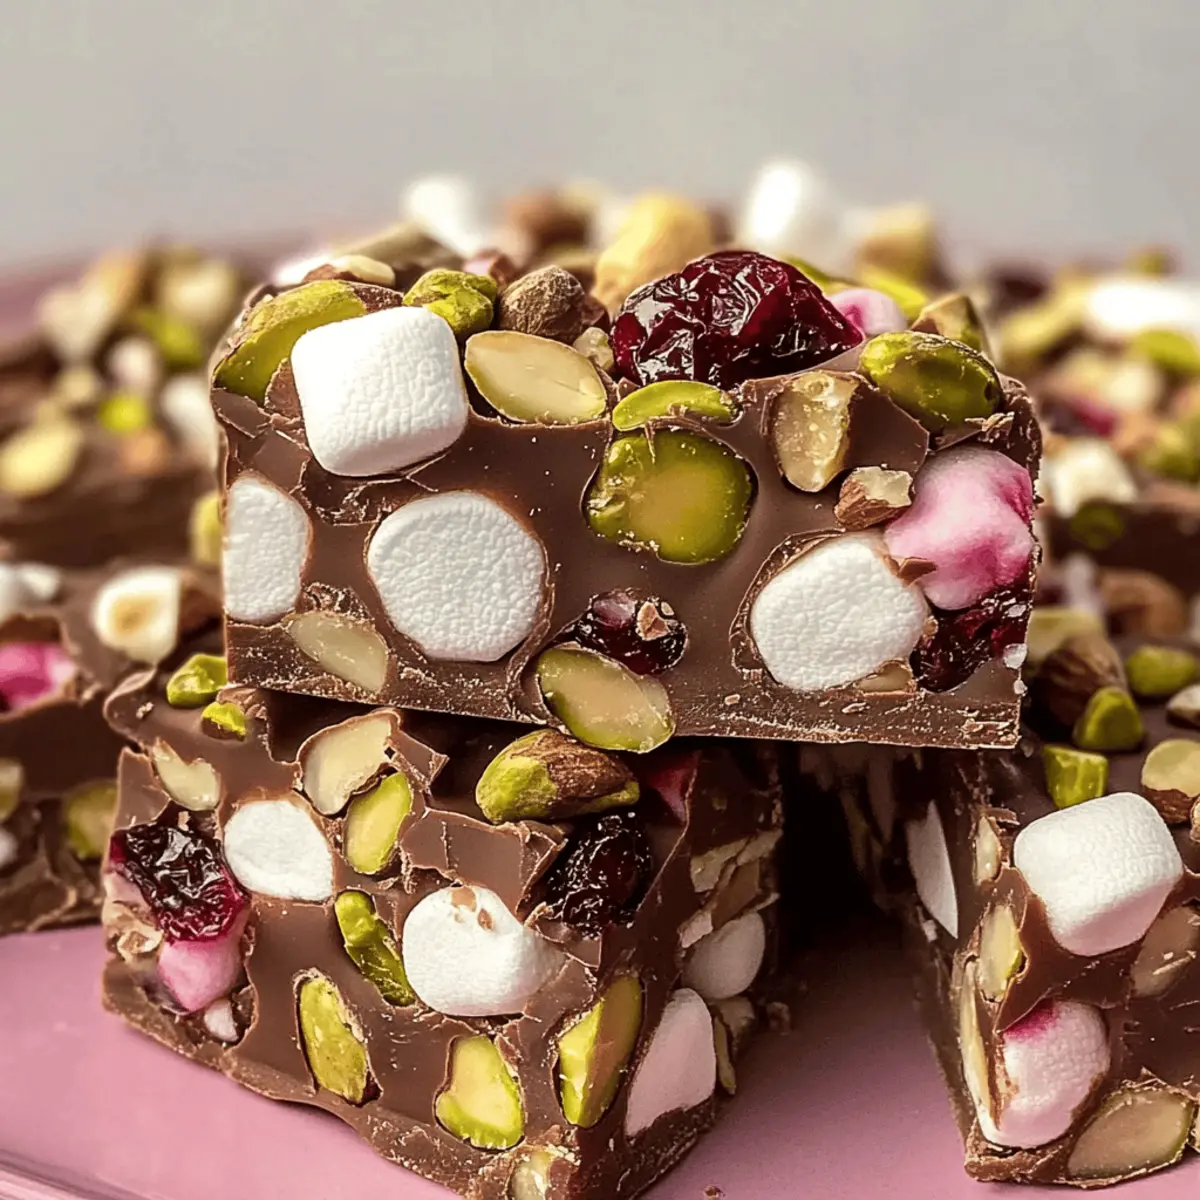
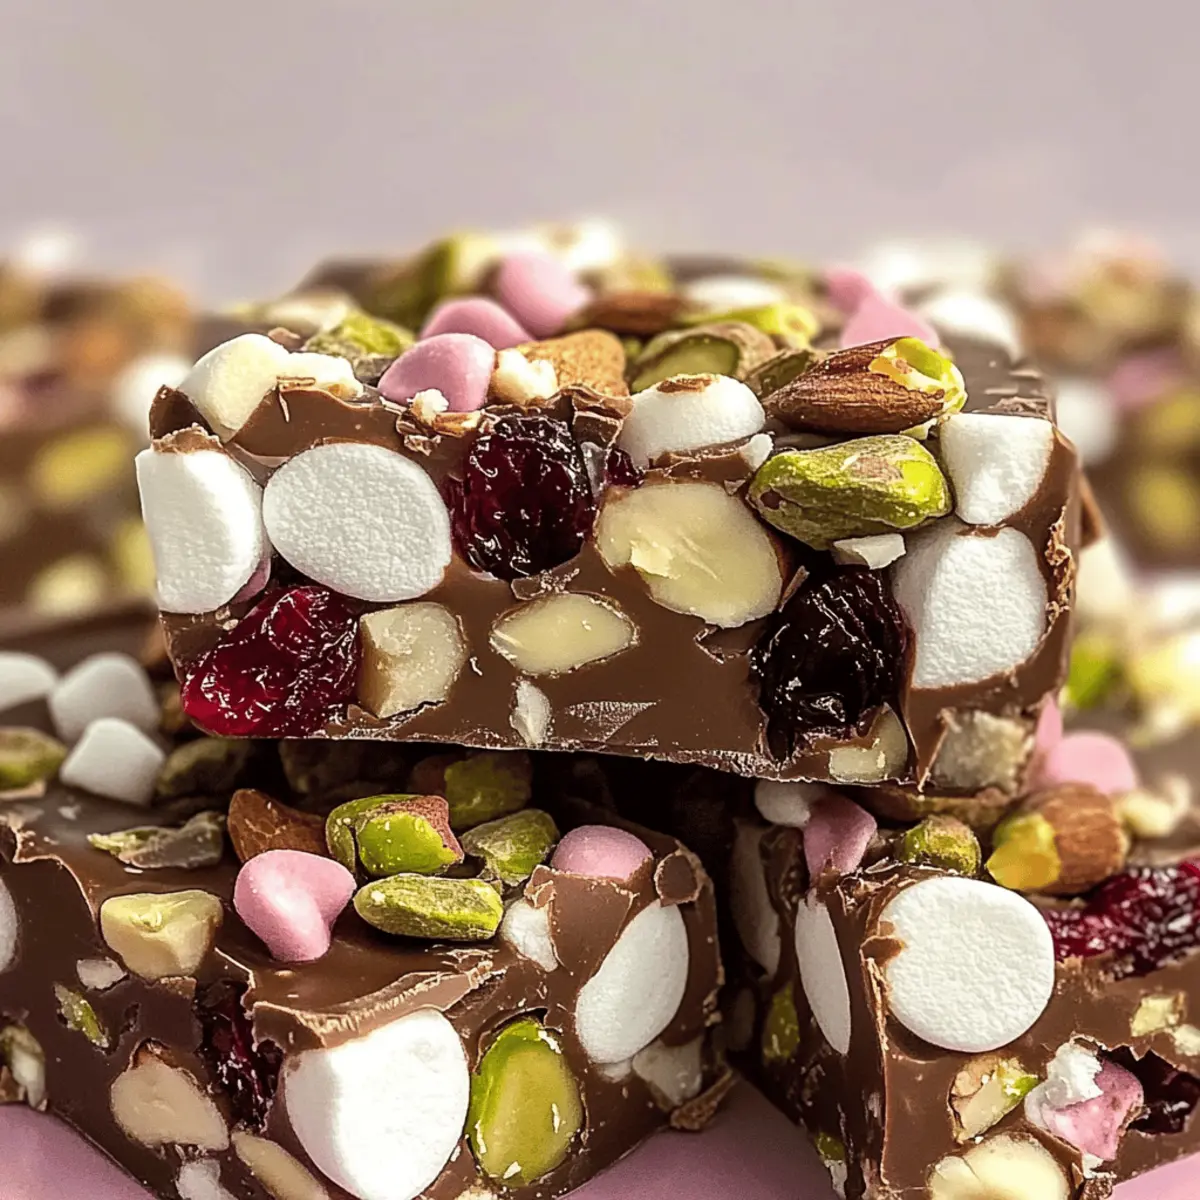
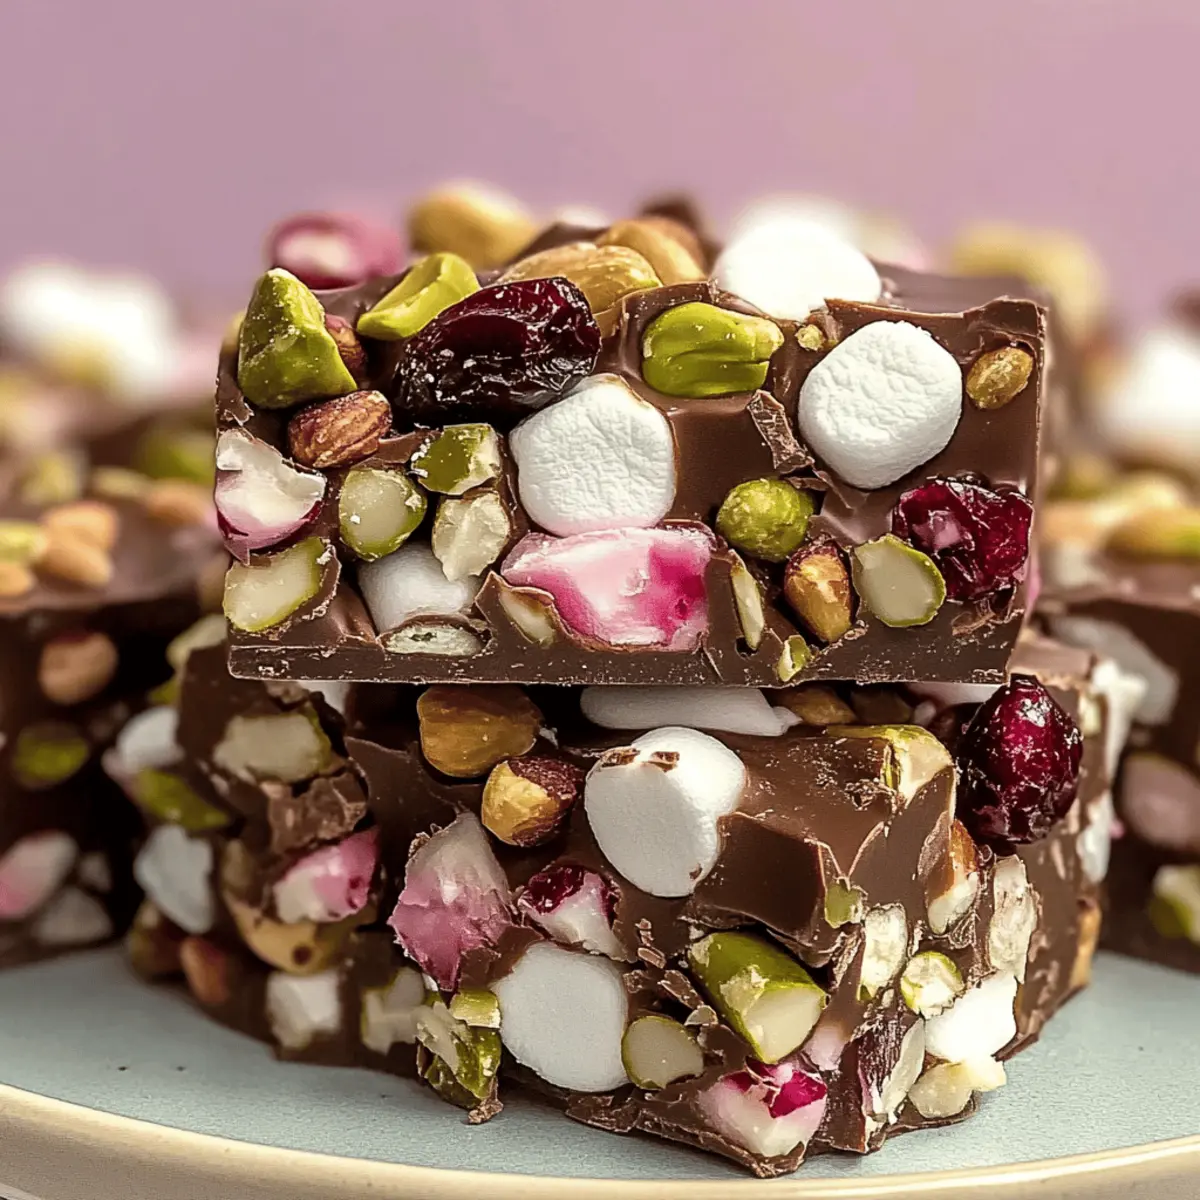
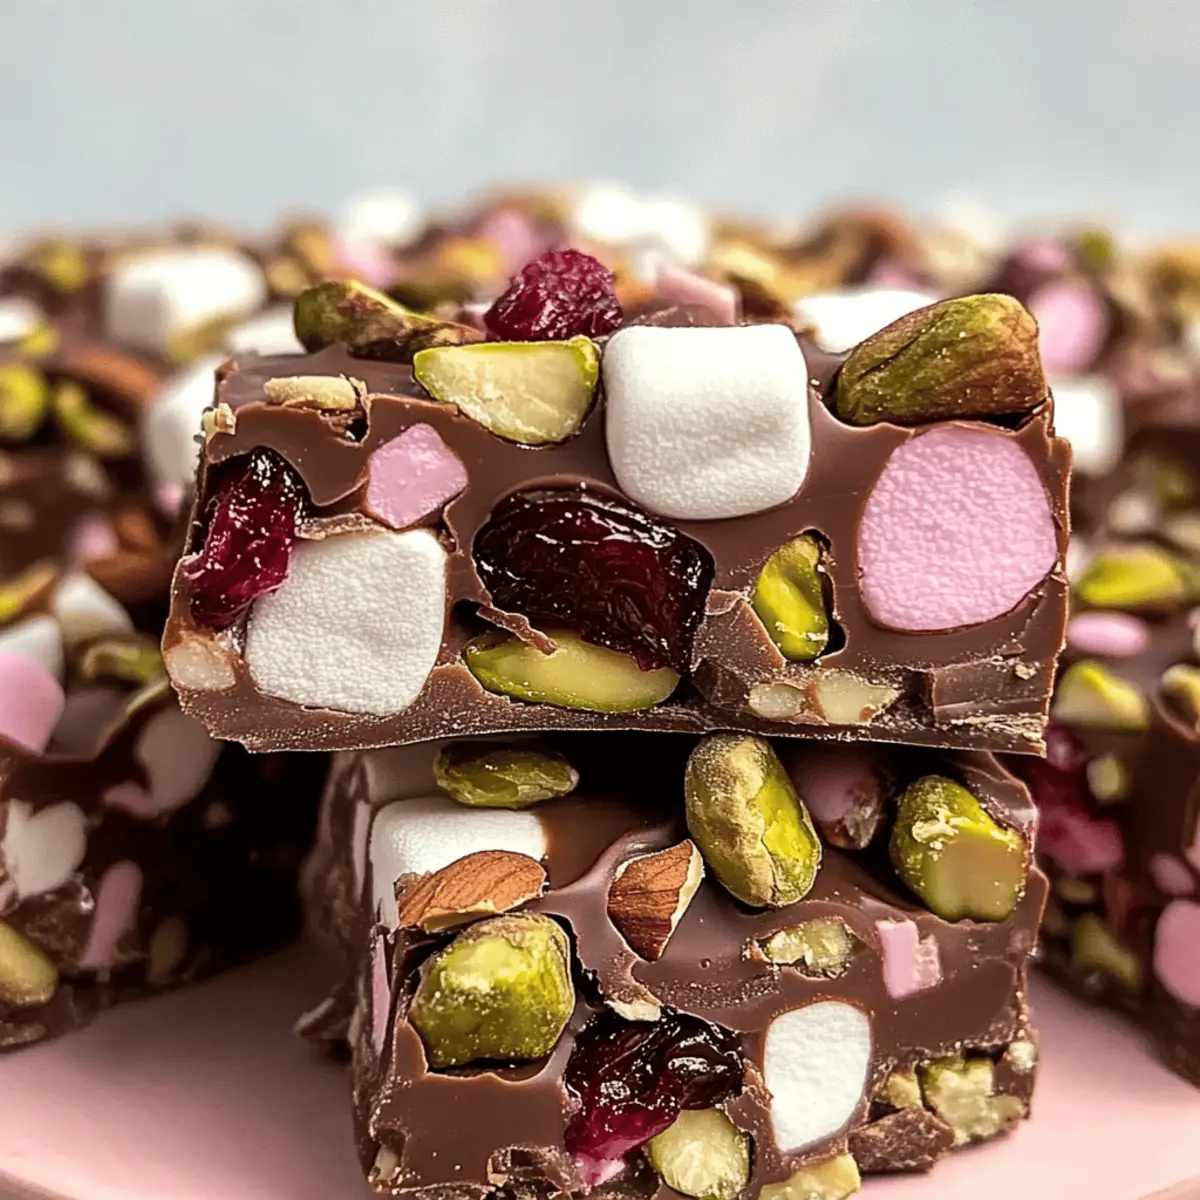
The aroma of chocolate wafting through the kitchen can instantly transform any moment into a celebration, especially during the holidays. Whipping up a batch of Easy No-Bake Christmas Rocky Road is not only a delightful way to unleash your inner chocolatier in just 20 minutes, but it also serves as a customizable crowd-pleaser that dazzles at any festive gathering. Picture a perfect medley of roasted macadamia nuts, crunchy pistachios, chewy cranberries, and fluffy marshmallows—each square a treasure of textures and flavors wrapped up in holiday cheer. Whether you’re sharing them with loved ones or packaging them as gifts, these treats make every bite feel like a warm embrace. Ready to dive into the world of joyous indulgence? Let’s roll up our sleeves and get started!
Why is Christmas Rocky Road a Must-Try?
Quick, No-Bake Delight: You can whip this up in just 20 minutes, making it ideal for last-minute gatherings.
Endless Customization: Mix in your favorite nuts, candies, or even a dash of peppermint for a personal touch—just like my Christmas Kitchen Sink Cookies.
Crowd-Pleasing Treat: The delightful combination of textures—cocoa-rich chocolate, crunchy nuts, and chewy marshmallows—will wow your guests.
Perfectly Festive: Each piece embodies the spirit of the season, making them a charming addition to any holiday table.
Great for Gifting: Package these treats as thoughtful gifts to spread holiday cheer effortlessly!
Christmas Rocky Road Ingredients
• Ready to craft this delightful holiday treat? Here’s everything you’ll need!
For the Chocolate Base
- Milk Chocolate – Provides a smooth, creamy base; feel free to swap with all dark chocolate for a richer flavor.
- Dark Chocolate – Enhances the richness; you can omit this if you’re using only milk chocolate.
For the Mix-ins
- Roasted Macadamia Nuts – Adds wonderful crunch and a nutty flavor; substitute with almonds for a different twist.
- Crispy Pistachios – Offers additional crunch and beautiful color; sunflower seeds can be used as a nut-free alternative.
- Mini Marshmallows – Contributes a softness that balances out the crunch; larger ones can be halved for a similar experience.
- Cranberries – Provides a sweet and tart burst; dried cherries work as a lovely alternative.
- Turkish Delight – Introduces a unique chewy texture; feel free to replace with other chewy candies if desired.
Optional Toppings
- Extra Nuts – Sprinkle on top for added decoration and flavor.
- Colorful Sprinkles – A fun addition that enhances the festive look of the Christmas Rocky Road!
Step‑by‑Step Instructions for Easy No-Bake Christmas Rocky Road
Step 1: Melt Chocolate
Begin by chopping the milk and dark chocolate into small pieces for even melting. Place the chocolate in a microwave-safe bowl and microwave on medium power for 20 seconds. Remove and stir well, returning to the microwave for additional 20-second intervals until smooth and fully melted, which should take about 1 to 2 minutes total. Be careful not to overheat the chocolate; it should be glossy and silky.
Step 2: Mix in Ingredients
Once the chocolate is melted and slightly cooled, gently fold in the roasted macadamia nuts, crispy pistachios, mini marshmallows, and cranberries. Stir until all the mix-ins are evenly coated in the rich chocolate mixture. The colors and textures should combine beautifully, ensuring a delightful balance for your Christmas Rocky Road.
Step 3: Prepare Pan
Line an 8-inch square baking pan with parchment paper for easy removal. Pour the chocolate mixture into the pan, spreading it out evenly using a spatula. Make sure the mixture reaches all corners, creating a uniform layer that will set nicely. This step is crucial for achieving the perfect thickness for your holiday treat.
Step 4: Add Toppings
Before the chocolate mixture begins to set, sprinkle any optional toppings you like, such as extra nuts or colorful sprinkles, over the surface. Press them slightly into the mixture to help them adhere. This step adds visual appeal and a festive touch to your Easy No-Bake Christmas Rocky Road.
Step 5: Chill to Set
Cover the baking pan with plastic wrap or aluminum foil to keep the mixture fresh. Place it in the refrigerator and chill for at least 1 hour, or until completely firm. The chocolate should hold its shape well, allowing you to slice it into delicious squares when ready to serve.
Step 6: Cut and Serve
Once set, carefully lift the Rocky Road out of the pan using the parchment paper. Place it on a cutting board and slice into squares of your desired size. Each piece should reveal the beautiful layers of nuts, marshmallows, and chocolate. Serve these delightful treats at your holiday gatherings and watch them disappear!
What to Serve with Easy No-Bake Christmas Rocky Road?
Indulging in this festive treat can be even more delightful when paired with complementary flavors that enhance its rich chocolatey goodness.
- Rich Hot Chocolate: A cozy mug of hot chocolate perfectly matches the chocolatey flavor, creating a warm and inviting dessert experience.
- Vanilla Ice Cream: The creamy texture of vanilla ice cream balances the chocolate crunch, making each bite a heavenly contrast of temperatures.
For a special twist, serve with crispy Spiced Nuts. Their savory crunch adds a delightful contrast, keeping your palate engaged through each sweet bite of Rocky Road.
- Fresh Berries: Tart, juicy berries cut through the sweetness, offering a refreshing bite that brightens up your dessert spread.
- Coffee: A strong cup of coffee pairs wonderfully, enhancing the chocolate depth while providing a comforting experience for the adults gathered around.
- Gingerbread Cookies: Their spiced warmth enriches the festive feel, turning your dessert table into a magical holiday tableau.
Finish off with Festive Peppermint Bark for a chocolatey kick. Its crunch and minty freshness echo the flavors of the Rocky Road while adding that classic holiday twist!
Christmas Rocky Road Variations
Feel free to explore mouthwatering twists on this festive treat that suit your taste and dietary needs!
-
Nut-Free: Omit all nuts and replace them with sunflower seeds for a similar crunch without the allergy concerns. This makes the treat accessible to everyone!
-
Peppermint Chocolate: Add a teaspoon of peppermint extract to the melted chocolate for a refreshing holiday touch. This little addition brings a burst of festive flavor that makes your Rocky Road truly special.
-
Dark Chocolate Delight: Substitute all milk chocolate with dark chocolate for a richer, deeper flavor profile. The intense chocolatey experience will impress chocolate lovers everywhere!
-
Colorful Marshmallows: Use vibrant mini marshmallows mixed with festive colors to create a visually stunning treat. A playful touch that adds to the allure, just like my Christmas Kitchen Sink Cookies.
-
Tropical Twist: Incorporate dried pineapple or mango chunks in place of cranberries for a delightful tropical flavor. This variation is reminiscent of summer bliss—perfect for those who love a fruity edge!
-
Crunchy Cereal Layer: Mix in crispy rice cereal or granola for an added crunch factor. The playful texture contrasts beautifully with the creamy chocolate base.
-
Spicy Kick: Sprinkle in a dash of cayenne or chili powder for a hint of heat. This unexpected twist will pleasantly surprise those who take a bite!
-
Chewy Candy Fun: Substitute the Turkish Delight with your favorite chewy candy, such as fruit chews or gummy bears, to mix things up. This swap can lead to exciting flavor combinations that everyone will love!
Helpful Tricks for Christmas Rocky Road
-
Temperature Check: Ensure melted chocolate is glossy but not too hot. Overheating can lead to a lumpy texture, ruining your Christmas Rocky Road.
-
Mixing Method: Stir gently when folding in mix-ins to avoid crushing the marshmallows and nuts. A light hand ensures all ingredients are coated!
-
Even Layering: Spread the mixture evenly in the pan before chilling. This helps each piece of your Rocky Road maintain consistency in thickness.
-
Cutting Technique: For clean slices, dip your knife in hot water before cutting. It’ll glide through the chocolate without sticking to the ingredients.
-
Storage Solution: Store leftover Christmas Rocky Road in an airtight container in the fridge for up to 2 weeks, ensuring it stays fresh for you to enjoy later!
Storage Tips for Christmas Rocky Road
Fridge: Store the Christmas Rocky Road in an airtight container for up to 2 weeks. This keeps it fresh and prevents it from absorbing any odors from the fridge.
Freezer: For longer storage, wrap the slices tightly in plastic wrap and place them in a freezer-safe container. They can be frozen for up to 3 months, ensuring you have this delightful treat on hand for future celebrations.
Thawing: When ready to enjoy, transfer the frozen Rocky Road to the fridge to thaw overnight. This gentle thawing method helps preserve its texture and flavor.
Serving: Cut into squares straight from the fridge or allow to sit at room temperature for 10-15 minutes for a perfectly soft and chewy experience!
Make Ahead Options
These Easy No-Bake Christmas Rocky Road treats are perfect for meal prep and can save you valuable time during the busy holiday season! You can prepare the chocolate mixture and mix in the ingredients up to 24 hours in advance. Just follow the melting and mixing steps, then pour the mixture into your lined pan. Cover and refrigerate until you’re ready to serve. When you’re ready to impress your guests, simply take it out, let it sit at room temperature for about 10 minutes to soften slightly, and cut it into squares. This method ensures your treats remain just as delicious and festive, making holiday entertaining a breeze!
Christmas Rocky Road Recipe FAQs
What chocolate should I use for the best flavor?
I recommend using a combination of milk chocolate and dark chocolate for a rich and creamy base. The milk chocolate provides smoothness, while the dark chocolate adds depth. If you prefer just one type, using all milk chocolate works perfectly fine for a sweeter taste.
How should I store leftover Christmas Rocky Road?
Store any leftover Christmas Rocky Road in an airtight container in the fridge for up to 2 weeks. This way, the treats remain fresh and protected from any odors in your refrigerator. Make sure to keep them well-sealed to maintain their delightful textures!
Can I freeze Christmas Rocky Road?
Absolutely! To freeze, wrap the slices tightly in plastic wrap, ensuring no air is trapped inside, and then place them in a freezer-safe container. Your treats will stay fresh for up to 3 months. When you’re ready to enjoy, simply move them to the fridge for an overnight thaw—that’ll help retain their luscious texture.
What can I substitute for the nuts in the recipe?
If you’d like to make a nut-free version of your Christmas Rocky Road, simply omit the roasted macadamia nuts and pistachios. You can replace the nuts with puffed rice for added crunch or use sunflower seeds for a nut-like texture, providing a delightful alternative without allergens.
How do I know when my chocolate is melted properly?
Melted chocolate should be glossy and silky smooth without any lumps. When microwaving, stir frequently and take it out in 20-second intervals to prevent overheating. Once fully melted, let it cool slightly before mixing in other ingredients for the best consistency!
Can I use different mix-ins for personalization?
Yes! The joy of making Christmas Rocky Road lies in its customization. You can swap macadamia nuts for almonds, use dried cherries instead of cranberries, or even add in some peppermint extract for a festive twist. Get creative and make it your own!
Irresistible Christmas Rocky Road You'll Love to Share
Ingredients
Equipment
Method
- Chop the milk and dark chocolate into small pieces and melt in a microwave-safe bowl.
- Once melted, gently fold in macadamia nuts, pistachios, mini marshmallows, and cranberries.
- Line an 8-inch square baking pan with parchment paper and pour the chocolate mixture into it.
- Sprinkle any optional toppings over the melted chocolate before it sets.
- Cover and chill in the refrigerator for at least 1 hour until firm.
- Once set, lift from the pan and cut into squares for serving.
Leave a Reply