
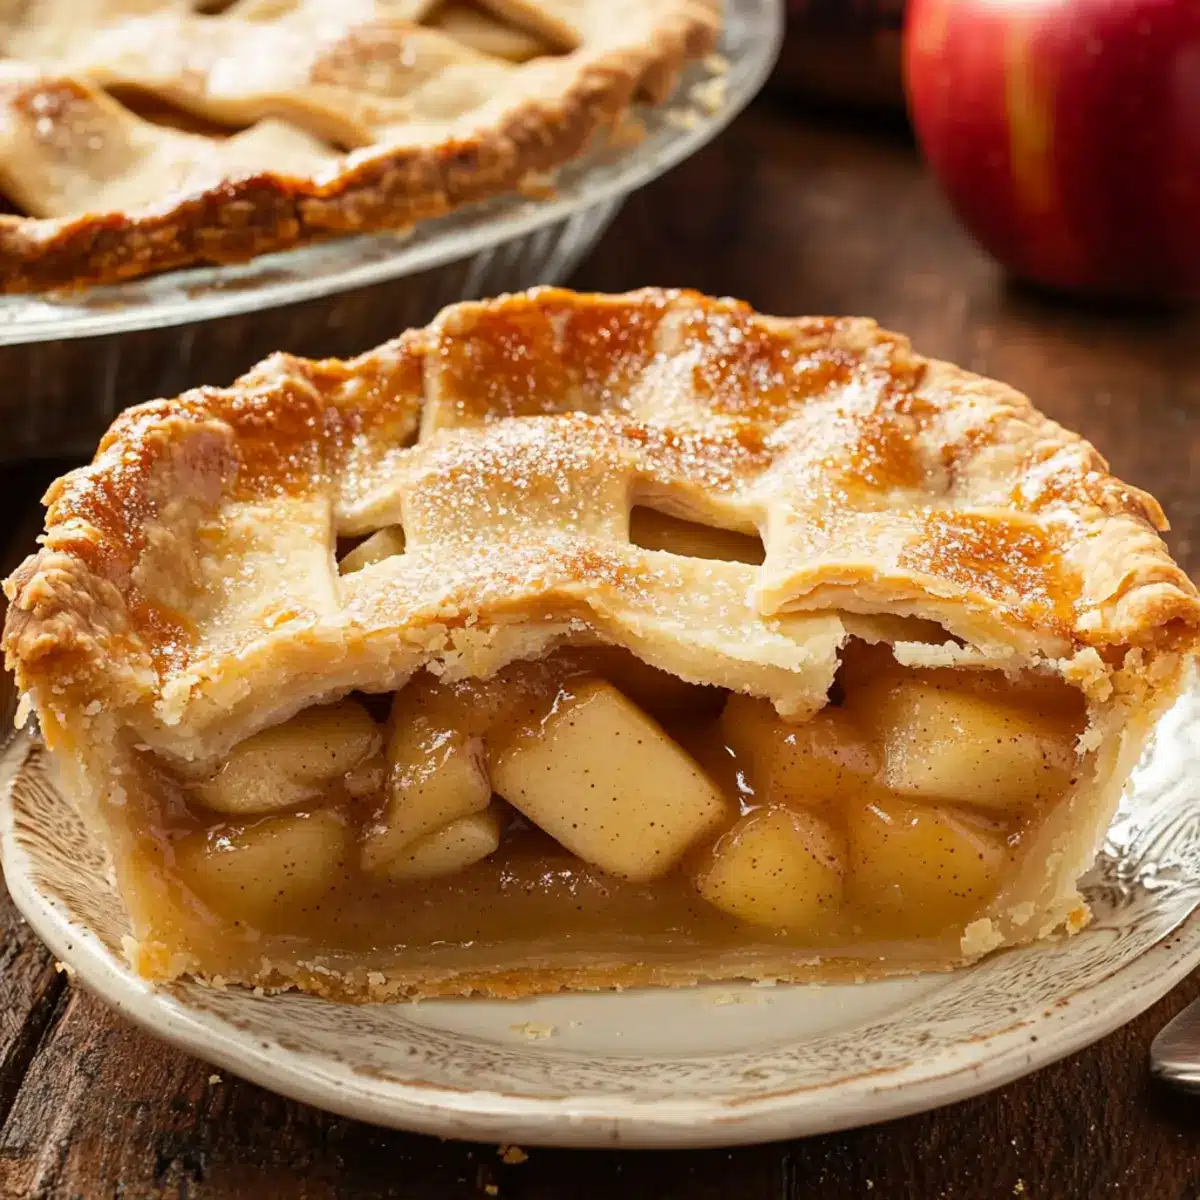
The aroma of baking apples mingling with warm cinnamon is like a time machine that transports us to cozy gatherings around the kitchen table. In this post, I’m excited to share my Classic Homemade Apple Pie recipe, a beloved staple that’s easy to whip up and meant for sharing—perfect for family get-togethers or quiet evenings at home. This pie is not just comforting; it’s a beautiful blend of tender caramelized apples tucked beneath a flaky, buttery crust that makes each bite a delightful experience. Plus, it offers a delightful way to show off your baking skills without spending the entire day in the kitchen. Are you ready to uncover the secrets behind this timeless dessert? Let’s dive in!

Why is Homemade Apple Pie So Special?
Comforting at its core, this homemade apple pie brings warmth to any gathering, evoking fond memories of shared moments. Deliciously versatile, customize the filling with your favorite apple varieties for a taste that suits every palate. Effortlessly simple, anyone can master this classic dessert without hours spent in the kitchen. A showstopper, this pie dazzles with its golden crust and sweet, spiced apple filling, making it a perfect centerpiece for family occasions. For more cozy recipes, check out my Baked Oatmeal Applesauce or explore new flavors with Pineapple Zucchini Bread.
Homemade Apple Pie Ingredients
For the Filling
• Apples – 6 cups (about 6 medium, peeled, cored, and cut into ¼ inch thick slices) provide the main flavor and filling; consider a mix of tart and sweet apples like Granny Smith and Honeycrisp for best results.
• Sugar – ¾ cup; sweetness for the apple filling. Adjust based on the tartness of the apples used.
• All-Purpose Flour – 2 tablespoons; thickens the juice released from the apples during baking.
• Ground Cinnamon – ¾ teaspoon; adds a warm spice that complements the sweetness of the apples.
• Salt – ¼ teaspoon; enhances all flavors for a well-rounded taste.
• Ground Nutmeg – ⅛ teaspoon; works beautifully with cinnamon to elevate the filling.
• Lemon Juice – 1 tablespoon; brightens the flavor of the apples; can be substituted with vinegar for a sharper taste.
• Butter – 2-3 tablespoons (cut into small pieces); enriches the filling with a creamy texture.
For the Crust
• Double Pie Crust – 1 pastry; forms the structure for the pie and can be homemade or store-bought, depending on your preference.
Embrace the joy of baking with this Homemade Apple Pie recipe, and watch as it becomes a cherished favorite at your family gatherings!
Step‑by‑Step Instructions for Homemade Apple Pie
Step 1: Prepare the Pie Crust
Start by rolling out your double pie crust on a clean, floured surface until it’s about ⅛ inch thick. Carefully place the bottom crust into a 9-inch pie plate, ensuring it fits snugly against the sides. Use your fingers to press the crust into the plate, trimming any excess dough hanging over the edges, and refrigerate while you prepare the filling.
Step 2: Make the Filling
In a large mixing bowl, combine the sliced apples, sugar, flour, cinnamon, salt, nutmeg, and lemon juice. Toss the mixture well until all the apple slices are evenly coated with the sugar and spices. This ensures a well-balanced flavor in your homemade apple pie. Set the filling aside for a few minutes to allow the flavors to meld.
Step 3: Fill the Crust
Remove the pie crust from the refrigerator and spoon the apple mixture into the crust-lined pie plate. Dot the top of the apple filling with small pieces of butter for extra richness. Cover the pie with the second crust, sealing the edges by crimping them with your fingers or a fork to create a lovely pattern. Remember to slice slits into the top crust to allow steam to escape while baking.
Step 4: Bake the Pie
Preheat your oven to 425°F (220°C). Once it’s heated, place your apple pie on the middle rack and bake for 15 minutes. Then, reduce the temperature to 375°F (190°C) and continue baking for an additional 30 minutes. Keep an eye on the crust; it should turn golden brown and the filling should bubble gently when the pie is ready.
Step 5: Cool and Serve
Once baked to perfection, remove the homemade apple pie from the oven and let it cool on a wire rack for at least 2 hours. This cooling time allows the filling to set up and makes slicing easier. When ready, serve your warm pie with a scoop of vanilla ice cream or whipped cream for a delightful finish.
Make Ahead Options
These homemade apple pies are a blessing for busy weeknights! You can prepare the pie crust and filling up to 24 hours in advance; simply roll out the crust and store it in the refrigerator, while the apple mixture can also be refrigerated in an airtight container. To maintain the freshest flavors and prevent browning, add the lemon juice to the filling right before you’re ready to assemble it. When you’re ready to bake, fill the pie crust with the apple mixture, cover with the top crust, and bake according to the recipe instructions, starting with a high temperature to get that lovely golden color. This way, you’ll have a warm and comforting homemade apple pie, ready with minimal effort when you need it most!
Homemade Apple Pie Adaptations
Feel free to personalize your homemade apple pie with these delightful twists and substitutions, ensuring it’s perfectly tailored to your taste.
-
Nutty Crunch: Add chopped pecans or walnuts to the apple filling for an unexpected crunch. This nutty flavor can enhance the heartiness of your pie, making each slice even more delightful.
-
Oat Crumble: Replace the top crust with a streusel topping made of oats, flour, butter, and brown sugar for a cozy, crunchy finish. This variation adds a rustic charm, perfect for those who adore extra texture in their desserts.
-
Spice It Up: Introduce a hint of ground ginger or allspice to the apple mixture for a warm, spiced twist. A little extra spice goes a long way, creating a comforting aroma that fills your home.
-
Citrus Burst: Experiment with orange juice or zest alongside the lemon juice for a refreshing citrus flavor that brightens the apple filling. This zesty touch can awaken the flavors of the apples beautifully.
-
Sweeten Wisely: Swap out regular sugar for brown sugar or maple syrup for a richer sweetness with caramel undertones. The depth of flavor from these sweeteners elevates your pie to a new level of deliciousness.
-
Bourbon Boost: For an adults-only version, adding a splash of bourbon to the filling can introduce a warm, aromatic complexity. This twist is perfect for special occasions, as it offers a sophisticated depth to your dessert.
-
Gluten-Free Crust: Use a gluten-free pie crust for a delicious alternative suitable for gluten-sensitive family members. It allows everyone to indulge in this classic without worry.
Feel inspired? With each variation, you can make your homemade apple pie an even more personal and cherished staple. And, if you’re looking for more cozy baking ideas, don’t forget to check out my Baked Oatmeal Applesauce or dive into the flavors of Pineapple Zucchini Bread. Happy baking!
Expert Tips for Homemade Apple Pie
Choose the Right Apples: Use a mix of tart and sweet apples like Granny Smith and Honeycrisp for the best flavor combination in your homemade apple pie.
Slice Evenly: Ensure your apple slices are uniform in thickness to guarantee they cook at the same rate, resulting in a perfectly tender filling.
Don’t Overfill: Avoid adding too many apples, as overflowing can cause messy bubbling over. Stick to the recommended amount for a clean bake.
Butter It Up: Dot the filling with small pieces of butter before adding the top crust. This adds richness and enhances the flavor of the pie.
Cool Before Slicing: Always allow the pie to cool completely. This resting time helps the filling set, making for cleaner slices and better presentation.
Storage Tips for Homemade Apple Pie
Room Temperature: Allow your pie to cool completely, then cover it loosely with foil or a kitchen towel to store at room temperature for up to 2 days.
Fridge: Store leftover pie tightly covered in the refrigerator for up to 4 days to keep it fresh and safe to enjoy.
Freezer: For longer storage, wrap the pie in plastic wrap, then in aluminum foil, and freeze for up to 3 months. Thaw overnight in the fridge before reheating.
Reheating: To enjoy your homemade apple pie warm, reheat individual slices in the microwave for 30 seconds or place the whole pie in a preheated oven at 350°F (175°C) for 15-20 minutes.
What to Serve with Classic Homemade Apple Pie
The delight of a freshly baked pie invites a gathering of flavors, making your dining experience truly special.
- Vanilla Ice Cream: A scoop of vanilla ice cream melts beautifully over warm pie, creating a creamy contrast to the flaky crust and spiced apples.
- Whipped Cream: Light and airy, whipped cream adds a luscious touch, enhancing the pie’s comforting flavors without overwhelming them.
- Caramel Sauce: Drizzling warm caramel over each slice transforms your dessert into an indulgent treat with its rich sweetness and silky texture.
- Pecan Pie Bars: Introducing another layer of flavors, these bars offer a delightful crunch that balances well with the soft apple filling.
- Spiced Apple Cider: Warm up cider with cinnamon sticks to elevate the apple experience. Its cozy flavor pairs beautifully beside your pie.
- Cheddar Cheese: A surprising addition, sharp cheddar on the side offers a savory contrast that brings out the sweetness of the apples beautifully.
- Autumn Harvest Salad: Fresh greens mixed with dried cranberries and nuts create a crisp, refreshing side that complements your pie, balancing sweetness with crunch.
- Pumpkin Spice Latte: Serve alongside a cup of this classic drink; the warm spices harmonize with apple pie, embracing the seasonal flavors of fall.
- Chocolate Chip Cookies: Add a batch of homemade cookies for an extra sweet touch, creating a comforting dessert spread the whole family will enjoy.
Homemade Apple Pie Recipe FAQs
What type of apples should I use for my homemade apple pie?
Absolutely! A mix of tart and sweet apples works wonderfully, such as Granny Smith for acidity and Honeycrisp for sweetness. This combination ensures a balanced flavor profile in your pie.
How long can I store leftover pie, and where should I keep it?
You can store your leftover homemade apple pie tightly covered in the refrigerator for up to 4 days. If you prefer, you can leave it at room temperature for up to 2 days, just make sure it cools completely first.
Can I freeze homemade apple pie, and how would I do that?
Yes, you can freeze apple pie! Wrap it tightly in plastic wrap followed by aluminum foil to prevent freezer burn. It can be stored for up to 3 months. When you’re ready to enjoy, thaw it overnight in the fridge and reheat it in a preheated oven at 350°F (175°C) for 15-20 minutes.
What should I do if my apples turn brown before I bake?
Very simple! To prevent browning, toss your sliced apples in lemon juice immediately after cutting. This acidity helps maintain their lovely color and flavor as you prepare your homemade apple pie.
Are there any dietary considerations I should be aware of with this apple pie?
If you’re serving this pie to family or friends with dietary restrictions, a few adjustments can be made. Substitute the sugar with a sugar alternative for those watching their sugar intake, and ensure the crust is made with gluten-free flour if needed. If you have allergies to nuts or dairy, consider using dairy-free butter options in the filling and crust.
Warm and Cozy Homemade Apple Pie for Every Family Gathering
Ingredients
Equipment
Method
- Roll out the double pie crust on a clean, floured surface until it's about ⅛ inch thick. Place the bottom crust into a 9-inch pie plate and refrigerate.
- In a large mixing bowl, combine sliced apples, sugar, flour, cinnamon, salt, nutmeg, and lemon juice. Toss until all slices are coated. Set aside for flavors to meld.
- Spoon the apple mixture into the crust-lined pie plate. Dot the filling with small pieces of butter, cover with the second crust, seal edges and slice slits into the top crust.
- Preheat your oven to 425°F (220°C). Bake the pie for 15 minutes, then reduce temperature to 375°F (190°C) and bake for an additional 30 minutes.
- Remove pie from the oven and let it cool on a wire rack for at least 2 hours before slicing.
Leave a Reply