
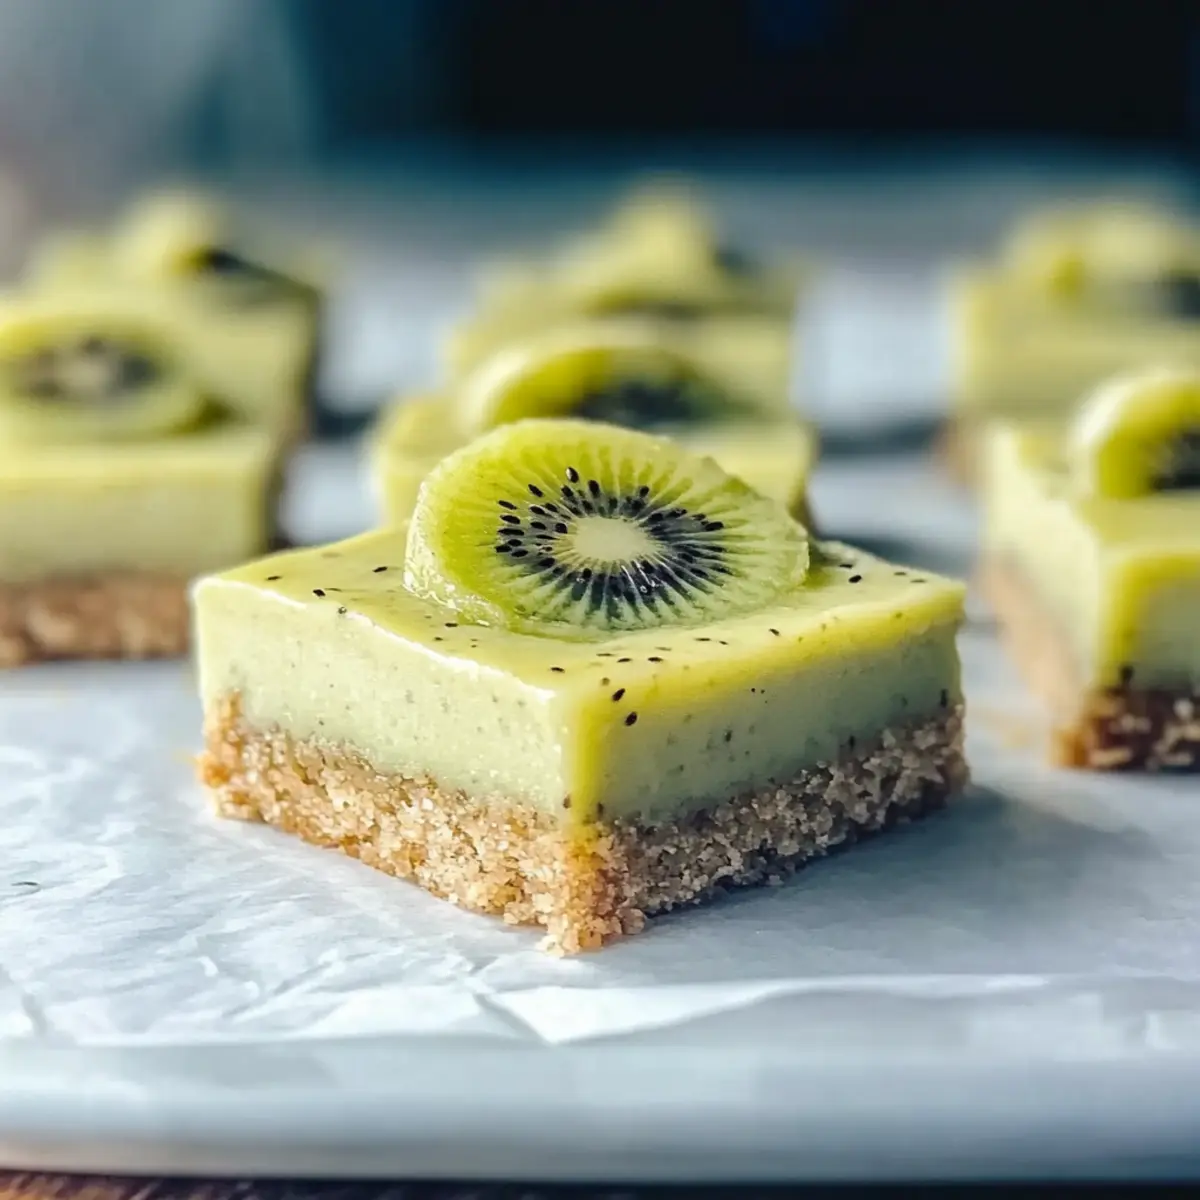
Stepping into the kitchen feels like unwrapping a gift: every ingredient holds promise, and today, that promise is all about the vibrant, tropical delight of Kiwi Bars! These irresistible treats bring a beautiful splash of color and a sweet-tart zing that transports me right to paradise. What I love most is how quick they are to make—perfect for unexpected guests or that craving for something fruity and refreshing. Plus, they’re vegan-friendly, so everyone can enjoy a slice of summer bliss. Whether you’re hosting a backyard barbecue or savoring a cozy evening at home, these Kiwi Bars are sure to make a splash. Curious about how to whip them up and perhaps try some fruity variations? Let’s get started!
Why Try These Kiwi Bars?
Ease of Preparation: You’ll appreciate how simple it is to create these delicious Kiwi Bars. Just mix, bake, and chill for a delightful dessert that anyone can master!
Refreshing Flavor: The sweet-tart burst of fresh kiwis shines through, taking your taste buds on a tropical adventure. Pair them with whipped cream for extra indulgence, or try a variation with strawberries for another zing!
Vegan-Friendly: Enjoy the satisfaction of offering a treat that everyone can savor, regardless of their dietary preferences. These bars cater to various diets without compromising on taste.
Perfect for Any Occasion: Whether it’s a summer party or a cozy gathering, these Kiwi Bars are a showstopper. They work beautifully alongside iced tea or lemonade, making them an ideal choice for warm days.
Crowd-Pleasing Delight: Trust me, these bars will disappear quickly, leaving everyone wanting more! They’re an instant hit with family and friends, bringing smiles with every bite.
For even more delightful options, don’t forget to check out how to Bake Chocolate Bars that can complement your dessert table!
Kiwi Bars Ingredients
For the Filling
• Ripe Kiwis – Use fresh kiwis for optimal flavor and that vibrant green color.
• Sugar – Adjust the sweetness to balance the tartness of the kiwis as you like.
• Lemon Juice – A splash enhances flavor; lime juice is a tasty alternative!
• Cornstarch – Essential for thickening the filling, ensuring the perfect texture.
• Eggs – Helps bind the filling and allows it to set beautifully when baked.
For the Crust
• Graham Cracker Crumbs – Forms the base; opt for gluten-free crumbs for a different twist.
• Butter – Adds richness; use vegan butter for a plant-based version.
• Powdered Sugar – Sweetens the crust and can be adjusted or omitted to taste.
Optional Toppings
• Whipped Cream – A delightful addition that pairs wonderfully with the fruity batter of the Kiwi Bars.
• Fresh Mint – Adds a touch of freshness that complements the fruity flavors beautifully.
Dive into the joy of creating these Kiwi Bars—it’s time to embrace that tropical delight!
Step‑by‑Step Instructions for Kiwi Bars
Step 1: Prepare the Oven
Preheat your oven to 350°F (175°C) and grab an 8×8-inch baking pan. Line the pan with parchment paper, allowing some overhang to make it easier to lift out the Kiwi Bars once they’re baked. The aroma of the preheating oven will set the stage for this delightful tropical treat.
Step 2: Make the Crust
In a mixing bowl, combine graham cracker crumbs and melted butter until the mixture resembles wet sand. Press this mixture evenly into the prepared pan, creating a solid base. Aim for a firm and compact crust, which will provide a delicious foundation for your Kiwi Bars. Bake the crust for 8-10 minutes, or until it’s lightly golden.
Step 3: Prepare the Filling
While the crust cools, peel and mash the ripe kiwis in a separate bowl until smooth. Stir in sugar, lemon juice, cornstarch, and eggs thoroughly until well blended. The mixture should be vibrant and smooth—this filling will create the delightful fruity layer of your Kiwi Bars.
Step 4: Bake the Filling
Pour the kiwi mixture over the pre-baked crust, spreading it out evenly. Bake the assembled Kiwi Bars in the oven for 25-30 minutes, or until the filling is set and has a slight golden hue on top. Keep an eye on them, as a golden surface indicates they’re perfectly baked.
Step 5: Cool Down
Remove the pan from the oven and allow it to cool completely at room temperature, which helps the filling firm up. Once cooled, use the parchment paper overhang to lift the bars out of the pan. Place them on a cutting board and let them chill in the fridge for an hour before slicing.
Step 6: Serve and Enjoy
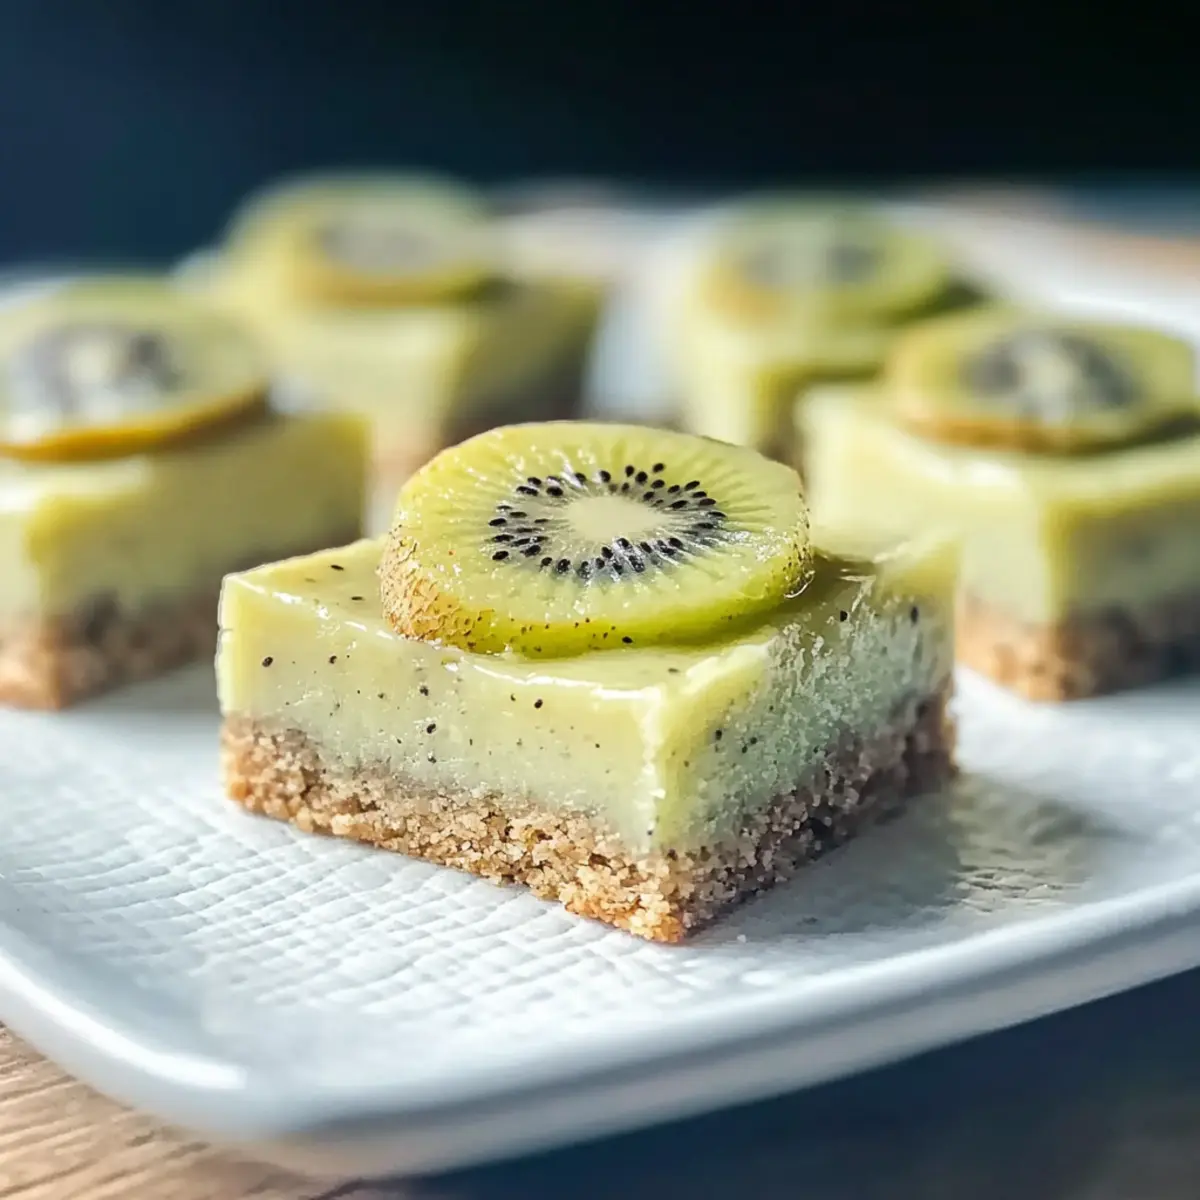
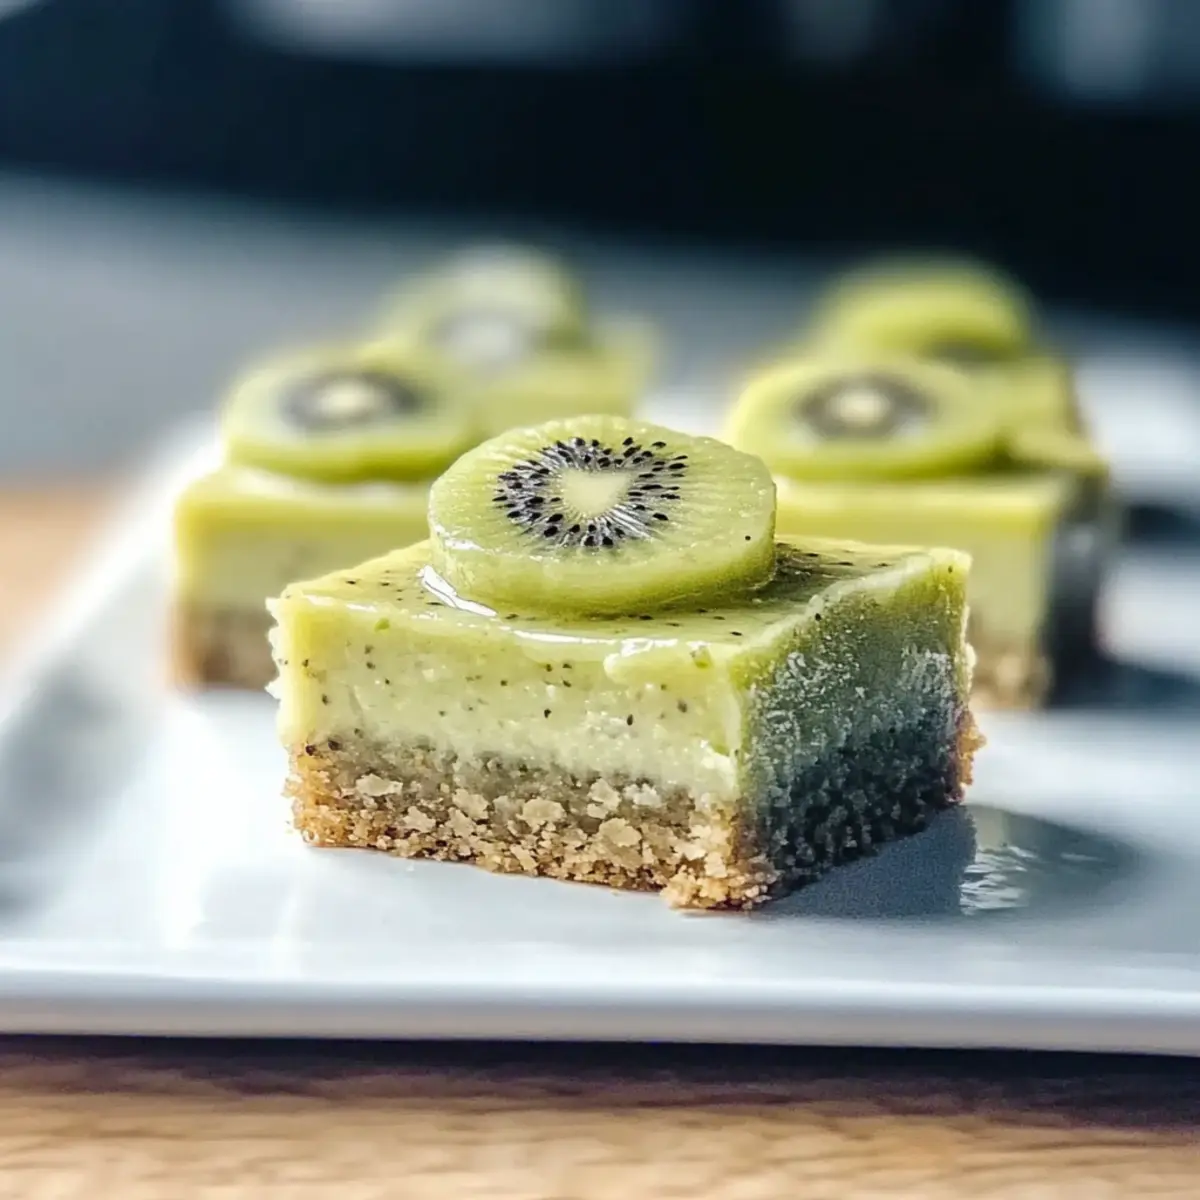
Cut your Kiwi Bars into squares and consider topping them with whipped cream or fresh mint for a lovely finish. These delicious tropical treats can be served chilled or at room temperature, perfect for gatherings or a sweet snack at home!

Expert Tips for Kiwi Bars
-
Choose Ripe Kiwis: Use fully ripe, fragrant kiwis for maximum sweetness and flavor—unripe kiwis can be too tart and won’t deliver the desired taste.
-
Watch Your Baking Time: Keep an eye on the bars towards the end of baking to prevent overcooking; they’re ready when they have a lightly golden top and a slight jiggle in the center.
-
Cooling is Crucial: Allow the filling to cool completely before slicing. If you cut them while warm, the squares may crumble instead of holding their shape.
-
Experiment with Variations: Feel free to swap out kiwis for other fruits like strawberries or mangoes, but ensure the fruit’s moisture content is similar for the best results.
-
Chill Before Serving: For the freshest taste, refrigerate the Kiwi Bars for at least an hour before serving—this also enhances the texture.
What to Serve with Irresistible Kiwi Bars?
Step into a world of vibrant flavors and textures that beautifully complement these refreshing fruity delights!
-
Creamy Vanilla Ice Cream: A scoop of ice cream adds a smooth, cool contrast to the sweet-tart filling, creating a luscious bite every time.
-
Crispy Fruit Salad: Toss together seasonal fruits like strawberries, mangoes, and blueberries for a colorful side that enhances the tropical theme.
-
Minty Iced Tea: A glass of mint-infused iced tea provides a refreshing, herbaceous note that balances the sweetness of the Kiwi Bars.
-
Coconut Whipped Cream: Elevate your dessert with a dollop of coconut whipped cream, enhancing the tropical vibe while adding fluffiness to each bite.
-
Chocolate Drizzle: A light drizzle of melted dark chocolate brings a rich depth that pairs wonderfully with the fruity notes of the Kiwi Bars.
-
Lemonade Spritzer: A citrusy lemonade spritzer is the perfect thirst-quencher, complementing the vibrant tartness of the Kiwi Bars effortlessly. It’s like summer in a glass!
-
Fresh Mint Leaves: Garnishing each square with fresh mint not only looks inviting but also adds a burst of freshness that ties all the flavors together beautifully.
Storage Tips for Kiwi Bars
Room Temperature: Store uncut Kiwi Bars in an airtight container at room temperature for up to 2 days to maintain their freshness.
Fridge: For longer storage, refrigerate cut Kiwi Bars in a sealed container for up to 7 days. This keeps them cool and delicious for gatherings or late-night snacks.
Freezer: Freeze individual portions of Kiwi Bars wrapped tightly in plastic wrap and then placed in a freezer bag for up to 3 months. Thaw in the fridge before serving for the best texture.
Reheating: If desired, serve chilled or at room temperature. There’s no need to reheat these bars, as their refreshing flavor shines when enjoyed cool!
Make Ahead Options
These Kiwi Bars are fantastic for busy cooks looking to save time! You can prepare the crust and filling up to 24 hours in advance. To do this, simply make the crust, press it into the pan, and store it tightly wrapped in plastic wrap at room temperature. For the filling, blend your kiwis and other ingredients as directed, then refrigerate the mixture in an airtight container. When you’re ready to bake, pour the chilled filling over the crust and follow the baking instructions. This way, you can enjoy the same delightful flavor with minimal effort, making your time in the kitchen more efficient while still delivering stunning results!
Variations & Substitutions for Kiwi Bars
Feel free to get creative and customize your Kiwi Bars with these delightful twists that will enhance both flavor and texture!
-
Berry Twist: Substitute ripe kiwis with fresh strawberries or raspberries for a berry-infused treat, bursting with sweetness.
-
Tropical Fruit: Switch out kiwis for diced mangoes or peaches, bringing a delightful tropical flair to your dessert.
-
Zesty Lime: Use lime juice instead of lemon juice for an extra zing that will brighten up the overall flavor profile.
-
Nutty Crust: Add ground almonds or crushed walnuts to your graham cracker crust for added crunch and a nutty flavor.
-
Vegan Delight: Use aquafaba (the liquid from canned chickpeas) instead of eggs for a vegan-friendly filling that doesn’t compromise on taste.
-
Minty Freshness: Stir in finely chopped fresh mint into the filling for a refreshing minty twist, perfect for summer parties.
-
Chocolate Drizzle: Drizzle melted dark chocolate over the chilled bars for an elegant presentation and an extra layer of indulgence.
-
Freezing Goodness: Freeze portions of these bars, then blend into a cool smoothie for a fruity treat on a hot day. You might even consider making Bake Chocolate Bars to pair alongside your refreshing dessert!
Enjoy the process of making these Kiwi Bars uniquely yours with these tasty variations!
Kiwi Bars Recipe FAQs
How do I select ripe kiwis?
Absolutely! For the best flavor in your Kiwi Bars, look for kiwis that are slightly soft to the touch but not mushy. They should be fragrant and free of any dark spots or blemishes. You want them ripe for that perfect balance of sweetness and tanginess!
What is the best way to store leftover Kiwi Bars?
Very! Cut Kiwi Bars can be stored in a sealed airtight container in the refrigerator for up to 7 days. If you have uncut bars, they’ll stay fresh at room temperature for up to 2 days. Just make sure they’re covered to prevent them from drying out!
Can I freeze Kiwi Bars, and how do I do it?
Absolutely! You can freeze individual portions of Kiwi Bars. Wrap each slice tightly in plastic wrap, then place them in a freezer-safe bag or container. They can be stored for up to 3 months. To enjoy, simply thaw them overnight in the refrigerator and savor the tropical taste!
What should I do if my filling doesn’t set properly?
If your filling seems too runny after baking, it may need a little more cornstarch or time in the oven. Always ensure that you mix your filling well and bake until the top is lightly golden and slightly firm to the touch. If there are still issues, try letting them cool completely in the fridge before slicing, as this can sometimes help it firm up!
Are these Kiwi Bars safe for my allergies?
Absolutely! These Kiwi Bars can be adapted to accommodate allergies. For example, you can use vegan butter instead of regular butter for a dairy-free option. Always make sure to check labels if you have nut allergies or other dietary restrictions; while this recipe uses basic ingredients, substitutions can safely meet various needs.
Delicious Kiwi Bars: Your New Favorite Tropical Dessert
Ingredients
Equipment
Method
- Preheat your oven to 350°F (175°C) and line an 8×8-inch baking pan with parchment paper.
- In a mixing bowl, combine graham cracker crumbs and melted butter until the mixture resembles wet sand. Press this mixture into the prepared pan to form a crust.
- Peel and mash the ripe kiwis in a separate bowl until smooth. Stir in sugar, lemon juice, cornstarch, and eggs until well blended.
- Pour the kiwi mixture over the pre-baked crust, spreading it evenly. Bake for 25-30 minutes or until set.
- Allow the pan to cool completely at room temperature, then refrigerate for an hour before slicing.
- Cut into squares and serve with optional toppings.
Leave a Reply