
As I whisk the tart lemon juice with sugar, the kitchen fills with a zesty aroma that instantly transports me to sun-drenched picnics and carefree summer days. These Super Easy Lemon Bars, with their rich, buttery crust and tangy filling, are a perfect antidote to the rush of fast food and routine desserts. They’re not just a delightful homemade treat; they’re a quick and satisfying way to bring a burst of sunshine to your table, no matter the season. With only a handful of ingredients and minimal prep time, you’ll find yourself whipping these up for family gatherings, potlucks, or just because! Are you ready to embrace the sweetness of homemade lemon bars and impress your loved ones?
Why Are These Lemon Bars Irresistible?
Simplicity at Its Best: This recipe boasts a straightforward approach—perfect for cooks of any skill level.
Buttery Crust Delight: The rich shortbread crust melts in your mouth, creating a mouthwatering base that perfectly complements the tangy filling.
Zesty Flavor Explosion: Each bite bursts with vibrant lemon goodness, making it a refreshing treat that brightens any occasion.
Quick Preparation: With minimal ingredients and simple steps, you’ll have these delightful bars ready in no time. Perfect when you’re short on time!
Versatile Serving Options: Enjoy them chilled, at room temperature, or even as a cheerful addition to your afternoon tea. Consider pairing these with a delectable Lemon Butter Fish for a complete zesty meal.
Crowd-Pleasing Treat: Guaranteed to impress family and friends, these lemon bars are a great way to bring people together while enjoying a homemade dessert.
Lemon Bars Ingredients
For the Crust
• Unsalted Butter (½ cup) – Provides richness and creates a tender crumb in the crust; can be substituted with salted butter by reducing added salt.
• All-Purpose Flour (1 cup + ½ cup, sifted) – Essential for structure in both crust and filling; gluten-free flour can be used for a gluten-free version.
• Powdered Sugar (¼ cup) – Adds sweetness and contributes to the smooth texture of the crust; granulated sugar works in a pinch but may slightly alter texture.
For the Filling
• Lemon Juice (½ cup) – The heart of the lemon bars; freshly squeezed is preferred for optimal freshness and a strong lemon flavor.
• Lemon Zest (1 tbsp) – Elevates the flavor profile with natural oils from the rind; using a microplane makes zesting easy and effective.
• Large Eggs (3, room temperature) – Binds the filling and adds richness; whisk them slightly before incorporating into the mixture.
• Granulated Sugar (1½ cups) – Sweetens the filling while balancing the tartness of the lemon juice for the perfect harmony of flavors.
For Serving
• Powdered Sugar (for dusting) – Optional for serving; adds a decorative and sweet touch that enhances the presentation of your Lemon Bars.
Creating these Lemon Bars is a delightful way to enjoy a homemade dessert filled with tangy goodness!
Step‑by‑Step Instructions for Super Easy Lemon Bars
Step 1: Preheat the Oven
Begin by preheating your oven to 350°F (175°C). While the oven heats up, prepare an 8” x 8” baking pan by lightly spraying it with non-stick spray or lining it with parchment paper. This step ensures easy removal of your delicious lemon bars later on and sets the stage for baking.
Step 2: Make the Crust Mixture
In a medium mixing bowl, combine ½ cup of unsalted butter, 1 cup of sifted all-purpose flour, and ¼ cup of powdered sugar. Use a fork or pastry cutter to blend these ingredients together until they achieve a crumbly texture resembling coarse sand. This buttery mixture will create a delightful crust that forms the foundation of your super easy lemon bars.
Step 3: Press the Crust into the Pan
Transfer the crumbly crust mixture into the prepared baking pan. Using your fingers or the back of a measuring cup, press the mixture evenly into the bottom of the pan, ensuring it covers the entire surface. Once evenly smoothed, place the pan in the fridge or freezer for about 10-15 minutes to chill, which helps achieve a firmer crust.
Step 4: Bake the Crust
After chilling, bake the crust in the preheated oven for 15-18 minutes or until it turns lightly golden around the edges. The crust should be firm but not overbaked, as it will bake again with the filling. Keep an eye on it towards the end; a golden hue indicates that it’s ready for the next step.
Step 5: Prepare the Lemon Filling
While the crust is baking, whisk together ½ cup of freshly squeezed lemon juice, 1 tablespoon of lemon zest, 3 large eggs (lightly whisked), and 1½ cups of granulated sugar in a medium bowl. Finally, add the remaining ½ cup of sifted flour, and stir until the mixture is smooth and fully combined, creating a luscious lemon filling that will be poured over your crust.
Step 6: Pour the Filling over the Baked Crust
Once the crust is done baking and is still warm, carefully pour the prepared lemon filling evenly over the crust. This warmth helps meld the flavors beautifully. Return the pan to the oven and bake for an additional 25-30 minutes, or until the filling is set with a slight jiggle in the center; this indicates a creamy texture, essential for the perfect lemon bars.
Step 7: Cool and Refrigerate
After baking, remove the pan from the oven and let it cool completely on a wire rack. Once cooled, transfer it to the refrigerator and chill for at least 1 hour. This cooling period allows the lemon bars to firm up and makes cutting them into squares much easier and neater when you’re ready to serve.
Step 8: Cut and Serve
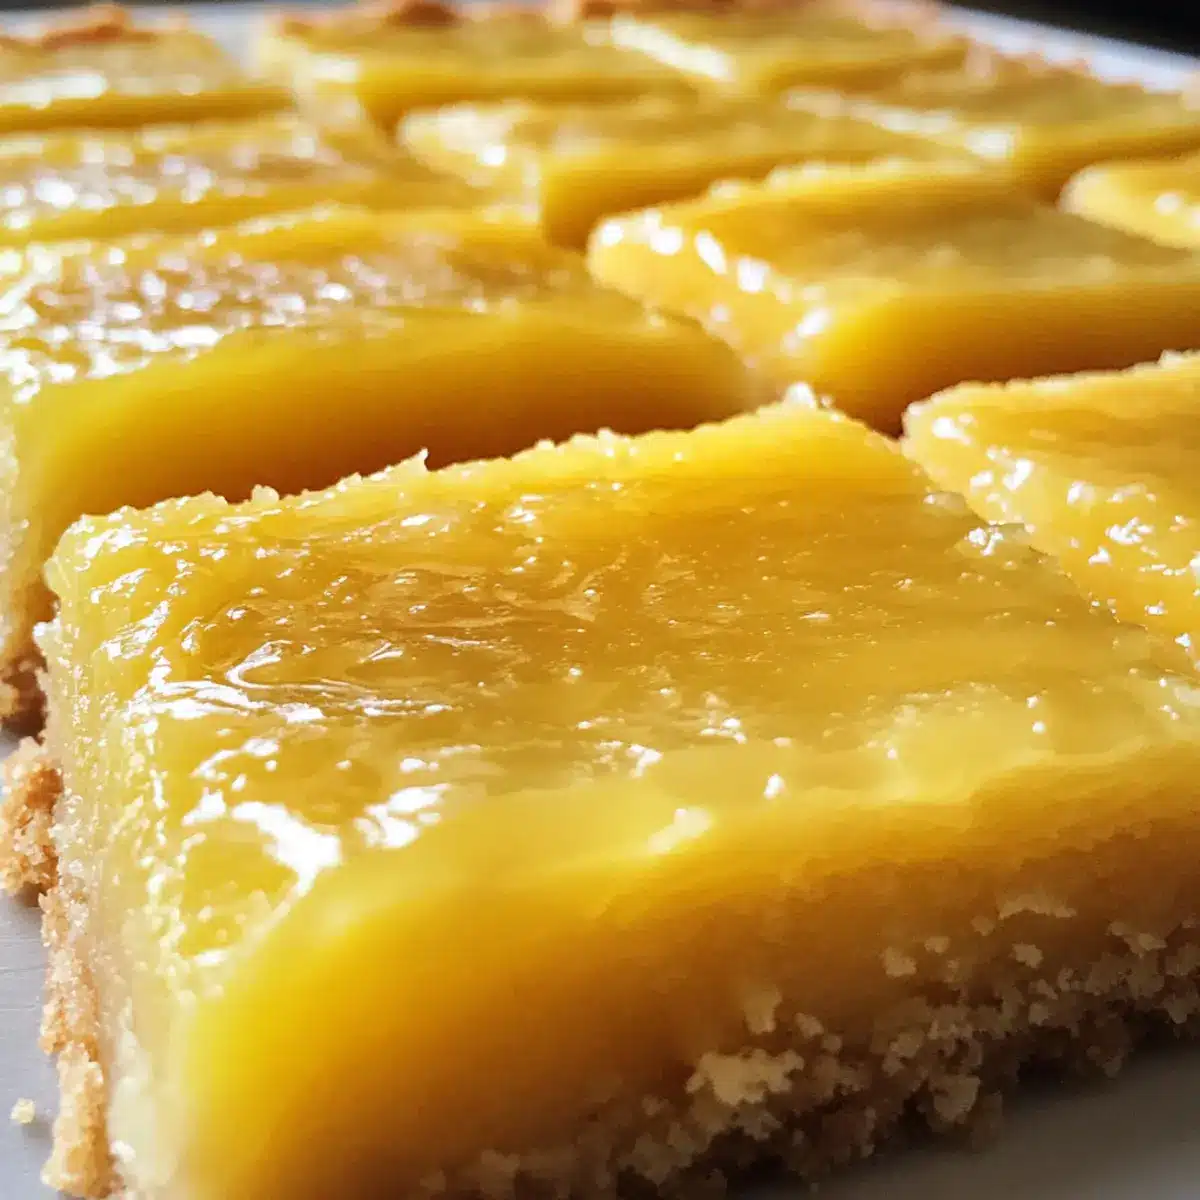
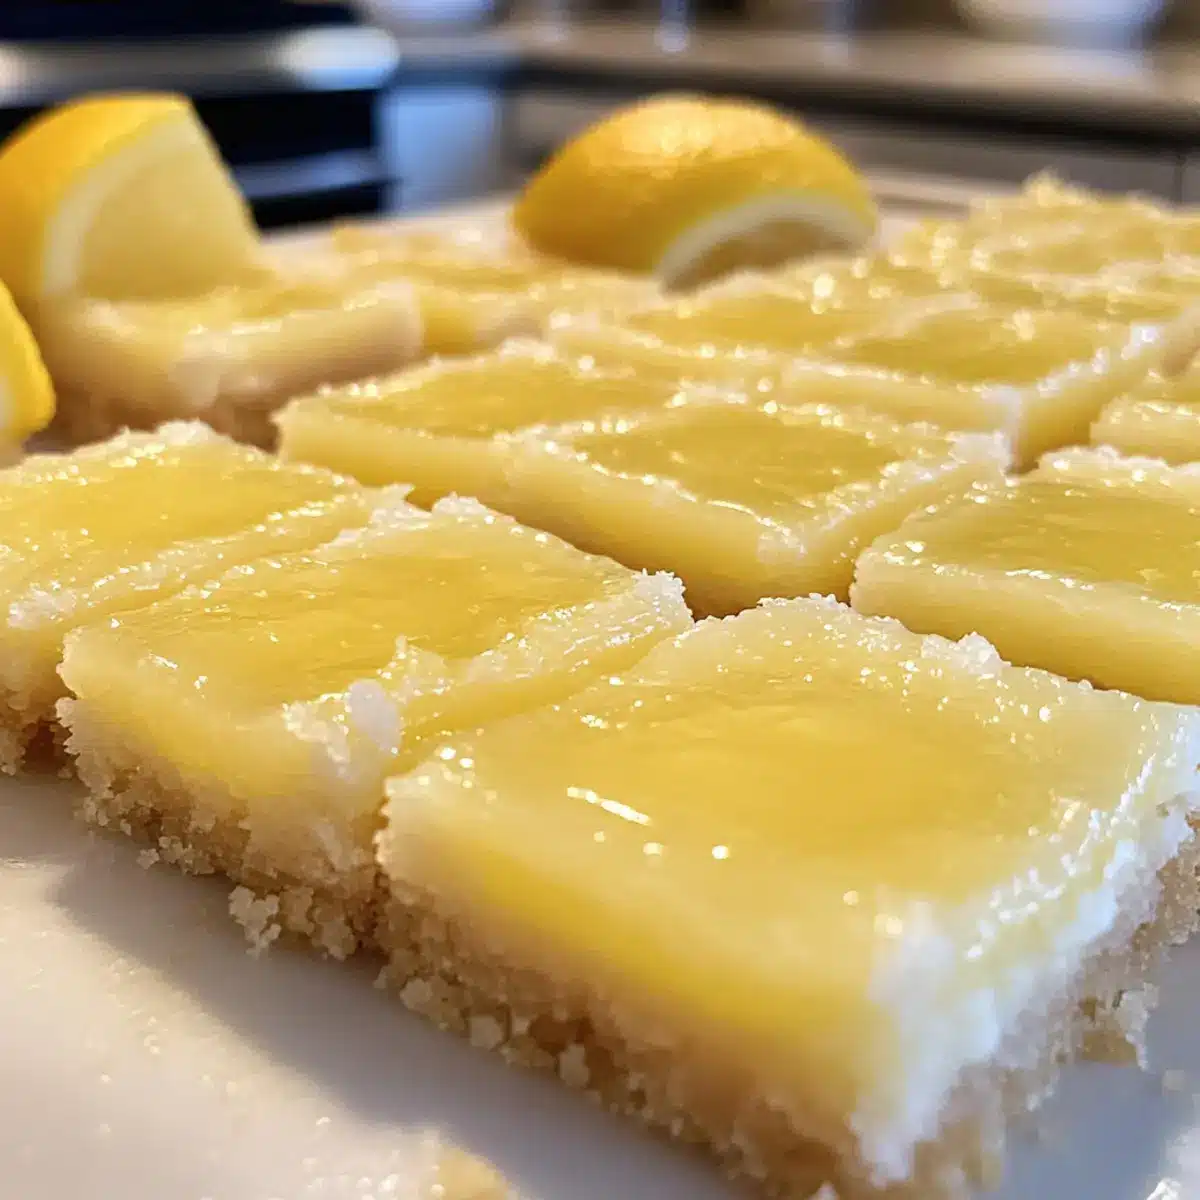
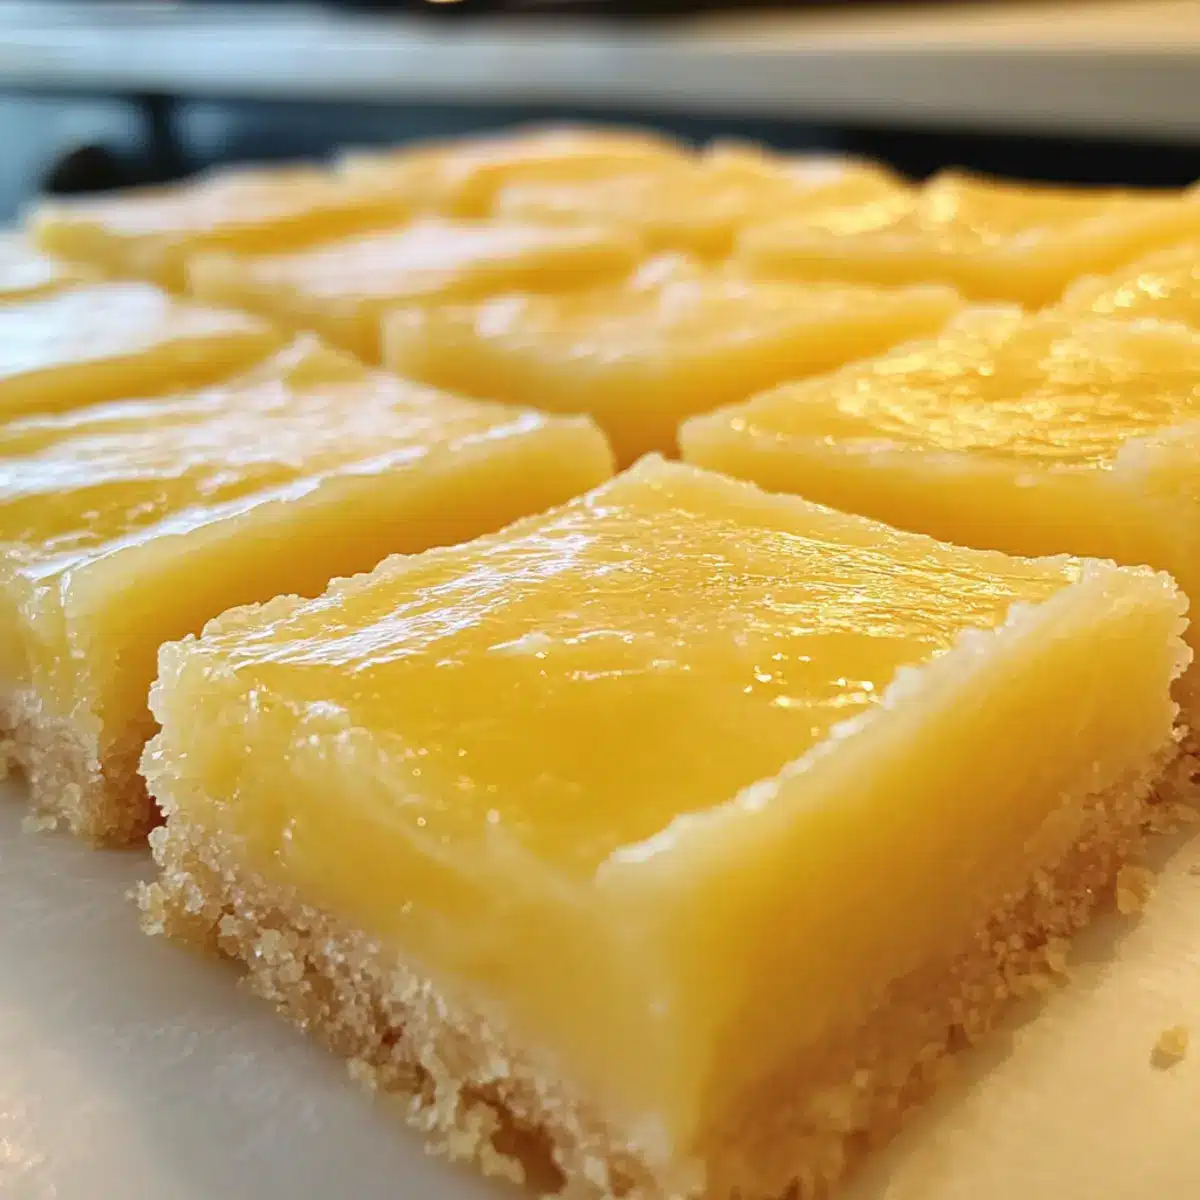
After chilling, use a sharp knife to carefully cut the lemon bars into desired squares for serving. Dust the top with powdered sugar for an added touch of sweetness and a lovely presentation. These super easy lemon bars are now ready to be enjoyed, making a refreshing addition to any dessert table!
Expert Tips for Perfect Lemon Bars
-
Avoid Overbaking: Overbaking can lead to a tough crust and a dry filling. Keep an eye on them, especially towards the end of baking!
-
Use Fresh Ingredients: Always opt for fresh lemon juice and zest for the best flavor. Bottled versions can’t match the zesty brightness of fresh lemons.
-
Chill Properly: Ensure your baked lemon bars are completely cool before refrigerating. Chilling enhances their texture and makes cutting much easier.
-
Cut with Precision: For clean edges, use a sharp knife, and wipe it clean between cuts. This keeps your lemon bars looking as good as they taste.
-
Whisk Eggs Lightly: Whisk the eggs just enough to blend. Overwhipping can introduce air that may affect the filling’s texture.
Incorporating these expert tips into your process will guarantee a delightful batch of lemon bars every time!
How to Store and Freeze Lemon Bars
Fridge: Place your lemon bars in an airtight container, where they can stay fresh for up to 5 days. This helps maintain their creamy filling and buttery crust.
Freezer: For longer storage, wrap lemon bars individually in plastic wrap and place them in a freezer-safe container. They can be frozen for up to 3 months.
Thawing: To enjoy your frozen lemon bars, simply transfer them to the fridge to thaw overnight before serving. This preserves their textures and flavors beautifully.
Serving Tip: Dust with powdered sugar just before serving to enhance both the appearance and taste of your delicious lemon bars!
Make Ahead Options
These Super Easy Lemon Bars are perfect for busy home cooks looking to save time without sacrificing flavor! You can prepare the crust and refrigerate it up to 24 hours in advance, ensuring that it’s ready for when you’re ready to fill it. Simply follow the initial steps, press your crust into the pan, and chill. The lemon filling can also be whisked together 24 hours in advance and stored in the refrigerator in an airtight container, preventing the eggs from altering in texture. When you’re ready to bake, pour the filling over the chilled crust and follow the final baking steps. This means you can enjoy fresh, tangy lemon bars with minimal effort on those hectic days!
What to Serve with Super Easy Lemon Bars
Bring your gatherings to life with complementary flavors and textures perfect for enhancing your lemon bars experience.
-
Fresh Berries: A vibrant mix of strawberries, blueberries, and raspberries adds sweetness and a pop of color to your dessert platter. Their natural juiciness contrasts beautifully with the zingy lemon filling.
-
Whipped Cream: Light and fluffy whipped cream offers a rich, creamy contrast to the tangy bars. A dollop on top transforms each bite into a dreamy, indulgent experience.
-
Iced Tea: A glass of refreshing iced tea, whether unsweetened or lightly sweetened, balances the sweetness of the bars with its subtle bitterness. This pairing creates a delightful afternoon tea vibe.
-
Coconut Macaroons: Chewy coconut macaroons add a different texture and a hint of tropical flavor that can elevate your dessert offerings. Their sweet, chewy goodness complements the brightness of lemon perfectly.
-
Chocolate Drizzle: A simple drizzle of dark chocolate can add a rich, luxurious touch, enhancing the tangy profile of the bars with the depth of chocolate—a delightful surprise for chocolate lovers.
-
Almond Biscotti: Crunchy almond biscotti provides a satisfying texture and nutty flavor that pairs harmoniously with the lemon bars. Dip them in a warm cup of coffee or tea for the best experience.
Enjoy these delectable pairings that turn your Super Easy Lemon Bars into a sensational dessert feast!
Lemon Bars Variations & Substitutions
Feel free to explore these delightful adaptations of your lemon bars that will awaken your taste buds and complement your personal preferences!
- Lime Twist: Swap lemon juice and zest for lime juice and zest to create tangy lime bars that brighten your dessert table.
- Berry Layer: Add a layer of pureed fruit, like raspberries or blueberries, beneath the lemon filling for a fruity explosion—just mix well and pour!
- Dairy-Free Delight: Substitute coconut oil for butter in the crust for a dairy-free option that remains rich and satisfying.
- Sweetener Swap: Use honey or agave syrup instead of granulated sugar for a more natural sweetening option; just adjust the quantity to taste.
- Extravagant Chocolate Drizzle: After cutting into squares, drizzle melted dark chocolate over the bars for a fabulous chocolate-lemon fusion that will turn heads.
- Nutty Crust: Mix crushed almonds or pecans into the crust for an added crunch that complements the buttery texture and tangy filling.
- Poppy Seed Addition: Stir in a tablespoon of poppy seeds with the filling for a delightful crunch and a pop of color—an ode to classic lemon desserts.
- Meringue Topping: Top your baked lemon bars with a light, fluffy meringue for a stunning finish that takes them to the next level.
Each of these variations is designed to enhance your lemon experience, letting you create a uniquely delightful treat. If you are looking for something a bit different, consider making Bake Chocolate Bars as another sweet option to surprise your loved ones. Enjoy crafting your perfect lemon bars!
Super Easy Lemon Bars Recipe FAQs
What type of lemons should I use for the best flavor?
Absolutely! For the most vibrant flavor, I recommend using fresh, ripe lemons. Look for lemons that feel heavy for their size and have a bright, smooth skin free of dark spots. Organic lemons are a great choice as they typically have more robust flavor and less wax.
How should I store leftover lemon bars, and for how long?
You can store your lemon bars in an airtight container in the refrigerator for up to 5 days. To keep them fresh, make sure they are completely cooled before placing them in the container. This will maintain their creamy filling and buttery crust, preserving the delightful texture!
Can I freeze lemon bars for later enjoyment?
Yes, very! To freeze lemon bars, wrap each bar individually in plastic wrap or foil, then place them in a freezer-safe container. They can be frozen for about 3 months. When you’re ready to enjoy them, simply move the bars to the refrigerator to thaw overnight for the best texture.
What if my lemon bars don’t set properly?
If your lemon bars are too jiggly in the center after the baking time, it may need a little longer in the oven. Bake them for an additional 5-10 minutes, keeping a close watch to prevent overbaking. To test for doneness, they should look slightly set at the edges, with just a gentle jiggle in the center.
Are these lemon bars safe for pets or those with allergies?
While the ingredients in these lemon bars are safe for most people, they are not suitable for pets, particularly due to the sugar and eggs. If you have allergies, be cautious of the eggs, and consider using an egg replacer if needed. Always check your individual allergy preferences before sharing with others!
How can I ensure a smooth cut when serving my lemon bars?
To achieve clean edges when cutting your lemon bars, I suggest using a sharp knife. Dip it in warm water, then wipe it dry before each cut. This keeps the knife clean and prevents any sticking, ensuring each piece looks just as delightful as it tastes!

Zesty Lemon Bars with Buttery Crust for a Sweet Escape
Ingredients
Equipment
Method
- Preheat your oven to 350°F (175°C) and prepare an 8” x 8” baking pan with non-stick spray or parchment paper.
- Combine ½ cup of unsalted butter, 1 cup of sifted all-purpose flour, and ¼ cup of powdered sugar in a medium bowl until crumbly.
- Press the crust mixture evenly into the prepared baking pan and chill for 10-15 minutes.
- Bake the crust for 15-18 minutes or until lightly golden.
- Whisk together ½ cup of lemon juice, 1 tablespoon of lemon zest, 3 large eggs, and 1½ cups of granulated sugar, then add the remaining flour.
- Pour the filling over the baked crust and bake for an additional 25-30 minutes.
- Let it cool completely on a wire rack, then refrigerate for at least 1 hour.
- Cut into squares and dust with powdered sugar before serving.
Leave a Reply